What Did You Do To Your Mini Today
#9616
Posted 07 September 2024 - 03:40 PM
I've fitted a lovely new AC Dodd HIF44 carburettor.
I used a K&N filter cleaner kit to clean and re-oil the air filter. When I say clean I mean remove 30 years of filth
It took a few goes and you have to wait for the filter to dry after washing the cleaner out of it. Do it takes longer than you think.
#9617
Posted 07 September 2024 - 06:41 PM
Finally got brave and drilled a hole in the inner wing to pull through the wiring loom from the door. I was quite pleased with how it worked and looks. I now have a working electric window and door lights. Need to work out how to wire the central locking next and then tackle the passenger door loom!
20240906_144510.jpg 34.76K 2 downloads
Edited by Davidmt, 07 September 2024 - 06:42 PM.
#9618
Posted 07 September 2024 - 07:57 PM
#9619
Posted 09 September 2024 - 01:54 PM
On my own at the moment so having a few days on the Mini - just removed the hub nut to fit new discs and calipers - since the photo I have also removed the track rod end as I will replace that at the same time.
20240909_134002.jpg 57.66K 3 downloads
Attached Files
#9620
Posted 26 September 2024 - 05:49 PM
Finished fitting a 3-2-1 sport manifold to the 1098 instead of the rusty LCB it came with. Had problems with clearance between twin carb inlet and the top of the centre exhaust flange and with the HS2 linkages and springs hitting the centre pipe.
Minor adjustments with heat and hammer solved the problem.
#9621
Posted 27 September 2024 - 07:23 AM
Yesterday I fitted the HIF44 i rebuilt (with the help of AC Dodd You tube videos) modified a throttle cable and linkage assembly to get it all working, refitted the obviously home made LCB. Fitted the rebuilt rod change assembly and had it running for the first time since 1992 (having previously stripped the head for checking, lapping in the valves and new stem seals)
Lots of squirrels nuts and bits and bobs flew out the exhaust, muat have been lodged in the single rear silencer box - so then i had to sweep the garage
#9622
Posted 27 September 2024 - 10:21 PM
Yesterday I fitted the HIF44 i rebuilt (with the help of AC Dodd You tube videos) modified a throttle cable and linkage assembly to get it all working, refitted the obviously home made LCB. Fitted the rebuilt rod change assembly and had it running for the first time since 1992 (having previously stripped the head for checking, lapping in the valves and new stem seals)
Lots of squirrels nuts and bits and bobs flew out the exhaust, muat have been lodged in the single rear silencer box - so then i had to sweep the garage
You got to mind those squirrels nuts especially their bits and bobs ! Although it sounds more like mice to me
#9623
Posted 12 October 2024 - 06:16 PM
#9624
Posted 13 October 2024 - 07:16 PM
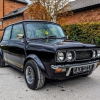
Popped down to The Black Swan, at Ockham, for the monthly Classic Car and Motorcycle Breakfast Meet.
Saw this interesting car.
Approaching this one from the rear, I thought "BMW?
Profile was ver-ry long but with the aero-style overhead glass, I'm still thinking "Aviation Company, diversifying. Maybe Armstrong Siddeley, Bristol?"
Suprise!
I did not expect a Riley badge!
My Mate, Paul Turner of Sprockets and Spanners, Leeds, did the research on this interesting car
https://www.supercar...er-kong-saloon/
Edited by Quinlan minor, 13 October 2024 - 07:17 PM.
#9625
Posted 14 October 2024 - 06:39 PM
First 15 minutes were miserable, trying to defrost and demist. Next 25 minutes were heaven as the sun came up and quiet roads because it's a bank holiday here.
Attached Files
Edited by roblightbody, 14 October 2024 - 06:39 PM.
#9626
Posted 14 October 2024 - 08:08 PM
And half a box of bits ….
No going back now!
#9627
Posted 25 October 2024 - 05:09 PM
Windscreen fitting!
A job I have always dreaded. Today I discovered a little trick to make this so much easier. When using the seal on car - fit glass into seal method (don't think the drawstring method works at all for the front screen). The bottom of the screen will go into the rubber without problems, the sides can be pried in with a plastic trim fitting tool (not a metal screwdriver!!), but the top edge is where things often get difficult. By the time you get to this bit, the gap that you are trying to pull the rubber through is getting smaller and smaller, so it gets near impossible.
The trick I have found is, once the bottom and sides are in, you need to push the top of the screen out again - like you did to remove it - though just a bit so the screen does not actually come out - it should just bulge out a bit, but the top sides/corners should still sit in the rubber with the rubber still on the car. This should just create a tiny gap at the top edge of the screen - and do this one side at a time! Then, get inside the car and using a flat wooden dowel or something similar - (I used a wooden stir fry spatula with a flat handle, so about an inch across and about 5mm thick) and use the dowel to push the rubber out and over the screen. Put the end of the spatula into the groove on the rubber where the screen should go and push it up and out. When you get back out of the car, you should see that the rubber seal is now almost in place and will just require a bit of lipping over the screen. Do this, then give the screen a careful push back and it will seat in place. Remember - do one side at a time as this will help prevent the screen from coming out of the rubber.
I hope this makes sense. Doing it like this, the screen went in quite easily.
#9628
Posted 25 October 2024 - 06:13 PM
I was taught rubbers with filler strips did not use the string method.Steve..
#9629
Posted 26 October 2024 - 06:43 AM
Turned out the wire had simply worn off the sensor- crimped a new spade connector on and job done! A 2min job that actually took two minutes!!
#9630
Posted 28 October 2024 - 11:18 PM
4 user(s) are reading this topic
0 members, 4 guests, 0 anonymous users