Jump to content


Photo
- - - - -

My Sprite, First Car And Rebuild


  • Please log in to reply
62 replies to this topic

#46 dougie1142

dougie1142

    Super Mini Mad

  • Members
  • PipPipPipPipPipPip
  • 500 posts
  • Location: Inverness/Elgin
  • Local Club: I.M.O.G

Posted 07 May 2011 - 10:44 AM

Clay or whatever you are thinking of using will be no good, ideally you need something like this
http://www.frost.co....ront-414ml.html

Or what you can do is tack weld the repair panel in place with 1" spaced tacks. Keep a damp rag to hand then pulse weld between each tack but keep applying the damp rag to help dissipate the heat build up. You will still get some distortion but nothing a skim of filler will not fix.

The repair you have done to the flitch although the welds look ok i would seriously re-consider what you have done around the door mounts. The repair panel needs to be tied into the door mount area properly so if i was you make two filler pieces that will slot into the gaps where the mounting bolts go, seam and plug weld in the pieces then back drill through the A post hinge holes.

Refit the door.


Many thanks for your help! I managed to get the quarter panel repairs done alright without any warps.

Okay i'll go back to the flitch panels and get them done properly, thanks for the help as usual Sonik! :D Saving people a lot of hassle down the line..

#47 Stevee

Stevee
  • Members
  • 0 posts
  • Local Club: #

Posted 07 May 2011 - 11:25 AM

its not 34mm :) its 1 5/16" AF socket they used
but 34mm fits with little bit of movement

nice project by the way :)


Ah i just realised, i think mine was refitted with a 34mm nut about 5 years ago (purely for convenience sake)! Sorry for the wrong info, don't take anything from me :) Hehe.

Thanks man


Yeah mini spares i think do the 34mm replacement nut cause its easier to find a socket for it :) it took me ages to find a 1 5/6" socket but also have a 34mm :)

and no problem :) 34mm dose fit but on a tight bolt i wouldn't like to try use it


Forgot to add also fits the steering wheel centre nut aswell :D

looking good dude :thumbsup:

#48 dougie1142

dougie1142

    Super Mini Mad

  • Members
  • PipPipPipPipPipPip
  • 500 posts
  • Location: Inverness/Elgin
  • Local Club: I.M.O.G

Posted 28 May 2011 - 02:29 AM

I'm not the best at updating this, but here's the next installment. Been pushing on with the car over the past couple of weeks...

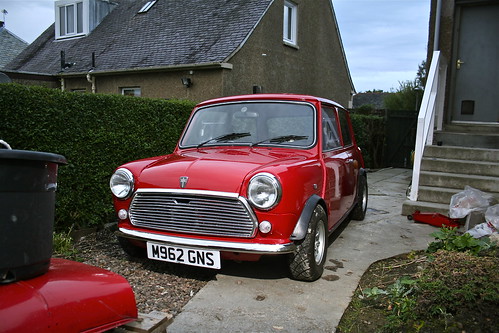
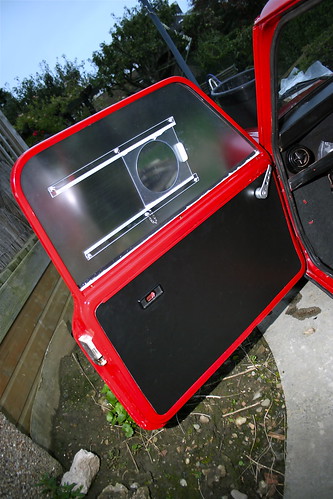
Okay set to work on finishing the front end, quite pleased bearing in mind i used non heritage panels (Except the scuttle).

I didnt have enough grips to mount all the panels first, and the weather hasnt been the best lately so i decided to get a rough idea by lining them up with the front panel and the a panels as best i could then just tacked them in place. Going to have to get a new bonnet too as mine is pretty warped in the middle.
Posted Image

After a lot of trial and error and some frustrating moments i managed to get them all fitted and looking like this
Posted Image

So that was one of the final big things that needed to get done. Another big task was to get the rear subframe built up again
Posted Image

Then with some help i got it mounted in fine
Posted Image

All going well? No.

One of the nuts inside the heelboard is too far gone, the bolt wouldnt catch and after using a tap to get the threads sorted it wouldnt tighten. So today i cut out a little section in the sill ready to fit a new nut on the back, didnt get any pictures as theres not much to look at, but finding a bolt the right size is a bit of a nuisance. This is one of the last things i need to do before it gets painted, all i have to do is get the subframe sorted, brakes bled, trim put on so i can get it MOT'd then paint!

However, i also managed to sort out a little problem on one of the subframe steadies at the drivers footwell. There was basically nothing holding the steady on with any strength, when i went to touch the head of the bolt with a screwdriver it pretty much just fell off so i decided that instead of taking the bolts out i would just cut around them and then weld straight onto the mount, making it effectively a solid mount, much sturdier than before.

Posted Image
Posted Image

After cutting around it, cleaning it a bit and adding some weld through:
Posted Image

I layered the sheet metal, putting a slightly thicker guage metal underneath directly onto the subframe steady to make sure it was strong enough, plug welded onto the mount. Then slighty thinner metal on top to add an extra bit of security and to finish it off. I also effectively welded in the heads of the bolts which go into the mount, there was no way you'd get a spanner on them and i didnt see the need to take them out. Not much to look at but function..
Posted Image


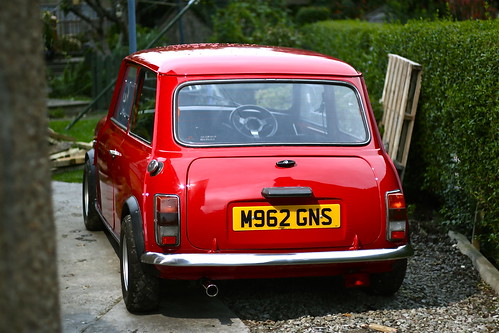
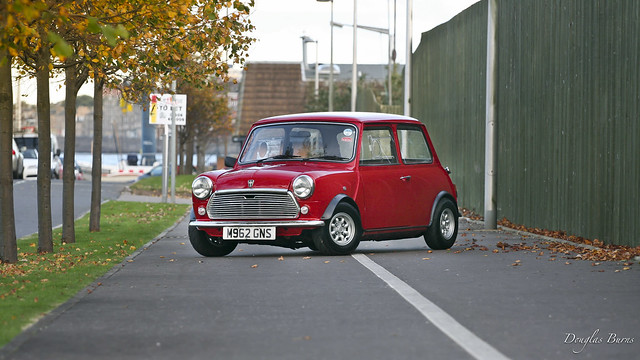
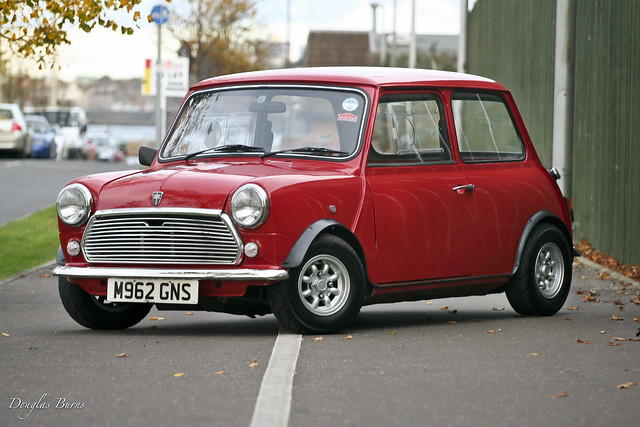
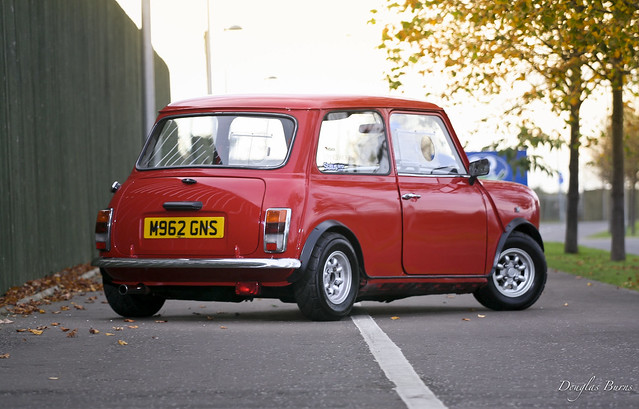
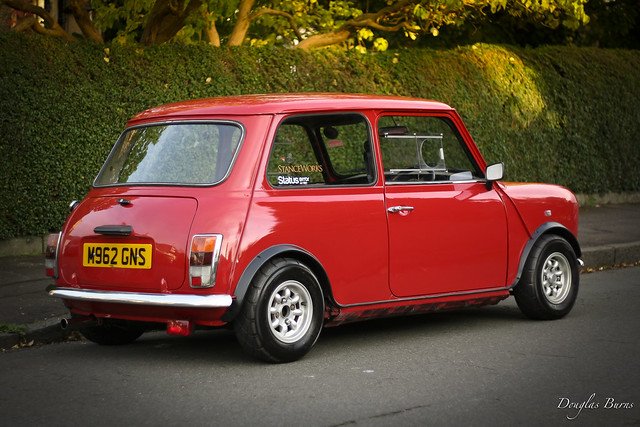
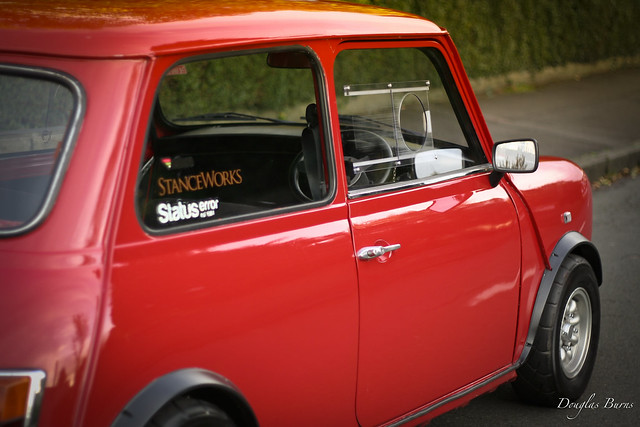
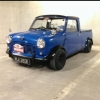
Bit of a dilema with the paint as i'm not sure what colour i want to go, i'd like to stay red but lately i've been seeing a lot of pale gray/cream cars which have really caught my eye.
Posted Image

If i keep it red i dont need to get the interior painted, but i love the white/cream/grey!

Anyway, hopefully have some more updates soon as i'm going to be fitting the exhaust, fuel tank back in maybe over the weekend if i can get some time so hopefully get the car running next week at some point!

Thanks

Edited by dougie1142, 28 May 2011 - 02:40 AM.


#49 dougie1142

dougie1142

    Super Mini Mad

  • Members
  • PipPipPipPipPipPip
  • 500 posts
  • Location: Inverness/Elgin
  • Local Club: I.M.O.G

Posted 10 June 2011 - 02:39 PM

Well another few updates, as some of you might have spotted i was having trouble with the fuel pump, which is in the tank on SPI's. I amnt very knowledgable on car wiring but got a good neighbour round to give me a hand. Managed to trace everything back and after worrying about it being something more serious like the relay or ECU we fathomed out that it was simply some bad earths. With that sorted it STARTED - after a bit of coaxing i do admit - but its so nice to know that everything was put back together okay, such a relief.

Other than that, all the panels are on and sorted fine. All the brakes, suspension is on so its just a case of painting it now!

#50 dougie1142

dougie1142

    Super Mini Mad

  • Members
  • PipPipPipPipPipPip
  • 500 posts
  • Location: Inverness/Elgin
  • Local Club: I.M.O.G

Posted 15 September 2011 - 09:19 PM

Seeing as the pictures never worked last time, here's a couple of what it went from, to how it sits just now. New grille will be on its way soon! :) Just interior to finish off then i'll get some non phone pictures.

Posted Image

Posted Image

Posted Image

Posted Image

Posted Image

Edited by dougie1142, 15 September 2011 - 09:20 PM.


#51 dougie1142

dougie1142

    Super Mini Mad

  • Members
  • PipPipPipPipPipPip
  • 500 posts
  • Location: Inverness/Elgin
  • Local Club: I.M.O.G

Posted 19 September 2011 - 10:26 PM

Haha chat away!

Anyway, here's some update pictures i took tonight, was fed up of phone pictures.. Not much has changed, made up the door cards, wanted to keep them clean, although i still need to sort out some interior handles. Pretty much ready for the MOT just to sort out the exhaust as it's not permanently fixed up yet. I'm hoping for this weekend! Still need to sort out a new grille.

Thanks for looking.
Posted Image
Posted Image
Posted Image
Posted Image
Posted Image

#52 benjy_18

benjy_18

    One Carb Or Two?

  • TMF+ Member
  • PipPipPipPipPipPipPip
  • 1,038 posts
  • Local Club: LSMOC

Posted 20 September 2011 - 12:36 PM

is there a sort of locking mechanism on the polycarb windows?

id love to use them but ill end up driving the mini daily so i want it to be safe

#53 analogue_radio

analogue_radio

    Up Into Fourth

  • TMF+ Member
  • PipPipPipPipPipPipPipPipPip
  • 4,897 posts
  • Location: Melton Mowbray, UK.

Posted 20 September 2011 - 04:47 PM

Sharp photos!

#54 dougie1142

dougie1142

    Super Mini Mad

  • Members
  • PipPipPipPipPipPip
  • 500 posts
  • Location: Inverness/Elgin
  • Local Club: I.M.O.G

Posted 20 September 2011 - 09:13 PM

is there a sort of locking mechanism on the polycarb windows?

id love to use them but ill end up driving the mini daily so i want it to be safe


Well it's not a seriously secure method but if you can see a little chain in the picture, on the end of that there is a split pin which basically goes in behind the sliding part to stop it sliding back.. you could make a more substantial one but thankfully i don't have to drive it every day! :) They do save a ton of weight though.

Oh and also there is still a protective sheet on the inside of my windows hence why they aren't clear just now!

Sharp photos!


Hehe thanks, can't go wrong with Canon's Nifty Fifty! :)

Edited by dougie1142, 20 September 2011 - 09:14 PM.


#55 dougie1142

dougie1142

    Super Mini Mad

  • Members
  • PipPipPipPipPipPip
  • 500 posts
  • Location: Inverness/Elgin
  • Local Club: I.M.O.G

Posted 26 October 2011 - 11:39 AM

Went out last weekend to get some pictures, here's some of the stuff i got:

Posted Image
Posted Image
Posted Image
Posted Image
Posted Image
Posted Image

You can read some stuff about it here: http://www.statuserror.co.uk/?p=5916

C+C welcome :)

#56 analogue_radio

analogue_radio

    Up Into Fourth

  • TMF+ Member
  • PipPipPipPipPipPipPipPipPip
  • 4,897 posts
  • Location: Melton Mowbray, UK.

Posted 27 October 2011 - 12:39 PM

Lovely!

Those polycarb windows do look nice, what are they like for fresh air flow?

#57 E.L.M.O

E.L.M.O

    Up Into Fourth

  • Members
  • PipPipPipPipPipPipPipPipPip
  • 3,953 posts
  • Location: London

Posted 27 October 2011 - 02:46 PM


Posted Image

is there a sort of locking mechanism on the polycarb windows?

id love to use them but ill end up driving the mini daily so i want it to be safe


yes you can see it in the picture. That little hinged tab flicks upwards onto the runner so you cant slide the "window" open. its a rather crude design and is effective (ish!)
its similar to what my scamp had, but pick up is a little better as you need to press a button down to be able to slide the catch, but they break easily. Work well when in good condition though,

#58 dougie1142

dougie1142

    Super Mini Mad

  • Members
  • PipPipPipPipPipPip
  • 500 posts
  • Location: Inverness/Elgin
  • Local Club: I.M.O.G

Posted 28 December 2011 - 07:57 PM

Okay guys, thought i'd update a bit.

If any of you saw my troubleshooting thread over in the Injection bit you'll see now that i've solved some issues. It was juddering under load basically, and running very very rich. So what i've done is replaced the vacuum pipe from the fuel trap to the ECU and it seems to have sorted the juddering. I've also replaced the Coolant Temp Sensor under the inlet manifold which has helped the emissions and also the juddering as i am convinced it was over fueling. So if any of you have similar issues that could be the fault. I never had access to any diagnostics or did too much testing of things (perhaps i don't have the patience). But i knew the sensor wasn't working as i had no temp gauge movement at all. It now goes up and down as it should, or at least better than before. Warning: it's bloody hard to do without removing a good few pipes and hoses.

Anyway the next stage of this build is looking into getting that bit more power, i've been looking at different kits and cylinder heads for a long time now and still haven't decided what route to go. For simplicity reasons i want to just get a new head with larger inlet valves. Which head to get is another thing, perhaps the 940 with larger valves? Or an MED one? The other option is to buy an engine "kit" like the budget one from Minispeed. Has anyone had any experience with this kit and how have you found it if so? I really don't have a big budget being at uni etc so the cheaper the better! I've been patiently waiting for a cheap engine on Ebay/classifieds to come up with some basic modifications but yet to see the right one..

Ideally i'd like to keep the upgrade simple, a new head and perhaps rockers would be fine. I'm not looking for crazy figures, just a little increase as i've removed a lot of weight from the car it doesn't need much more. Just find myself seeking that little bit more a lot of the time.

Let me know what you guys think!

Posted Image

Edited by dougie1142, 28 December 2011 - 08:02 PM.


#59 dougie1142

dougie1142

    Super Mini Mad

  • Members
  • PipPipPipPipPipPip
  • 500 posts
  • Location: Inverness/Elgin
  • Local Club: I.M.O.G

Posted 28 December 2011 - 08:15 PM

On looking further into Minispeeds catelogue, how about the Stage 4 SPI head with 36mm Inlet/31mm outlets? Anyone with any experience of these heads? Another one i'm considering is Morspeed's Stage 3 head with 35.7mm inlet and 29.mm outlet valves? Been hearing great things about Morspeed!
Thanks

Posted Image

If any of you use instagram my name is Dougie1142 on it! :)

Edited by dougie1142, 28 December 2011 - 08:28 PM.


#60 minimuk

minimuk

    Camshaft & Stage Two Head

  • Members
  • PipPipPipPipPipPipPipPip
  • 1,946 posts
  • Location: Midlands

Posted 28 December 2011 - 09:33 PM

Nice one Dougie, like your tread and car looks ace, well done!!!


1 user(s) are reading this topic

0 members, 1 guests, 0 anonymous users