Jump to content


Photo
- - - - -

My Sprite, First Car And Rebuild


  • Please log in to reply
62 replies to this topic

#16 dougie1142

dougie1142

    Super Mini Mad

  • Members
  • PipPipPipPipPipPip
  • 500 posts
  • Location: Inverness/Elgin
  • Local Club: I.M.O.G

Posted 16 July 2010 - 06:44 PM

Posted Image

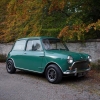
Definately didnt look too bad before i started eh? :/
#17 dougie1142

dougie1142

    Super Mini Mad

  • Members
  • PipPipPipPipPipPip
  • 500 posts
  • Location: Inverness/Elgin
  • Local Club: I.M.O.G

Posted 16 October 2010 - 04:33 PM

Some progress, only small but, got the whole rear subframe stripped, painted and new things about to go on. Along with Painted Radius arms, braided hoses etc.

Here's the Rear subframe and parts with their first coat of paint.

Posted Image


Stripped all the sound proofing out to save some weight, 22lbs of it! Madness.
Posted Image

Some shiny new parts :D
Posted Image
Posted Image

The next stage... welding, and that'll be the last thing before it get resprayed!

Posted Image
Posted Image

Theres other wee bits around the boot and rear arches but that's all fairly simple stuff.


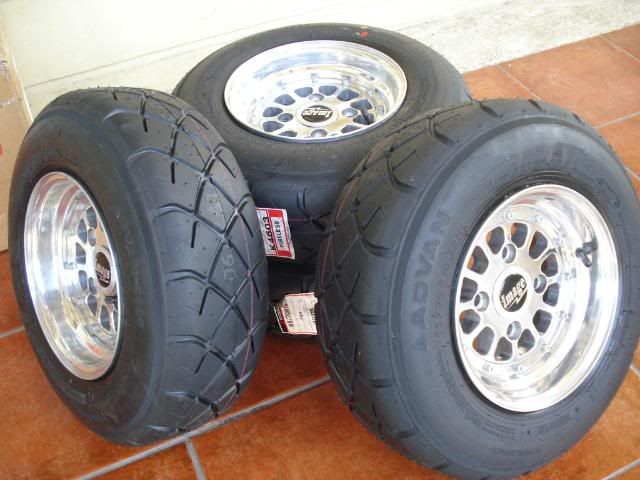
Also going to get the wheels powdercoated soon, and lavishly wrapped in this rubber..

Posted Image

That's about all for now, sorry for the crappy phone pictures!

#18 AVV IT

AVV IT

    I am a shed dragger.

  • TMF+ Member
  • PipPipPipPipPipPipPipPipPipPip
  • 6,122 posts
  • Name: Dave
  • Location: Cambridgeshire
  • Local Club: Nobody will have me!!

Posted 16 October 2010 - 05:28 PM

Nope definatley didn't look that bad before you started, but then you only ever see "the tip of the iceberg" with the ole orange demon!

If your not already planning to do so, then I would seriously consider "biting the bullet" and replacing the lower scuttle as well. You will never get all the rot out of that one, and as you have gone to all that trouble it would be such a shame for all your new paint to be ruined by the rust blistering through in a few months time. I too have a similar aged sprite and I replaced the entire front end as you are doing, but only treated/ repaired the rust on the scuttle (which was not actually as bad as yours is). I now so wish that I had done the scuttle at the same time, as the scuttle is gradually getting worse and I now realise that a new one is inevitable, which realistically will also mean doing the wings again at the same time at the very least. :D

Good Luck with it!!


Oh & once it's done get yourself a set of wing/wheel arch liners to protect it all and throw as much waxoyl at it as you can!!

#19 dougie1142

dougie1142

    Super Mini Mad

  • Members
  • PipPipPipPipPipPip
  • 500 posts
  • Location: Inverness/Elgin
  • Local Club: I.M.O.G

Posted 17 October 2010 - 08:07 AM

If your not already planning to do so, then I would seriously consider "biting the bullet" and replacing the lower scuttle as well.

Oh & once it's done get yourself a set of wing/wheel arch liners to protect it all and throw as much waxoyl at it as you can!!


Yep, definately getting a new scuttle, wouldnt know where to start if i never got one! =]

Hehe, that's a good idea, will def have to do that!

#20 miniallsort

miniallsort

    Up Into Fourth

  • Members
  • PipPipPipPipPipPipPipPipPip
  • 4,723 posts

Posted 17 October 2010 - 02:54 PM

Great project mate lookin good

#21 dougie1142

dougie1142

    Super Mini Mad

  • Members
  • PipPipPipPipPipPip
  • 500 posts
  • Location: Inverness/Elgin
  • Local Club: I.M.O.G

Posted 18 October 2010 - 08:34 AM

Great project mate lookin good


Cheers, i could get more pictures, but i always forget when i'm out there working on it!

#22 dougie1142

dougie1142

    Super Mini Mad

  • Members
  • PipPipPipPipPipPip
  • 500 posts
  • Location: Inverness/Elgin
  • Local Club: I.M.O.G

Posted 22 February 2011 - 01:58 PM

Okay had some major setbacks.. mainly uni and getting broken into. But i've been gathering various parts together and getting on with some welding. I've not had the chance to take any pictures but i'll be sure to get some from now on whenever i do anything. Just going through the insurance just now to sort out some replacement tools! :)

#23 dougie1142

dougie1142

    Super Mini Mad

  • Members
  • PipPipPipPipPipPip
  • 500 posts
  • Location: Inverness/Elgin
  • Local Club: I.M.O.G

Posted 04 March 2011 - 01:44 AM

Well another delayed update, things are starting to happen now the weather has picked up and i'm working outside.

Well i've taken off all the panels that need replaced bar the scuttle as mine hasnt arrived yet so will measure it up when it does. Not cut out all the rust yet but i've located all the bits that need done so it's just a case of cutting out and welding. Will be doing that on Sunday and tomorow if i get round to it. In the meantime i've been cleaning up some small bits and found a can of Hammerite black spray in my shed, actually has a very nice finish to it! I've also fitted high lows/braided hoses and painted the whole rear subframe, just got to fit hilos on the front just now but i'm not dropping the front sub yet as i'll be building another engine once the Summers over so it'll be getting dropped then.

I've picked up an oil cooler for a nice price which i believe comes from an Era Turbo? Or turbo of sorts. I know oil coolers aren't really needed but it should fit into my plans nicely!

Couple of pic's.

Posted Image

Also removed the front shock mounts, usual rust behind them.

Posted Image

Thermostat mount from this:
Posted Image

To this:
Posted Image

Once everything had a couple of coats of the spray ended up like this.

Posted Image
Posted Image


So plans from now on are to weld up all the small holes first. Then measure out the scuttle and fit that, along with a new front end. Then move onto the rear boot floor section and rear valance. Then it's ready for paint/MOT! It's really not far to go, along the way there are other small things that need done. Going polycarb window route along with maybe Alloy doors. New interior. Ordered a Maniflow cat back exhaust and i'll be making a decat to go along with it. New brightwork and perhaps wheels if i source the right set. Ideally i'd love SSR FLII's but can't see it viable to import some just now so i'll have to be patient. Colour is staying red i think! Got all the brakes to go over and all the ball joints to do etc.

Edited by dougie1142, 06 March 2011 - 08:21 PM.


#24 dougie1142

dougie1142

    Super Mini Mad

  • Members
  • PipPipPipPipPipPip
  • 500 posts
  • Location: Inverness/Elgin
  • Local Club: I.M.O.G

Posted 06 March 2011 - 08:01 PM

Okay another small update, started welding the small holes on the inner wings. The usual places behind the top damper mount on each side and a hole just above the passengers footwell. First welding i've done on the car so was a bit apprehensive not having much practice, but found it to be not too bad.. Very satisfying when you do it you just want to keep going and not stop :D

So i cut a square basically around each hole and then made a square to fit inside for each one. The first one i did took a bit of time but found out a faster method after that. A few pics, nothing special unfortunately!

Posted Image
Posted Image
Posted Image
Posted Image
Posted Image


This one was slightly larger and will require 2 plates, it could of been done in 1 but i'll do the other tomorow as it was getting pitch black!

Posted Image

Sprayed some hammerite inside just for a bit of safety :P This was done on both sides, and the metal that was going in was primed on the back and then primed on the front too once i finished.

Posted Image
Posted Image
Posted Image

Never got a picture of this side finished. I'm not going for a full panel replacement on either inner wings as i can't justify the price at all just now and although i'd like these repairs to last as long as possible, if they last a couple of years i'll be happy as i'll probably be going for something quite extreme when that time comes ;D

I'm not sure if its possible to see from these pictures but there was actually a crack down both of the inner wings next to the shock mounts which i had to weld up aswell.

Till next time, cheers!

Edited by dougie1142, 06 March 2011 - 08:22 PM.


#25 sonikk4

sonikk4

    Twisted Paint Polisher!!!

  • Admin
  • PipPipPipPipPipPipPipPipPipPipPip
  • 16,033 posts
  • Name: Neil
  • Location: Oxfordshire

Posted 06 March 2011 - 09:24 PM

Nice little project you have got there. One thing though i would replace those flitch sections as they look bad. By the time you have fitted new A panels the rust will quickly eat its way through.

#26 dougie1142

dougie1142

    Super Mini Mad

  • Members
  • PipPipPipPipPipPip
  • 500 posts
  • Location: Inverness/Elgin
  • Local Club: I.M.O.G

Posted 06 March 2011 - 10:49 PM

Nice little project you have got there. One thing though i would replace those flitch sections as they look bad. By the time you have fitted new A panels the rust will quickly eat its way through.


Cheers mate! Yeah going to have to do that for sure, the joys of uncovering little secrets with mini's! :D Just ordered the rest of the stuff, then saw this.. oh well another order it looks like. Do you know if they are hard to fit at all? Is bracing required across the door's etc? To be honest the other side is worse than the passenger side, so it will have to be replaced i think.

Edited by dougie1142, 06 March 2011 - 10:54 PM.


#27 sonikk4

sonikk4

    Twisted Paint Polisher!!!

  • Admin
  • PipPipPipPipPipPipPipPipPipPipPip
  • 16,033 posts
  • Name: Neil
  • Location: Oxfordshire

Posted 06 March 2011 - 10:59 PM

Can't be any harder than the complete inner wings that i changed on my boys car so they should be pretty straight forward. Hopefully the full A post will be fine so you shouldn't have any issues with the door hinge mounts.

You can lay the panel over the existing flitch, mark a line then cut to this. Then trim back for a final fit. Use some bolts through the existing holes for the hinge mounts and use intergrips to clamp the flitch to the rest of the inner wing.

#28 Pitcrew6464

Pitcrew6464

    Camshaft & Stage Two Head

  • Members
  • PipPipPipPipPipPipPipPip
  • 1,673 posts
  • Location: uk
  • Local Club: mini 7 racing club

Posted 09 March 2011 - 05:37 PM

cool project thats some seriously rust arches!!! love the adventure to get her in your garden :)

#29 dougie1142

dougie1142

    Super Mini Mad

  • Members
  • PipPipPipPipPipPip
  • 500 posts
  • Location: Inverness/Elgin
  • Local Club: I.M.O.G

Posted 11 March 2011 - 12:07 AM

Cheers Pitcrew! I know i know :thumbsup: Maybe looking to reshell in a couple of years or having something a bit more special, but this is good practice and i'm enjoying it so we'll see how it goes.

But unfortunately the crap UK weather is stopping me from making any progress.. I recieved the parts needed to progress, such as the scuttle, boot floor etc.

Updates soon :D

#30 vaughn1

vaughn1

    Mini Mad

  • Members
  • PipPipPipPip
  • 194 posts

Posted 11 March 2011 - 12:31 AM

i know the feeling with the weather, i am also working outside weather permitting.

progress looks good but as previously said it looks like it may be worth your while replacing the inner wings now rather than later.


1 user(s) are reading this topic

0 members, 1 guests, 0 anonymous users