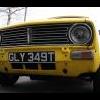
Fom The Clubman Estate
#61
Posted 08 May 2010 - 10:47 PM
I made a couple little circular plates and check fitment.
Miged it all the way around and also welded it from the inside.
Grabbed the grinder and made it all lovely and smooth.
Of course I did the same on the opposite side.
Next I turned my attention to the O.S headlight mount. I was just going to cut the rusted part out but seen as I've got the whole panel I figured I'd drill the spot welds and do it properly.
Drilled 16 spot welds out on the the slam panel, 4 on the front panel and 7 on the inner wing just to get this out. :shock:
With all those out I was able to flex the slam panel up ever so slightly and pull the headlight mount off. There's a bit of grinding and redoxiding left the be done and then I should be able to fit some new metal in there.
I went and dug out our sacrificial scuttle panel.
I laid on top of the original to make sure I cut the right piece out.
Cut the repair section out.
Marked out the area that needed cutting out on the original scuttle.
Chopped the rust out.
And as if by magic the new piece fits.
#62
Posted 11 May 2010 - 08:35 PM
I started by making a template with card.
Cut the what will be the N.S section out of our ever shrinking sheet of steel.
Seen as we haven't got a sheet metal roller to do the curve with I clamped the plate into the vice with a piece of tube to form it over. I used the seem in the tube to make sure I was putting the curve in the right place.
Then pushed it around the tube with the palms of my hands.
Then I did the 90* bend for the back of the door frame in the metal brake.
So this what it looked like after all that bending.
Then I trimmed it trimmed to fit down behind the outer sill and painted with red oxide on the back and bottom.
And of course the last thing to was clamp them up and weld them in.
I also thought I'd make a plate for the gaping hole in front of the O.S rear arch that I cut last week.
Again I made a template and cut the plate front steel with the intension of welding on a lip for the trim.
Then I had a drink and realized we had the back of a step sill repair panel that I could used instead to much better effect.
So I cut out the piece I needed and tacked it in.
I welded about an inch at a time allowing it to cool in between runs so I I wouldn't put to much heat into the panel and warp it.
I got the whole thing welded in. It did take a little longer but far less time than it would take straighten it out if it had warped.
The last job as always was to grind down the weld. The join will need working with the hammer and dolly but nothing major.
#63
Posted 11 May 2010 - 10:08 PM
#64
Posted 12 May 2010 - 07:30 AM
#65
Posted 12 May 2010 - 08:22 PM
Liking the work and panel fabrication very nice. Be careful when you get your door step panels, the ones iv'e had so far have needed a lot of work to make them fit. Seeing as you have got access to a folder have a go at making your own which is what i wish i had done but hindsight is a wonderful thing.
Thanks for the kind words. I had thought about making my own step sill but the bends are to close together to do on our folder so I'll have to buy one.
Your metal work is great. I love all the pictures aswell as it give a good idea of what i need to do when starting to fix my rusty bits.
Repairing rust really isn't that hard as long as you've got a game plan and take your time. The trickiest part for me is the welding but I'm getting pretty good now.
I started this morning by tacking the new scuttle section onto the car.
Once I was happy with where it was positioned I welded along the length of the repair and down into the channel.
Last of all I attacked it the the grinder and then switched to a flap disc and got it all lovely and smooth.
I of course need an O.S wing but there's no way I was going to fork out the £85 for a new one so I dug out the front end that I've had for the past 6 years.
I thought it was going to be a lot of work to get the wing off but they had obviously been replaced at some point and brazed on instead of welded. This meant that the brazed joints could just the heated up the the oxy and popped off. Dad the heating while I held the panels steady as things tend to go horribly wrong when I use the oxy.
The joins inside the wing where a bit harder to do but still easier than drilling and grinding welds.
So after 20 minutes of heating , flexing and scraping I've got two really good wings, a front panel that needs a bit of work but is pretty good and 6/8ths of a slam panel.
The only thing I had to do was grind off the plug brazes.
I also linished all the surface rust off the back of the wing and red oxided the whole thing to try and save myself some work once it's fitted.
The last thing I did today was make a repair section for the end of the scuttle and weld it in.
Tomorrow I'm going to make a scuttle closing panel and weld that in and hopefully make a start on welding the the new/old wing on.
Edited by Tupers, 12 May 2010 - 08:26 PM.
#66
Posted 15 May 2010 - 03:12 PM
I ground and flap wheeled the welds on the end of the scuttle panel and punched holes for the closing panel to weld through.
The last job to do before fitting a new wing was to make and fit a closing panel. I started out by making a template out of card.
I traced it out onto some steel and added the lips that weld onto the flitch and scuttle.
I bent the lips a the back and checked how it fitted the body.
I did a little more trimming and painted it in red oxide.
Finally welded it in.
With that welded in I clamped a new a panel to my wing and put them up to check fitment and found the front of the wing was sitting to high.
It turned out that the 90* bend at the top of the headlamp mount was 5MM to high.
I flattened it out in the vice and then used a planishing hammer to smooth it out.
Last of all I re folded the edge so it's now exactly like the original panel and should solve the issues with the wing being to high.
#67
Posted 15 May 2010 - 03:39 PM
All the best,
Al
#68
Posted 24 May 2010 - 09:10 PM
I welded in the modified headlight mount and the wing now fits much nicer.
Seen as I want a roof mounted aerial I decided to fill the old hole in the salvaged wing.
Made a little plate .
Welded it it and ground down with the flap wheel. You can see a bit of a depression where the the hole was but I can lose that.
This afternoon we got the shell put on the whirligig spit thing so I could get the the sills and floor pan easier.
This spit was made for a saloon so I had to make a my own mount to bolt onto the back.
Had some fun spinning it around.
Rust killered the inner sill and painted it in red oxide.
Sat the new sill on to check fitment. (picture prior to being painted in red oxide)
Of course it needs to sit under the heel board so I marked it up ready to be modified.
#69
Posted 25 May 2010 - 09:16 PM
Here you can see how the sill laps under the heel board. Tomorrow I'll drill a couple holes so I can plug weld the heel board to the sill.
#70
Posted 26 May 2010 - 10:25 PM
I ground down the welds on the top of the sill but left about 1MM to give the seam trim a little something extra to hold onto.
Next job was to drill the holes in the end of the heel board that I forgot to do on tuesday and plug them.
With all that done I painted the seams in red oxide and moved onto chopping off the passenger side A panel.
As you can see it was a bit rusty. I promise I wasn't trying to mig up the hole just messing about seeing if I could melt through it with the welder.
Two cuts latter and most the it's gone.
I found a nice little hole that was hiding behind the big rust patch on the A panel.
So I miged it up along with another hole I found above it.
I also found a hole at the top of the N.S door frame but it should be nice and easy to sort now the spit.
#71
Posted 07 June 2010 - 10:12 PM
Started by grinding down welds on the lip that sits behind the A panel.
Now that the sill's on I was able to make a repair section for the bottom of the flitch.
Got it all welded on. I bent ear that normally stick out of the sill down for a cleaner look and butt welded the repair section the rest of the sill.
I then ground down and flap disced the welds, looks proper smooth.
Painted the repair panel and rest of bare metal on the flitch in red oxide.
As well as being heavily dented the N.S floor pan had rusted out around one of the drainage holes.
I chopped out the rotten area with the grinder.
Cut a little plate out of some spare steel.
Finally welded it in. Once I have welded it from the other side and ground it down I'll re drill the hole in the original position.
#72
Posted 24 June 2010 - 09:57 PM
We moved the shell from the body shop to the main workshop as a mini's being spayed and lent it on it side so I could get to the inner sill.
I cut the rest of the sill off and treated the edge of the floor pan and crossmember with rust killer.
Martin gave me a hand to line up the new sill and then go it welded in.
This in the inside of the floor, that's 33 plug welds through the floor pan to the sill with seam welds on each side.
With the sill on we rolled the shell down and I braced it up and cut off the step sill.
I lined the step up, Dad welded the seams and I did the spot welds to the sill.
Dad lined up and welded on a new N.S "A" panel while I grabbed a front floor pan from the shop.
Cut the section out of the floor pan I needed and drilled the plug weld holes.
Once I'd reshaped it a little Dad welded it in, I could have done it but I'm lazy.
So that's all for today I'm hoping that tomorrow I'll be able get the O.S flitch welded up and the O.S "A" panel and wing. I might be able to do a heel board and rear floor pan but I'd be happy it I got the front end sorted.
Edited by Tupers, 24 June 2010 - 10:02 PM.
#73
Posted 24 June 2010 - 10:55 PM
Just noticed your Dad isn't wearing a mask, risky stuff!
Edited by mighty mini jack, 24 June 2010 - 10:55 PM.
#74
Posted 25 June 2010 - 07:13 AM
heres a picture of mine!
#75
Posted 25 June 2010 - 10:28 AM
Rebuild looks good, you've got skills, should be good once finished!
Keep up the good work!
1 user(s) are reading this topic
0 members, 1 guests, 0 anonymous users