Jump to content


Photo
- - - - -

Rio-Tec (Aka Demoraliser) B20 And Rovers Finest Steel Wheels Equals


  • Please log in to reply
1065 replies to this topic

#91 Kam

Kam

    Straight to the Point

  • TMF+ Member
  • PipPipPipPipPipPipPipPipPip
  • 4,140 posts
  • Location: Hampshire
  • Local Club: 16vMini club

Posted 20 April 2010 - 08:31 PM

Ok, been kicking my heels lately as I didnt really know what to do next? I know theres a crud load I can start but thought I'd at least start putting some bits on the engine to make it look like an engine! Spent/wasted so much time lately I needed a boost, so started off lightly with putting on the sump plug! :mrcool:

Posted Image

After that confidence boost I went onto much more complicated stuff, starter motor, two bolts :xxx:

Posted Image

Then decided to trial fit the alternator and exhaust manny using the allspeed bracket for clubman/extended roundnoses, next two pictures are for people that dont know what it looks like, the top part uses the original holes for the power steering assembly, not sure what the bottom original holes were for but more importantly I dont care :blink:

Posted Image

Posted Image

Exhaust manny, I still gotta buy the rest of the pipe from the manny, but just wanted a money shot! :thumbsup:

Posted Image

Posted Image

You can see how much the alternator sticks out, front brace bar is for standard roundnose, manny is obviously custom for roundnose, gives you an idea of why people say "vtec? standard roundnose? NOOOOO!!!!!" :o

Posted Image

Posted Image

Fed the throttle cable through, but didnt hook it up yet, this is standard honda which has been extended for just the right length for a super smooth response :crazy: bought it from a guy over on 16v :thumbsup:

Posted Image

Then tried the alternator plug as it has been known to sit waaaay too close to the manny, yep, check :cry:

Posted Image

Simple solution, chopped of a lug on the tab, still clicks in and comes off if needed

Posted Image

The engines gonna move about when on the road so may wrap up the manny pipes still, will see

Sorry, I know I'm going into silly detail stuff here, its only for people that are not sure on these builds and gives them a heads up of usual build probs :thumbsup:

Chucked on the old manky clutch slave cylinder, got a new one here but just wanted to see for myself the clearance issue you get with these and the standard front brace bar hitting the bolts

Posted Image

Posted Image

Slave cylinder will need to be drilled out for some M-8 countersunks to get.....

Posted Image

So what to do next? Well I'm dreading two things on this build, electrics and bodywork, so decided to hit the electrics first, I really dont know squat about electrics, I like to complicate it for some insane reason, so started with feeding the original mini loom back through the ridiculous little hole I cut out in the bulkhead. I mean why retain the original shape hole? For starters its not even in the same place as before! Idiot! :xxx:

Considering there was relays, inline fuses and god knows what else in there I somehow managed to get the lot through

Posted Image

Posted Image

Then plug it up as before

Posted Image

Still got the DTA wiring loom to pass through!!! Doh! Idiot! :xxx:

Started taking the mini loom apart :cry:

Posted Image

Posted Image

#92 Kam

Kam

    Straight to the Point

  • TMF+ Member
  • PipPipPipPipPipPipPipPipPip
  • 4,140 posts
  • Location: Hampshire
  • Local Club: 16vMini club

Posted 20 April 2010 - 08:31 PM

Chopped off what I think I dont need? Hope so :xxx:

Posted Image

Only done half the DTA loom, engine/alternator/starter

Posted Image

Will need to speak to Geoff at Watsons (again!) :blink: before I tackle the DTA interior side of things, ecu relays etc

I know I have a pre-made loom here from Watsons but you still need to know where it goes and your still cutting/removing stuff from the mini loom aswell, you dont get any easier than this apprantley, but would still prefer even easier! :mrcool:

Thought I'd check to see if my days effort had been wasted.....

Posted Image

Wahooo!!! Power!! Big confidence booster! :thumbsup: Vid of the above light if anyones interested :o I was happy anyway :crazy:

Posted Image

Seeing as my deadline Le Mans leaving date is now 51 days away this car wont make it there, still need to buy bits, work out where stuff goes, get booked in at bodyshop, get booked in for a mapping session, get a MOT and have some shakedown time, you know how it is? So will just plod along now at my own pace :cry:

#93 HARBER07

HARBER07

    Up Into Fourth

  • Traders
  • PipPipPipPipPipPipPipPipPip
  • 4,498 posts
  • Location: Suffolk
  • Local Club: Naaa......

Posted 20 April 2010 - 08:39 PM

Bit gutting about Le Mans, but you are doing a great job with this! :blink:

#94 adam_93rio

adam_93rio

    Up Into Fourth

  • Members
  • PipPipPipPipPipPipPipPipPip
  • 3,271 posts

Posted 20 April 2010 - 08:53 PM

better get cracking then. 51 days is nothing, who needs shakedown time? i rebuilt my rio and got an MOT on the tuesday before the london to brighton

i know lemans is a bit of a bigger target, but also you have a bigger build, so dont worry so much and just get cracking on with it!!

its coming on great, good luck to you and your deadline

#95 captainjack15

captainjack15

    Up Into Fourth

  • Banned
  • PipPipPipPipPipPipPipPipPip
  • 3,925 posts
  • Local Club: Somerset Rusteez

Posted 26 April 2010 - 08:36 PM

You can do it! :(


I know you can. It shouldn't take long >_<

#96 Kam

Kam

    Straight to the Point

  • TMF+ Member
  • PipPipPipPipPipPipPipPipPip
  • 4,140 posts
  • Location: Hampshire
  • Local Club: 16vMini club

Posted 29 April 2010 - 11:53 PM

I am a man on a mission!

Anywaaaaays.........back to reality.....I'll get me coat.... :) So, as for the build.....I am a man on a mission :D

Been hitting it lately, got loads done but yet again it dont seem like your going forward? Weird? Actually no, this is usual and I hate it! :dontgetit:

Started off wondering if I done the electrics ok with chopping off bits here and there? Too late now so onto the next job :P so got the replacement dizzy on, apologies in advance - I know I keep going into detail on little silly things so bear with me - its for people that dont know this or the ones that come across this on a search :thumbsup:

As I'm using a DTA ecu from Geoff at Watsons it uses a Ford DIS system so no honda dizzy used here, in the kit you get a bung that cover the 'hole' when you take the dizzy off, yes I dont know (or care) what that hole is called? ;)

Posted Image

Bunged, hole problem solved

Posted Image

Bracket goes in place using the original honda dizzy bolt holes

Posted Image

Which holds the DIS system, I think its from a mondeo, if anyone cares? Obviously I dont :closed:

Posted Image

Now this threw me for when I come to HT lead time as I'm used to 'rotor arm' stuff so a quick phonecall Geoff and he said this is a 'wasted spark' system type......so basically no'1 lead can go to either 1 or 4 and no' 2 to either 2 or 3? Simples :-

Got the Kambelt :) done

Posted Image

Popped into a local commercial vehicle parts shop for some bits n bobs and after a chat with the guy he said he has a couple of hoses (they dont sell hoses) so managed to get hold of a couple of 28mm ID random shape hoses - as you do!

Posted Image

By luck, the honda radiator I got is 28mm ID ;D So started on the coolant hoses, I decided to run new hoses from the matrix etc

Had a bit of excess hoseage :o

Posted Image

The rearmost coolant pipe on the honda is an absolute nightmare if the engine is already in and your using the allspeed frame, they do say get the pipes in beforehand but you know me, why make life easy for yourself? (part one).......

You get about 25mm to slide and bend the hose on

Posted Image

So solution needed :)

Posted Image

Dont know what the big deal is all about? 40mm clearance is enough? :-

Posted Image

#97 Kam

Kam

    Straight to the Point

  • TMF+ Member
  • PipPipPipPipPipPipPipPipPip
  • 4,140 posts
  • Location: Hampshire
  • Local Club: 16vMini club

Posted 29 April 2010 - 11:53 PM

Thought I'd try out my 'commercial vehicle random offcuts hoses' to see if they venture anywhere near the rad?

Posted Image

Posted Image

That'll be a yes then :o

Had some 28mm OD alloy pipe sections fall through through the door from Demon Theives aswell on standby just incase

Posted Image

Got some paint on the brake regulator valve (allbiet badly) but its on there

Posted Image

And the Kambelt :) cover

Posted Image

Cut off the interference section on the crank sensor mounting bracket (this is made for a Watsons frame)

Posted Image

Put the crank sensor on

Posted Image

This is part of the DTA kit, it sits I think around 0.05mm away from the honda crank pulley and picks up on the 'teeth' that Geoff adds to your pulley when you send it in

I'm hoping to use my original mini 3 clock pod, rev counter aint a problem as it convientely goes upto 8000rpm :) but the speedo is, mini is cable and honda is electronic, this is the VSS (Vehicle speed sensor plug) that sits onto of the gearbox

Posted Image

Which bolts on this, the bottom section of the VSS on the gearbox

Posted Image

Strangely the bit that sits between the two has a square section on one end - just like the mini speedo cable.........

Posted Image

I'm not too bothered at the moment so just bolted it all up, I know what speed my mini is doing at the moment, Zero! Mph or Kmh, take your pick :P

Now I was getting really impaitent, I wanted to know where I stood with this build as I'm putting in an engine I bought from ebay secondhand without hearing it so decided to hook it up and crank it up!

Radiator on - thats a custom Clarke radiator device only avaliable from machine mart :closed:

Posted Image

Posted Image

I just wanted to know if it will crank, fire, blow up etc! ;)
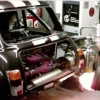
Hooked up the fuel tank (currently sitting on the floor!) this has no exhaust just the manifold so ear plugs were on standby! hooked up the inlet - did Mr Monkey say a bulkhead access panel was much needed? Really?

Umm yes ;D What a nightmare, got there in the end (part two) :) filled up with some Mobil 1 etc and turned key and got........ :dontgetit:

Posted Image

Well it turns? :D Had a little look around, did have a little leak of fuel from the return pipe, tightened up jubilees sorted that and tried again

Posted Image

:o Well I'm still alive, sounded like a V8 on throttle before it died! :- tried another couple of times after blocking various vent pipes etc managed to get it going for a few seconds but it has an erratic idle and dies after a short time

Believe it or not but I'm actually over the moon I got this far, I didnt expect it to turn let alone fire up, I reckon its a vacuum issue as there is no air filter on there and a couple of vent hoses on the inlet need either blocking off venting somewhere.....

I'm off for the next few days so will attack it tommorrow, my last crank was around 9.30pm and thats pushing it I reckon, especially with just a manifold on there, the garage shook enough :-

On a high at the mo :thumbsup:

#98 captainjack15

captainjack15

    Up Into Fourth

  • Banned
  • PipPipPipPipPipPipPipPipPip
  • 3,925 posts
  • Local Club: Somerset Rusteez

Posted 30 April 2010 - 01:12 PM

That's a giant step, well done Kam :D

Big smile on face I bet (Y)

:wub: ;D

#99 cptkirk

cptkirk

    Camshaft & Stage Two Head

  • Members
  • PipPipPipPipPipPipPipPip
  • 1,799 posts
  • Location: West Sussex
  • Local Club: B.M.C. + Chiminiclub

Posted 30 April 2010 - 02:27 PM

Been hitting it lately, got loads done but yet again it dont seem like your going forward? Weird? Actually no, this is usual and I hate it! :wub:


Boy I know that feeling.

Project looks good though, keep up the good work.

#100 Kam

Kam

    Straight to the Point

  • TMF+ Member
  • PipPipPipPipPipPipPipPipPip
  • 4,140 posts
  • Location: Hampshire
  • Local Club: 16vMini club

Posted 30 April 2010 - 09:20 PM

Big smile alright Jack :rolleyes: Its rare I smile nowdays :D

Started off today with a trip upto Sanspeed in Bexleyheath to get some breathing equipment

Posted Image

Now, although my fuel tank is only temporary for starting up......

Posted Image

Posted Image

my exhaust has only got the manny on, I really need to quieten it down as although my neighbours are used to me making alot of noise this engine without a pipe really does push the neighbour friendly banter to the limits :w00t:

So mocked up a side exit yank stylee the Kam way

Posted Image

Its about 5% quieter now so I consider that a success :wub:

My new air filter 'may' overhang the car a bit :w00t:

Posted Image

Posted Image

Few more checks and start ups and finally it kicked in and started up but idles at 2500rpm which I 'think' is a tad high ;D

Posted Image

This glow costs me £600+ :wub:

Posted Image

I reckon the earlier probs I was having with it struggling to keep an idle may have been due to some crud in the tank as the run before the vid above it was struggling again then suddenly just kicked in and shot straight upto 2500rpm, tank is a MPI secondhand ebay purchase, I think I've used up all the crap now so we'll see, starts fine now.

I need to hook this up to my laptop and see whats going on, just need to get some right leads first, found out I can change the idle speed on the laptop, so at least untill they are here I can start with getting on with other stuff now

:ermm:

#101 ginger_monkey

ginger_monkey

    One Carb Or Two?

  • Members
  • PipPipPipPipPipPipPip
  • 1,080 posts

Posted 30 April 2010 - 10:23 PM

Brilliant work mate. Keep going you'll have it on the road in no time :mrcool: Don't do what I did and forget to connect your vss plug to the loom. Though I had wrong wires for the speedo but turned out the plug was off. i want to see lots of progress when I get back from the run :dontgetit: Will be coming down your way after the run the next few weeks I think so might have to stop by and have a butchers

#102 Kam

Kam

    Straight to the Point

  • TMF+ Member
  • PipPipPipPipPipPipPipPipPip
  • 4,140 posts
  • Location: Hampshire
  • Local Club: 16vMini club

Posted 01 May 2010 - 09:56 PM

Brilliant work mate. Keep going you'll have it on the road in no time :) Don't do what I did and forget to connect your vss plug to the loom. Though I had wrong wires for the speedo but turned out the plug was off. i want to see lots of progress when I get back from the run :D Will be coming down your way after the run the next few weeks I think so might have to stop by and have a butchers


I'm leaving the speedo off for the time being, gonna try and use the force instead to calculate.......

Your more than welcome to stop by for a cup of tea and some biscuits Mr M :D

Well at the moment the car starts up fine but idles at 1500rpm now, so its getting better :D Not sure what I did, as standing there gawking at it with pepsi in one hand and a lovely kfc chicken in the other hand seems to of done it? Temperamental? I say yes!

Posted Image

Until I hook up my laptop to this and drop the idle speed I'm not bothered, main thing is the engine aint a duff so I can get on with other stuff now :)

Got some KAD steering rack limiters to fit

Posted Image

Not sure if my cv's will over travel on full lock but didnt want to take a gamble so thought sod it, who uses full lock anyway? :teehee:

Will hopefully get on with chopping up the integra type r shifter I got, mini one above for comparasion

Posted Image

Posted Image

;)

#103 captainjack15

captainjack15

    Up Into Fourth

  • Banned
  • PipPipPipPipPipPipPipPipPip
  • 3,925 posts
  • Local Club: Somerset Rusteez

Posted 02 May 2010 - 03:47 PM

Good work :thumbsup:

#104 Kam

Kam

    Straight to the Point

  • TMF+ Member
  • PipPipPipPipPipPipPipPipPip
  • 4,140 posts
  • Location: Hampshire
  • Local Club: 16vMini club

Posted 03 May 2010 - 09:54 PM

Forget the gear selector (or shifter for our yank friends) I'm gonna leave that till I sort out the exhaust which isn't get much sorting out at the moment :thumbsup:

Started off with not going forwards but backwards by taking the hubs off again

Posted Image

I was waiting for some water shield collars to sit behind the mini hubs, the hubs were only just placed on anyway as its on axles

Assembled the hubs and tried to put the gaz shocks on and hit a snag

With the top section in place the main body of the shock rests flush against the allspeed frame

Posted Image

Preventing the lower section to go on?

Posted Image

After some headscratching (I'm gonna go bald at this point) I found out you need to take off the top shock mount

Posted Image

Which is fair enough, but as the drivers side fits on normal you can see why this side would confuse simple people (like me) :- so if your using an allspeed frame......

As for my temporary exhaust.......it was a mixture of.....well basically a rc40 silencer and main link pipe spun 180 slammed into the collector end! :dontgetit:

Posted Image

Posted Image

Posted Image

I've gotta sort out the pipe before I start it up again! :genius: well maybe not, we'll see...... :D

Chucked on my old wheels and dropped the fella, thats not a shot term for our yank friends :D

Posted Image

Posted Image

It does have rear wheels, its just the door is slightly ajar, or open for others

The driver side camber looks almost negative?

Posted Image

And the pass side aswell?

Posted Image

Hmmm I actually wanted neg camber anyway on the fronts? Still needs to be checked! :thumbsup:

This has been on axles for the last six months and I've got used to where the engine height sits but after dropping it down...

Posted Image

you realise how low the mini really is! :cry: I aint driven a mini for six months and am getting really short fused about it! :xxx:

Little vid, nothing special, just trying out my new camera so its more for my benefit than yours :thumbsup:

Posted Image

:thumbsup:

#105 Kam

Kam

    Straight to the Point

  • TMF+ Member
  • PipPipPipPipPipPipPipPipPip
  • 4,140 posts
  • Location: Hampshire
  • Local Club: 16vMini club

Posted 09 May 2010 - 08:53 PM

I thought I'd try something I aint done in a while, its called one step forward two steps back......oh dear here we go again

Although I was happy my engine aint a duff as it fired up, idling at 2500rpm is seemed a little high (really?) then I had trouble starting atall, turns out after all the cranking my old mini battery had finally given up the ghost, I was gonna change it anyway I just thought I'd see how long it lasted, still waiting to pick up a new one so am charging my old one a bit each time till its here <<<< that is really sad! =]

As for the idling (this is for people that dont know so apologies to the others that do) as I'm using a DTA ecu it has been known to do this, so after a quick heads up from the 16vmini lot, I need to block the Idle Air Control Valve on the back of the inlet as the DTA doesn't use it, there are two 'holes' in the throttle

Posted Image

Its pulling in extra air through these, The IACV assembly itself has two hoses at the bottom, this is one (the main culprit)

Posted Image

The other goes to the large coolant pipe that runs end to end behind the engine

Posted Image

This is the two hoses in situ

Posted Image

So block them off, but before you do you need to make sure your engine will fire up as blocking these will drop your revs, so go poking with your two fingers first!!!!! :lol:

Start engine, let it idle at whatever, take off air filter and block both the holes with your fingers, if your revs drop (no doubt they will if you got the Watsons map) you need to block off both the pipes, little vid here

Posted Image

If your engine still idles after blocking then good, if not then you need to adjust the small 7mm nut and allen key screw underneath the throttle cable holder as below, yellow mark on the right

Posted Image

This opens up the throttle butterfly, so open it till to raise the idle till it holds after blocking the holes, when it ticks over fine then go ahead and block off both hoses

This is how Track n Road rolling road place do this as the usual method (via the brass screw at the top of the throttle assembly is usually seized up) when they map the DTA on the honda minis, so if its good enough for them.....

Then just plug in your laptop and do the rest, I dont know what the 'rest' means so I'm booked in with Track n Road at the end of this month :-

That was my one step forward two steps back, spent best part of today taking off the inlet and sorting it out the above, needless to say its done now but could've been spent better doing other stuff! :(

As for the build :teehee:

Started off with drilling out some countersunk holes on the clutch slave cylinder

Posted Image

When putting the new sunk bolts in you appreciate how close the bar sits! pictures dont do it justice

Posted Image

Got some new magnecor HT leads from Funky Power come through aswell

Posted Image

Sprayed up the wiper motor plastic cover

Posted Image

Got some measured up braided hoses through from Speedflow

Posted Image

Made up the 14mm AP clutch master cylinder to the correct length as the original mini item

Posted Image

I think its gonna be a tight fit against the bulkhead with the air filter ducting and mini brake servo bracket in place so I opted for a banjo fitting to help out, I'm gonna get the top hole (to the res pot) either a 90 degree or another banjo, haven't decided yet

Posted Image

Decided to keep up the one step two step malarky by drilling another hole on the driver side for the heater hose.....

Posted Image

Now I'm gonna put a heater hose either side to the block to save a bit less on clutter in the bay

My temporary fuel tank needed sorting out, so after a bit of time I got it in

Posted Image

As its a MPI tank it has a much smaller neck than the others, so if you have one of them aston caps then you better log into ebay to sell it!

Posted Image

Then my jack decided to break! :dontgetit:

Its my second cheapo clarke one from machine mart in only a year so decided enough of that crud.......

So got a clarke one from machine mart :teehee:

Posted Image

Actually, this ones pretty neat, oh dear :lol: Shiny chrome syndrome? :( We'll see :thumbsup: Sex weeeeeeeeeee!!!!

Still waiting on a couple more bits, so hopefully I'll get them this week and crack on, after these bits arrive then theres the big one, the front end which I'm gonna try and fit myself...... :wub:


1 user(s) are reading this topic

0 members, 1 guests, 0 anonymous users