Jump to content


Photo
- - - - -

Rio-Tec (Aka Demoraliser) B20 And Rovers Finest Steel Wheels Equals


  • Please log in to reply
1065 replies to this topic

#466 Kam

Kam

    Straight to the Point

  • TMF+ Member
  • PipPipPipPipPipPipPipPipPip
  • 4,140 posts
  • Location: Hampshire
  • Local Club: 16vMini club

Posted 16 January 2011 - 09:03 PM

I see what you mean about those extra pipes, could be good if you need an oil cooler when you go turbo though. :P


One thing at a time eh? :withstupid:

As for the build, well I aint been nowhere near the engine (either engine!) as I got bits everywhere lying around the garage, theres no room to swing a hamster now, I need to get on with one engine to get the ball moving so I'm gonna make London2Brighton as my deadline now, I would like to take this to Brooklands in march but can't see that happening, I want to try this "taking it easy' malarky rather than eating sleeping and sheeting mini!!! :)

I've decided to re-build the 1.8 and leave the 1.6 aside, I need an engine in my car, I need to DRIVE my mini, getting withdrawal symptoms now.....

I've had the 1.6 pistons in the parts washer for the last three days and they come up nice, so I have fitted everything together in the block as I need it off the engine stand and my 1.8 sitting on there to work on, please note the 1.6 has been fitted together and not torqued up but got some oil on the bearing caps etc even though the crank won't be turned, I just need it "dry" fitted so I can leave the block complete somewhere, I've still got to clean up the valves and re-install them on the 1.6 head and then chuck that back on, at least then the engine is out of the way rather than having parts for it everywhere, and its nice to re-assemble an engine as I've never done it before, so alls good :thumbsup:

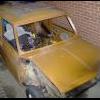
Took it off the stand and set it aside as I wanted to get the type-r on the stand

Posted Image

Posted Image

Started off with taking the crank pulley off which will be swapped for the 1.6 as that has cut outs for the crank sensor, but noticed a slight difference between the two, first was the 1.8 on the left is a tad bit wider and the 1.6

Posted Image

Don't worry about the groove vs non groove on the outer pulley, alternator uses the inner one

Other difference is on the face of the pulley, one is set deeper than the other for the big ass honda tool to get the pulley off, its alot more steady with the 1.6 one pulley.......

Posted Image

I'm sure it will be fine to use.......next thing I noticed is on the 1.8 there is some kind of extra casting/moulding which my 1.6 hasn't got right underneath where the flywheel would be

Posted Image

Posted Image

I'm gonna keep this and use it, I'm not sure on its exact purpose but I remember when I split the engine/transmission on the 1.6 (one of many times!) I had to support the underside of the engine otherwise when the transmission was pulled away the engine would be resting on the flywheel, this I think helps to keep it level and the flywheel off the floor? Not sure but I'll go with that :thumbsup:

Next was to swap the sumps over, simple right? No

I want to use my 1.6 sump on the 1.8 as its got a baffle kit already welded in there

Posted Image

And put the 1.8 sump on my 1.6 "dry" build engine so I can at least stand it up on its own somewhere and out of harms way, problem was my 1.6 (baffled) sump wasn't fitting on the 1.8 **scratches head** so checked the underside

Posted Image

Posted Image

So its gots P72 and mine has nothing, so what? its just a sump??? Then I lined them up

Posted Image

Ahhh ok, makes sense now, the 'deeper' section at the end of the 1.8 one......for the windage tray

1.6

Posted Image

1.8

Posted Image

So now I gotta buy another baffle kit and get it welded, I'm only using a MIG here so I'll need to take it somewhere with a TIG, unless I can chuck a few MIG tacks on it? Anyone? I've got some argon only gas if that helps....

Also found in the 1.8 sump, oil was moving freely......like water!

(vid)

Posted Image

Hmmm probably a good job its being taken apart! On my sump the oil was moving slowly

Next job is to make up the 1.6 head, chuck it on and get the engine wrapped up and store it somewhere, all this putting the block and head together is good practise for when I tackle the 1.8, kinda like a trial run :angry:

So lesson for today kids is when you got a 1.6 and want a 1.8 then buy a 1.8 complete for less headache!

And I've nearly finished me book ^_^

#467 GreaseMonkey

GreaseMonkey

    Has Ratchet, Will Make Noises

  • Members
  • PipPipPipPipPipPipPipPipPip
  • 3,663 posts

Posted 16 January 2011 - 09:22 PM

You better have it ready for Brooklands :)

#468 Burnard

Burnard

    4 gears good........... .......................5 gears Better

  • Banned
  • PipPipPipPipPipPipPipPipPip
  • 3,350 posts
  • Location: Reading

Posted 16 January 2011 - 09:23 PM

Mig should be fine, no real reason to use Tig instead of MIG. Its all still just melting steel to steel...

#469 Burnard

Burnard

    4 gears good........... .......................5 gears Better

  • Banned
  • PipPipPipPipPipPipPipPipPip
  • 3,350 posts
  • Location: Reading

Posted 16 January 2011 - 09:23 PM

Doubley postey.

Edited by Burnard, 16 January 2011 - 09:24 PM.


#470 mini_mad69

mini_mad69

    Let future you worry about it

  • Traders
  • PipPipPipPipPipPipPipPipPipPip
  • 5,417 posts
  • Local Club: urrrr no

Posted 16 January 2011 - 09:41 PM

Right, now im confused.

Your building up the 1.6 dry to store it?

Using the 1.8 yes? But going to use the 1.6 head on the 1.8?

Am I right?

Either way that oil in the 1.8 looks well past it, has the 1.8 been sitting inside or outside? Could it have gotten water in it?


Engine internals arn't too hard to understand once you've got your head around the basics. I find it's all the busienss around them that gets complicated.

Good luck with the new engine build.

#471 Kam

Kam

    Straight to the Point

  • TMF+ Member
  • PipPipPipPipPipPipPipPipPip
  • 4,140 posts
  • Location: Hampshire
  • Local Club: 16vMini club

Posted 16 January 2011 - 11:54 PM

Right, now im confused.

Your building up the 1.6 dry to store it?

Using the 1.8 yes? But going to use the 1.6 head on the 1.8?

Am I right?


Sort of :cry:

Ok, gonna be straight to the point :thumbsup:

I'm "dry" building my original 1.6 bottom end with my original 1.6 head so it can be stored out of the way to make some much needed room, my baffled sump will go on this, when this 'finally' gets rebuilt it will be made to stock figures then sold, unless I break it and sell it

My 1.8 integra type-r bottom end is being rebuilt by me and again to stock figures, and the top end which I recently bought is from a 1.6 civic type-r which will be bolted on top

I'm not sure if your know but the only two differences between the integra and civic type-r is apart from the displacement.......on the early integras they used a different intake cam to the civics but from '2000 they used the same ones (civic ones had 3 degree more duration than the early integra ones) exhausts cams were same throughout

And the civics use a higher compression piston which I could put into mine but fancy keeping my standard integra ones to keep the compression at 11:1, the civic ones would push it to 12:7

The heads on both the integra/civic type-r is basically my head casting from the B16a2 engine that gets a 'mild' port and polish (10 thou) from the factory and gets (whichever) cam for the car/year but a more durable valve train to handle 8600rpm rather than the 'normal' 8250rpm

I luckily managed to get my hands on some civic type-r cams then later got my hands on a civic type-r head which was meant to go on my 1.6 bottom end as a straight and quick and easy replacement.........but then unluckily I found a 1.8 integra type-r bottom end whilst searching for something else (sorry don't know the history apart from its from a 1999 'teg and done 110k)

Then I found out if I got the 1.8 integra type-r bottom end it would sit snugly with the newly aquired civic type-r complete head as a straight bolt on, the only issue is my gearbox which I know bolts on but whether the 3.4 final drive and steel wheels can handle the extra power will be interesting to see

Speaking of power, don't expect alot, essentially what I have got is a 1.8 integra type-r engine going in, pull an engine out of a '2000 integra and you should find what I'm putting together as they also use the same top end setup as mine, so book figure I think is 187hp

At this moment in time what I care about is whether an engine I put together can (apart from start!) handle a rolling road session and make its book figure. It would be a massive fail on my part as I had a perfectly sweet running 1.6 engine.......

As they say, only one way to tell

#472 Kam

Kam

    Straight to the Point

  • TMF+ Member
  • PipPipPipPipPipPipPipPipPip
  • 4,140 posts
  • Location: Hampshire
  • Local Club: 16vMini club

Posted 23 January 2011 - 12:28 AM

Right, once again things have taken another turn and I'm making some changes to the build :D the 1.8 type-r is still going in and I'm still gonna attempt to rebuild it myself but I've decided to change..................the front end

I'm gonna attempt standard roundnose :thumbsup:

I have tried my best to get along with the clubby front but I just can't have the clubby front on mine, it just don't look right in the pictures I have of it, yes it would look fine if the rest of the car looks lairy to go with it, but it doesn't, it needs its subtle standard nose on there to go with the rest of the cars granny look

But until I buy some new heritage panels to know for sure it will fit I need to make some changes, so I'm gonna do it the Kam styleee before I can afford to get more panels (again), measure once cut twice! trust me, I know what I'm doing! :-

As for the build, I have now finished my book, twice :D so I "dry" put my original 1.6 engine together. As its got no flywheel or underside support for the casing (1.8 only) that side is sitting on a brick to level it, this engine will be wrapped up and left in the corner as its given me more space than having it in bits with bits literally everywhere, you can see my civic type-r head in the background, I need my floor space back, hence why I dry built this as I was running out of room

Posted Image

As I've never done anything like this it was nice to have a 'trial' run of putting an engine together before I tackle mine, couple of little bits I forgot but quick check of the book and they were sorted but other than that, all fine, good practice

Next up was what I've been waiting for, waiting for these were holding up my plans to even start attempting a roundnose fitment, engine mounts

Posted Image

Posted Image

Posted Image

These are my original mounts, I sent them off to be polyurethane filled to a 62a shure rating, this is just the cam and gearbox mounts, there was no point in sending the allspeed rear bespoke mount as its still pretty much brand new and is already made with around 60a shure rating, so everything should be nice and vibrating now :P

Also I said to the guy, you aint gonna see them unless the front is off so do them in whatever blue you want, your call, I honestly didn't know what blue they would be nor did I care...........they almost match my rocker cover..... :D

Bolted up my original Y21 box to the 1.8 type-r and put the mounts on

Posted Image

Then I bolted on the hubs and brakes discs ready for the wheels

Incase your wondering what the hell my brake discs and engine mounts have got to do with me attempting roundnose, its simple, I need the engine in to check a couple of things?

I'm gonna drop the engine in tomorrow and drop the car to the ground and loosely place my Ek9 head on the block, that will let me know firstly how much clearance I got between the bulkhead and my new skunk2 inlet which is a tad shorter than the original but also its a little bit taller, so hopefully there should be ample room there now, we'll see

Secondly, with the engine in and on the ground I can turn the tyre to full lock towards the passenger side so I know if I got enough clearance........to cut the frame......

Plan is to cut the edge of the frame and relocate it 'outside' as so

Posted Image

I should have enough clearance going in towards the wheel (wheel is on full lock in pictures)

Posted Image

And alongside it

Posted Image

Incase you don't know, or care (pick one) :lol: I've been using KAD steering rack limiters since day one, you loose 7 degrees of lock and sometimes parking can take a little more effort, but as I'm not a girl thats not a concern :)

And also I was using an extra ducting pipe alongside that part of frame beforehand which is about 3" in width (wheels again on full lock) so I know I have got some room there

Posted Image

Posted Image

Got the day off work tomorrow so I'll get the engine in and the car down and see whats what, will also give me a chance to check the exhaust manifold and see how far I can drop it........

Also I'm not copying Chris (Gingermonkey) on the above cut of the frame, I was still waiting for my mounts and was about to chop that side of the frame up as I 'guessed' I could but luckily found Chris was doing his one, so I opted to wait to see how he gets on, as cutting up a frame which costs with bits altogether in excess of a grand is not my idea of fun! :o

Thankfully his one has inspired me to go for it, but I'm going on the 'outside' as I think I might have the clearance with my wheels.....

Also I'm not sure exactly where I can get a box section tubing made as I want it? Its not the sort of stuff you have lying around the kitchen! So I popped round to a local coachbuilders and he said "no probs, give me a mock up and I'll find some off cuts and make one up" Sorted :thumbsup:

And I'll be welding it in to the frame :D

Then my second source of inspiration, the alternator location. Another fellow vtec mini owner has given me an idea for maybe how I can mount one, but first off I popped down the local scrappys and picked up one from a suzuki 1.3, pics compared with the honda one

Posted Image

Posted Image

Its I think a 45amp jobbie, I think the honda one is around 70amps and the mini around 45/55 so hopefully this should be fine. Its marginally smaller, not alot but less (every little helps right?) apart from the pulley wheel the only other obvious difference is the mounting point

Posted Image

But I've got a plan for that, worse case scenaRIO :- I'll use the honda one, we'll see

Or even a more worse case scenaRIO I won't bother running with one and just trickle charge the dam battery! :lol:

All fun

#473 paul190181

paul190181

    Mini Mad

  • Members
  • PipPipPipPip
  • 193 posts

Posted 23 January 2011 - 04:37 PM

wher abouts did you get your bushes done if you dont mind me asking because i realy should get mine done , was it alot cheper than buying poly bushes thanks

#474 ginger_monkey

ginger_monkey

    One Carb Or Two?

  • Members
  • PipPipPipPipPipPipPip
  • 1,080 posts

Posted 23 January 2011 - 09:18 PM

Looking good mate.

Wanted to ask where did you get the uprated bushes that you used on your gear selector arm. I want to try and get some to tighten things up a bit.

Also do you know anyone or a place to get an extended throttle cable like yours as mine is a little naff.

Edited by ginger_monkey, 23 January 2011 - 09:28 PM.


#475 minidream94

minidream94

    One Carb Or Two?

  • Members
  • PipPipPipPipPipPipPip
  • 1,233 posts

Posted 23 January 2011 - 09:43 PM

Kam, you know how much i love this car, do you fancy hooking me up with ya clubbie front :) :D :)

#476 Kam

Kam

    Straight to the Point

  • TMF+ Member
  • PipPipPipPipPipPipPipPipPip
  • 4,140 posts
  • Location: Hampshire
  • Local Club: 16vMini club

Posted 24 January 2011 - 02:47 AM

Right, got the engine in and put the wheels on and on full lock then brought it down, and tried the new inlet

Posted Image

Only problem I had with the inlet preventing it from sitting flush was the small casting point on the side which needs to be grinded off

Posted Image

Posted Image

the same as it was on my last one

Posted Image

This is just a mounting point for a bracket on the donor car so its not needed, I'm also gonna shave off a bit on that bulkhead where it sits near just to ensure it don't catch or anything

Now the cars on the ground with some weight and the wheels at full lock I can properly check the clearance I got between the frame and wheel

Posted Image

Posted Image

Posted Image

As I guessed its pretty much the same amount of clearance as in the earlier pics as those were taken with a jack under the tyre

More importantly I needed to check how far the engine sticks out sideways of the frame from above as I'm looking to put my bar on the 'outside'

Posted Image

Posted Image

The gearbox sits bang on in line with the frame so I can safely go on the 'outside', if needed there can be a small cutaway in the bar just to be safe but I don't think I'll need it

The same as before, I'll need to chop down this coolant pipe as its too close to the frame

Posted Image

So now I'm gonna mock up a bar and find out from the coachbuilders how long it will take him to make a square tubing section all boxed off then I'll chop off the frame when I get it from them and go from there

Until I make a bar first I won't know how much extra room all this will give me........

Edited by Kam, 24 January 2011 - 10:36 AM.


#477 Kam

Kam

    Straight to the Point

  • TMF+ Member
  • PipPipPipPipPipPipPipPipPip
  • 4,140 posts
  • Location: Hampshire
  • Local Club: 16vMini club

Posted 24 January 2011 - 02:48 AM

wher abouts did you get your bushes done if you dont mind me asking because i realy should get mine done , was it alot cheper than buying poly bushes thanks


It costs about 60 odd quid inc posting, you send yours off so make sure your engine is supported if its in the car, turnaround in a week, its from a guy over on Civiclife.net, you need to be signed up as its in the Marketplace section, engine/gearbox parts for sale, he does different shure rating from 60's to 90's and various colours

Wanted to ask where did you get the uprated bushes that you used on your gear selector arm. I want to try and get some to tighten things up a bit.

Also do you know anyone or a place to get an extended throttle cable like yours as mine is a little naff.


You can pick up the energy suspension bushes that I got from a couple of places, Funky Power choose your car then transmissions then shifter bushings, or from Hond-R

If your still using a nut n bolt where the roll pin is supposed to go in the linkage to the gearbox then GET RID OF IT and use a proper roll pin, just grease the little sucker up and punch it in, difference is like night and day when changing gears

You can't buy my throttle cable anywhere, its the original honda one thats been extended by DarrenW over on 16v, I just bought it from him as I didn't have one so I didn't know it had been extended until I went to pick it up, I don't know how you extend a cable???? Theres probably a simple way but I don't know? :P I can get the measurement of mine if you know how to do it to give you an idea of the length, or if you don't you could try sending him a PM

Kam, you know how much i love this car, do you fancy hooking me up with ya clubbie front :) :D :)


Did you not get them clubby panels in the end? or are you still looking about? I know you wasn't in a rush at the time to get them but I figured you might have some by now?

If my roundnose works out then yeah the clubby front and bonnet will be up for sale, only problem is it has the two holes in each side where it hooks up to my a-panels and two holes at the front where it hooks up to my subframe.......

#478 Juju

Juju

    Up Into Fourth

  • TMF+ Member
  • PipPipPipPipPipPipPipPipPip
  • 3,620 posts
  • Location: UK
  • Local Club: Antisocial club (members = 1)

Posted 24 January 2011 - 07:33 AM

Kam, you are nuts.
Clinically & pathologically nuts. :D

Back to roundnose, weeeeeeeeeeeeeeee! :)

But, Christ, you're mad.

Carry on.

#479 THE STIG

THE STIG

    Da stig says, GO GO GO

  • Members
  • PipPipPipPipPipPipPipPipPip
  • 2,506 posts

Posted 24 January 2011 - 08:56 PM

dont wish to hijack your thread kam but i still have the set of engine mounts i filled with the polyurethane that i got over from the states
and have enough to do another 4-5 sets if you know anyone that wants any done

and as juju says your craxy lol

Edited by THE STIG, 24 January 2011 - 09:02 PM.


#480 Kam

Kam

    Straight to the Point

  • TMF+ Member
  • PipPipPipPipPipPipPipPipPip
  • 4,140 posts
  • Location: Hampshire
  • Local Club: 16vMini club

Posted 25 January 2011 - 10:46 AM

No worries Sean, I'm sure people here will see your mounts :closed: but will keep a word out

I don't think I'm crazy trying to go for roundnose now but I feel scared if I keep the clubman front on......

Keep the round nose, if poss? Love the sound of the engine-swap, but keep it externally as it is now? It's beautiful, Kam. You destroy those looks & it won't be a slap you'll get


......scared of what she is capable of doing, as you know she's the crazy one! :D


1 user(s) are reading this topic

0 members, 1 guests, 0 anonymous users