Are you not cutting the bulkhead for the gear change box?


Jayare's Clubman Estate Rebuild & Conversion
Started by
jayare
, Nov 13 2009 08:56 PM
108 replies to this topic
#77

jayare
-
- TMF+ Member
-

- 2,093 posts
Up Into Fourth
Posted 27 August 2010 - 04:11 PM
No - I'm going to use a cable-change gearbox - Vauxhall did them on a lot of 1.8 Vectra C's and also some Agilas (although if the parts come from one of them, I'm going to blatantly lie and say they're from a Vectra!). I already have a gearbox with the right ratios so I'm going to make a hybrid 'box with the cable change and correct ratios. That way all I need is a hole for the grommet in the bulkhead.
JR
JR
#78
GreaseMonkey
-

- Members
-
- 3,663 posts
Has Ratchet, Will Make Noises
Posted 27 August 2010 - 05:14 PM
Interesting!! Can it only be done to headboard F17 onwards or F15 as well?
#79
jayare
-
- TMF+ Member
-
- 2,093 posts
Up Into Fourth
Posted 27 August 2010 - 11:16 PM
From what I've found out from the Vauxhall EPC and interweb searching, the housing that fits on top of the gearbox where the rod goes into is the same across all F13/15/17 gearboxes. Specific to the F17, the cable change housing is the only part of the gearbox which is different on the Vectra C/Agila (that is to say the gearbox casing, the selector forks and other internals seem to be the same between rod and cable change). I would think that if you got the cable gearchange housing it could be fitted to the F15 without problems, although I obviously couldn't guarantee that would be the case!
I did get some of the parts priced up from Vauxhall which I think I put earlier in the thread - it came to around £180 for the housing, gasket and bracket for the cables. You still need to get cables and gearlever on top of that and there are pitfalls when looking at 2nd hand parts as there are other 5-speed cable change Vaux gearlevers with reverse in a different place to the F17 and also 6-speeders!
Time will tell if doing it differently from the tried & tested is the best way to go! There are 2 main reasons I want to do it this way though, first being the bulkhead not being cut and the second is not having to have the bulky, ugly plastic housing with a rod sitting a good 6" or more above the floor inside the car.
JR
#80
jayare
-
- TMF+ Member
-
- 2,093 posts
Up Into Fourth
Posted 27 August 2010 - 11:27 PM
Just realised there may be some extra info on my 16vminiclub build thread which isn't on here about the cable change - username's the same over there!
JR
JR
#81
jayare
-
- TMF+ Member
-
- 2,093 posts
Up Into Fourth
Posted 31 August 2010 - 08:39 PM
Spurred on a bit by the discussions about the gearchange above, I have bought a gear lever off eBay which should be with me in a day or two and also found a set of cables locally brand new in the packet for £25 which is a big chunk off the Vauxhall prices! I also have my eye on a gearbox which I'm waiting for an answer to a question I have asked the seller - hopefully they'll get back to me soon and I can pick it up some time this week.
I've also been getting the floor panel to fit nicely and am nearly ready to start welding it in. I've welded in a couple of small patches into the cross-member:
Cut out:

Welded in:
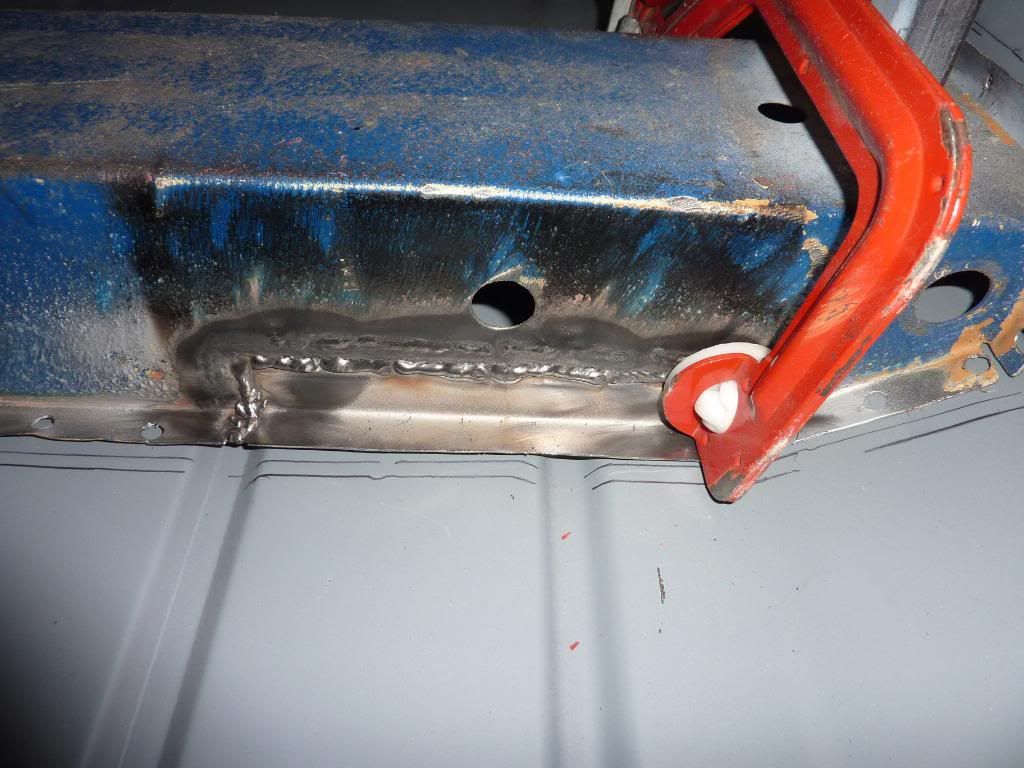
The clamp is just to pinch the bottom of the crossmember in slightly as it sprung out a bit when all the spot welds were drilled out.
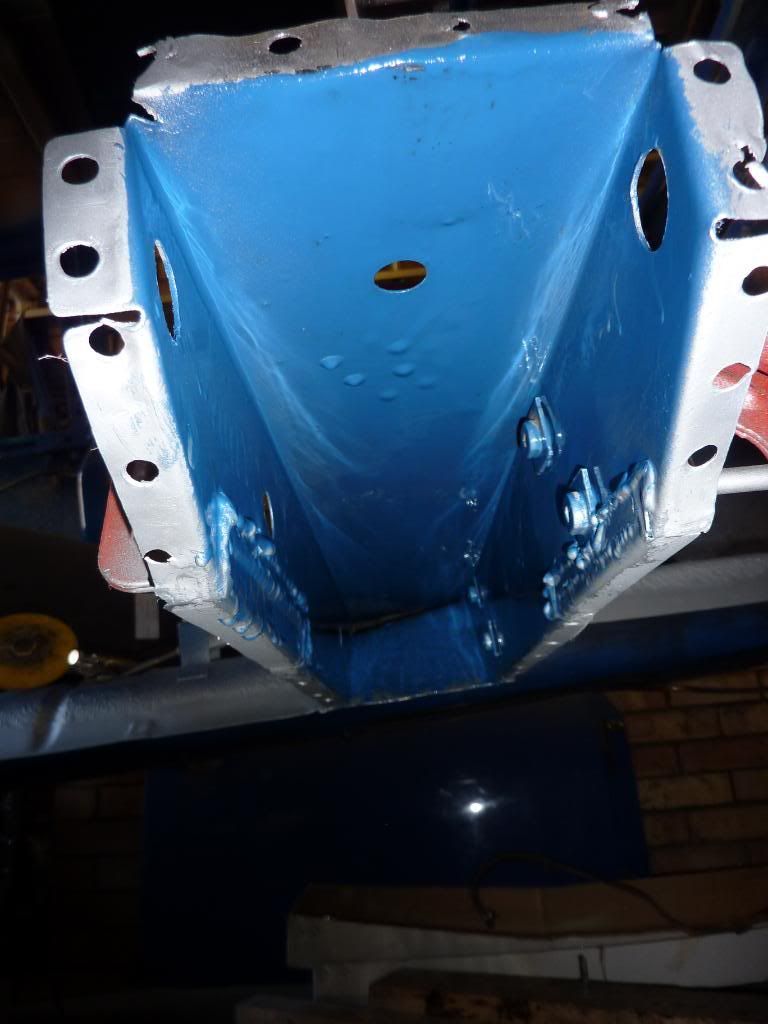
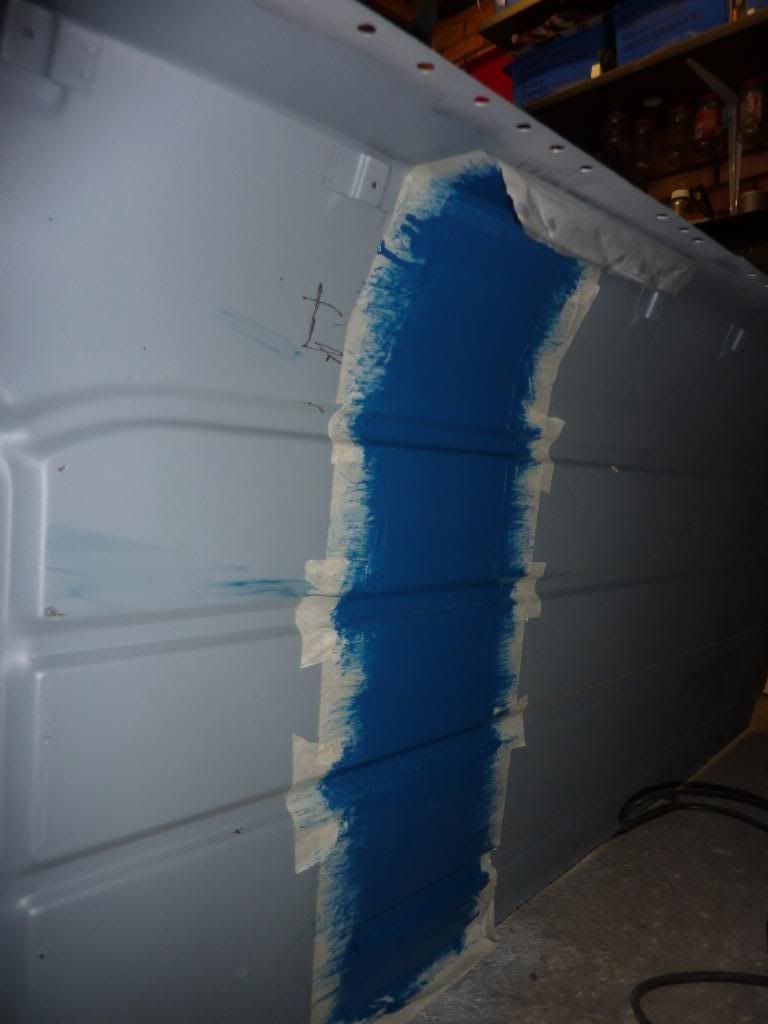
I've painted the inside of the crossmember and also the part of the floor which will be enclosed once fitted with hammerite - it will also get a load of waxoyl pumped in once it's painted:
JR
I've also been getting the floor panel to fit nicely and am nearly ready to start welding it in. I've welded in a couple of small patches into the cross-member:
Cut out:
Welded in:
The clamp is just to pinch the bottom of the crossmember in slightly as it sprung out a bit when all the spot welds were drilled out.
I've painted the inside of the crossmember and also the part of the floor which will be enclosed once fitted with hammerite - it will also get a load of waxoyl pumped in once it's painted:
JR
#82
alexcrosse
-

- Members
-
- 3,786 posts
Up Into Fourth
Posted 31 August 2010 - 09:00 PM
good work man  im about to chop my cross member out!
im about to chop my cross member out!
#83
jayare
-
- TMF+ Member
-
- 2,093 posts
Up Into Fourth
Posted 31 August 2010 - 09:41 PM
Cheers Al. I take it this is to do with the dreaded tinworm you've found when fitting all that scaffolding in yours - hope it aint too bad,
JR
JR
#84
alexcrosse
-
- Members
-
- 3,786 posts
Up Into Fourth
Posted 01 September 2010 - 09:22 AM
its very bad, shes off the road for a few months now  you might even beat me back onto the road
you might even beat me back onto the road
#85
jayare
-
- TMF+ Member
-
- 2,093 posts
Up Into Fourth
Posted 01 September 2010 - 06:02 PM
Bad Times
I doubt I'll beat you back on the road - there's still a very long way to go on mine!
I'm off to Bath tomorrow to collect a gearbox with the cable change and have picked up a gasket for the housing from the local Vauxhall stealers so by the end of this week I should have all the parts to be able to change gear without the ugly gear lever housing and rod. Will just need an oval hole in the bulkhead then. Hopefully the cables will be somewhere near the right length!
JR
#86
jayare
-
- TMF+ Member
-
- 2,093 posts
Up Into Fourth
Posted 03 September 2010 - 11:10 PM
Took a trip down to Bath yesterday to collect the gearbox I'd had my eye of for a while on eBay. Had a nice day out around Bath & Bristol making the most of the sunshine!
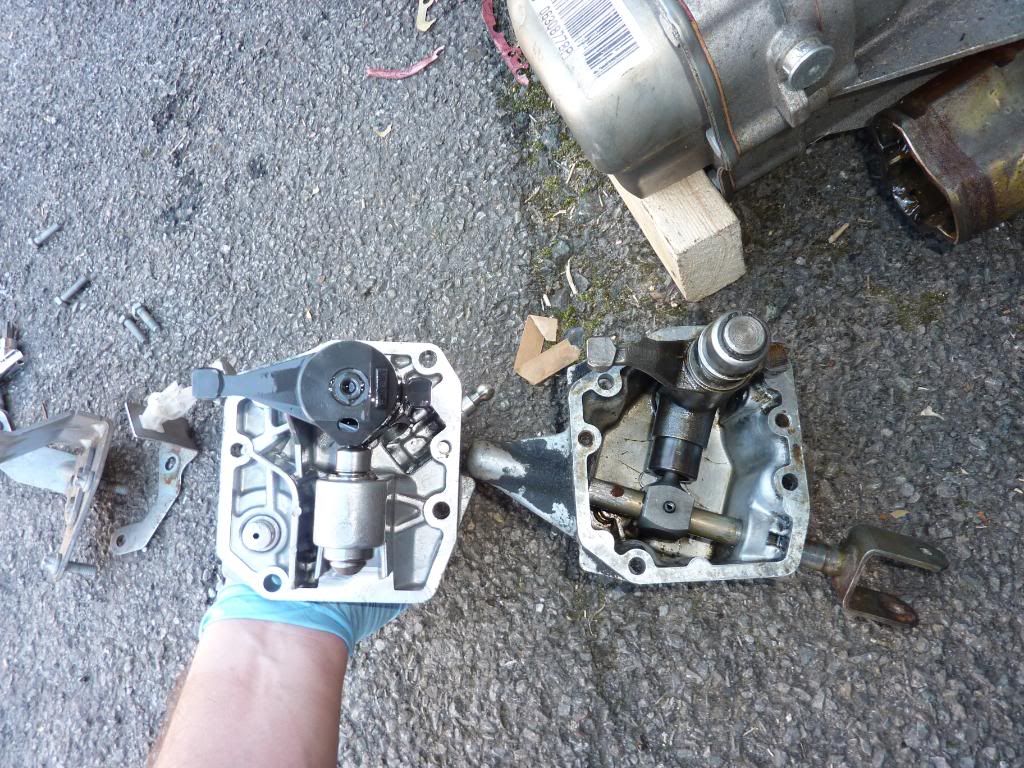
Today I collected the gearlever from the Post Office - was pleasantly surprised that it is brand new in the Vauxhall box and then spent some time (probably more time than I should have done really!) playing with the cable change stuff. It looks like the gearbox has the wrong bracket on it as one of the cables didn't fit correctly but as I'll probably have to get the cables made shorter, I can get the required 45mm difference taken into account then. Anyway hooked it all together (with a little bit of bodgery in the form of some visegrips holding the cable in approximately the right place) and all five gears and reverse are selectable - click pic for video:

Then popped the selector housing off to compare with the rod change type:
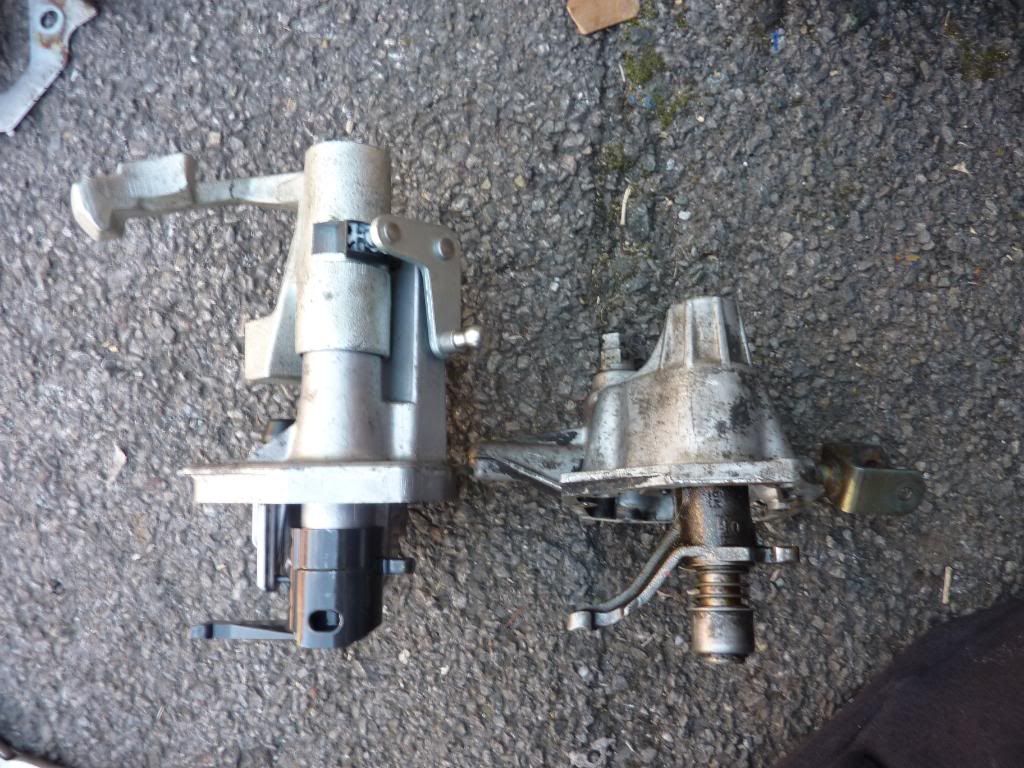
And tested the rod change housing on the 'box. All gears selected fine with that on too so the parts are definitely compatible which is nice. One thing I did notice with the 2 gearboxes on the floor together was the size of the inner CV joints - on the Diesel gearbox:
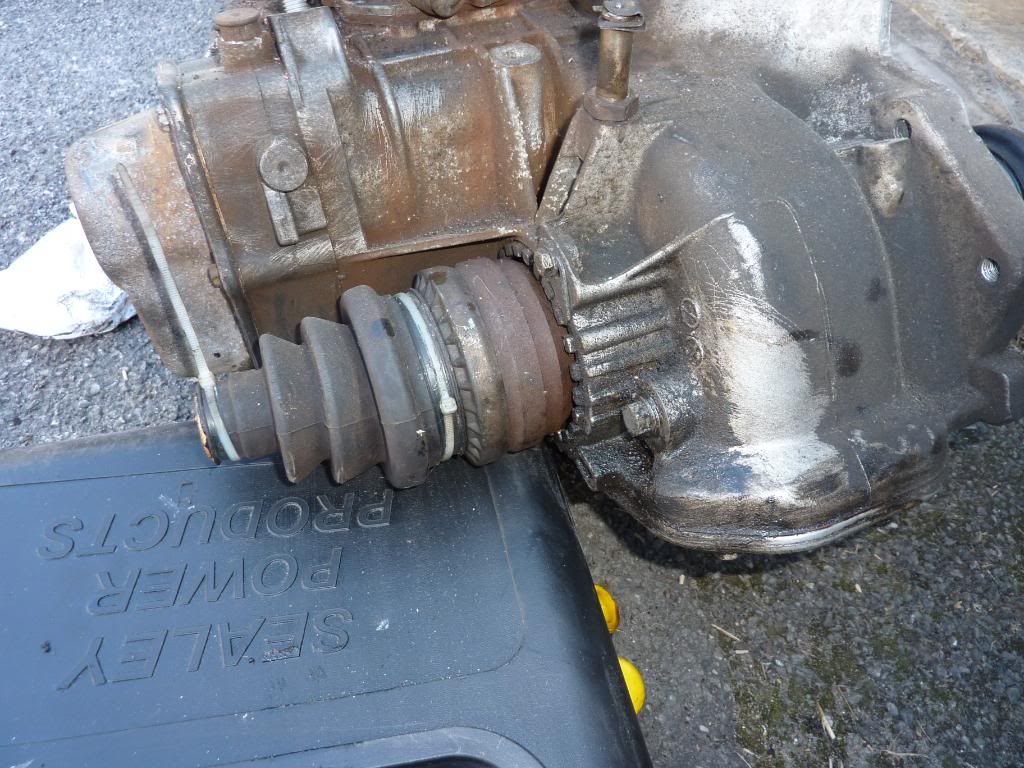
And the cable change gearbox:

The cable gearbox has apparently only covered 5000 miles which is believable as the printed numbers on the laygear were still easily readable!
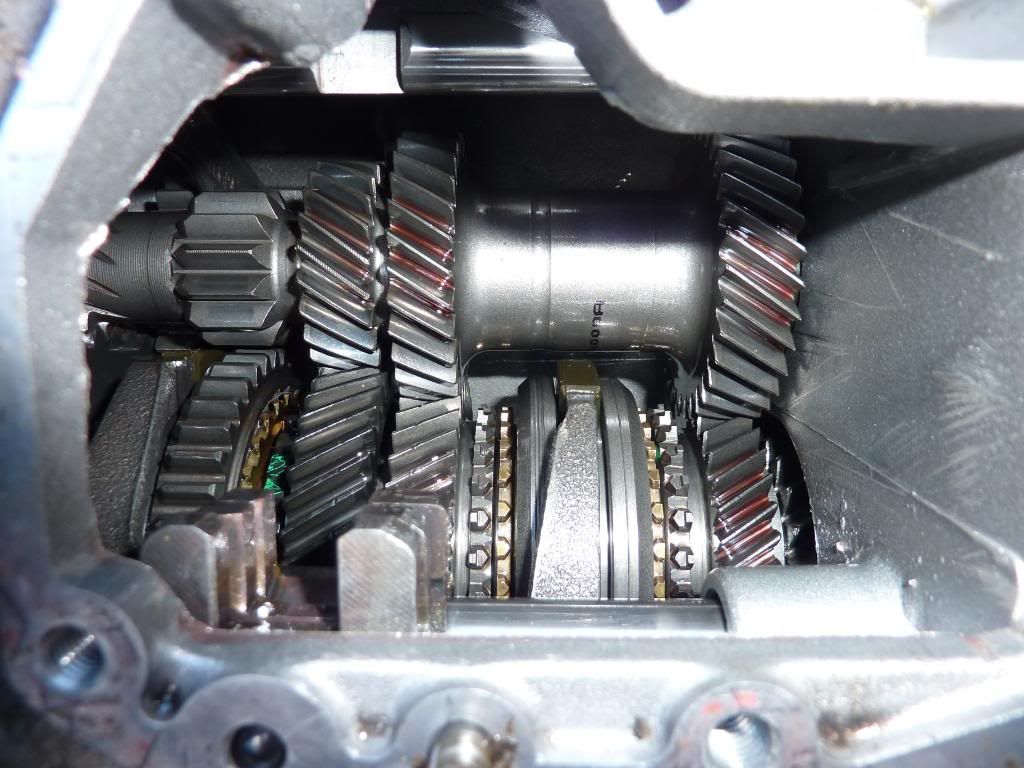
I may swap all the gears from the Astra Diesel into this casing using all the new bearings, baulk rings and so on which are in there. It would have been really nice if it had the right gearing but that would be too much to ask for!
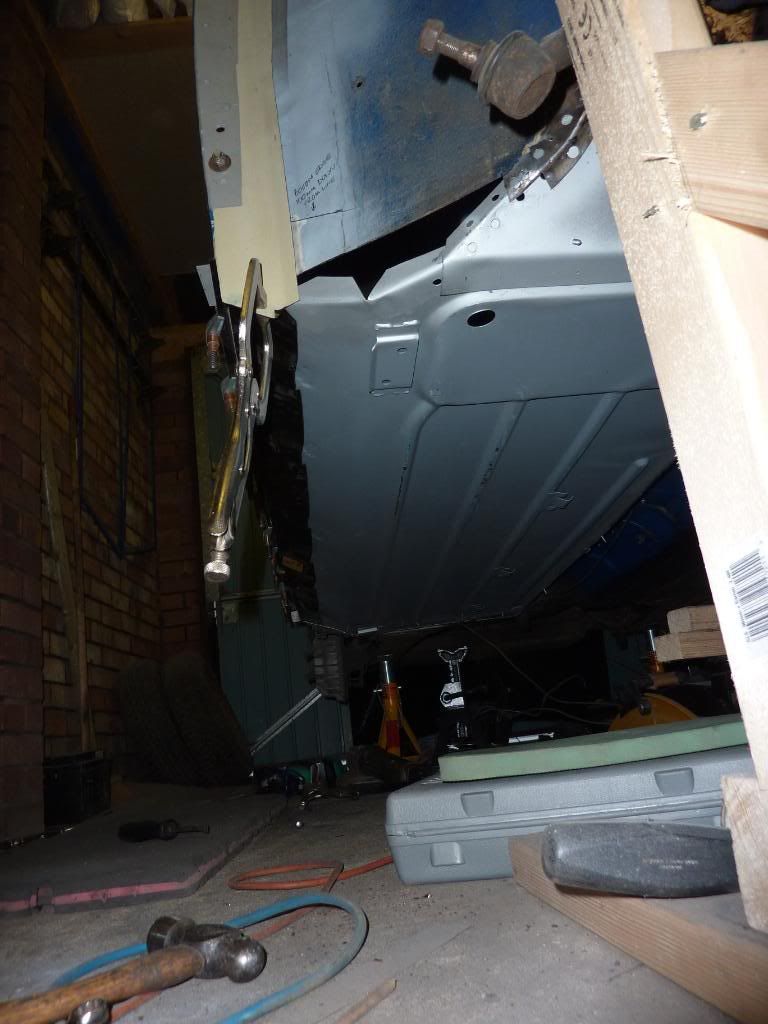
After I finished playing, I cleaned up the door step and rear quarter removing the remains of the old outer sills - there was only 1 sill on there but the original flange had been left on last time which I wanted to remove - it's now ready to accept the new outer sill once I've drilled loads of holes for plug welds and given it a coat of weld-through primer. Then I had the drivers floor in and out a few more times (I've lost count of how many times it's been in & out now) trimmed a few edges and flattened the back edge out a bit more as it wasn't fitting the floor extension very well in places. I also welded a couple of slits I'd made up, made sure all the hidden bits & joints were fully coated with weld-through primer and fitted it back up hopefully for the last time. I've held it in for the moment with a load of self tapping screws and will start welding it in tomorrow. I want to take my time on welding it in to minimise any distortion.
It looks nice under there now with it all clamped in place.
JR
Today I collected the gearlever from the Post Office - was pleasantly surprised that it is brand new in the Vauxhall box and then spent some time (probably more time than I should have done really!) playing with the cable change stuff. It looks like the gearbox has the wrong bracket on it as one of the cables didn't fit correctly but as I'll probably have to get the cables made shorter, I can get the required 45mm difference taken into account then. Anyway hooked it all together (with a little bit of bodgery in the form of some visegrips holding the cable in approximately the right place) and all five gears and reverse are selectable - click pic for video:
Then popped the selector housing off to compare with the rod change type:
And tested the rod change housing on the 'box. All gears selected fine with that on too so the parts are definitely compatible which is nice. One thing I did notice with the 2 gearboxes on the floor together was the size of the inner CV joints - on the Diesel gearbox:
And the cable change gearbox:
The cable gearbox has apparently only covered 5000 miles which is believable as the printed numbers on the laygear were still easily readable!
I may swap all the gears from the Astra Diesel into this casing using all the new bearings, baulk rings and so on which are in there. It would have been really nice if it had the right gearing but that would be too much to ask for!
After I finished playing, I cleaned up the door step and rear quarter removing the remains of the old outer sills - there was only 1 sill on there but the original flange had been left on last time which I wanted to remove - it's now ready to accept the new outer sill once I've drilled loads of holes for plug welds and given it a coat of weld-through primer. Then I had the drivers floor in and out a few more times (I've lost count of how many times it's been in & out now) trimmed a few edges and flattened the back edge out a bit more as it wasn't fitting the floor extension very well in places. I also welded a couple of slits I'd made up, made sure all the hidden bits & joints were fully coated with weld-through primer and fitted it back up hopefully for the last time. I've held it in for the moment with a load of self tapping screws and will start welding it in tomorrow. I want to take my time on welding it in to minimise any distortion.
It looks nice under there now with it all clamped in place.
JR
#87
Deathrow
-

- TMF IT Specialist
-
- 5,734 posts
Have you tried turning it off and on again?
- Name: Adam
- Location: Manchester, UK
Posted 20 September 2010 - 12:00 AM
Not entirely sure how I missed this one but I've got my eye on it now!
Liking the work so far, that gearbox looks so lovely and new, seems such a shame to have to rip all the gears out.
Liking the work so far, that gearbox looks so lovely and new, seems such a shame to have to rip all the gears out.
#88
jayare
-
- TMF+ Member
-
- 2,093 posts
Up Into Fourth
Posted 20 September 2010 - 07:54 PM
It does seem a shame really but I'd rather have all the new bearings in the box I'm going to use! The 2 gearboxes together were less than £200 - you can barely get an A-series rebuild kit for that sort of money.
Since my last update I've welded the drivers floor in with the exception of the strip on the front tunnel and the bottom of the flitch panel where I have some patches to make up. Weekend work (gotta love working in the retail industry!), my Honda daily breaking down and Stanford Hall show have gotten in the way of progress a bit and I'm down at Coombe this weekend. I may take a couple of days off in a few weeks time to get some decent progress made!
JR
#89
jayare
-
- TMF+ Member
-
- 2,093 posts
Up Into Fourth
Posted 03 October 2010 - 07:14 PM
Yesterday I went down to Minispares to collect more panels as they had a VAT-free day on to celebrate 35 years in business. I got a heelboard half for the N/S as I'm pretty sure I'm going to need it going by the O/S! I've also decided to go the whole hog on the N/S floor and replace the complete half floor like I've done on the O/S so got that as well, a pair of cross-member extensions which go inside the sills and a new centre rear valance (for a plan I have for later on in the build) and the centre rear seam trim. I had also picked up a pair of rear corner seam trims and a door step panel at Castle Coombe last weekend.
Today I finally managed to get an afternoon in the garage! I've made up and welded in a patch on the side of the centre tunnel in front of the crossmember where the floor panel wasn't wide enough to get rid of all the rust. I also made up and welded in a new bottom edge for the O/S flitch panel. I have a couple of bits to finish welding which I noticed I had missed after I'd packed the welder away and then need to grind back the welds to tidy them up. After that it's the crossmember extension which shouldn't take too long and then the door step, subframe mount stiffener panel and outer sill to finish the structural stuff on this side so I can get the bracing out and put the rear pocket back in. I've got almost a week off in 2 weeks time so should get all that done then with any luck. Then I'm going to take a break from bodywork and play with the engine/subframe fitting for a bit of a change!
JR
#90
jayare
-
- TMF+ Member
-
- 2,093 posts
Up Into Fourth
Posted 12 October 2010 - 08:37 PM
I really must get into the habit of grinding welds down as soon as I've done them otherwise I have to spend days like today when I spent nearly 6 hours grinding all the welds on the drivers side floor and the various repairs I had to make around it! My hands, wrists and forearms are going to ache in the morning I think! I also fettled the new Heritage crossmember extension (had to tweak pretty much every fold in it and trim excess material in 3 areas) which is now ready to weld in. I've also drilled all the holes for plug welding the outer sill to the floor so those 2 parts are the next on the list for welding in next week then it's on to the door step and getting the rear pocket back in.
JR
JR


1 user(s) are reading this topic
0 members, 1 guests, 0 anonymous users


