Lewis - cheers for the offer of the bonnet but I think I have located a new one at last!
Kam - glad you enjoyed reading through so far - still a long way to go though!
JR


Jayare's Clubman Estate Rebuild & Conversion
Started by
jayare
, Nov 13 2009 08:56 PM
108 replies to this topic
#62

evansisgreat
-

- TMF+ Member
-

- 1,103 posts
One Carb Or Two?
- Local Club: Not yet
Posted 05 July 2010 - 11:36 PM
Nice conversion this, lookng forward tomore progress. I didn't realise there was a 1.8 that cold go in with only a partial inner wing chop.
Good on ya mate! Flip fronts are cheating!
Good on ya mate! Flip fronts are cheating!
#63
alexcrosse
-

- Members
-
- 3,786 posts
Up Into Fourth
Posted 06 July 2010 - 05:38 PM
got that badge on yet? lol. Good to meet you at gaydon pal.
Al
Al
#64
jayare
-
- TMF+ Member
-
- 2,093 posts
Up Into Fourth
Posted 06 July 2010 - 10:34 PM
Nice to meet you too Al. Still working out where it will go - thinking maybe on the cam cover!
JR
JR
#65
jayare
-
- TMF+ Member
-
- 2,093 posts
Up Into Fourth
Posted 18 July 2010 - 12:02 AM
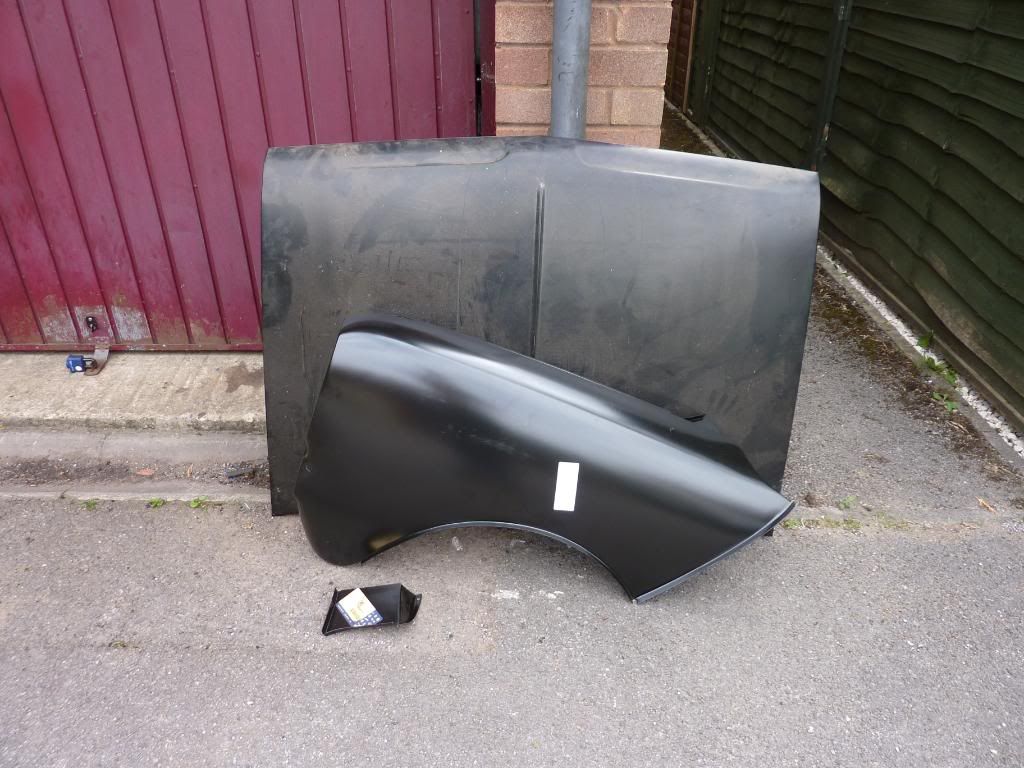
Not much done this weekend - on Friday I finished work around 2.30pm (started at 6am) and set off to pick up some panels - first stop Moss in Twickenham to get the N/S wing and a closing panel for the O/S (goes just in front of the wheelarch). Next Clacton on Sea to pick up a new bonnet which I finally managed to track down through a wanted ad. Only problem was the M25 was living up to it's reputation and the round trip which should have taken around 5 - 5.5 hours ended up taking 9 hours, albeit with an hour stop in Clacton to get some rock and have some fish & chips by the sea! I was absolutely knackered when I got in.
Anyway - these are the panels I picked up:
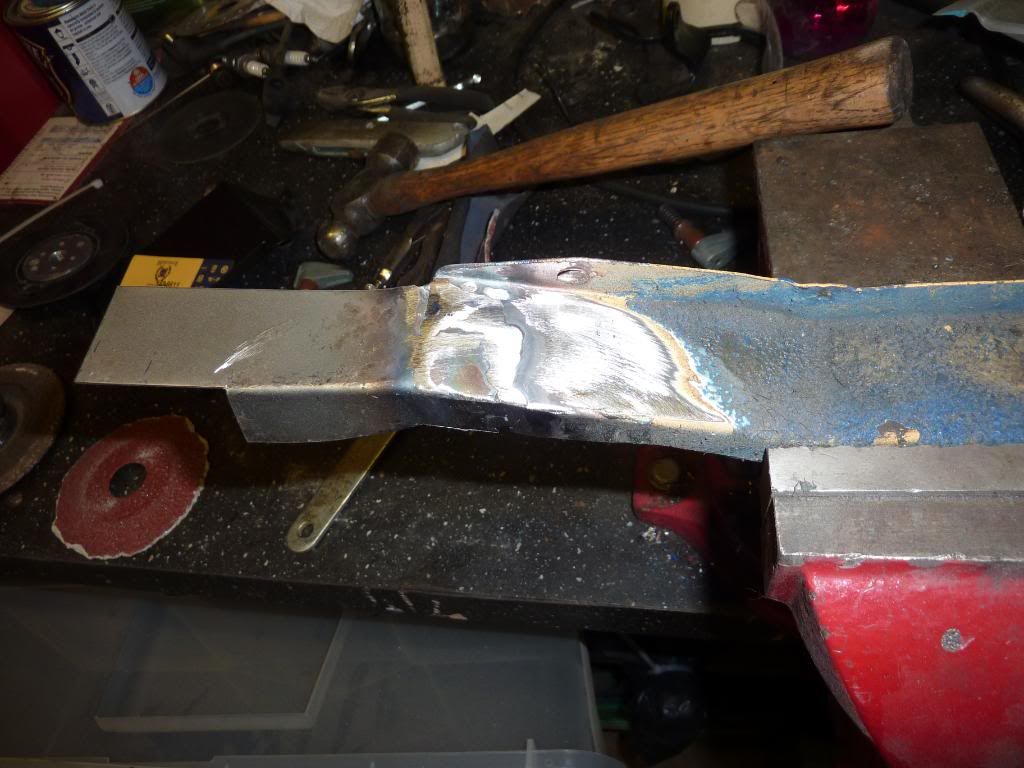
Today I spent a few hours in the garage after a lie in and chill-out morning. I decided as I still haven't got any 1.2mm steel sheet that I would start at the back of the floorpan instead of the front. I removed the closing/stiffening panel from the top of the inner sill in the pocket. The rear end of this had gone all crispy so using CAD made up a section and welded it together:
CAD in action:
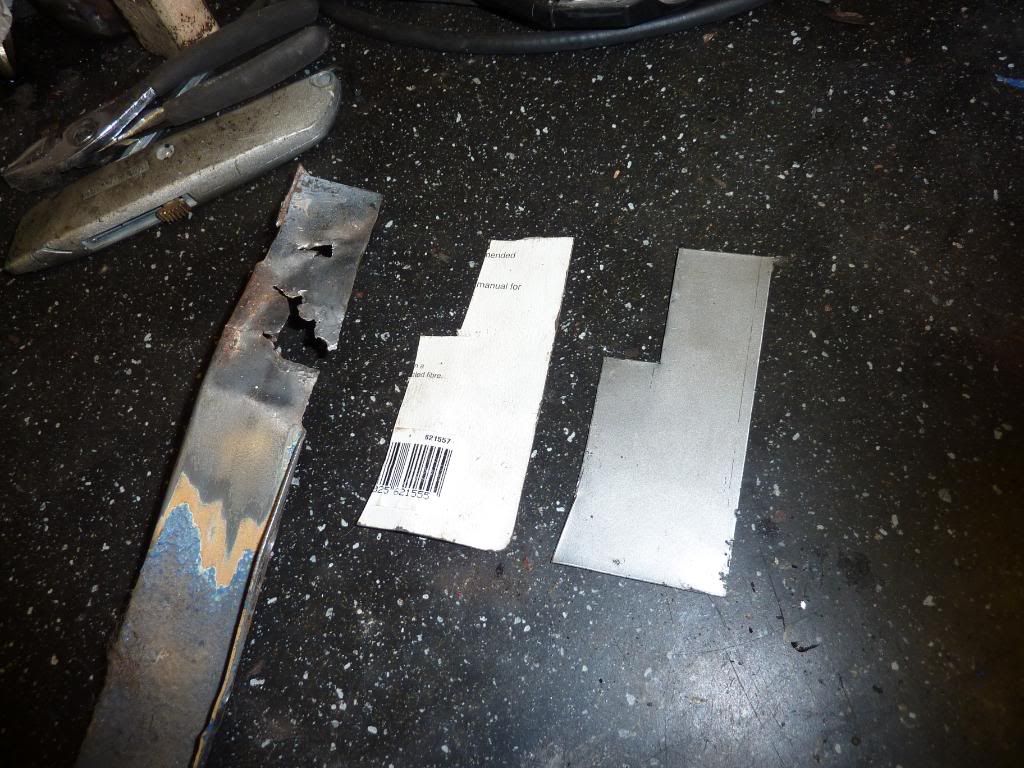
Repaired panel:
I've also tried it back in place to make sure it still fitted and all was good so moved on to the closing panel above the rear subframe mounting so that got chopped out and also a couple of inches next to the closing panel which had been repaired previously but wasn't great.
All cut out:
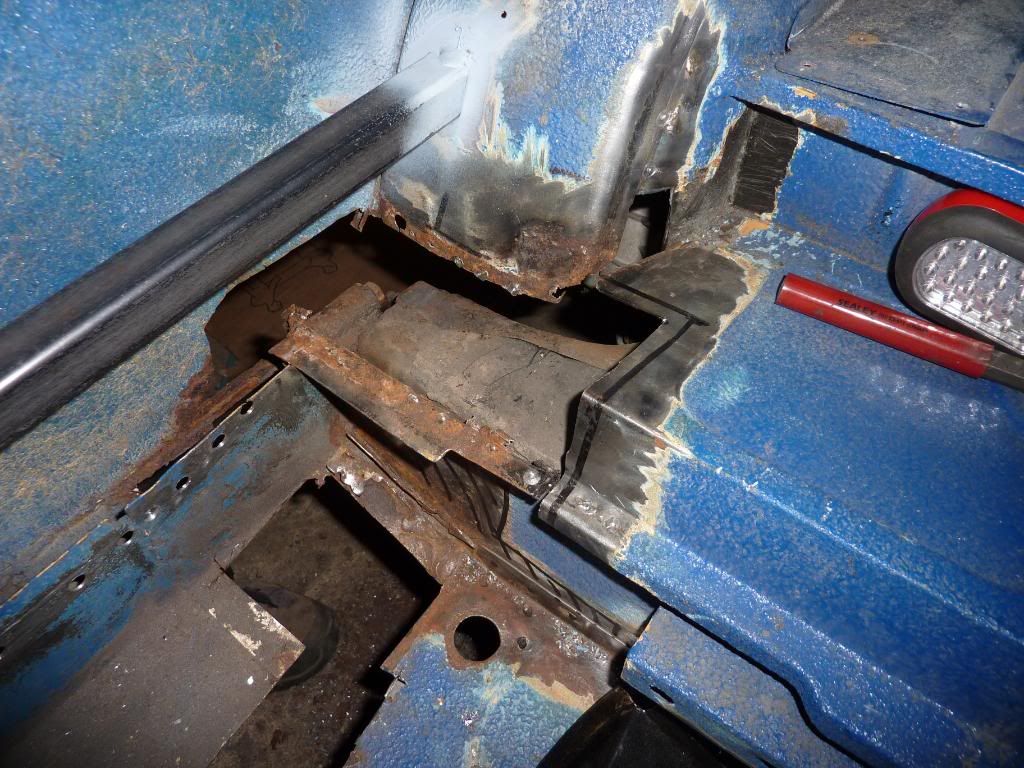
And with the new closing panel and repair panel I made up (more CAD!) in place:
I need to repair the pocket at the back edge (it fits down in between the closing panel and the repair panel to close a gap due to the different heights of the panels (as per standard - not from dodgy repair panel fabrication!)
I have also decided to replace the end of the heelboard - it's a similar story to a lot of the other areas on the car - it's not bad and could be patched up and last for a good few years but I want to make sure that if there is something I can sort relatively easily now I'm going to do it now rather than try to do it in a few years time, wrecking the paint, etc.
Plan for next weekend (I have to work tomorrow so no time to work on the car) is to get the closing panel and repair welded in (but not to the heelboard as that will be coming out). I should be able to get the 1.2 sheet for the front this week and get that end sorted as well. Then it's deep breath time and cut out half the floor!
JR
Anyway - these are the panels I picked up:
Today I spent a few hours in the garage after a lie in and chill-out morning. I decided as I still haven't got any 1.2mm steel sheet that I would start at the back of the floorpan instead of the front. I removed the closing/stiffening panel from the top of the inner sill in the pocket. The rear end of this had gone all crispy so using CAD made up a section and welded it together:
CAD in action:
Repaired panel:
I've also tried it back in place to make sure it still fitted and all was good so moved on to the closing panel above the rear subframe mounting so that got chopped out and also a couple of inches next to the closing panel which had been repaired previously but wasn't great.
All cut out:
And with the new closing panel and repair panel I made up (more CAD!) in place:
I need to repair the pocket at the back edge (it fits down in between the closing panel and the repair panel to close a gap due to the different heights of the panels (as per standard - not from dodgy repair panel fabrication!)
I have also decided to replace the end of the heelboard - it's a similar story to a lot of the other areas on the car - it's not bad and could be patched up and last for a good few years but I want to make sure that if there is something I can sort relatively easily now I'm going to do it now rather than try to do it in a few years time, wrecking the paint, etc.
Plan for next weekend (I have to work tomorrow so no time to work on the car) is to get the closing panel and repair welded in (but not to the heelboard as that will be coming out). I should be able to get the 1.2 sheet for the front this week and get that end sorted as well. Then it's deep breath time and cut out half the floor!
JR
#66
jayare
-
- TMF+ Member
-
- 2,093 posts
Up Into Fourth
Posted 28 July 2010 - 02:29 PM
Last weekend I got a little bit more done - took ages but didn't seem like much at the end of the day. Anyway I got a couple of patches welded into the bottom edge of the rear wheelarch as when it was cleaned up the metal was pretty thin and had a few holes in it. Then got the closing panel welded in:
I haven't plug welded it to the heelboard yet as the end is going to be replaced. I also fitted the patch next to the closing panel:
and re-fitted the inner sill closing panel - this is just welded to each end at the moment as the inner sill will be coming out.
I also repaired the pocket - the bottom rear corner was really thin once cleaned up and in removing it I had to cut a corner off it. This slips between the closing panel and the patch above to close the gap off:
At this point progress slowed down! I got hold of some 1.2mm sheet steel from the local motor factors which was a bit dearer than the steel stockholder but at least they gave me the correct stuff! With this I started to make up the repair panel for the toe-board but even after a couple of hours of faffing round with it I can't get it to sit correctly in relation to the other side or the remaining bit of toe-board on the drivers side and that's without even considering the compound curve in the front corner of the floorpan that I've got to try and create. In the end I just had to leave it as I was getting frustrated! This is how it stands at the moment:
Hopefully going back to it fresh this weekend it will all fall into place!
JR
#67
Paul Wiginton
-

- Members
-
- 1,585 posts
Camshaft & Stage Two Head
- Location: at home
Posted 28 July 2010 - 04:22 PM
JR, nice job, little tip for you - I see the patch for the toe board has a stsaggered joint, although necessary sometimes, it causes distortion when welding. Try to keep the joins as straight as you can.
Wigi
Wigi
Edited by Paul Wiginton, 28 July 2010 - 04:23 PM.
#68
jayare
-
- TMF+ Member
-
- 2,093 posts
Up Into Fourth
Posted 29 July 2010 - 06:57 PM
Cheers Paul - I'm probably going to have to re-make that patch anyway so wouldn't be any hassle to make the join straight on version 2. The bit I'm struggling with is shaping the flange onto the inner wing and the compound curve into the tunnel. Going to spend some time on it over the weekend so hopefully get it fitting right.
JR
JR
#69
jayare
-
- TMF+ Member
-
- 2,093 posts
Up Into Fourth
Posted 02 August 2010 - 11:51 AM
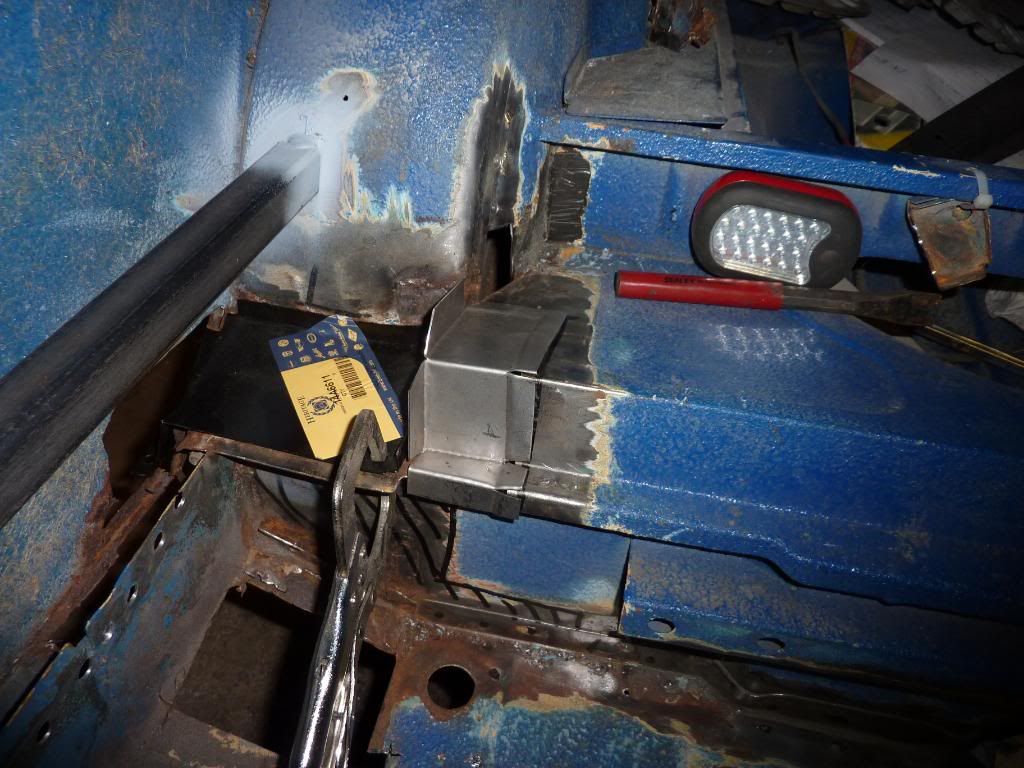
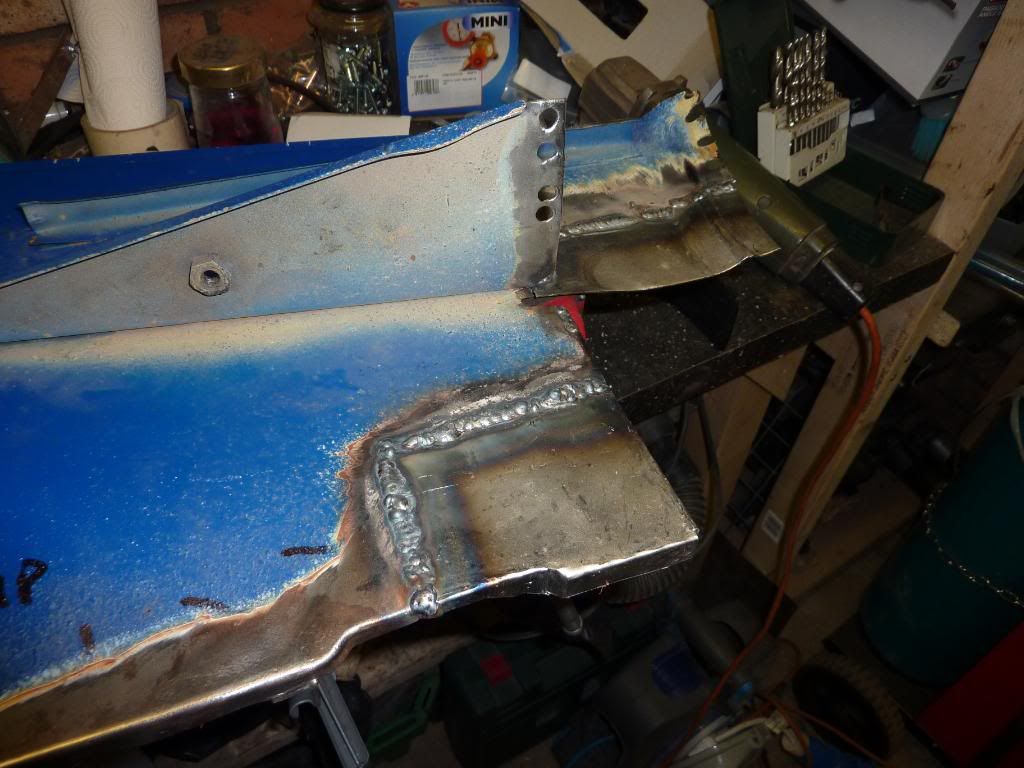
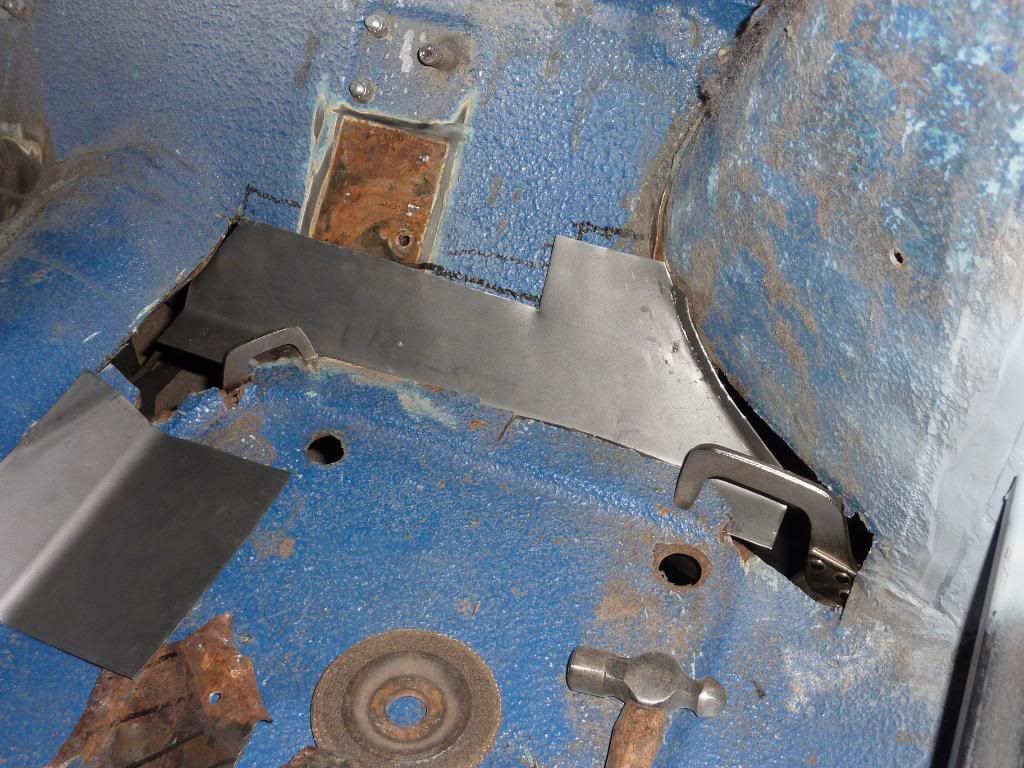
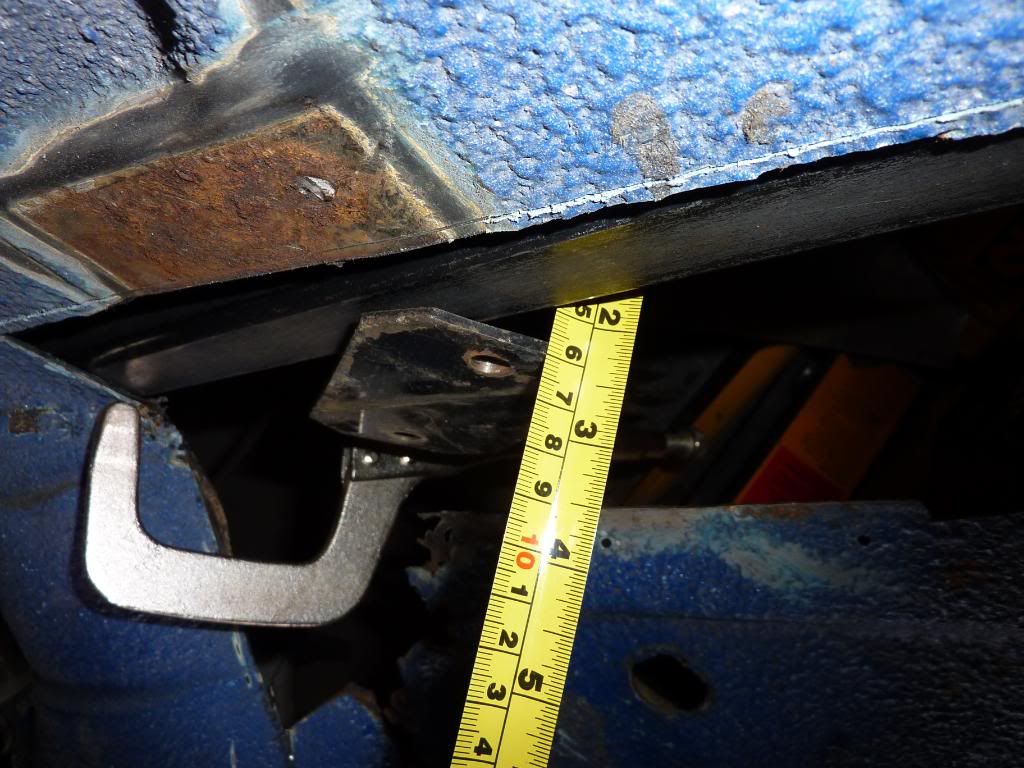
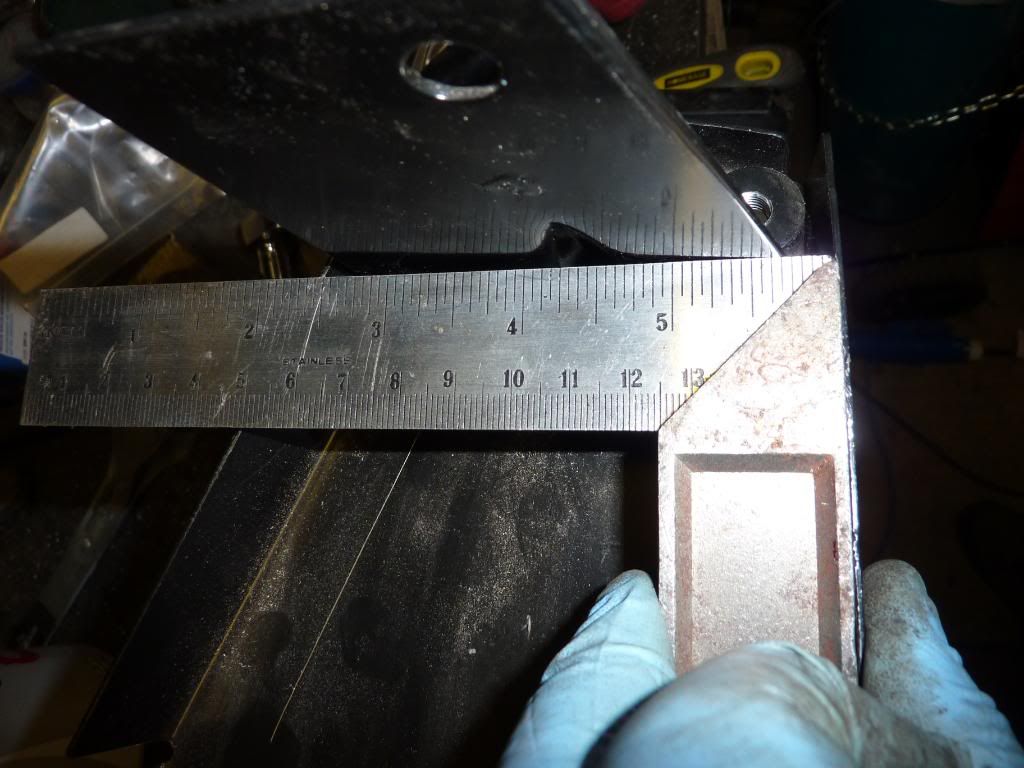
Had a reasonably good weekend on it - I was on my 3-day weekend so got 2 full days in. Friday I got the toe-board repair done - following Paul's advice I re-made the repair panel without the stepped edge. By doing this it put the weld-line above the subframe mount and highlighted one of the reasons I was struggling to get the version 1 patch to fit - the foot of the subframe wanted to sit around 10mm inside the car! This photo shows how a straight-edge clamped on the toe-board in the centre and the flange of the inner wing at the outside and how far into the car the subframe wanted to be:
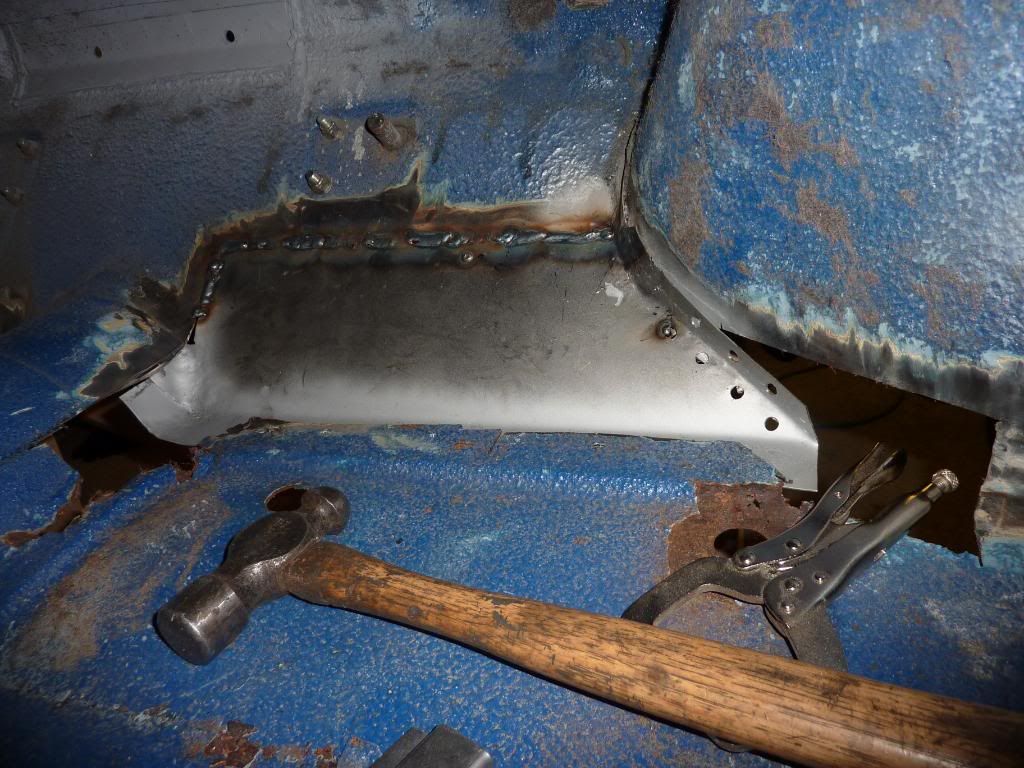
So I had to drop the subframe out to make the repair - I would rather make the subframe fit the car than the other way round - at least that way I could go back to a standard subframe (unlikely!!). Trouble was the car is supported on the subframe to had to make a wooden trestle to mount up under the cross-member. Once that was done I could get on with the repair. The difficult bit was shaping the compund curve at the tunnel end - it's still not great but it will do! Got that welded in along the top edge - the rest will be done when the floor goes in:
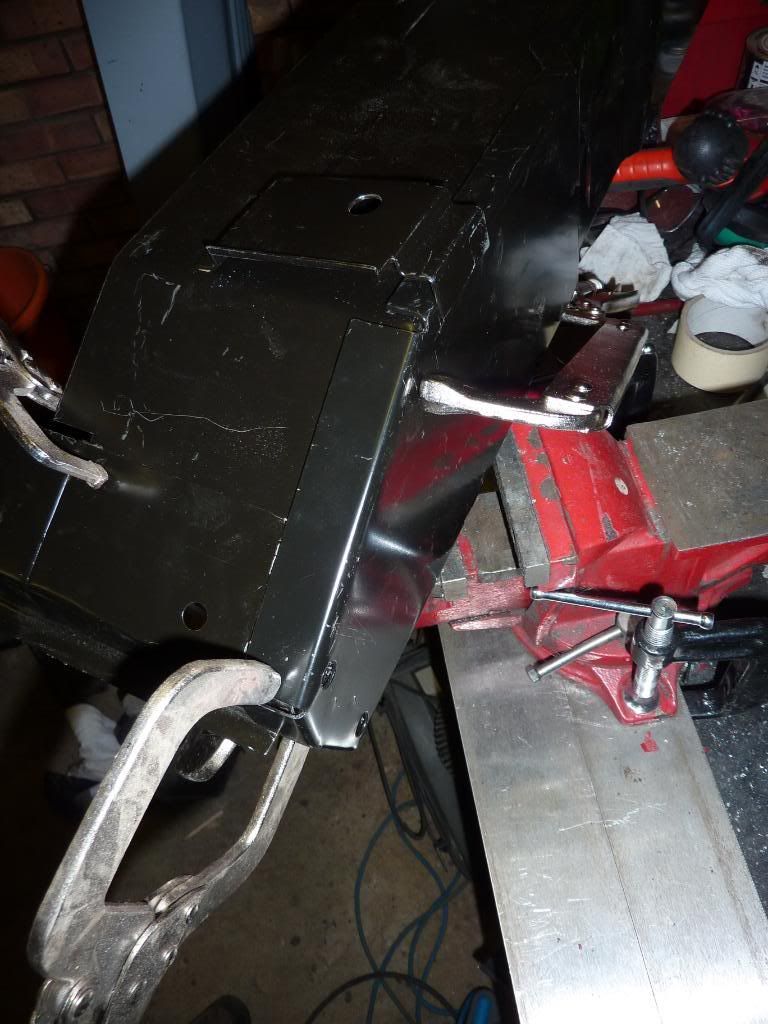
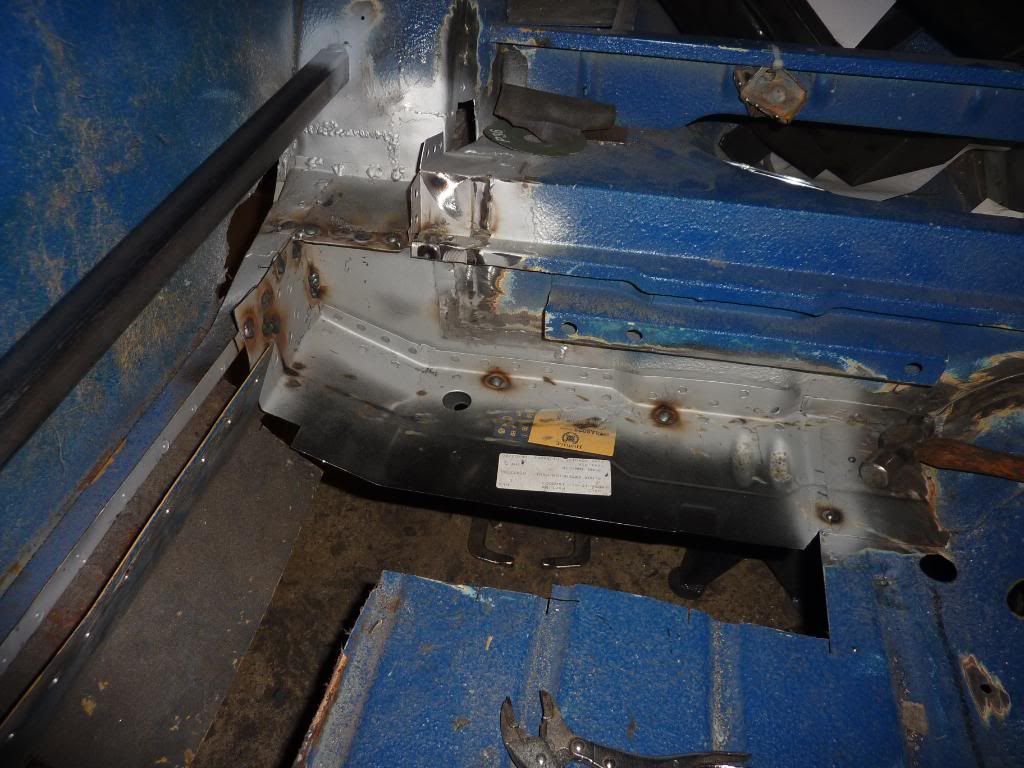
It doesn't look like much but I spent nearly 9 hours getting that done! On to Sunday and the heelboard and floor extension piece were the next target for replacement. Got all Heritage panels (heelboard, floor extension, outer sill) so did a quick mock-up with all the panels on the bench to figure out how it all fitted together:
Then tried to run a tap through the subframe bolt fittings in the heelboard but the threaded inserts weren't actually behind the holes in the panel:

A bit more investigating and it appears the stiffener with the nuts on had been welded to the main panel in the wrong place and on the *******:
How the hell Heritage use these panels to make actual shells I'll never know - maybe that's why they cost so much these days. Anyway drilled out the 2 spot welds holding the 2 bits together and removed the stiffener - I fitted the main panel and then bolted the stiffener on with the subframe mounting bolts and welded it in the right place.
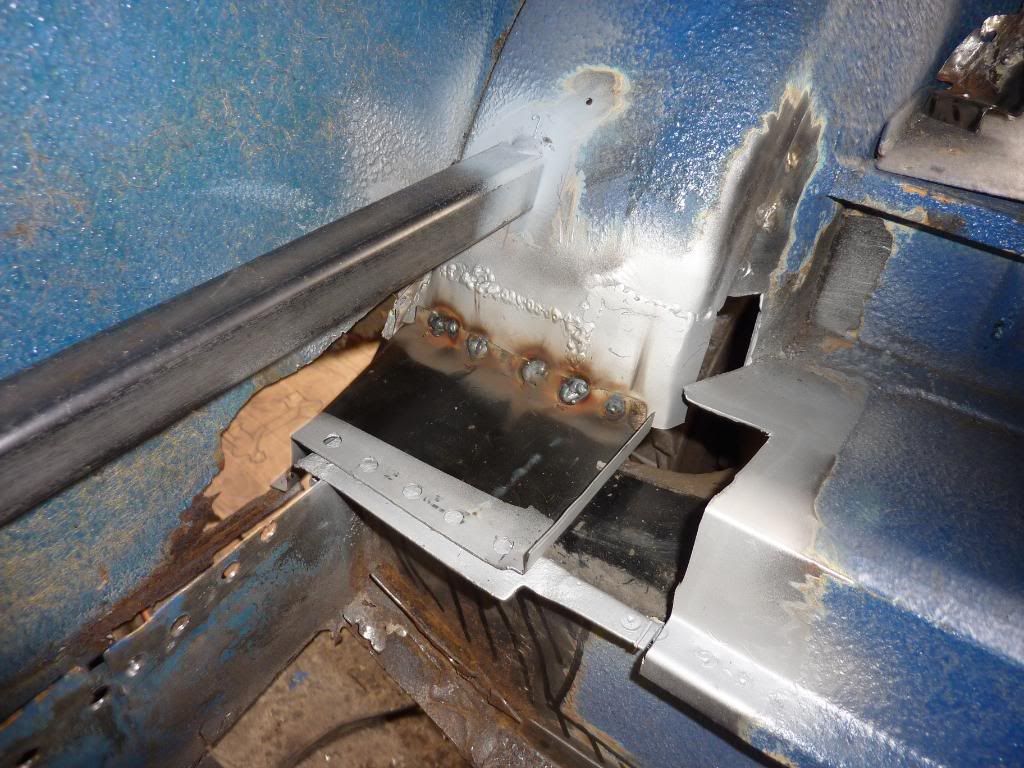
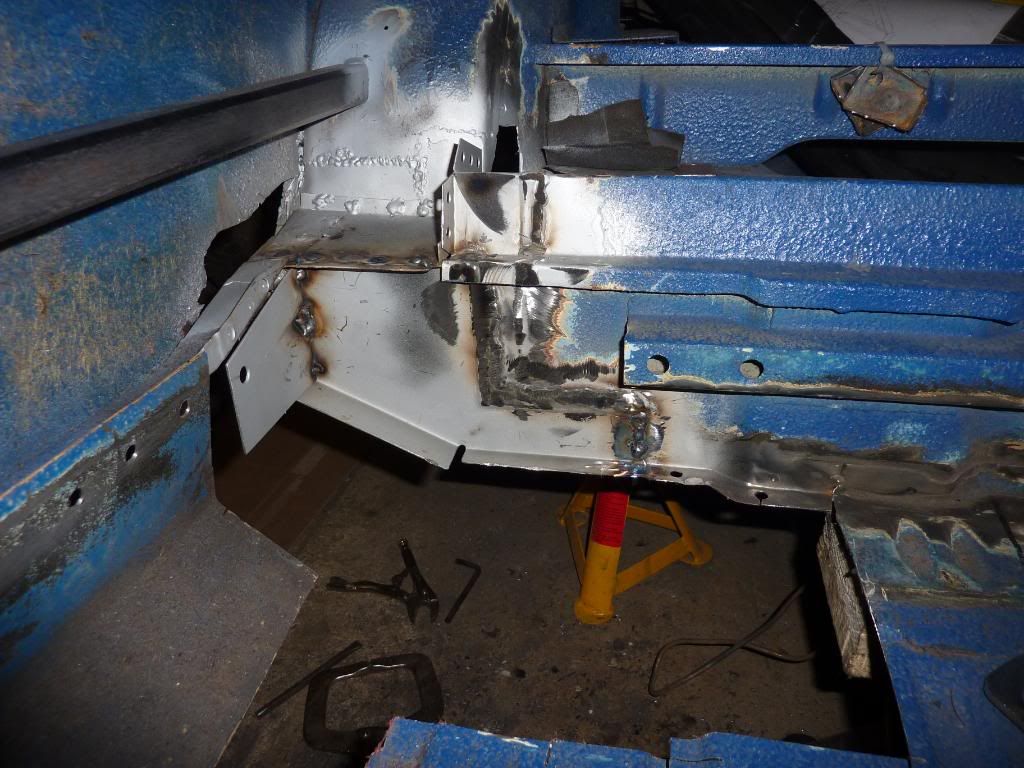
Heelboard area almost ready for repair panel:
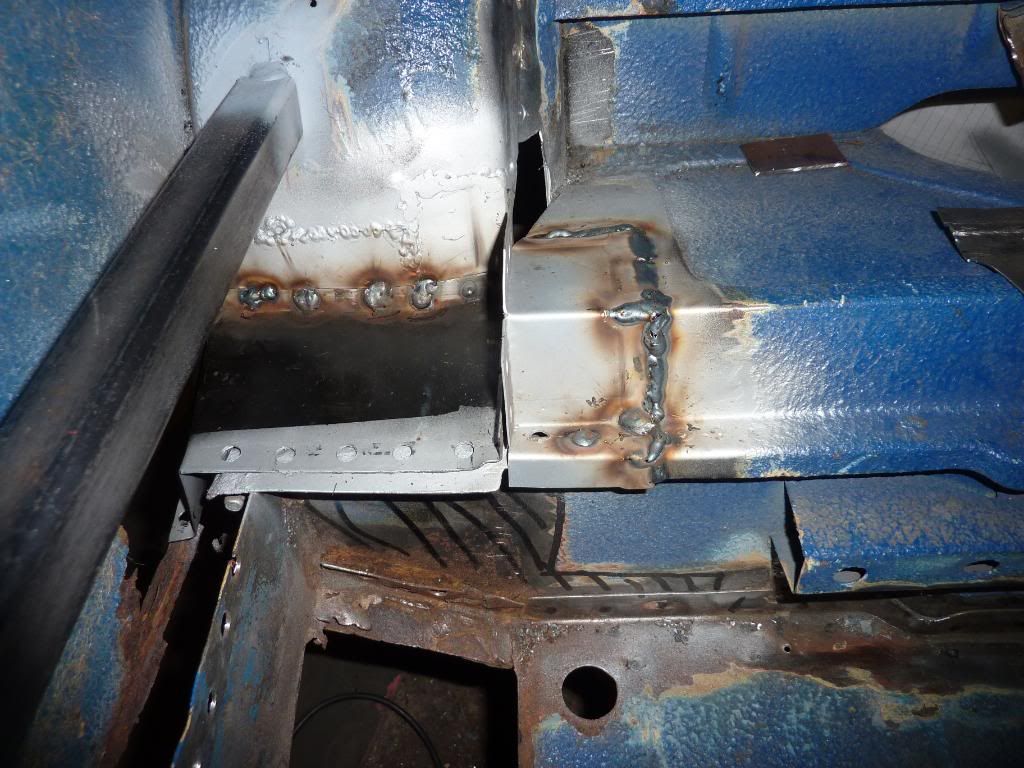
And welded into place complete with stiffener:
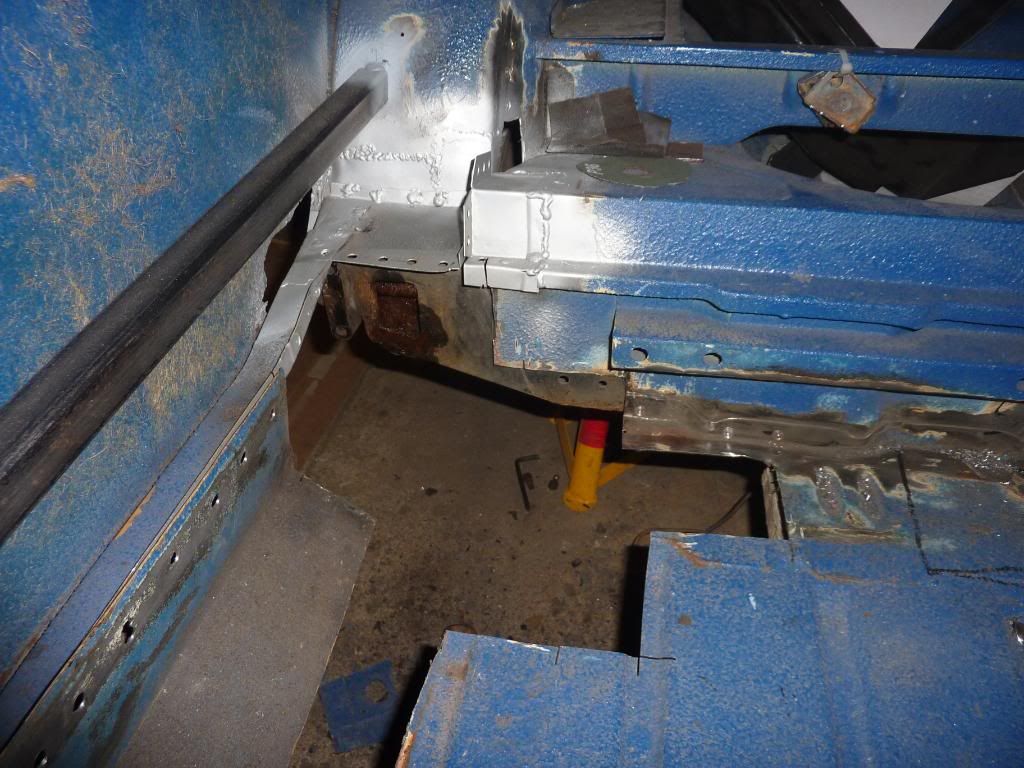
Then moved onto the floor extension - cut out the old, prepared all joints with weld-though paint:
And started to weld in the new panel. I was having all sorts of problems with the welding though - almost certainly settings & technique - I was pretty tired by this point so decided that I would be better off leaving it and coming back to it rather than carry on and make a complete *******-up of it and giving myself more work to do later. It's looking better now I'm filling up some holes rather than making them!
Once that's fully welded in it's on to chopping the floor out - hopefully get some of that done next weekend.
JR
So I had to drop the subframe out to make the repair - I would rather make the subframe fit the car than the other way round - at least that way I could go back to a standard subframe (unlikely!!). Trouble was the car is supported on the subframe to had to make a wooden trestle to mount up under the cross-member. Once that was done I could get on with the repair. The difficult bit was shaping the compund curve at the tunnel end - it's still not great but it will do! Got that welded in along the top edge - the rest will be done when the floor goes in:
It doesn't look like much but I spent nearly 9 hours getting that done! On to Sunday and the heelboard and floor extension piece were the next target for replacement. Got all Heritage panels (heelboard, floor extension, outer sill) so did a quick mock-up with all the panels on the bench to figure out how it all fitted together:
Then tried to run a tap through the subframe bolt fittings in the heelboard but the threaded inserts weren't actually behind the holes in the panel:
A bit more investigating and it appears the stiffener with the nuts on had been welded to the main panel in the wrong place and on the *******:
How the hell Heritage use these panels to make actual shells I'll never know - maybe that's why they cost so much these days. Anyway drilled out the 2 spot welds holding the 2 bits together and removed the stiffener - I fitted the main panel and then bolted the stiffener on with the subframe mounting bolts and welded it in the right place.
Heelboard area almost ready for repair panel:
And welded into place complete with stiffener:
Then moved onto the floor extension - cut out the old, prepared all joints with weld-though paint:
And started to weld in the new panel. I was having all sorts of problems with the welding though - almost certainly settings & technique - I was pretty tired by this point so decided that I would be better off leaving it and coming back to it rather than carry on and make a complete *******-up of it and giving myself more work to do later. It's looking better now I'm filling up some holes rather than making them!
Once that's fully welded in it's on to chopping the floor out
- hopefully get some of that done next weekend.JR
#70
GreaseMonkey
-

- Members
-
- 3,663 posts
Has Ratchet, Will Make Noises
Posted 02 August 2010 - 12:54 PM
Coming along nicely 
#71
Paul Wiginton
-
- Members
-
- 1,585 posts
Camshaft & Stage Two Head
- Location: at home
Posted 02 August 2010 - 04:24 PM
Looking good mate
#72
jayare
-
- TMF+ Member
-
- 2,093 posts
Up Into Fourth
Posted 08 August 2010 - 07:39 PM
Cheers for the kind comments guys!
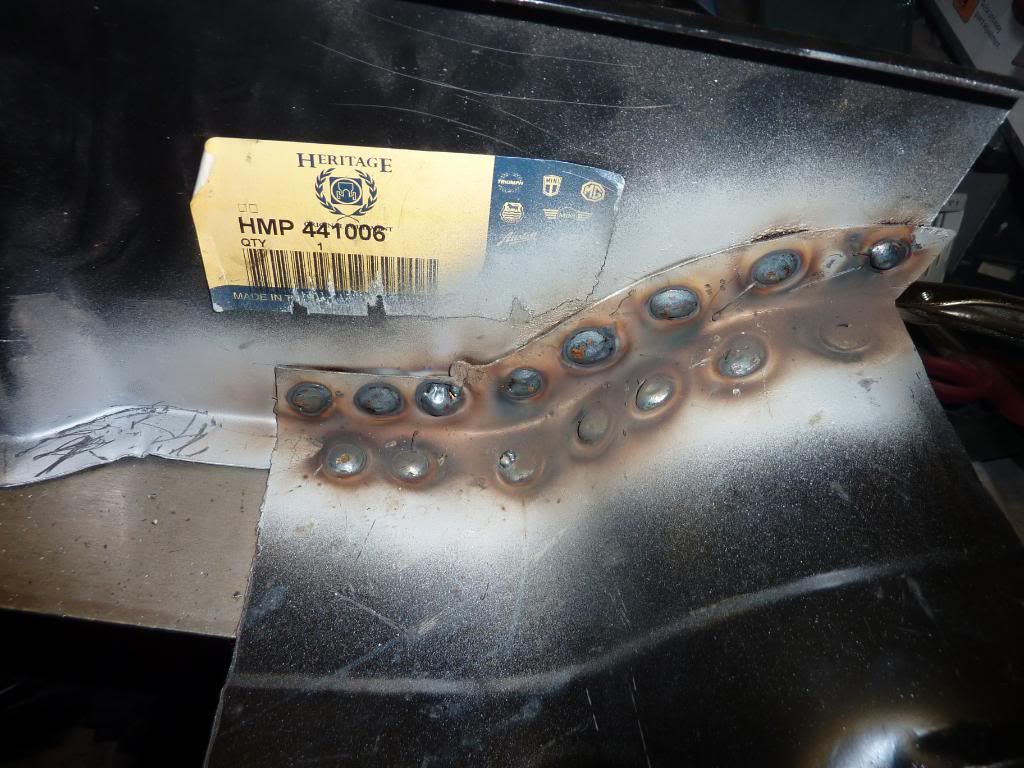
Anyway after having issues with the welding last weekend I started today by preparing some of the off-cuts in the same way as I had on the car so I could do a bit of practice and get the settings adjusted before tackling the car again. I upped the wire speed a little as it seemed like the wire was melting back then falling off in little balls and had a go - it was noticeably better so up a touch more and all seemed good - did the following practice plug welds:
Front:
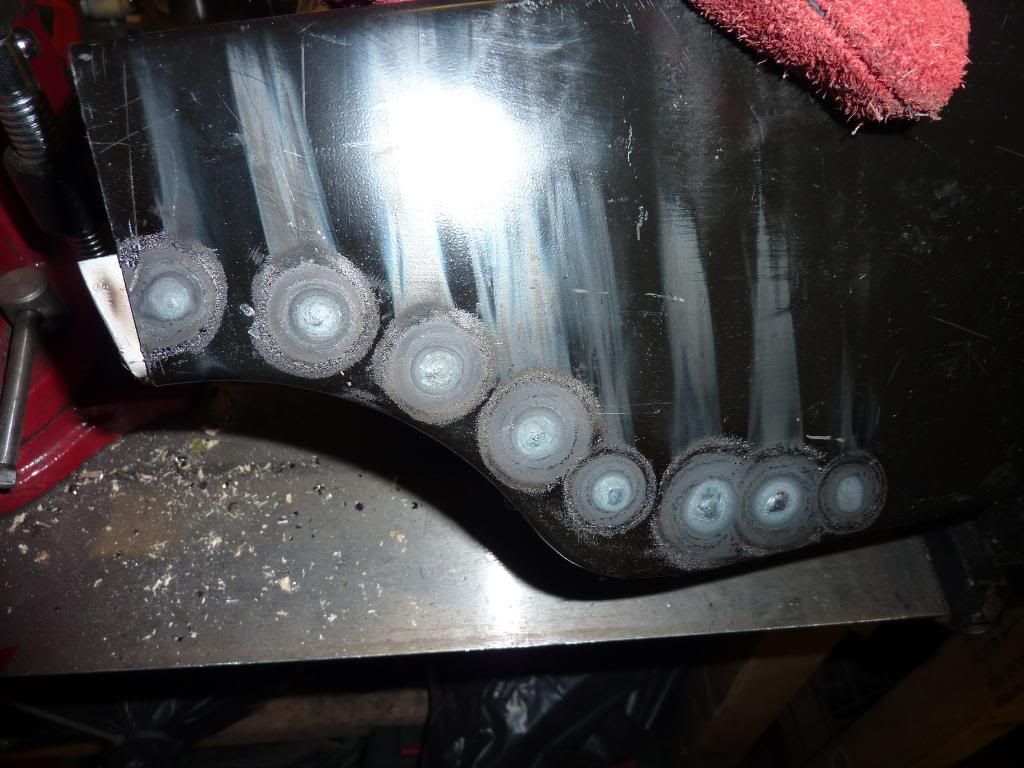
Back on horizontal welds:
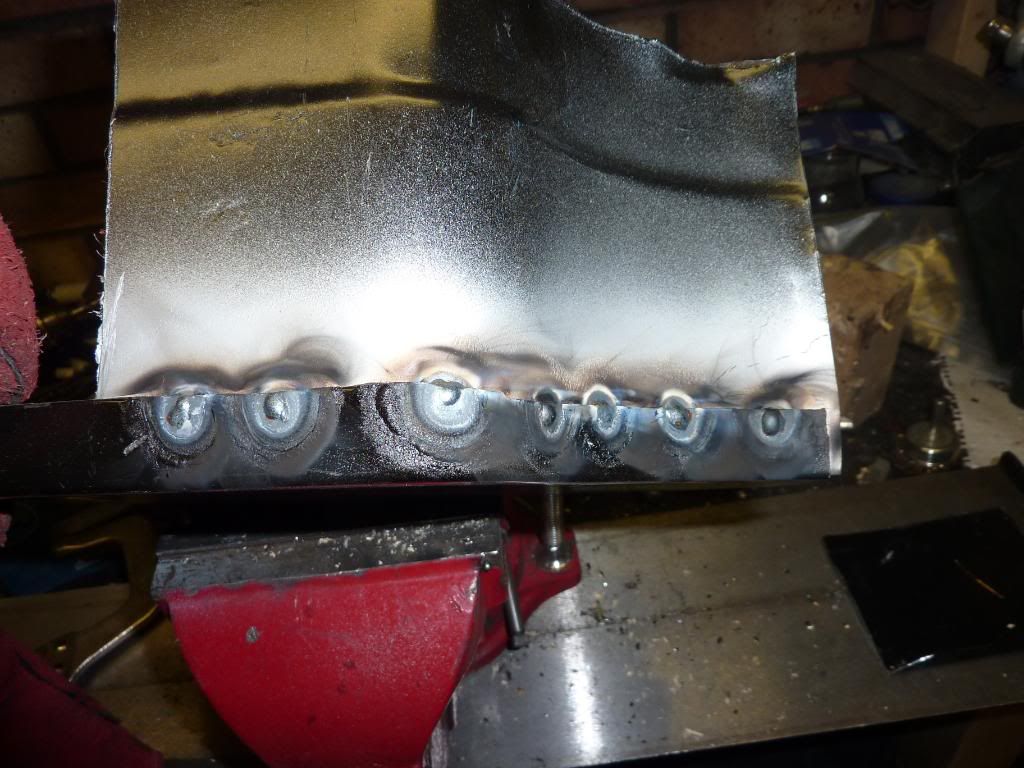
And on vertical ones:
So happy I'd got the settings sorted out, I went on to finish welding the floor extension in which I seem not to have taken a photo of !
!
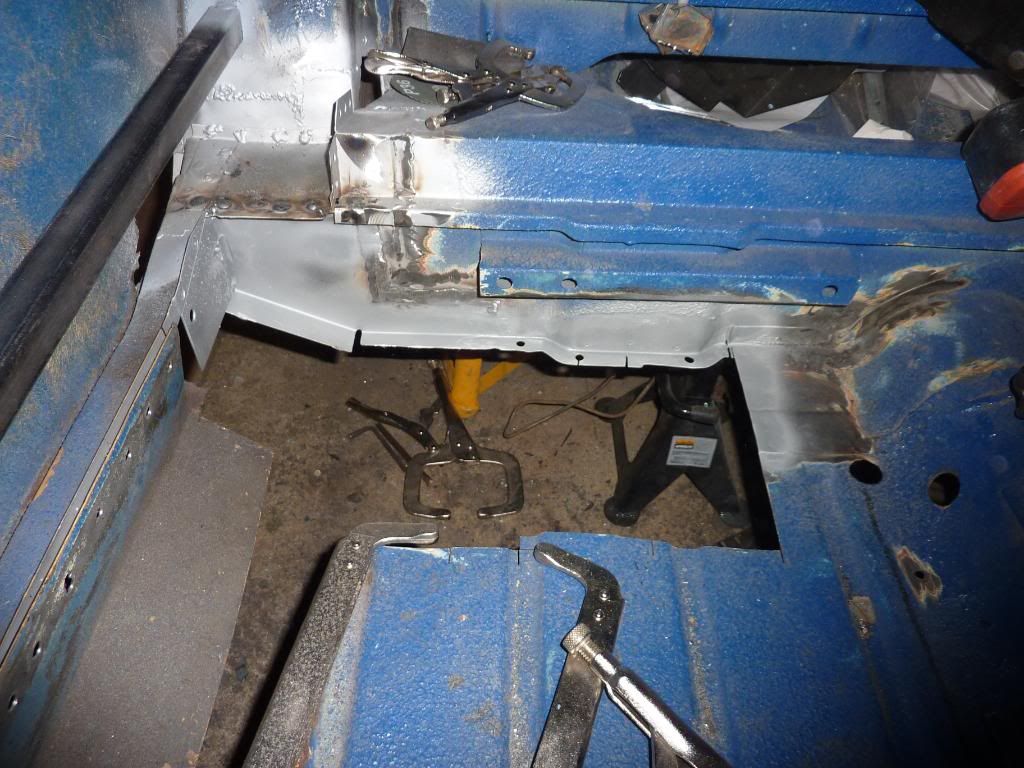
Then set about one of the 'big visuals' and cut the floor out I had to get hold of a longer drill bit for the spots on the cross-member as all the ones I had were just too short to be able to get the drill in straight. All went reasonably well except I ran out of the ultra-thin cutting discs I'd been using so had to resort to a cheap standard cutting disc which took ages to cut through the sill, was a nightmare to try to get the cut anywhere near where I wanted it and resulted in loads of smoke & fumes - probably due to a lot more heat build-up. Must visit Screwfix tomorrow for more supplies! Anyway the majority of the floor is now out - I still need to do the usual fiddly bits and trimming to allow the new panel to fit snug but there's now a dirty great hole in the bottom of my car:
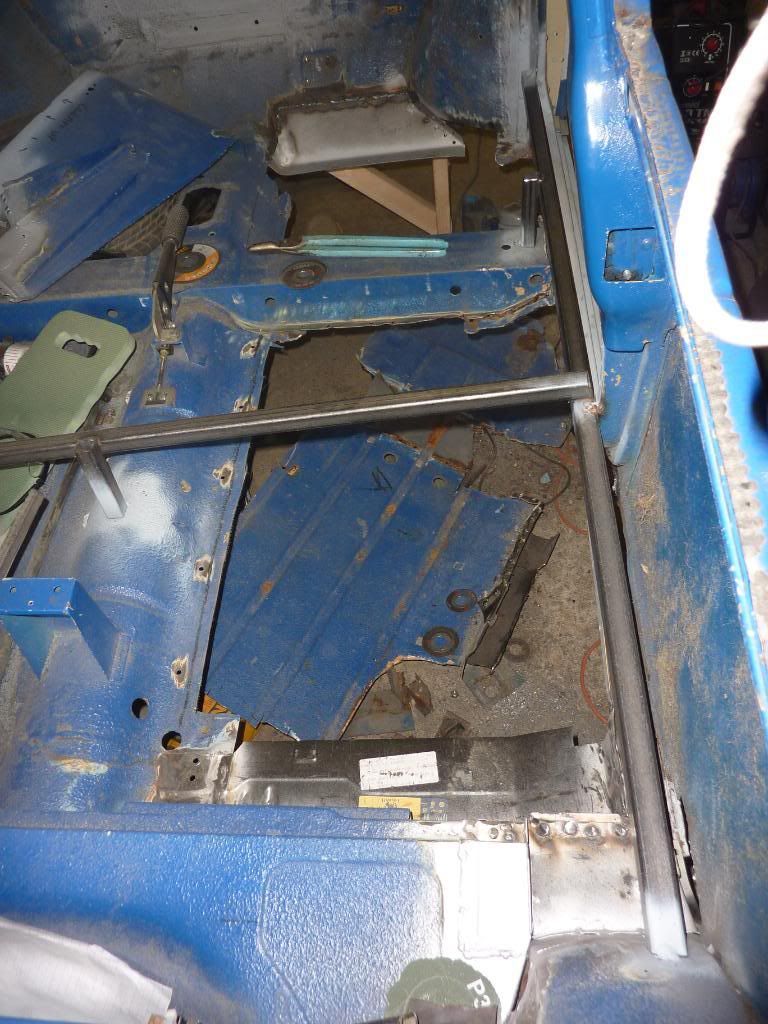
Pleasingly the inside of the cross-member is in good nick - just a little cleaning up and dressing of the flanges needed:

It will be nice to get a big lump welded back in - might get a couple of hours in through the week and next Saturday then MITP on Sunday - hopefully get to meet some of you guys and have a look at some finished cars to give me some more motivation!
JR
Anyway after having issues with the welding last weekend I started today by preparing some of the off-cuts in the same way as I had on the car so I could do a bit of practice and get the settings adjusted before tackling the car again. I upped the wire speed a little as it seemed like the wire was melting back then falling off in little balls and had a go - it was noticeably better so up a touch more and all seemed good - did the following practice plug welds:
Front:
Back on horizontal welds:
And on vertical ones:
So happy I'd got the settings sorted out, I went on to finish welding the floor extension in which I seem not to have taken a photo of
!Then set about one of the 'big visuals' and cut the floor out
I had to get hold of a longer drill bit for the spots on the cross-member as all the ones I had were just too short to be able to get the drill in straight. All went reasonably well except I ran out of the ultra-thin cutting discs I'd been using so had to resort to a cheap standard cutting disc which took ages to cut through the sill, was a nightmare to try to get the cut anywhere near where I wanted it and resulted in loads of smoke & fumes - probably due to a lot more heat build-up. Must visit Screwfix tomorrow for more supplies! Anyway the majority of the floor is now out - I still need to do the usual fiddly bits and trimming to allow the new panel to fit snug but there's now a dirty great hole in the bottom of my car:Pleasingly the inside of the cross-member is in good nick - just a little cleaning up and dressing of the flanges needed:
It will be nice to get a big lump welded back in - might get a couple of hours in through the week and next Saturday then MITP on Sunday - hopefully get to meet some of you guys and have a look at some finished cars to give me some more motivation!
JR
#73
toyboy396
-

- Members
-
- 1,000 posts
Grandad in training.....
- Location: High Wycombe
- Local Club: C&T Classics
Posted 08 August 2010 - 07:51 PM
Looks like you've had your work cut out mate,
Fair play to you.. Look forward to seeing it finished
Fair play to you.. Look forward to seeing it finished
#74
Kam
-

- TMF+ Member
-
- 4,140 posts
Straight to the Point
- Location: Hampshire
- Local Club: 16vMini club
Posted 11 August 2010 - 08:18 PM
Don't you love your days off eh? Plastering, plumbing, wallpapering, take the kids to the park or work on the mini!
Good move on sorting out the wire speed on the off-cuts rather than on the masterpiece! Wha-hey Flintstones car!!! Big job that, rather you than me Oh and thats what the underside of the cross member looks like in situ....
Nice work mate, keep at it
Good move on sorting out the wire speed on the off-cuts rather than on the masterpiece!
Wha-hey Flintstones car!!! Big job that, rather you than me Oh and thats what the underside of the cross member looks like in situ....Nice work mate, keep at it
#75
jayare
-
- TMF+ Member
-
- 2,093 posts
Up Into Fourth
Posted 12 August 2010 - 07:33 PM
Cheers Toyboy396 - I look forward to it being finished too - the light at the end of the tunnel seems a long way off at the moment - it will be really nice to get the floor welded in!
Kam - I think even the flintstones didn't have a hole that big in the bottom of their car
I spent a couple of hours this evening doing a few of the fiddly bits and cleaning the edges up - I may cut a couple of little bits out of the cross-member to get rid of some thin & pitted bits which were over the rotten flute in the floor. As I'm using a saloon length floor panel as per original, I had to flatten the vertical flange which would normally get welded to the heelboard in a saloon as this fits under the floor extension in the estate. I also made a card template for the bottom of the flitch panel so I can cut the last remains of the old one off in order to get the floor panel in.
No pics for this update as I forgot to take the camera out. I may get a little more done tomorrow and then half a day or so on Saturday - I'm hoping to get somewhere close on the floor fitment before MITP and start welding it in the weekend after.
JR


2 user(s) are reading this topic
0 members, 2 guests, 0 anonymous users


