Jump to content


Photo

Started My Pro-mo Build


  • Please log in to reply
487 replies to this topic

#136 Chriss

Chriss

    Mini Mad

  • Noobies
  • PipPipPipPip
  • 107 posts
  • Location: Kent

Posted 20 January 2013 - 02:35 PM

Looking forward to seeing the progress, shame about the Holiday!

#137 kjwithers

kjwithers

    Stage One Kit Fitted

  • Noobies
  • PipPipPip
  • 62 posts
  • Location: Somerset

Posted 20 January 2013 - 03:55 PM

Good luck braving the conditions, looking forward to an update!

#138 racerlike

racerlike

    Speeding Along Now

  • Members
  • PipPipPipPipPip
  • 427 posts

Posted 24 January 2013 - 02:21 PM

Spent the last few days carefully reshaping the wheel arch to gain clearance on full lock.
Now I have my group 5 wheel arch extensions to somehow fit. Anyone got any tips on the best way to approach this?
Can't offer the fronts up flush because of the seam.
But I can't accurately cut clearance for the seam because of the first issue.
There is also ride height to consider first before positioning the extension on the arch. Too high or too low could either limit ride height adjustability or look plain awkward.
Also I can see the wheels hitting them on full lock if I'm not careful and that would be back to square 1.

#139 jb93

jb93

    TMF Noddy Badge holder officially.

  • Members
  • PipPipPipPipPipPipPipPipPip
  • 2,439 posts
  • Location: .

Posted 24 January 2013 - 04:04 PM

I found it helpful to get someone to hold the arch into position and then get them to make adjustments until you are happy with the fit. Then all you need to do is mark where the seam hits the arch :thumbsup:

#140 racerlike

racerlike

    Speeding Along Now

  • Members
  • PipPipPipPipPip
  • 427 posts

Posted 24 January 2013 - 07:47 PM

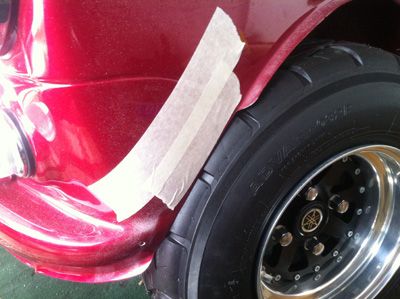
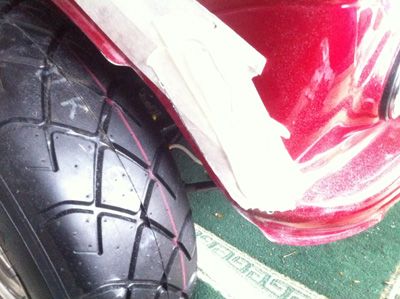
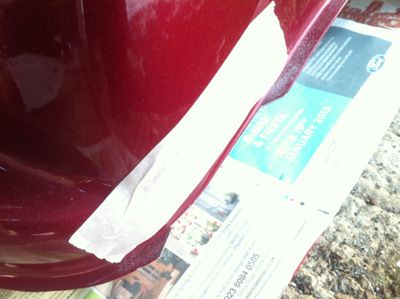
in the end i managed to support the arch on top of the wheel with a scrunched t-shirt underneath. held it in place for me to draw an outline on the body to work against. More on that tomorrow.
A few photos of how much needed trimming off the front arches.
Posted ImagePosted ImagePosted Image

#141 racerlike

racerlike

    Speeding Along Now

  • Members
  • PipPipPipPipPip
  • 427 posts

Posted 25 January 2013 - 04:02 PM

Front arch extension fits. Got it lined up exactly where I want it visually but not the way it was intended. I hate the fact they don't follow the shape of the body arch close enough so I've positioned it lower and surprise surprise - tyre hits the leading edge. More trimming involved here
Attached File  image.jpg   68.66K   14 downloads. Attached File  image.jpg   64K   9 downloads

#142 jb93

jb93

    TMF Noddy Badge holder officially.

  • Members
  • PipPipPipPipPipPipPipPipPip
  • 2,439 posts
  • Location: .

Posted 25 January 2013 - 04:50 PM

It's a real pain in the arse job to do, especially by yourself. You're doing a cracking job :thumbsup:

#143 racerlike

racerlike

    Speeding Along Now

  • Members
  • PipPipPipPipPip
  • 427 posts

Posted 25 January 2013 - 08:07 PM

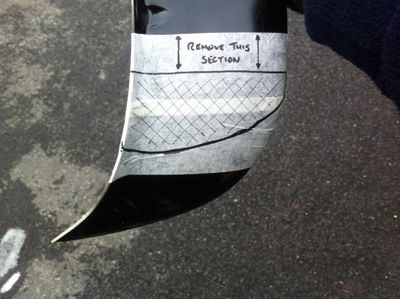
So the rear arch extensions. To fit them straight on you would end up having it halfway up the car with a good 2 inches of body arch showing below - pretty rubbish really. As with the fronts they just dont follow the lines of the car which is disappointing as they came from a well known supplier.
So to fit them how i think they should go means dropping it closer to the body arch - fine for the leading edge along the sill but it means the back end hangs down quite a bit below the valance.
This leaves two options - cut a section out and bond the two bits together to give the correct size (not sure how strong this would then become) or just re-profile the bottom edge as in the photo (kind of defeats why i bought this style though)
Posted Image

#144 racerlike

racerlike

    Speeding Along Now

  • Members
  • PipPipPipPipPip
  • 427 posts

Posted 10 March 2013 - 10:50 AM

Bit the bullet and took a hacksaw to the wheel arches. At the front in now resolves my full lock clearance issue so saves any further messing about. And at the rear I've had to do away with sculpted end which blends into the valance as it didn't line up.
Attached File  image.jpg   67.77K   11 downloadsAttached File  image.jpg   41.59K   20 downloads

#145 racerlike

racerlike

    Speeding Along Now

  • Members
  • PipPipPipPipPip
  • 427 posts

Posted 10 March 2013 - 11:10 AM

Re-shaped rear arches. Despite all the extra effort in having to do this I'm now happy the arches and their placement against the body. Plus they are now unique in design.
Attached File  image.jpg   49.38K   11 downloads
So the next step is to get the wheel arches, door mirrors and bumpers sprayed to match the car.
Bleed the brakes again to find where the fluid drained out from the last time I did it.
That will then leave me to focus solely on getting the engine running and not put it off any longer like I have been doing.

#146 racerlike

racerlike

    Speeding Along Now

  • Members
  • PipPipPipPipPip
  • 427 posts

Posted 02 April 2013 - 08:16 PM

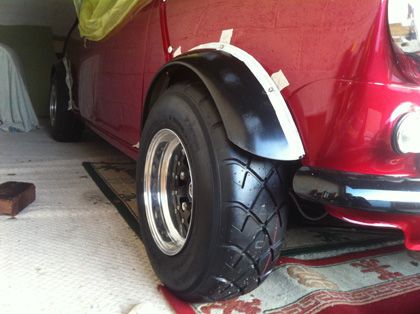
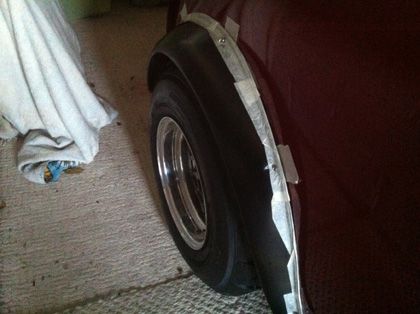
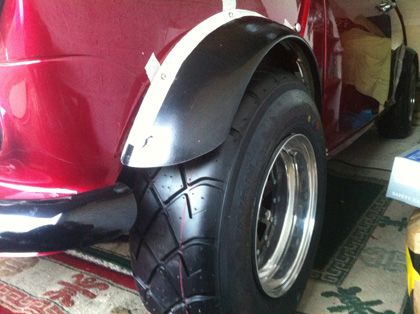
Little more progress this week thanks in part to a work related back injury putting me off work till the end of the week. Couldn't just sit around when there was work to be done in the garage so i decided to (carefully) crack on with the wheel arches.
Last time i hacked a couple of inches from the front of the front arches and about 3 inches from the rear of the rear arches. So i began by rubbing down the sill edges as these didn't allow the arch to fit flush against the body - then i got on with lining them up and marking where to drill the holes in the body.
Posted ImagePosted Image
Posted Image

Now fitted they have been removed to go to the sprayer tomorrow along with the bumpers and door mirrors.

#147 racerlike

racerlike

    Speeding Along Now

  • Members
  • PipPipPipPipPip
  • 427 posts

Posted 04 May 2013 - 08:56 PM

thought it might be a good idea to fit some heat shield material to the underside of my carbon bonnet.

started mocking up a template this afternoon.
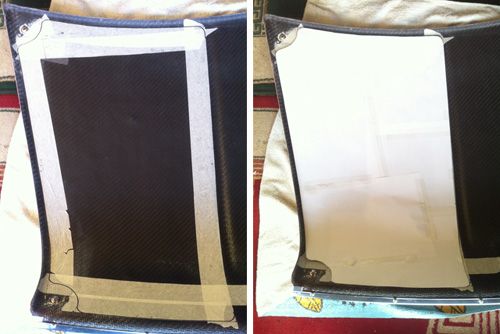
 

Untitled-1copy_zps336a99f8.jpg


#148 racerlike

racerlike

    Speeding Along Now

  • Members
  • PipPipPipPipPip
  • 427 posts

Posted 05 May 2013 - 08:17 PM

bonnet heat shield done. 
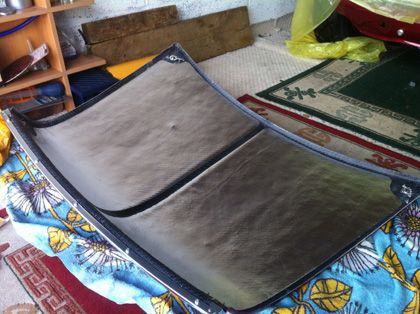
381_zps6dd997e2.jpg


couple of other bits and pieces sorted and ticked off the list but managed to add a few at the same time.

got a week off in another couple of weeks so im planning to get a crack on


#149 dougie1142

dougie1142

    Super Mini Mad

  • Members
  • PipPipPipPipPipPip
  • 500 posts
  • Location: Inverness/Elgin
  • Local Club: I.M.O.G

Posted 05 May 2013 - 09:10 PM

Very nice progress. Love this thread!


#150 blue blood

blue blood

    One Carb Or Two?

  • Members
  • PipPipPipPipPipPipPip
  • 806 posts

Posted 18 May 2013 - 07:19 AM

What heat shield material did you use? and where did you get it from? Regards Blue


1 user(s) are reading this topic

0 members, 1 guests, 0 anonymous users