Excellent thread mate, i imagine its very helpfull for those who havent replaced front wings before!


Ken -The 1275 High Compression Engine Micra Mini (Running Project)
Started by
lawrence
, Sep 19 2009 12:30 PM
761 replies to this topic
#121
: post #121")
jinjrich
-
- Members
-

- 543 posts
Super Mini Mad
- Location: York
- Local Club: YMMOC
Posted 02 December 2011 - 02:14 PM
#122
lawrence
-
- Members
-
- 1,341 posts
One Carb Or Two?
Posted 08 December 2011 - 12:21 PM
So then, an extremely late update, ive had a problem with my laptop so havent been able to update this since last time.
Thankyou jinrich, its nice to see another person make a comment well im trying to help people as i know how much other people projects have helped me!
heres a few days work then,
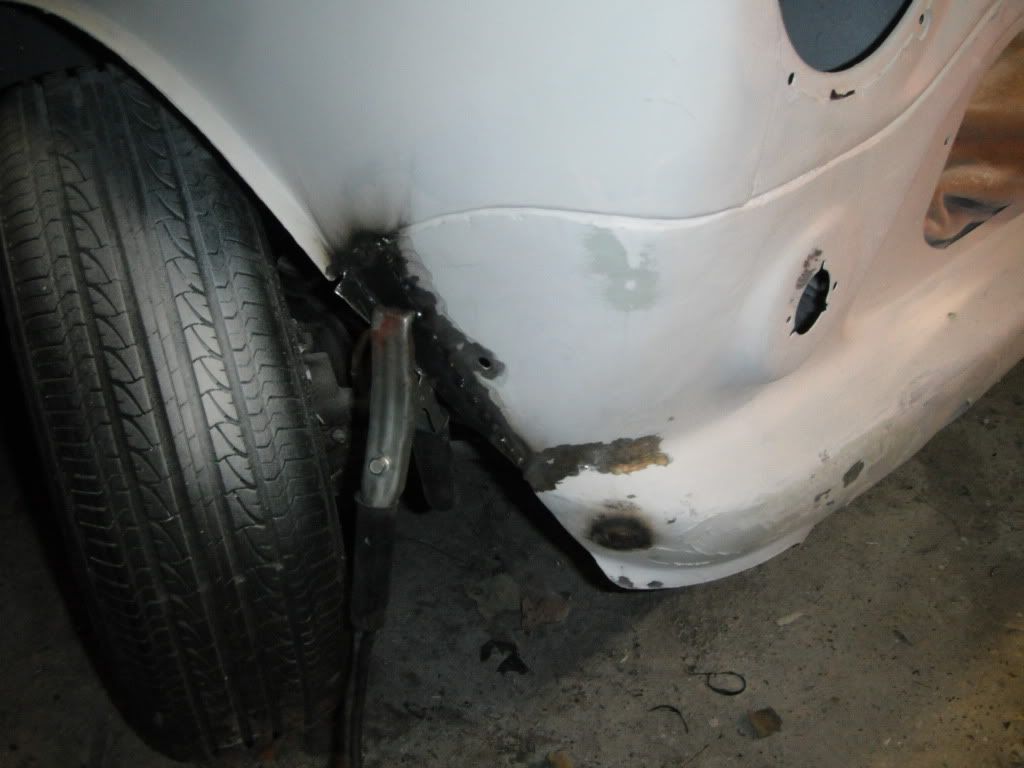
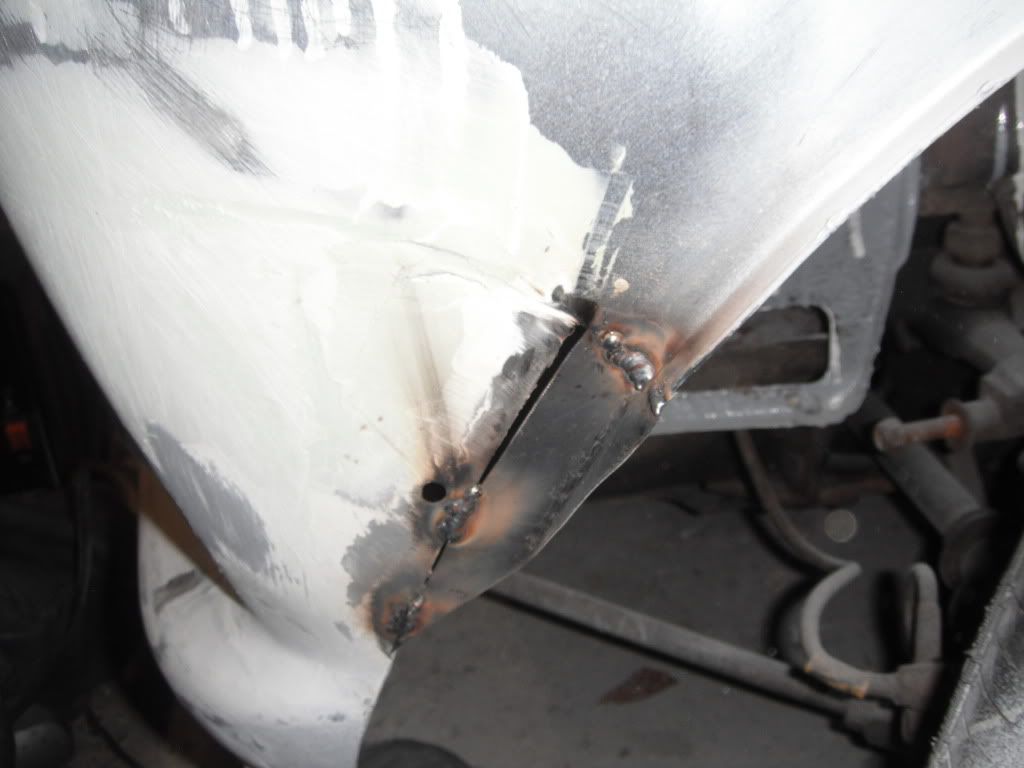
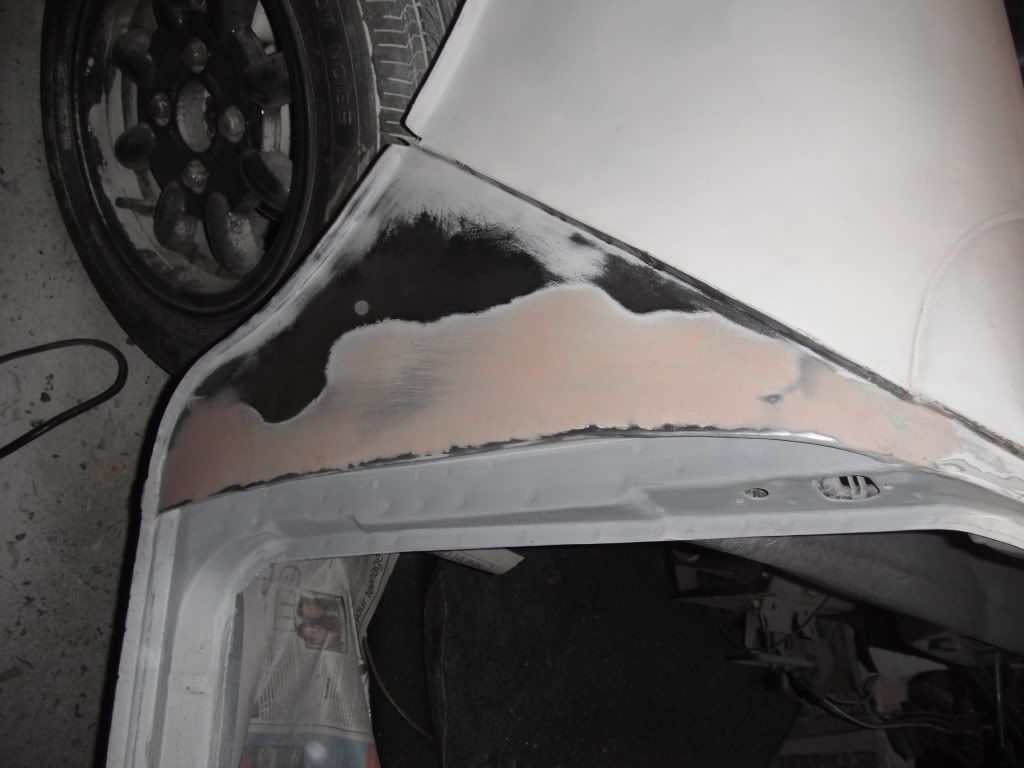
how it started on the front panel, needed filling along the seams and a bit of welding/blending between the wing and front panel and a few holes filled too

little hole from an arch bolt filled, a weld where there was a crack ages ago finnaly ground back and my blending patch tacked in
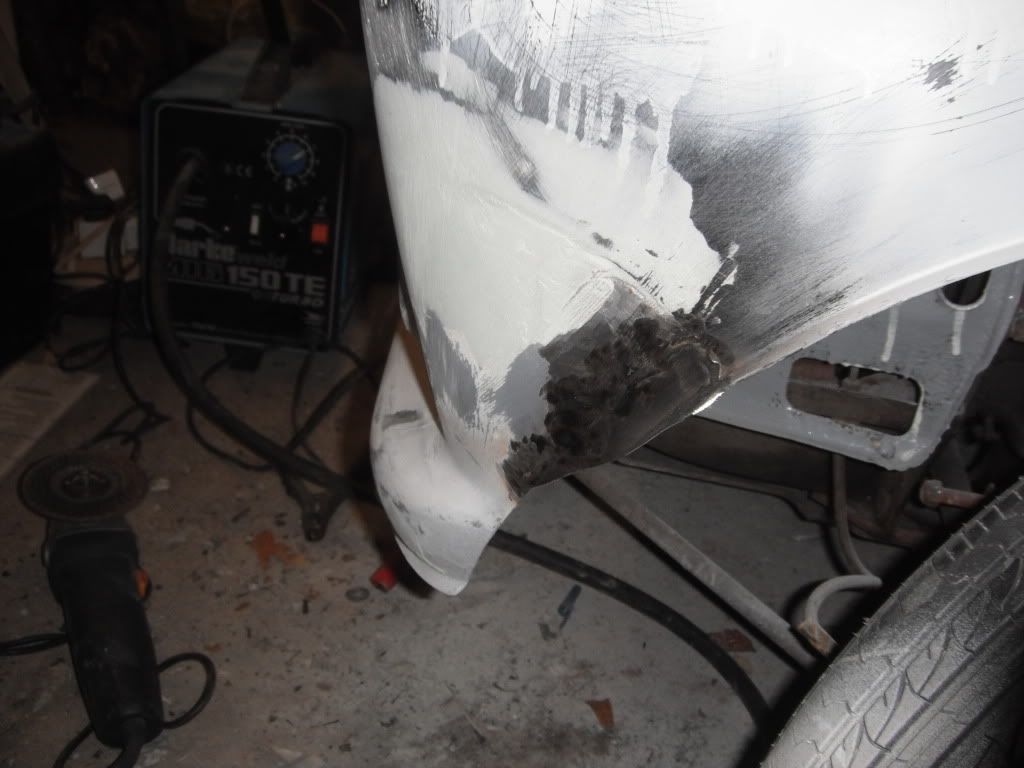
fully welded and ground down, its looking good

filler slopped on
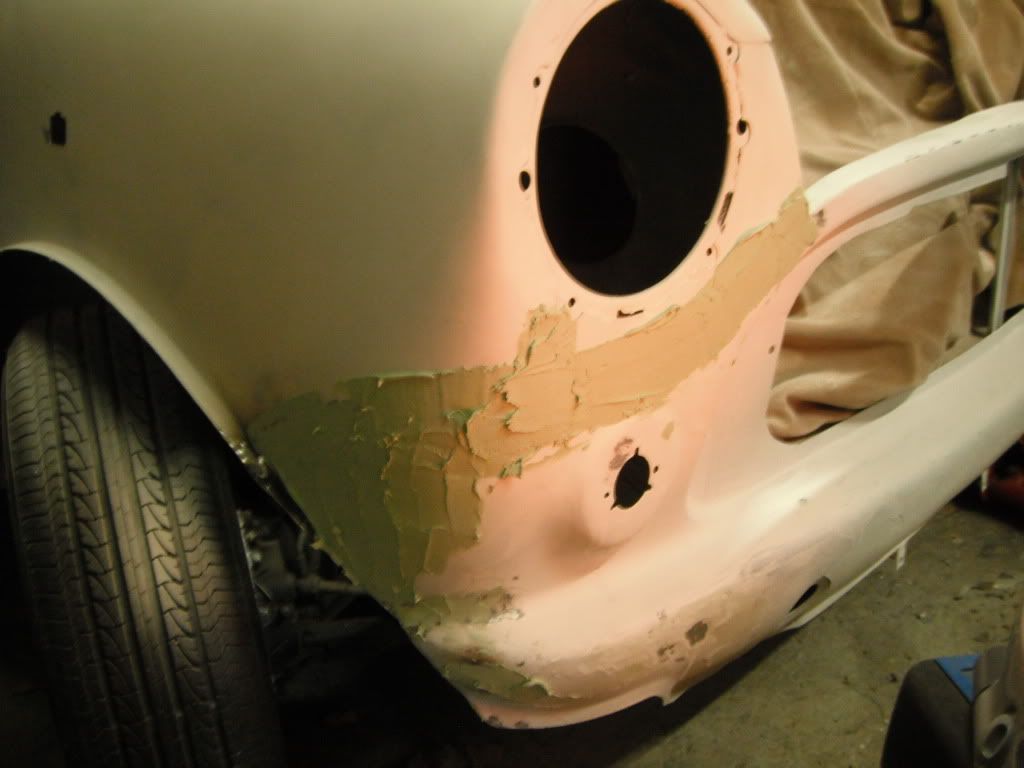
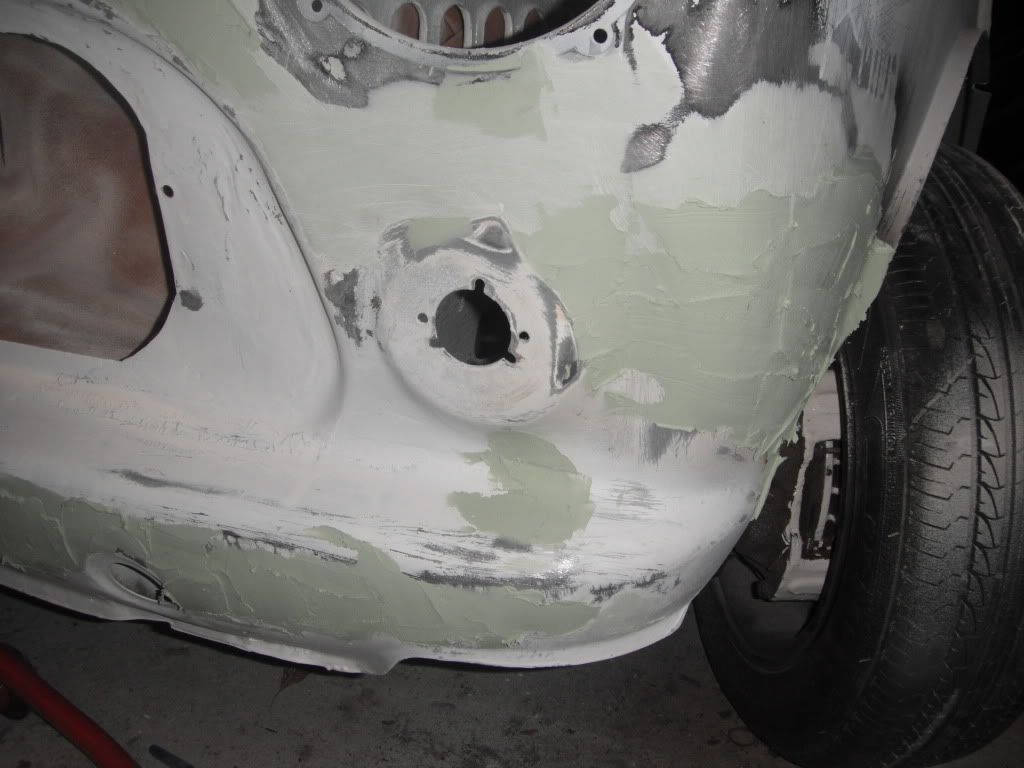
and rubbed back so now looking all smooth
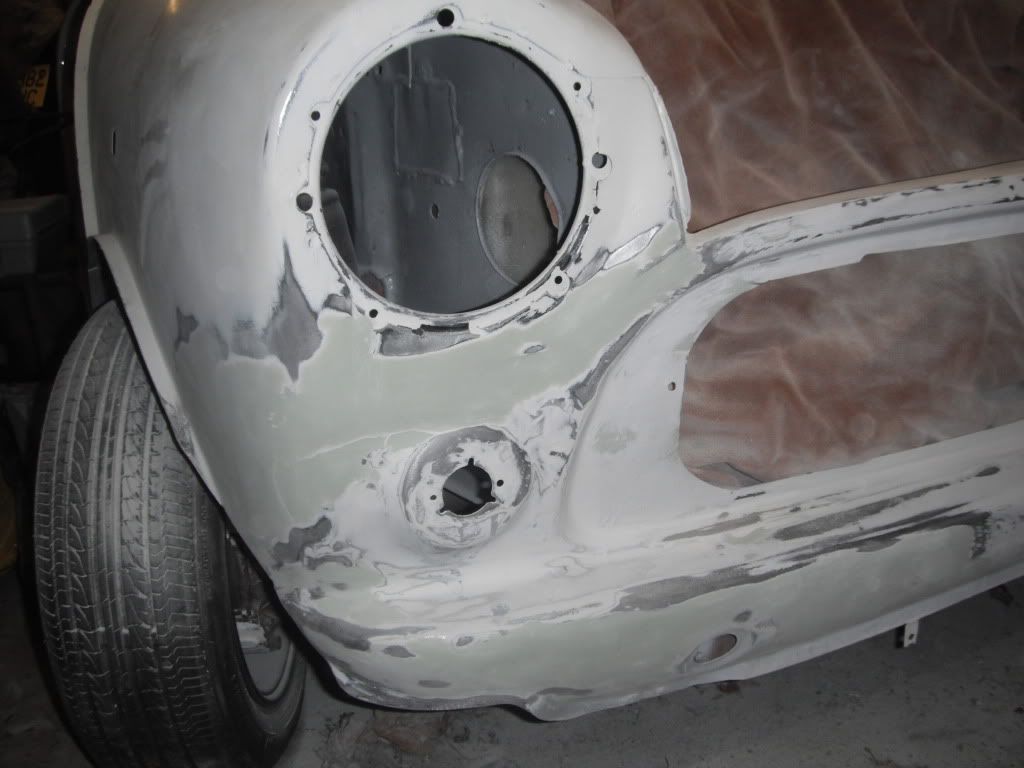
moved tother side, blending panel tacked in
welded and ground down
filler applied and left to set
passengers side all rubbed down and looking smooth
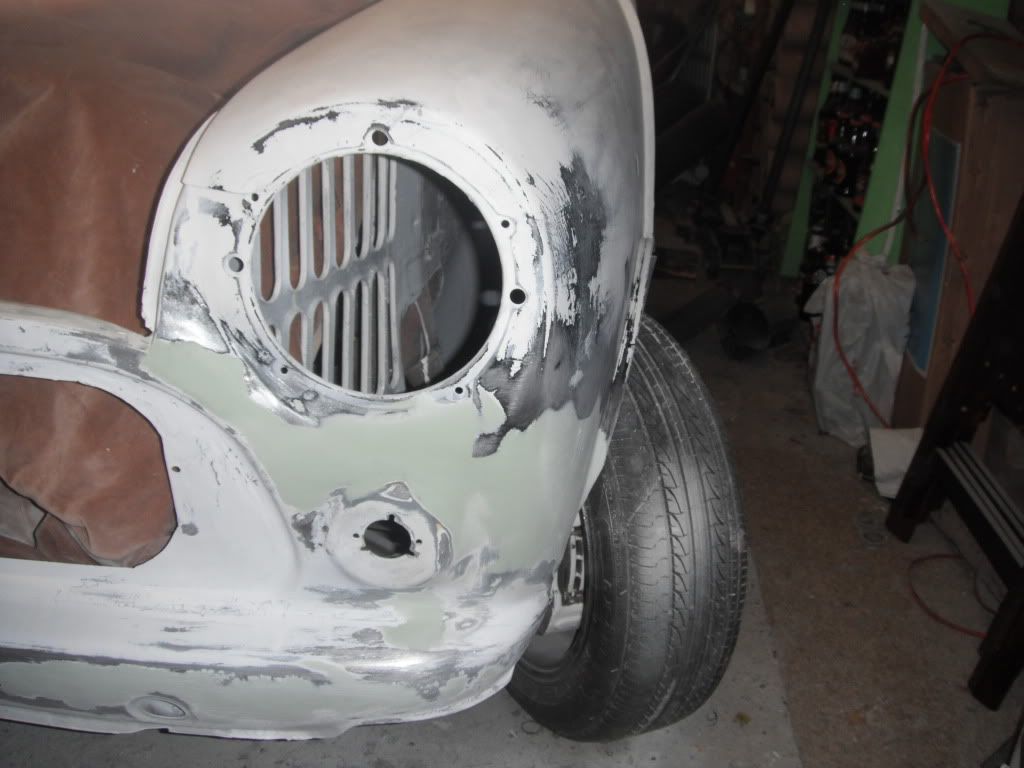
front end fully primed and pretty much ready to paint
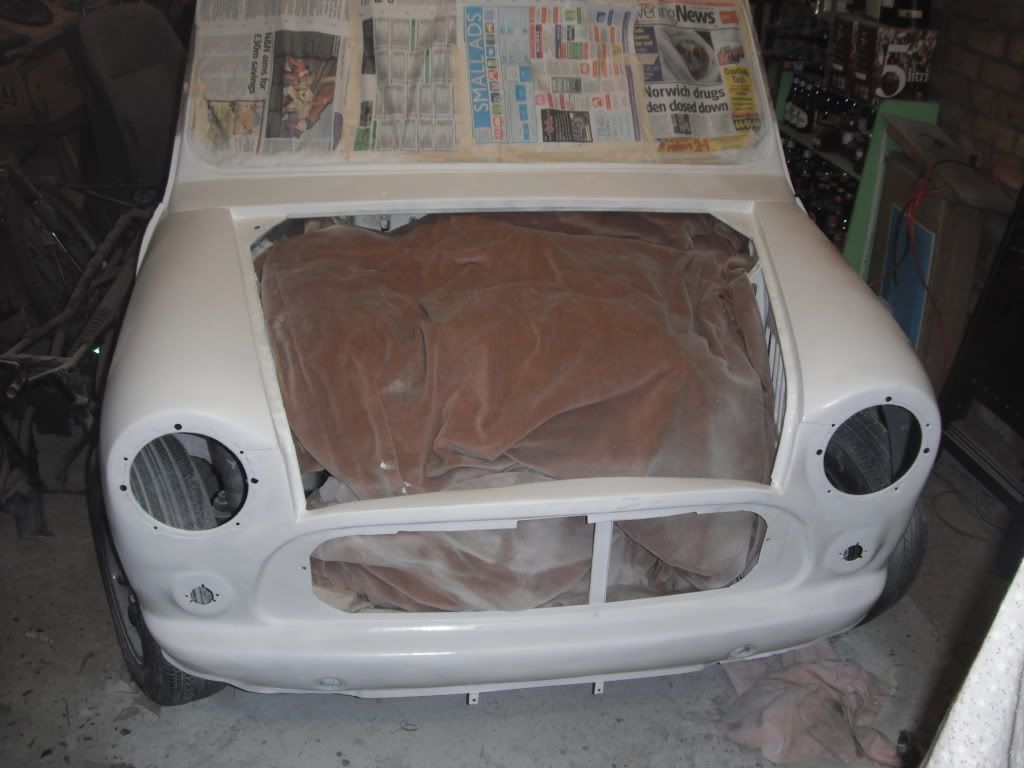
moving onto the bonnet for the front
sectioned in a few places to shrink the sides to improve the fit
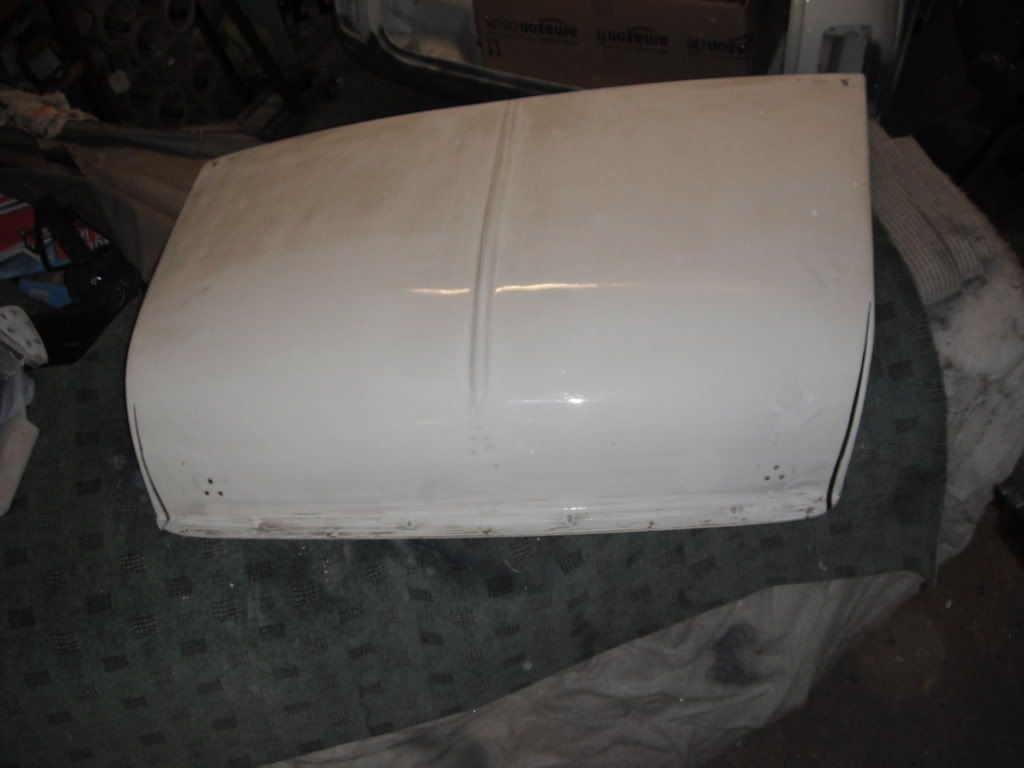
fiberglassing on the back to put the strength back in

fillered and smoothed off the sectioning
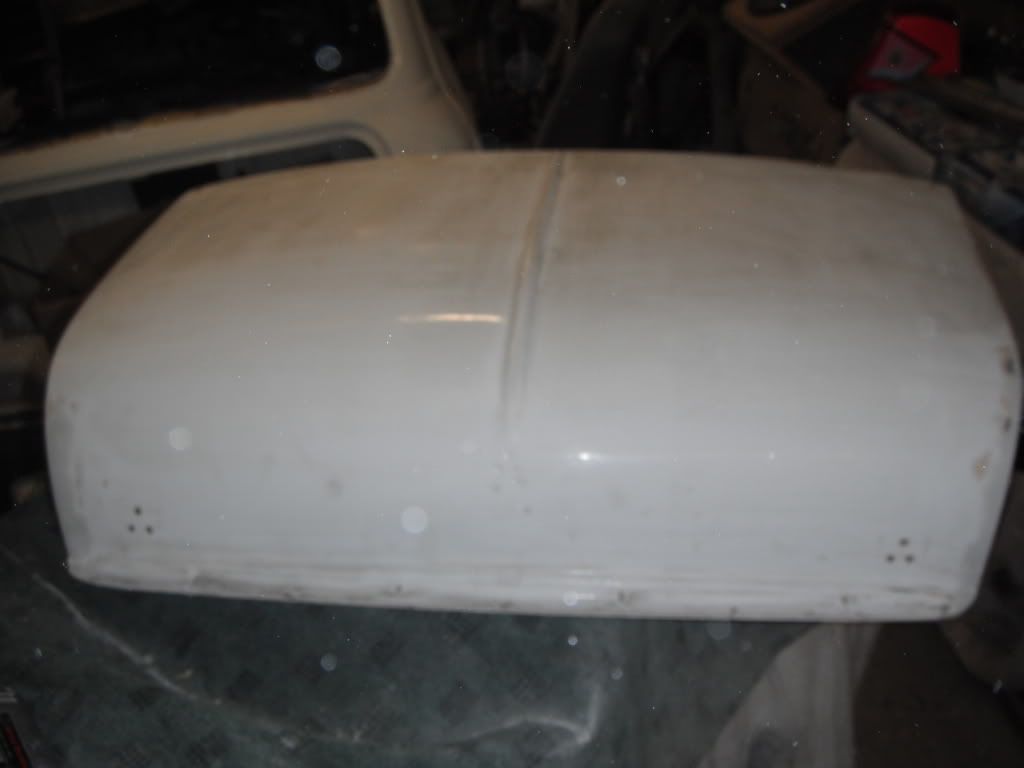
carbon fibre wrapped the bonnet and test fitted, its looking good
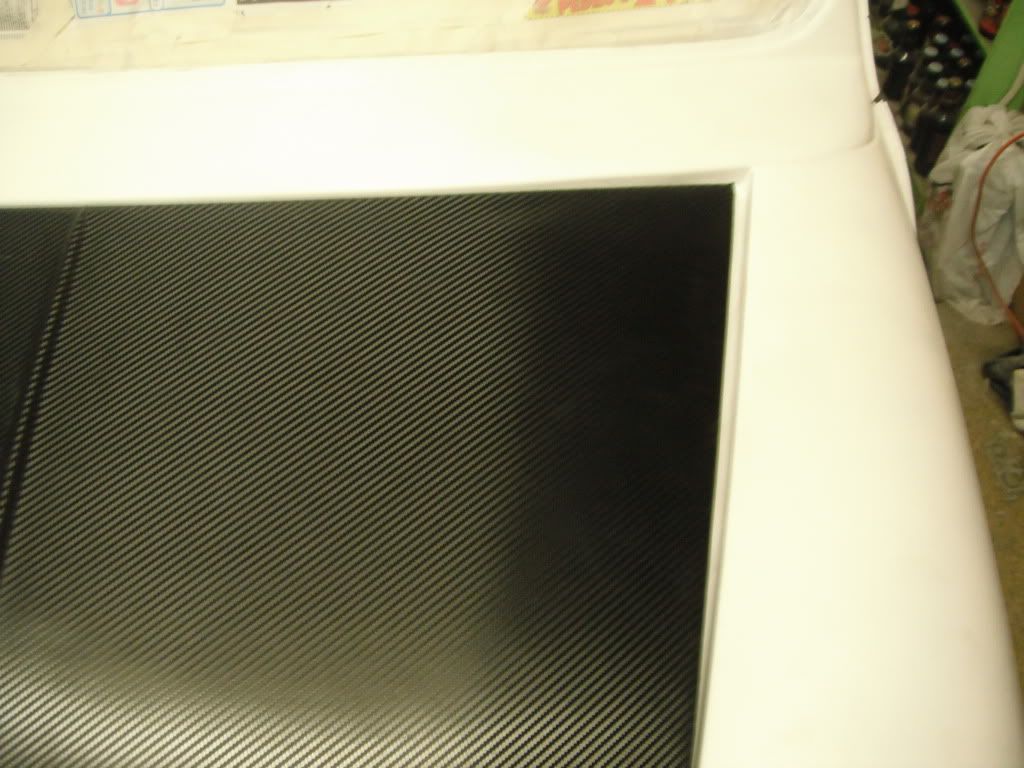
the actual reality, ran out of wrap stuff and it kept on breaking
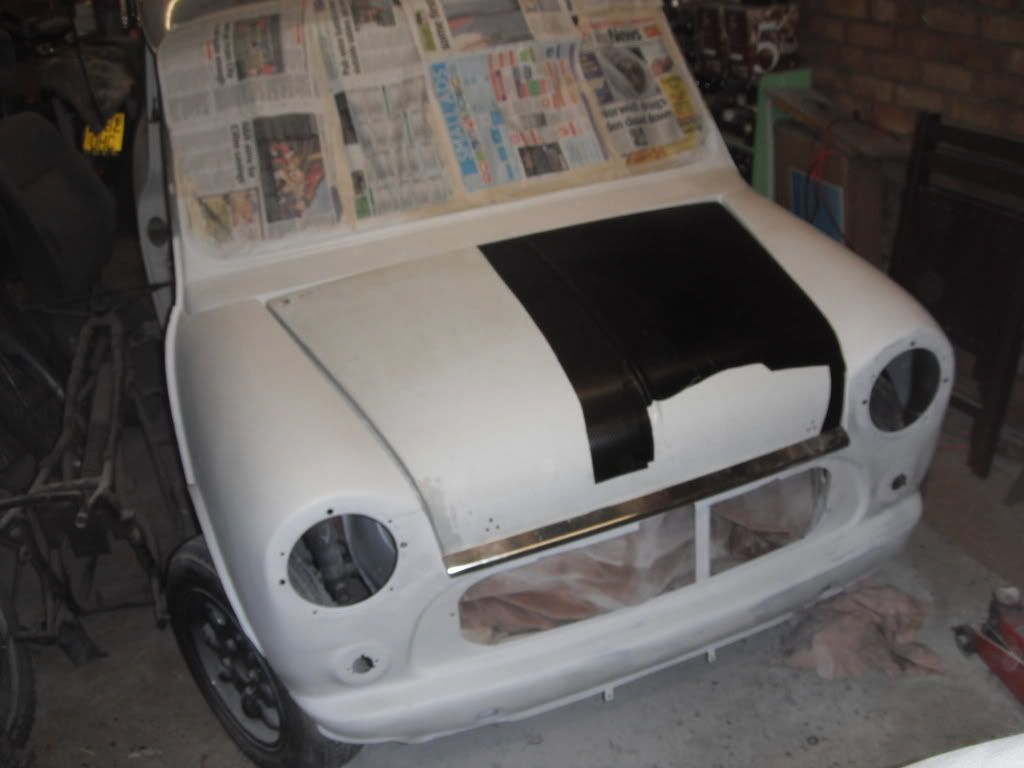
ive decided to paint the car in satin white with a carbon wrapped bonnet and hopefully roof if i can afford it, this is on suggestion from my little cousin
hope you like this rather lagging update
possibly will do some more work today but its getting a bit chilly in the garage
comments are nice
Lawrence
Thankyou jinrich, its nice to see another person make a comment
well im trying to help people as i know how much other people projects have helped me! heres a few days work then,
how it started on the front panel, needed filling along the seams and a bit of welding/blending between the wing and front panel and a few holes filled too
little hole from an arch bolt filled, a weld where there was a crack ages ago finnaly ground back and my blending patch tacked in
fully welded and ground down, its looking good
filler slopped on
and rubbed back so now looking all smooth
moved tother side, blending panel tacked in
welded and ground down
filler applied and left to set
passengers side all rubbed down and looking smooth
front end fully primed and pretty much ready to paint
moving onto the bonnet for the front
sectioned in a few places to shrink the sides to improve the fit
fiberglassing on the back to put the strength back in
fillered and smoothed off the sectioning
carbon fibre wrapped the bonnet and test fitted, its looking good
the actual reality, ran out of wrap stuff and it kept on breaking
ive decided to paint the car in satin white with a carbon wrapped bonnet and hopefully roof if i can afford it, this is on suggestion from my little cousin
hope you like this rather lagging update
possibly will do some more work today but its getting a bit chilly in the garage
comments are nice
Lawrence
#123
lawrence
-
- Members
-
- 1,341 posts
One Carb Or Two?
Posted 08 December 2011 - 05:38 PM
so then,
managed to get in the garage today! armed with a hat scarf and heater
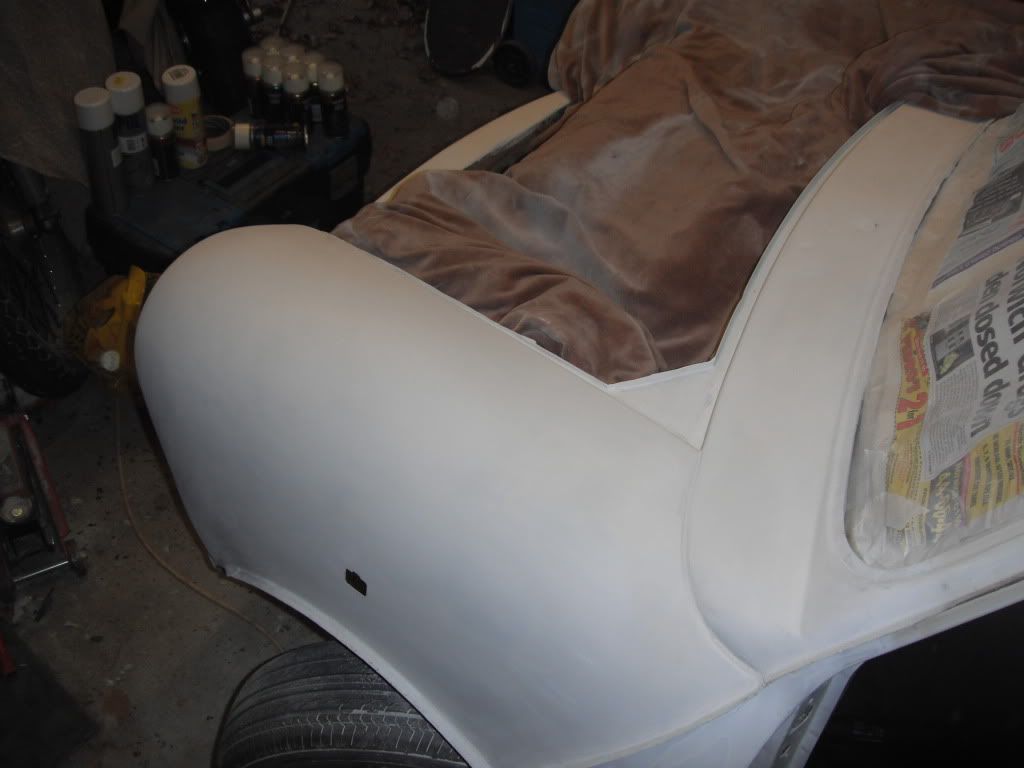
ive tested out the paint im using (volvo satin white) and i think its come out quite nicely, the wing has got a bit of shine to it. Think this will go nicely with the carbon wraped bonnet and roof
im now making my way round at the moment making her ready for painting:
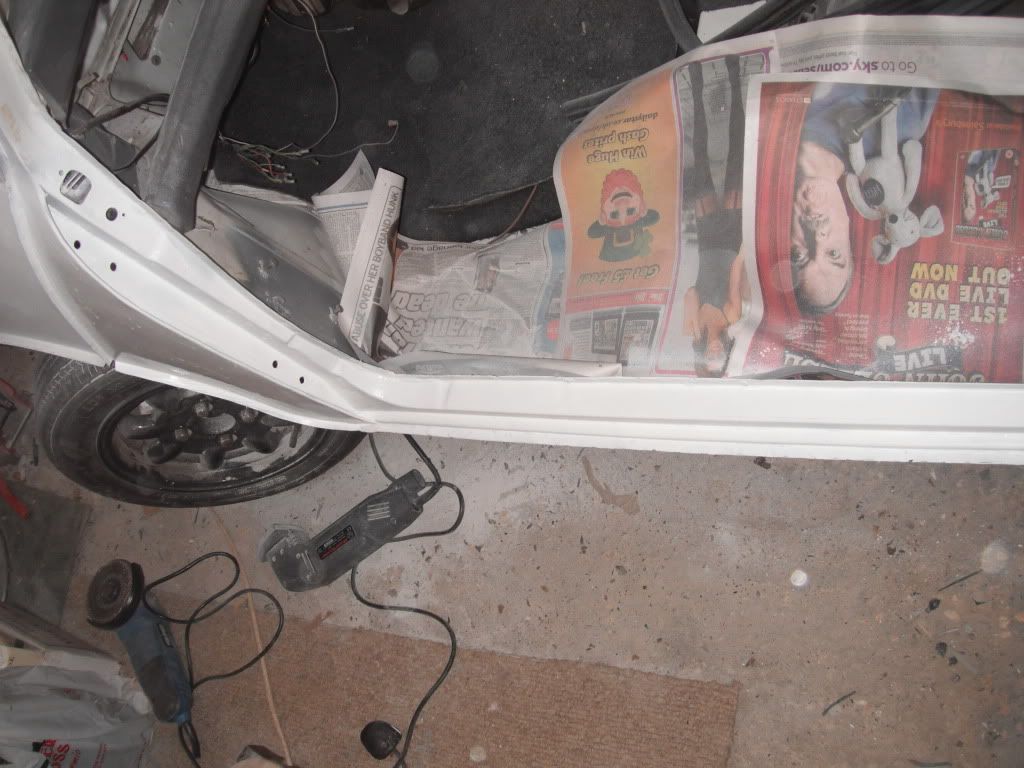
rubbed down and filled slightly the passengers side doorstep
primed it all up

sealed along the a panel once i had bent the lip round
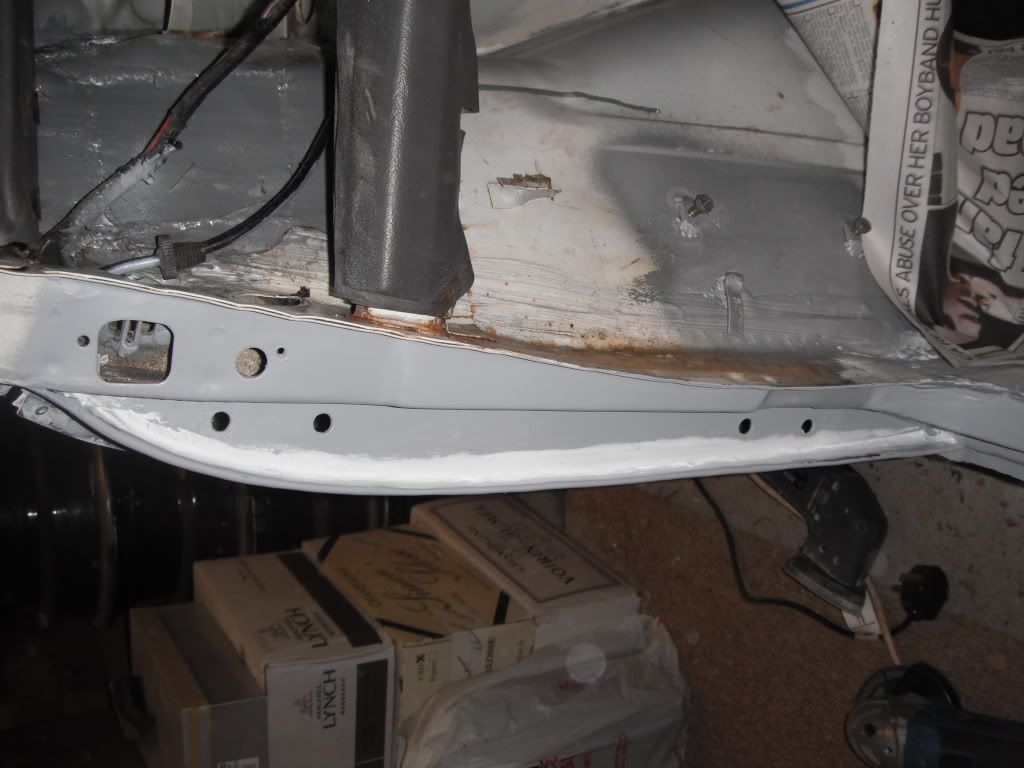
put a layer of filler down to cover the marks up from the mole grips
went to start sanding the a panel but my seam sealer inst drying in the cold so just primed the dorstep in white
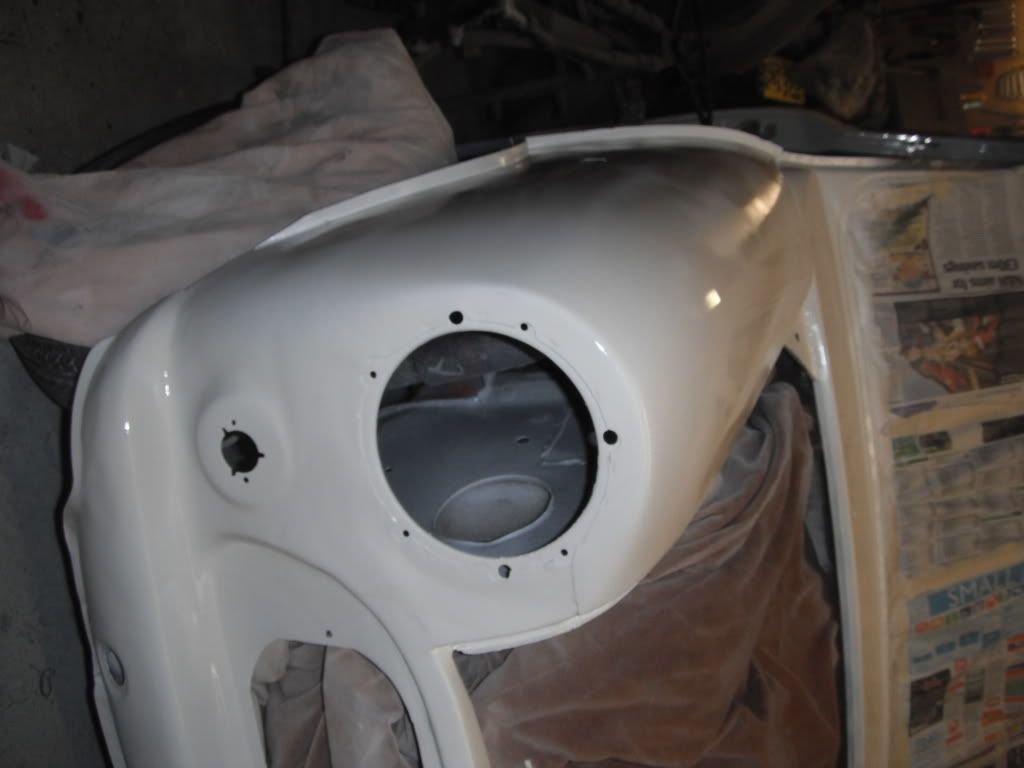
i then decided i wanted to put a few bits back on as this wing is now done and to see what the finished product will be haha
shes got an eye back now and an indicator

thats all for today folks, more tommorow when the the sealer is hopefully dry
hope you like todays work
feel free to comment
Lawrence
managed to get in the garage today! armed with a hat scarf and heater
ive tested out the paint im using (volvo satin white) and i think its come out quite nicely, the wing has got a bit of shine to it. Think this will go nicely with the carbon wraped bonnet and roof
im now making my way round at the moment making her ready for painting:
rubbed down and filled slightly the passengers side doorstep
primed it all up
sealed along the a panel once i had bent the lip round
put a layer of filler down to cover the marks up from the mole grips
went to start sanding the a panel but my seam sealer inst drying in the cold so just primed the dorstep in white
i then decided i wanted to put a few bits back on as this wing is now done
and to see what the finished product will be hahashes got an eye back now and an indicator
thats all for today folks, more tommorow when the the sealer is hopefully dry
hope you like todays work
feel free to comment
Lawrence
#124
Bash Master
-

- TMF+ Member
-
- 150 posts
Mini Mad
- Location: Blackpool, Lancashire
Posted 08 December 2011 - 06:24 PM
Looking good 
#125
lawrence
-
- Members
-
- 1,341 posts
One Carb Or Two?
Posted 09 December 2011 - 08:37 PM
A little more work was done today, ive got some more satin white paint on order that should be here on tuesday so untill then its more prep im afraid, bit boring i know!
so then,
ive resprayed the bonnet in satin black till i get the carbon wrap quote, it goes well with the white
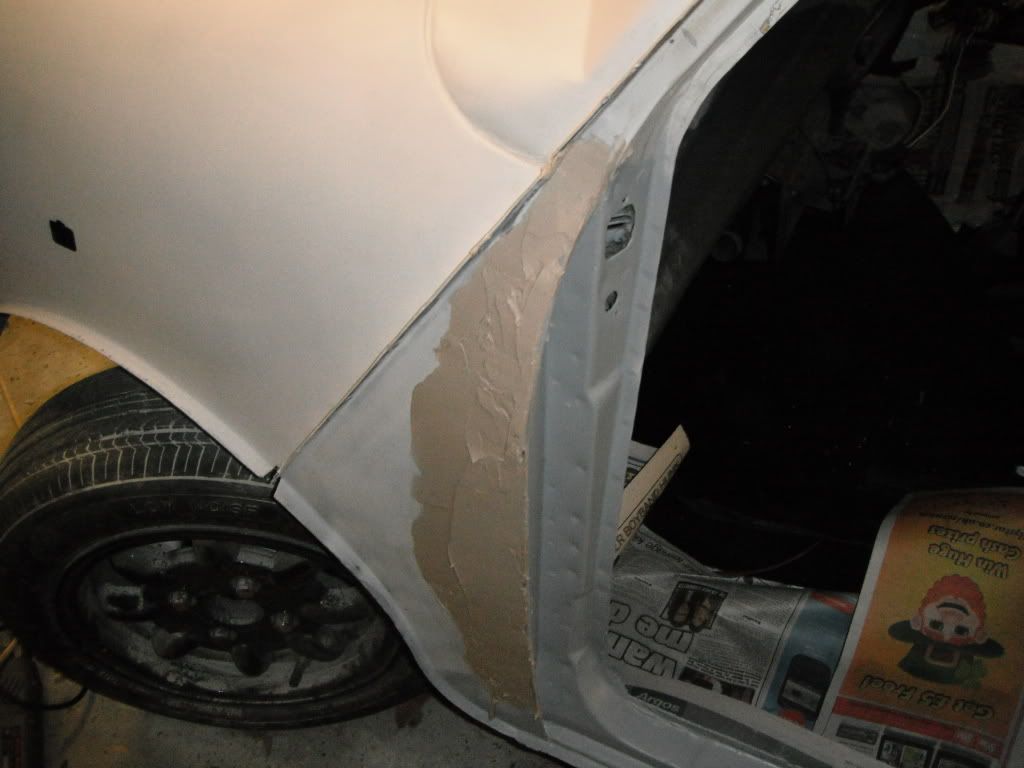
and ive fininshed filling the a panel, had to use filler 3 times, what a chore, nice and smooth now tho
primed it and the doorstep. They are now both ready for top coat.
fitted my 3rd hi level brake light (for safety) while i was waiting for paint to dry, looks pretty cool too

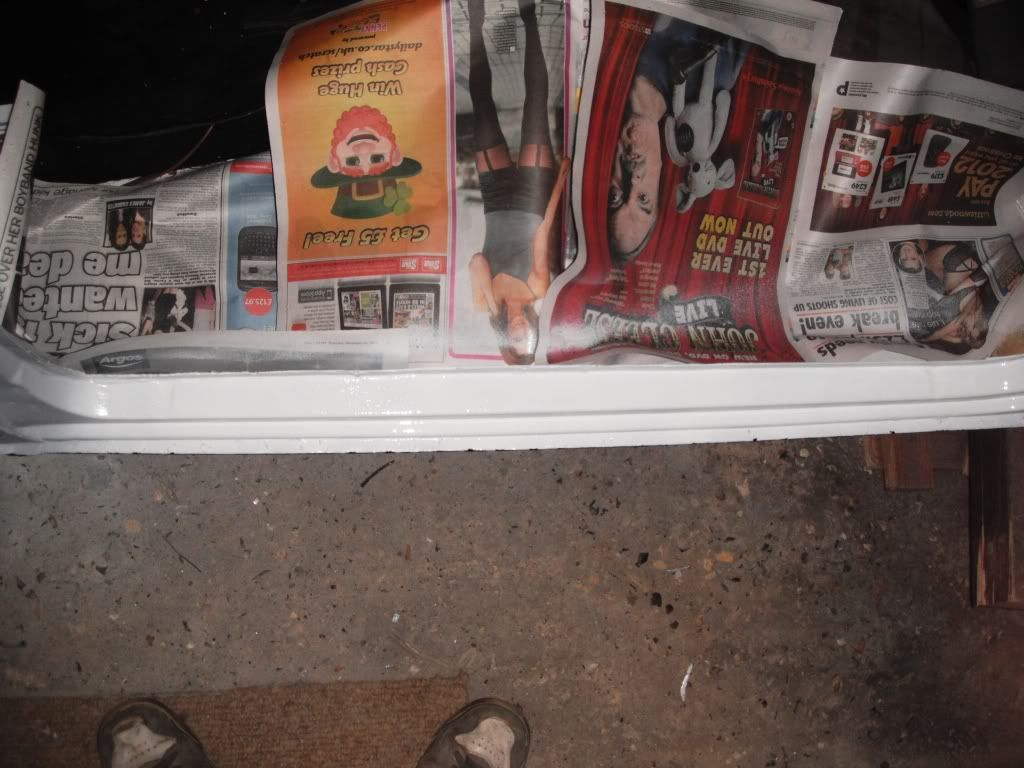
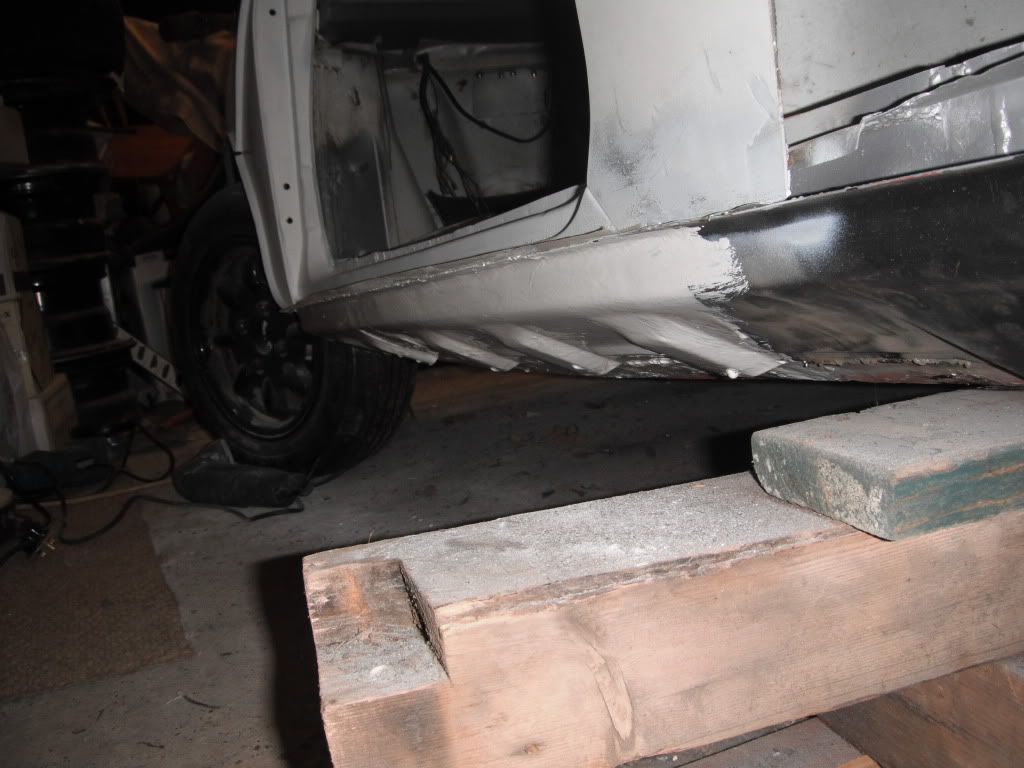
and ive ground down the welds and painted most of the sill in white rustoloum
hope you like todays update, its getting a bit chilly now so im done for the day!
Jobs for tommorow are:
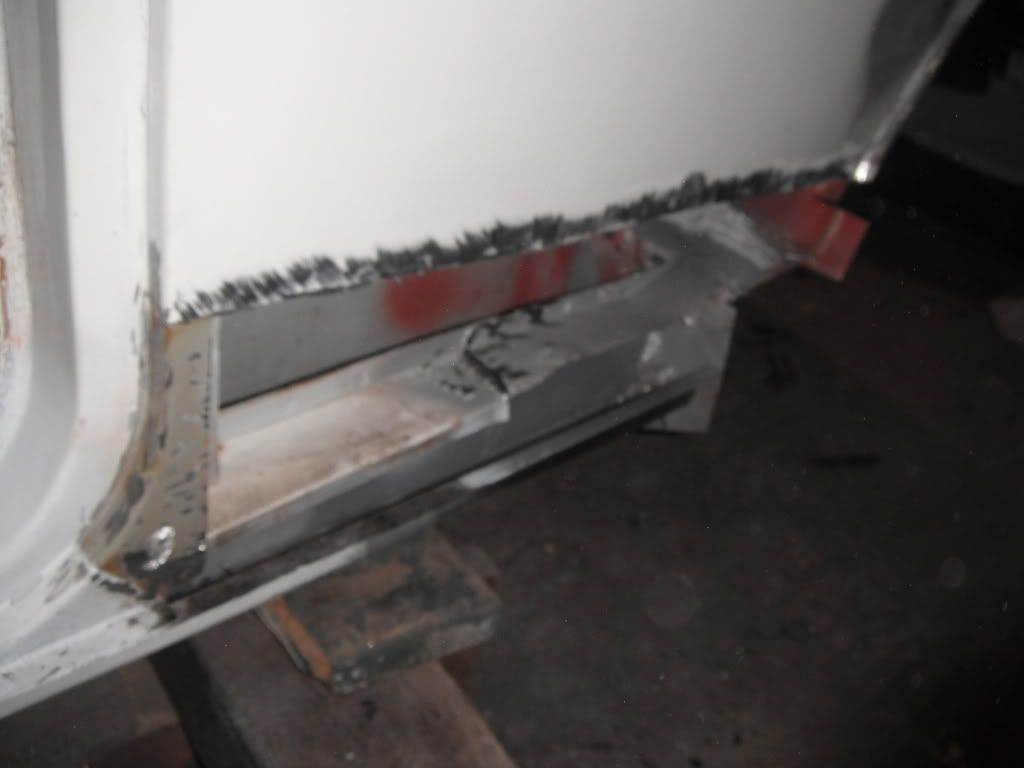
>Finish off the passengers side sill/heelboard end as there is some welding and grinding and painting there that needs doing
>Finish undersealing the rear boot floor
>Finish repairing the rear subframe as i cannot afford to get a new one yet may do some smoothing on it etc like ive seem other people do. Then its getting a nice coat of rustoloum white
>then i think ill make a list of all the little bits and pieces i need to rebuild the rear subframe
comment are welcome
Lawrence
so then,
ive resprayed the bonnet in satin black till i get the carbon wrap quote, it goes well with the white
and ive fininshed filling the a panel, had to use filler 3 times, what a chore
, nice and smooth now thoprimed it and the doorstep. They are now both ready for top coat.
fitted my 3rd hi level brake light (for safety) while i was waiting for paint to dry, looks pretty cool too
and ive ground down the welds and painted most of the sill in white rustoloum
hope you like todays update, its getting a bit chilly now so im done for the day!
Jobs for tommorow are:
>Finish off the passengers side sill/heelboard end as there is some welding and grinding and painting there that needs doing
>Finish undersealing the rear boot floor
>Finish repairing the rear subframe as i cannot afford to get a new one yet
may do some smoothing on it etc like ive seem other people do. Then its getting a nice coat of rustoloum white>then i think ill make a list of all the little bits and pieces i need to rebuild the rear subframe
comment are welcome
Lawrence
Edited by lawrence, 09 December 2011 - 08:38 PM.
#126
minimuk
-

- Members
-
- 1,947 posts
Camshaft & Stage Two Head
- Location: Midlands
Posted 09 December 2011 - 11:15 PM
nice progress, not stopping by the looks of it, carry on,......when will you be on the road? 
#127
lawrence
-
- Members
-
- 1,341 posts
One Carb Or Two?
Posted 10 December 2011 - 06:28 PM
nahh theres no reason to stop minimuk haha accept hitting a wall of lack of money! Im thinking just after christmas but theres no set date as yet, im not rushing
todays update, been a bit of a rubbish day really went surfing with a mate and then come to the garage 4 ish
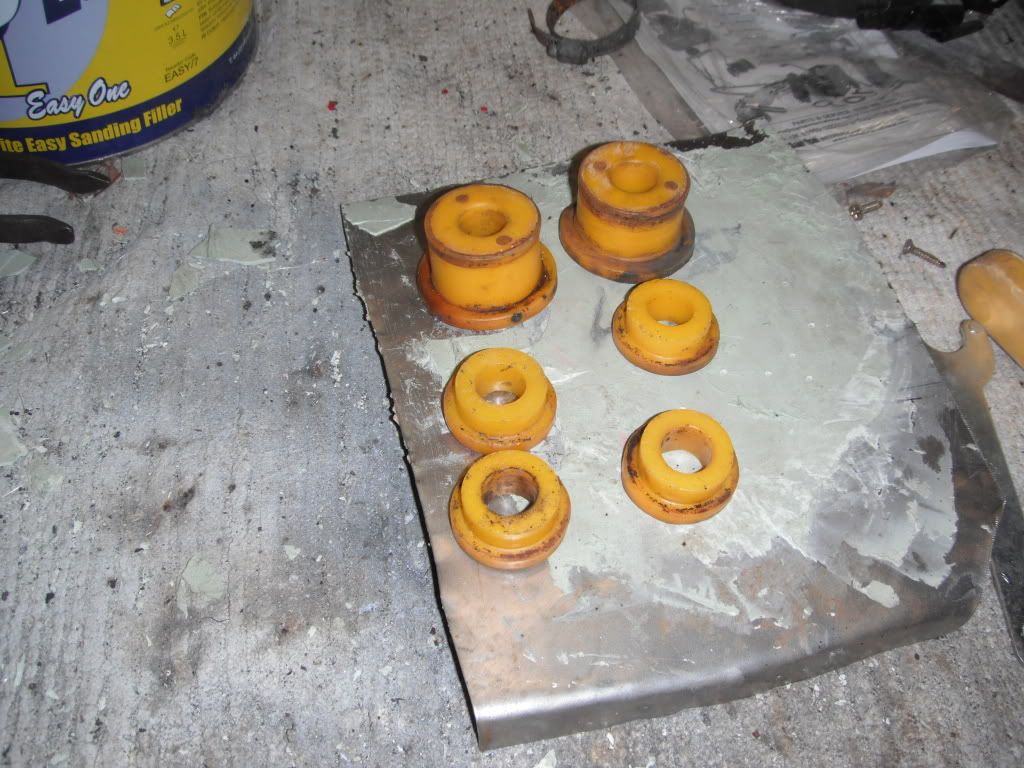
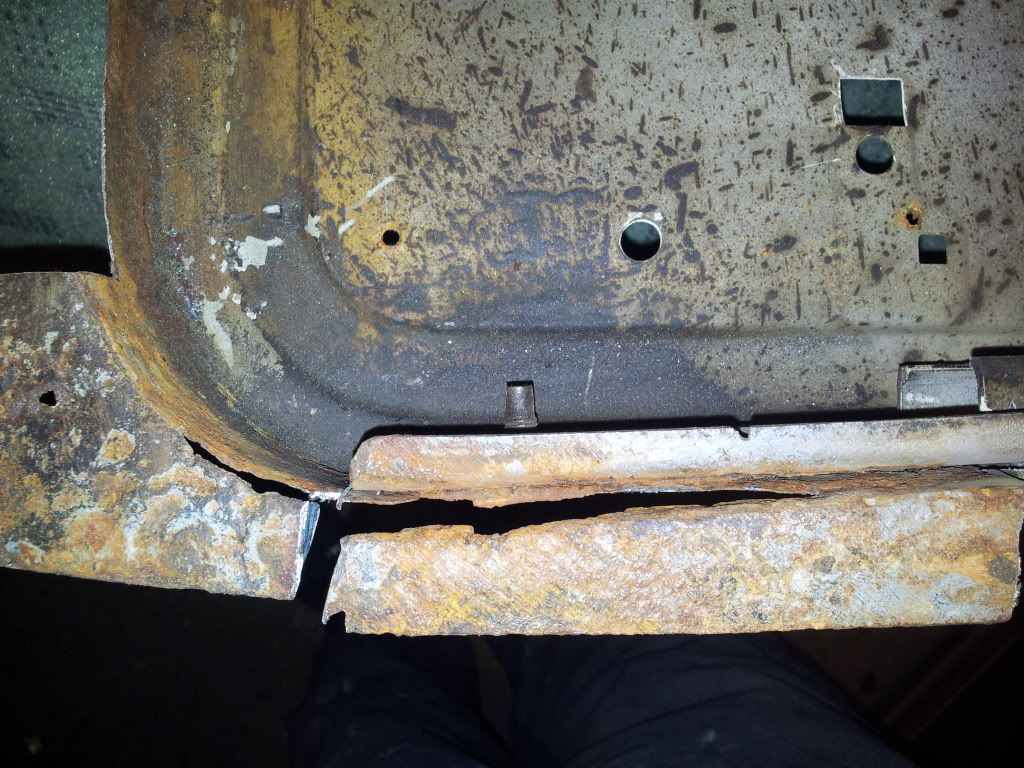
went to repair my rear suvbframe but its had it completely

so i cleaned up the poly bushes, glad there all ok, and ive started to clean up the mounts, got to keep an eye out for a new subframe or a good second hand one now
cleaned bushes
and ive given the passengers side rear quarter a trim ready for the new panels ill be getting after christmas sometime
moving tother side getting that ready for the new panels i realized i cant do any cutting without putting the waist rail in as im cutting a whole 1/4 panel so dont want the shell to collapse after all this haha. so thats me done for the day pretty much as ive not got a waist rail for this side, bit of a rubbish update i know
ill be ordering all the panel i need soon so untill then there will probably be a break from big bits of work and ill just be doing boring paint prep etc
Lawrence
todays update, been a bit of a rubbish day really went surfing with a mate and then come to the garage 4 ish
went to repair my rear suvbframe but its had it completely
so i cleaned up the poly bushes, glad there all ok, and ive started to clean up the mounts, got to keep an eye out for a new subframe or a good second hand one now
cleaned bushes
and ive given the passengers side rear quarter a trim ready for the new panels ill be getting after christmas sometime
moving tother side getting that ready for the new panels i realized i cant do any cutting without putting the waist rail in as im cutting a whole 1/4 panel so dont want the shell to collapse after all this haha. so thats me done for the day pretty much as ive not got a waist rail for this side
, bit of a rubbish update i knowill be ordering all the panel i need soon so untill then there will probably be a break from big bits of work and ill just be doing boring paint prep etc
Lawrence
#128
Risky
-
- Members
-
- 213 posts
Mini Mad
- Location: Zegge (The Netherlands)
Posted 11 December 2011 - 09:44 PM
The front end definitely looks good now!
#129
lawrence
-
- Members
-
- 1,341 posts
One Carb Or Two?
Posted 13 December 2011 - 04:55 PM
Thankyou there risky i agree shes starting to take shape now at least!
So then, there havent been any updates in a few days, mainly because on saturday i decided to go surfing and my board smashed into my hand bruising it leaving me with only one hands use for a few days its getting better now so im back out in the garage, with many layers of clothes on haha.
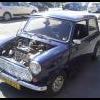
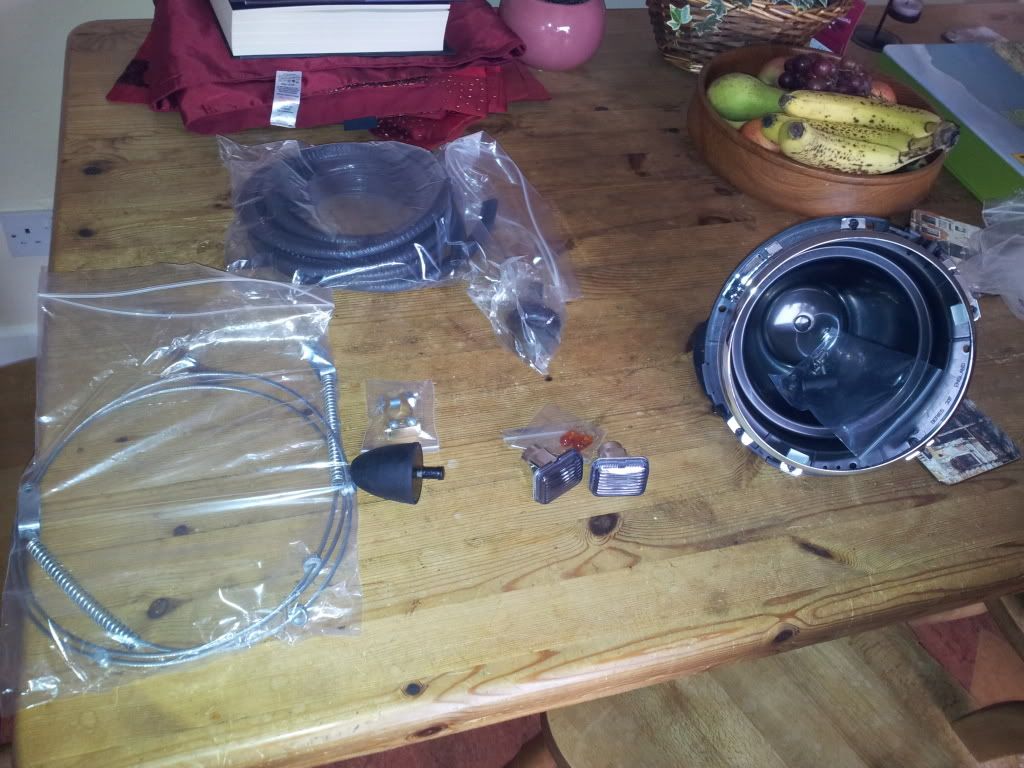
Well today i got my last spot light through from ebay so i can make my spotlight bar now, the lights
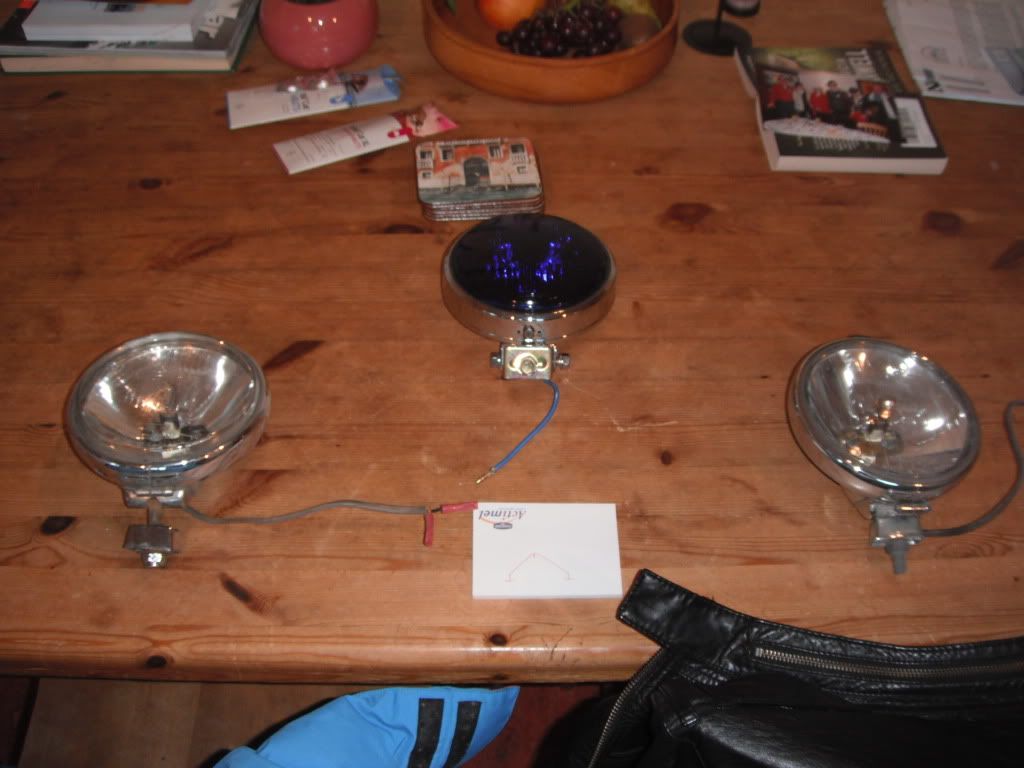
and ive been shopping for a few cans more of paint haha
work today will be to finish off the front end with its coat of satin white but apart from that im not really sure haha
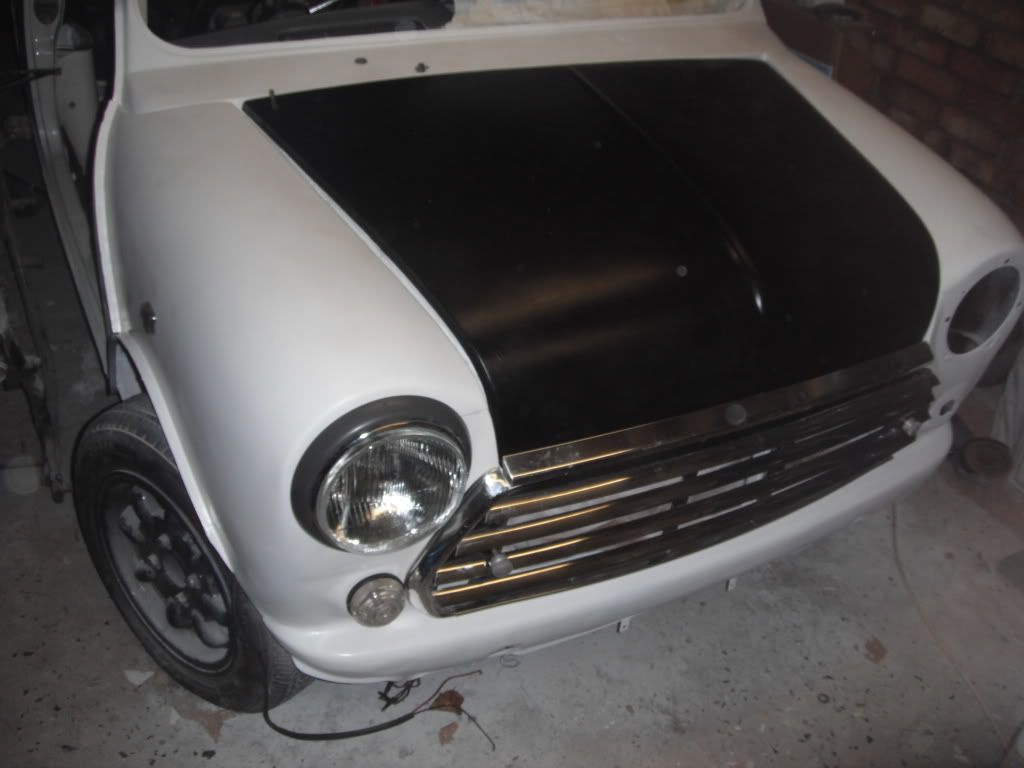
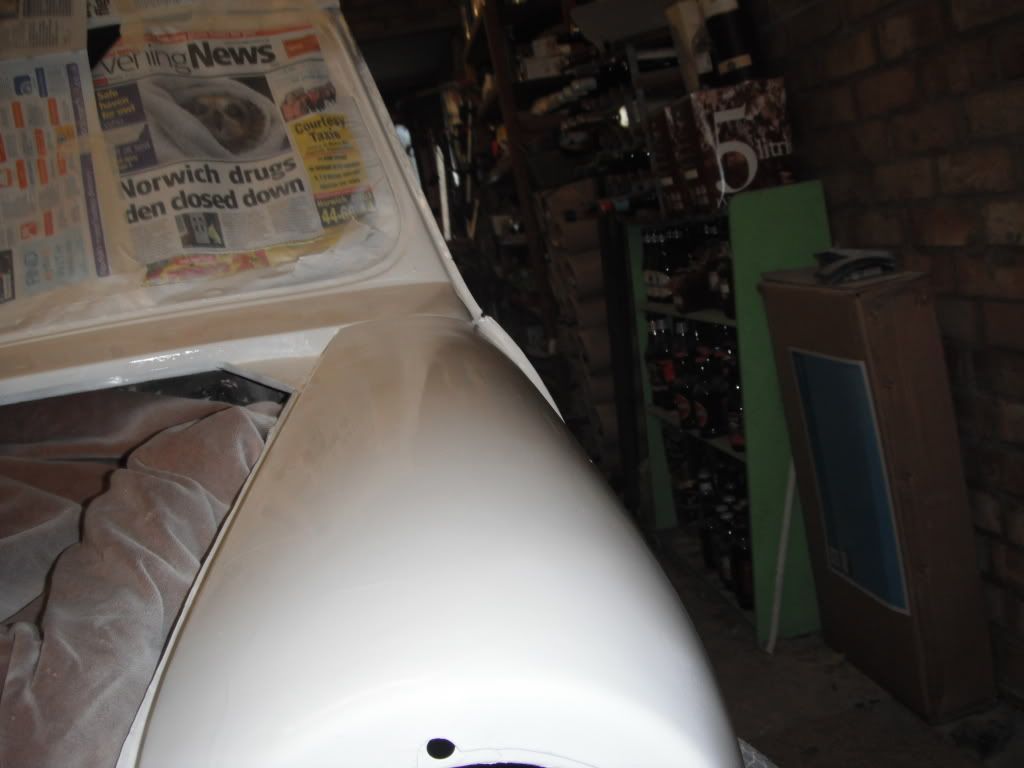
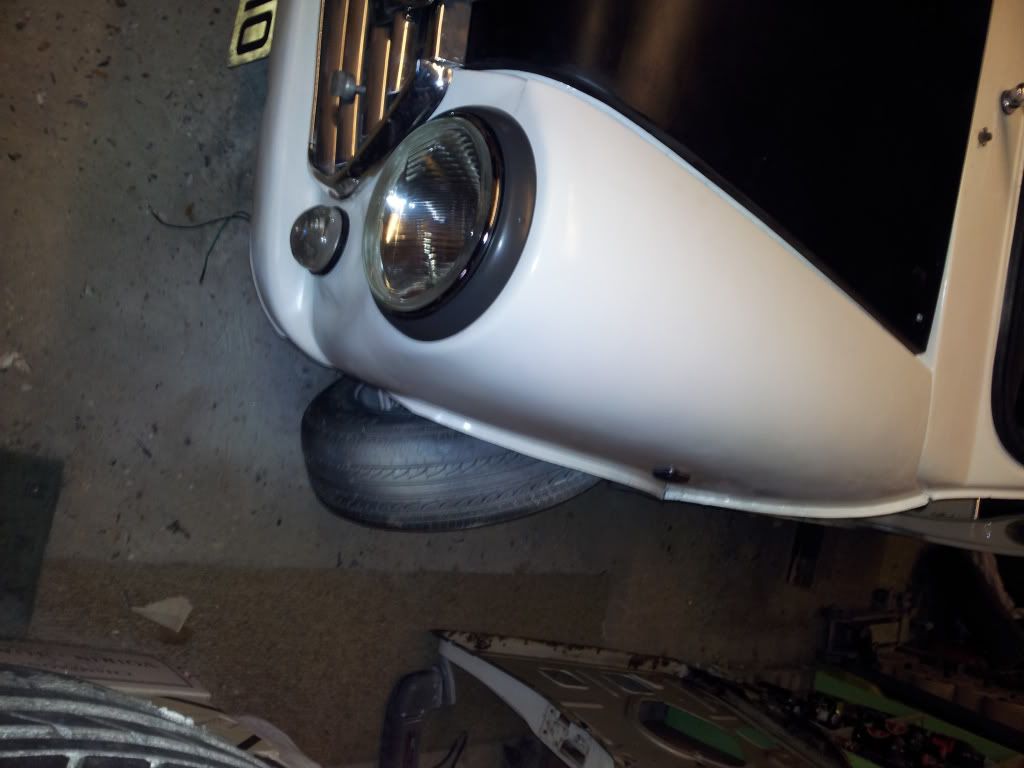
front end all prepped
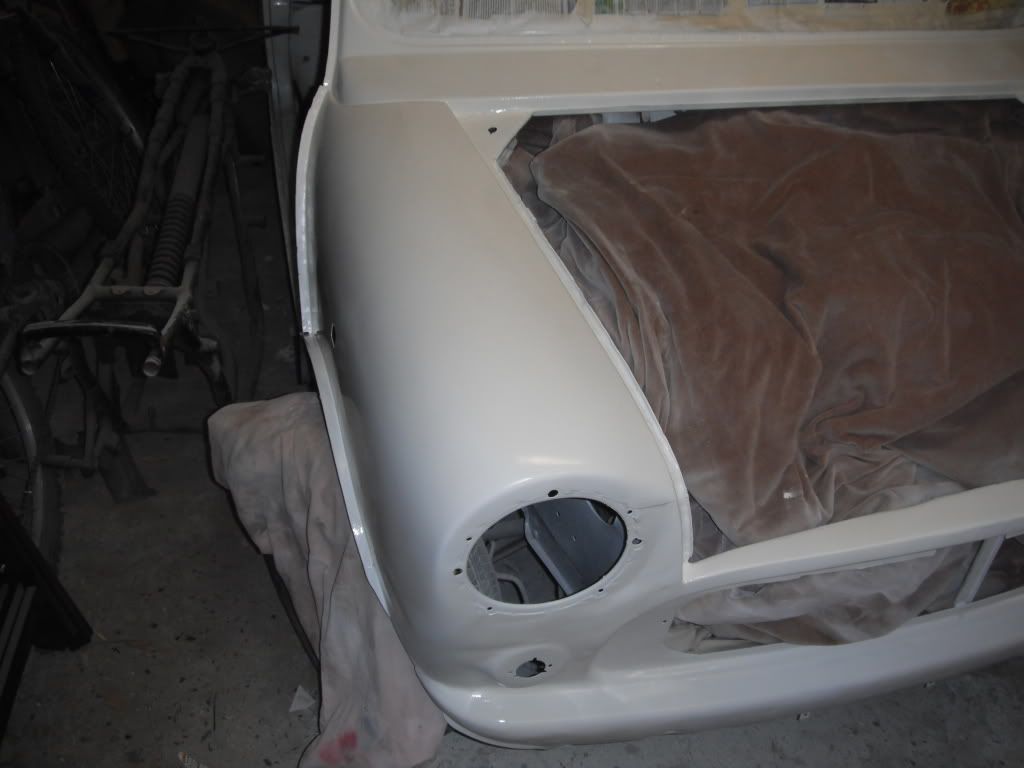
front end with a nice layer of paint, you can just about see the shine on the pic but the flash hides it somewhat
front end partly rebuilt
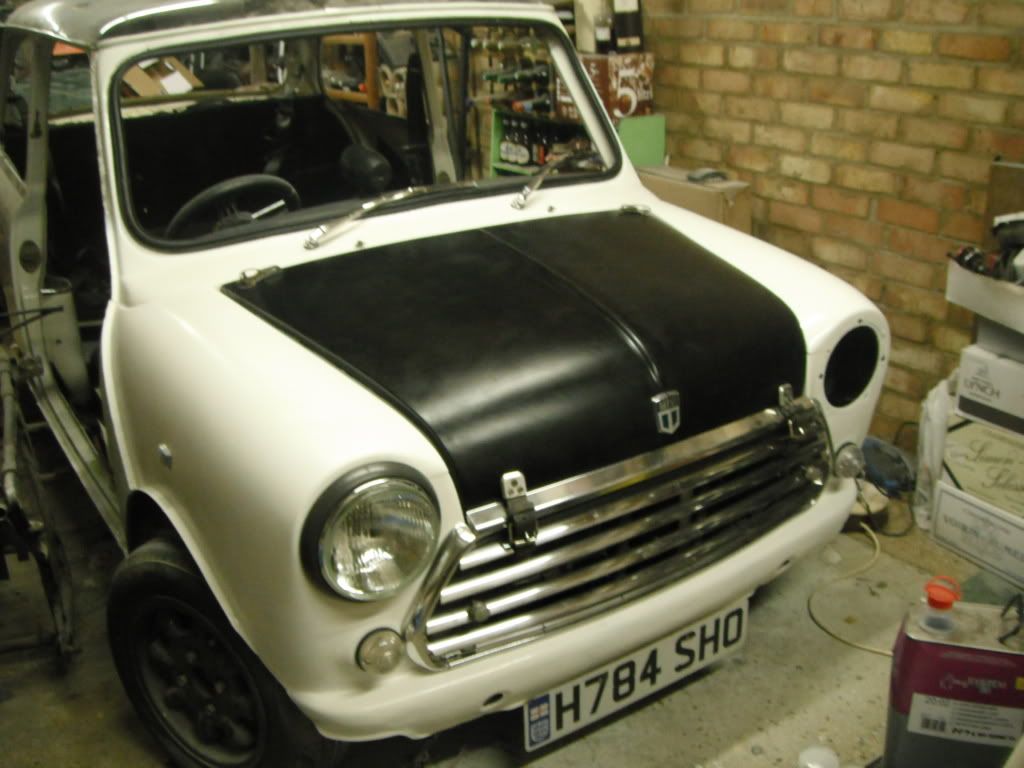
i still need a new pair of side repeaters and a new headlight bowl and some new bonnet pins and a new windscreen and new pressed numberplates............................... the list goes on haha
thats all for today folks as the hand is killing me again, feel free to comment!
Lawrence
So then, there havent been any updates in a few days, mainly because on saturday i decided to go surfing and my board smashed into my hand bruising it leaving me with only one hands use for a few days
its getting better now so im back out in the garage, with many layers of clothes on haha.Well today i got my last spot light through from ebay so i can make my spotlight bar now
, the lightsand ive been shopping for a few cans more of paint haha
work today will be to finish off the front end with its coat of satin white but apart from that im not really sure haha
front end all prepped
front end with a nice layer of paint, you can just about see the shine on the pic but the flash hides it somewhat
front end partly rebuilt
i still need a new pair of side repeaters and a new headlight bowl and some new bonnet pins and a new windscreen and new pressed numberplates............................... the list goes on haha
thats all for today folks as the hand is killing me again
, feel free to comment!Lawrence
#130
alex-95
-

- Members
-
- 6,078 posts
I am THE CLAMP MAKER
- Location: l
Posted 13 December 2011 - 05:14 PM
Looking good
#131
Mini 360
-

- Members
-
- 4,933 posts
Up Into Fourth
- Location: Aberdeenshire
- Local Club: Independent
Posted 13 December 2011 - 08:26 PM
Looking good but for the love of god don't wrap your bonnet in CF effect film! Looks cheap, and when you can buy a CF bonnet for just over £100 and sell your old one for £30-40 its better just to get the real deal!
#132
Risky
-
- Members
-
- 213 posts
Mini Mad
- Location: Zegge (The Netherlands)
Posted 13 December 2011 - 09:21 PM
Hmm I like the looks! 
#133
lawrence
-
- Members
-
- 1,341 posts
One Carb Or Two?
Posted 14 December 2011 - 10:19 AM
Thanks for the comments guys, i think with the light bar and spots its going to look quite beasty haha
In regard to your comment mini 360 i would love a full carbon bonnet but the problem ill have is i had to do work to get this fiberglass one to fit nicely but i wont be able to do that with the carbon one half as easily or keep it looking so good.
In regard to the rest of my project ill be popping to the scrap yard later today to try and fit a suitable fog light that i can recess in the rear valance so i can finnaly finish the rear off, currently thinking the new mini one or a peugeut 206 one
Lawrence
#134
lawrence
-
- Members
-
- 1,341 posts
One Carb Or Two?
Posted 13 January 2012 - 11:11 PM
So then people, its been a while to say the least and not alot of works been done!
i ran out of money again and due to getting paid short this month along with christmas absorbing money and having to pay car tax i only had about £40 to spend on mini
So armed with very little money i cleaned up the old front windscreen, its covered with marks and blobs from welding but cleaned up better than i hoped! itll get replaced when i can afford it.
I then got myself the parts i needed to finish off the front end
fitted new headlamp bowl
and new side indicators as the others were broken
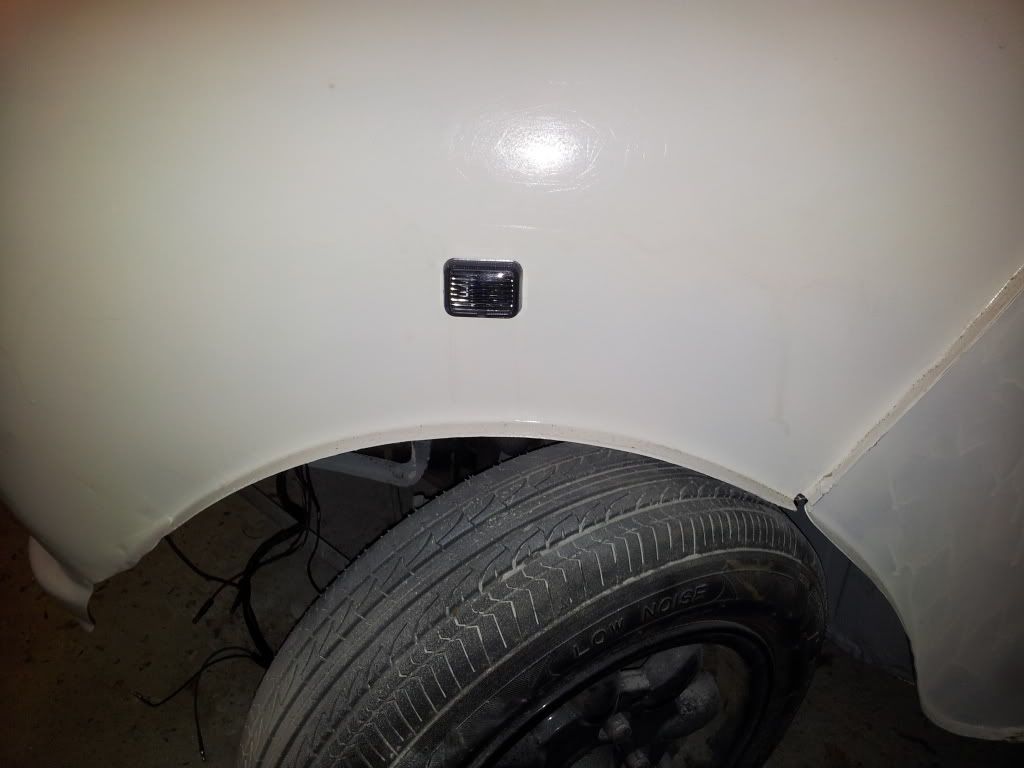
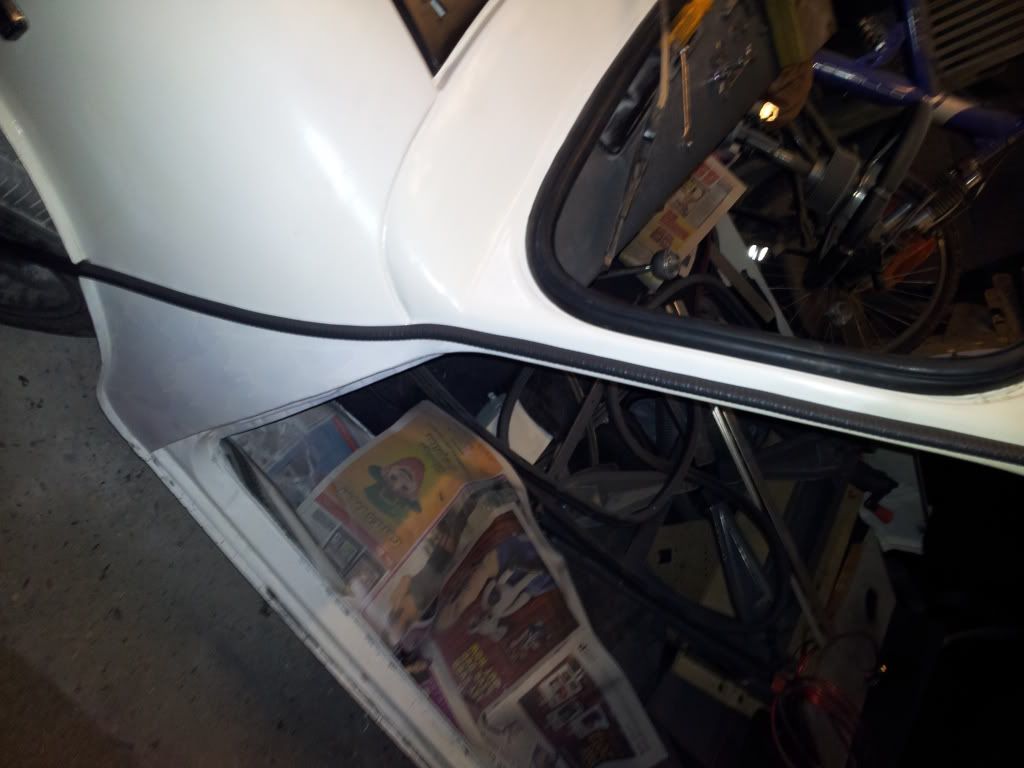
i also decided to do something a bit different for the visible side seams untill i can afford new seam strips, its the doorstep to sill rubber trim stuff, looks pretty good against the white.
i then decided to do work that wouldnt cost me money so ive profiled down my throttle disk
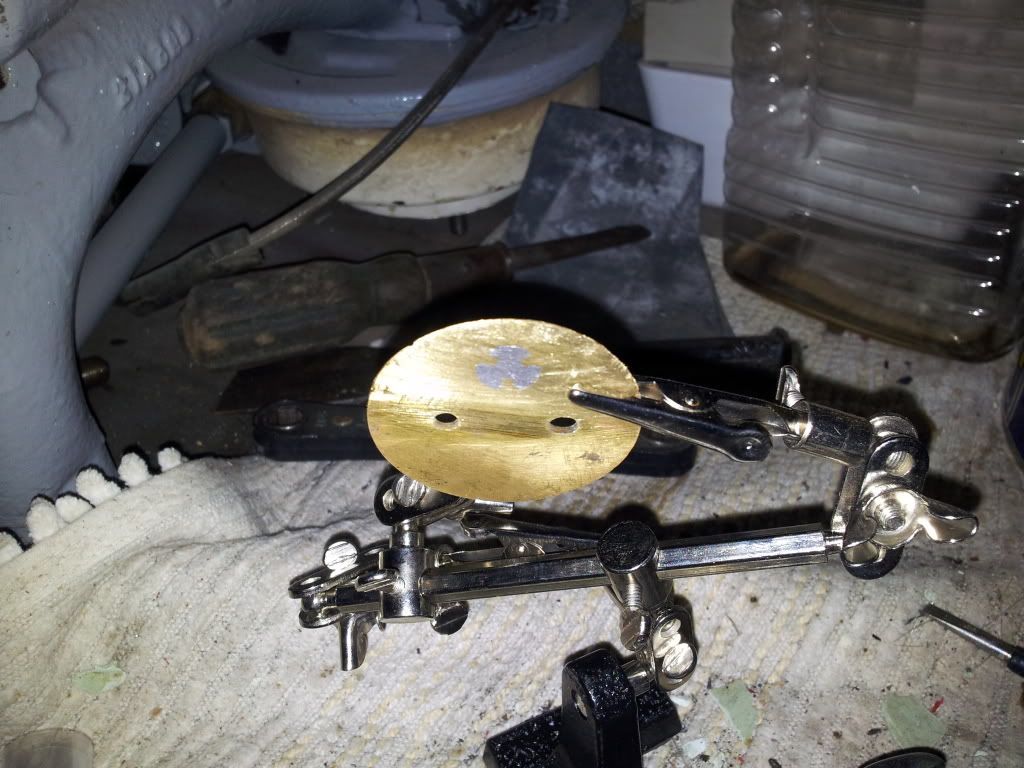
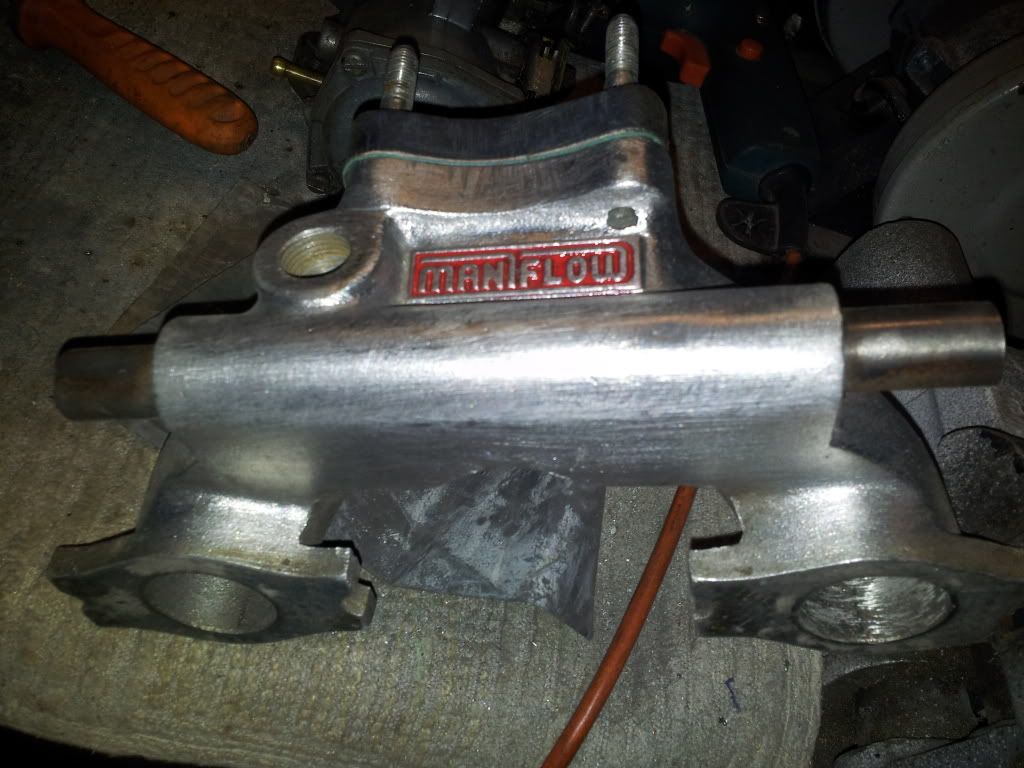
decided i had to improve the flow on the inlet manifold
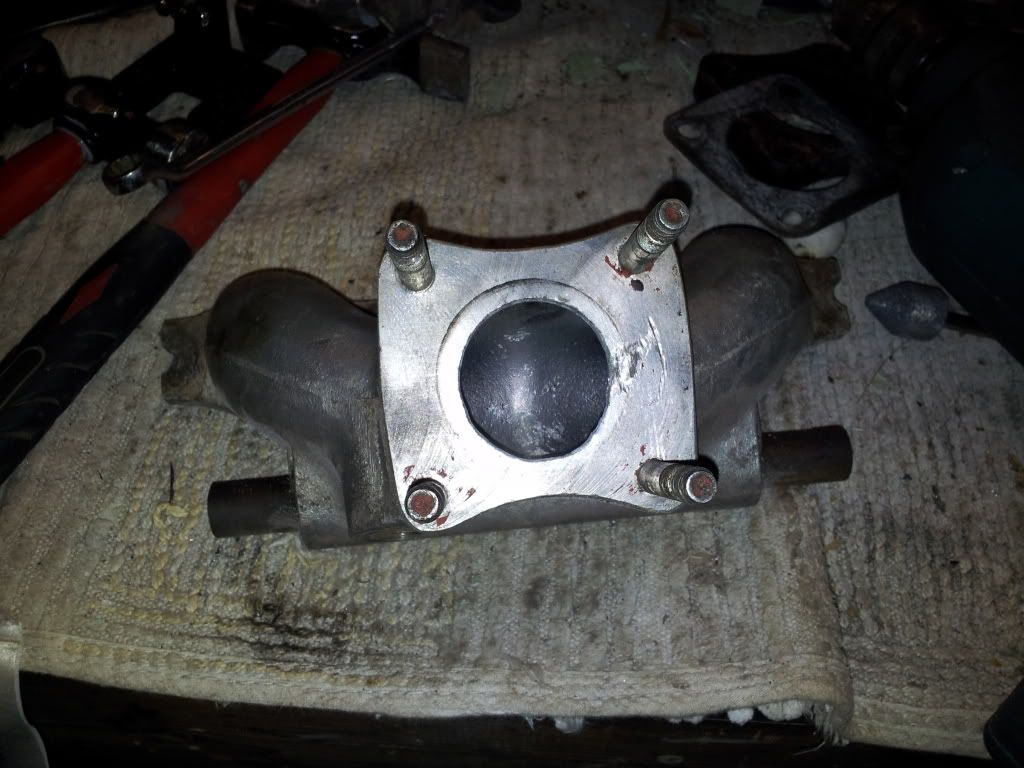
as you can see i can remove alot of material
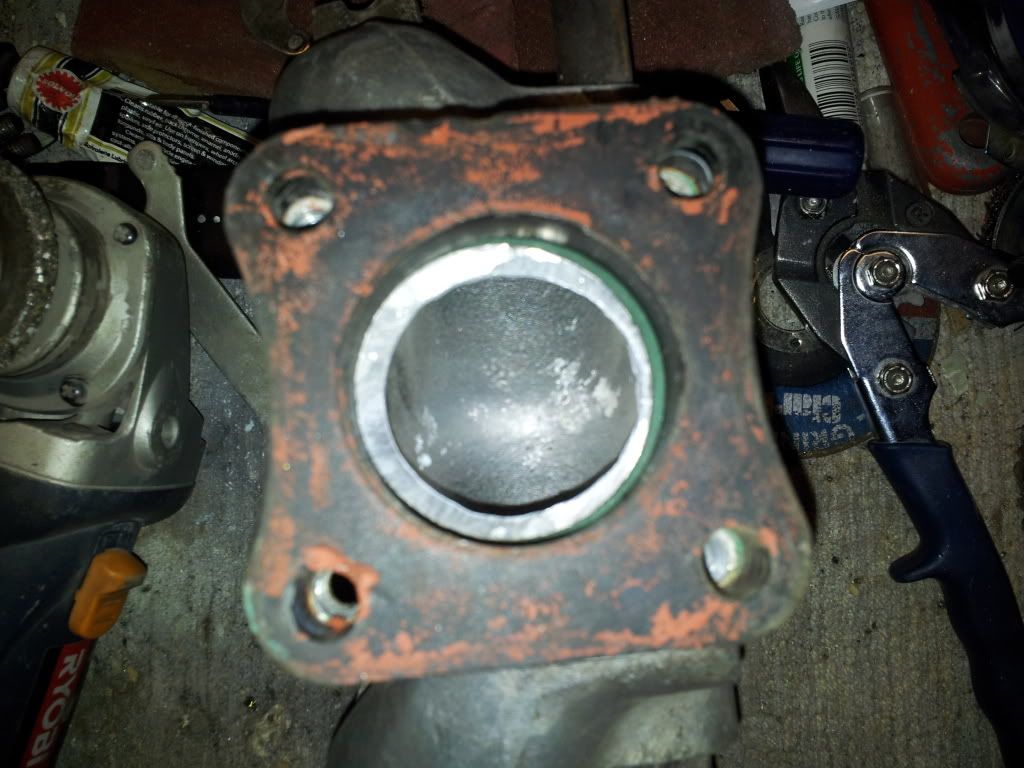
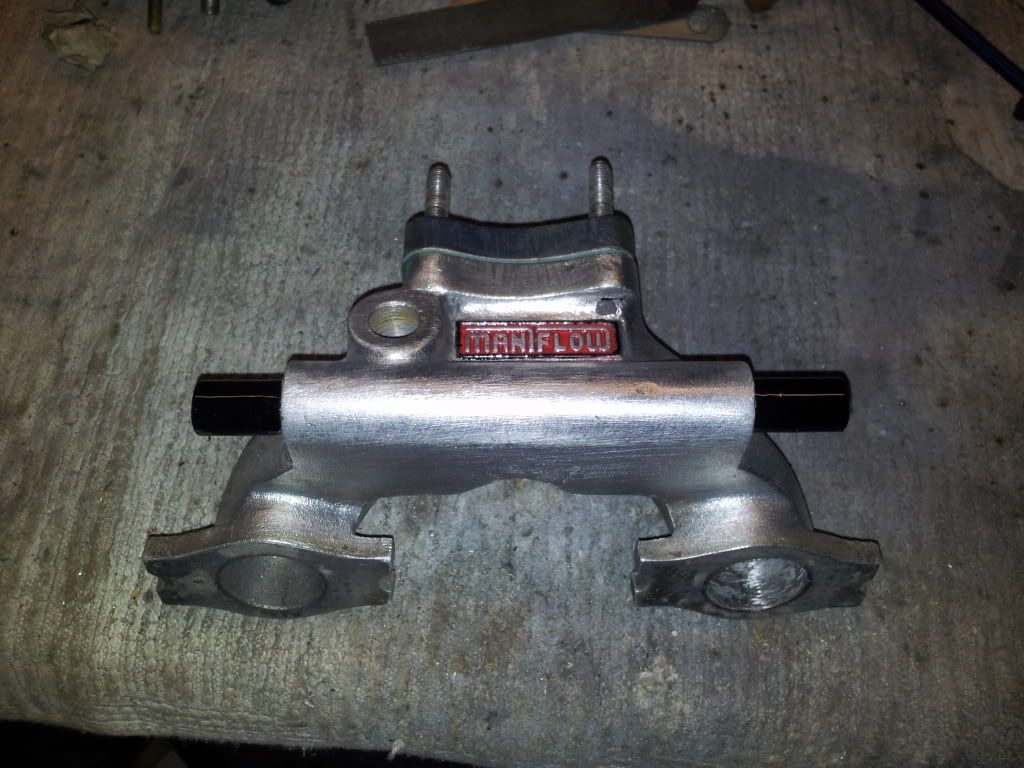
took me a while as i only had access to a file, some sandpaper and a grinder but i got there in the end, a big improvement in the flow of the manifold
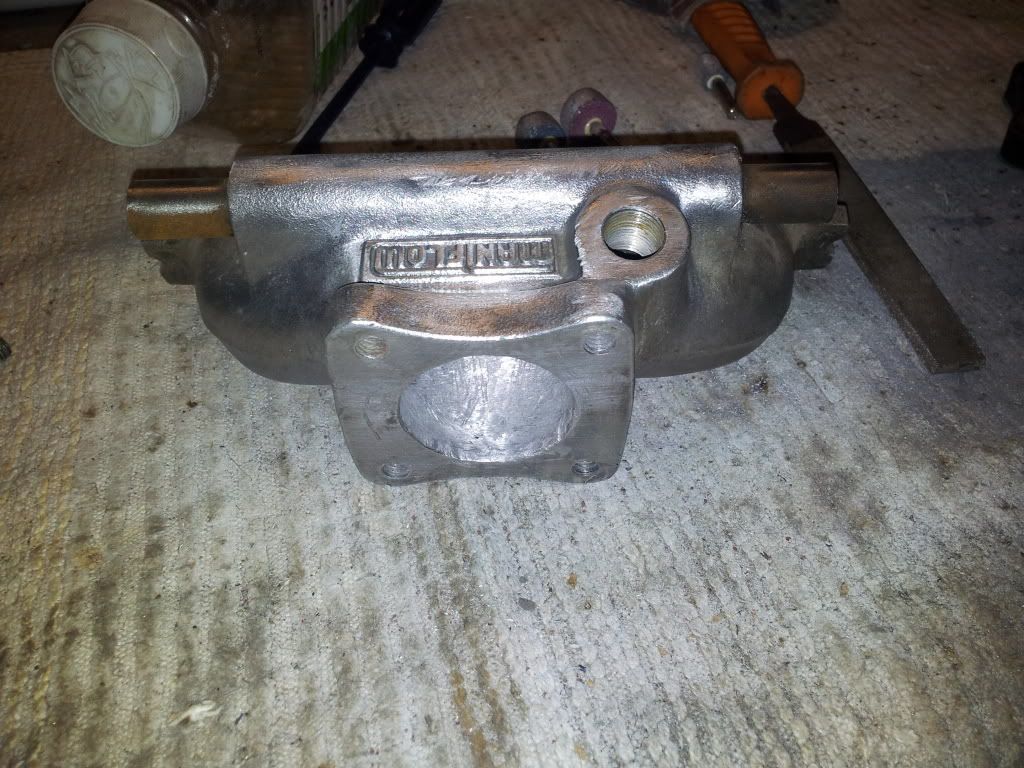
wanted to improve the look of the manifold so masked up
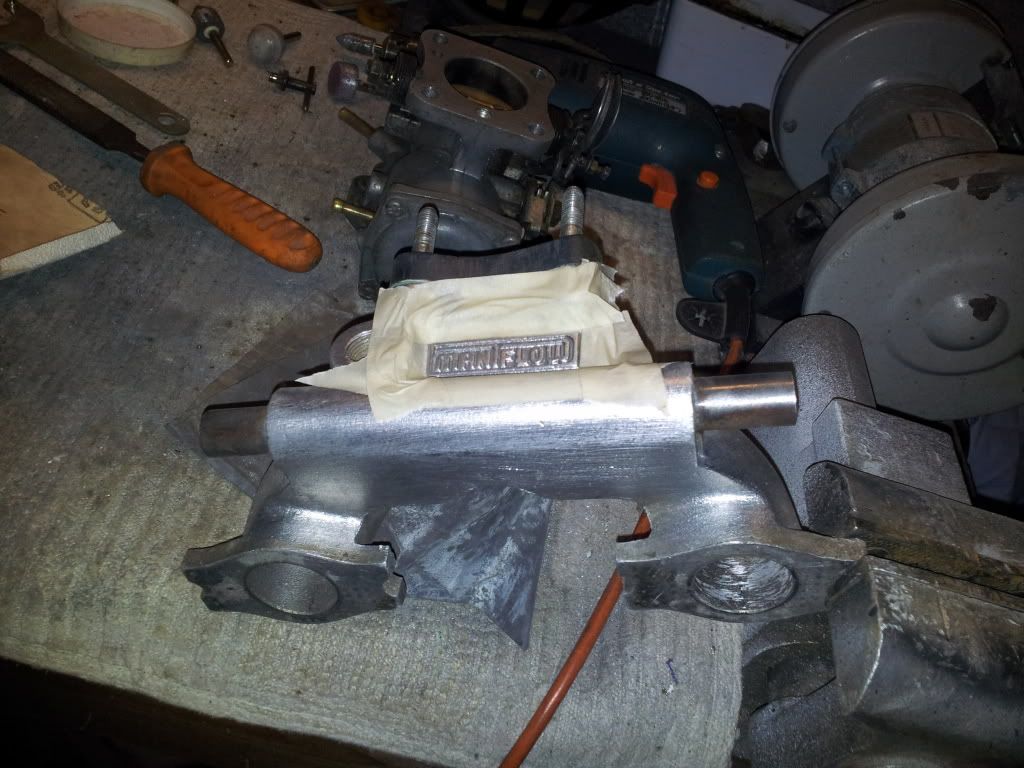
painted
bit more painting, think it looks pretty good
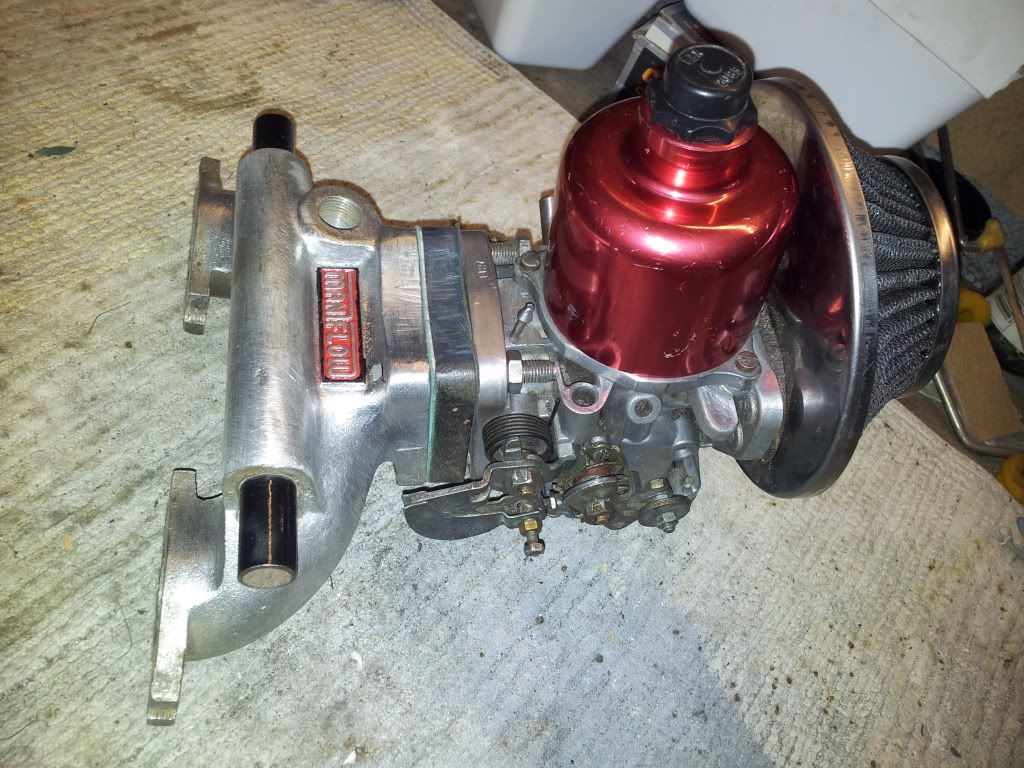
i then dismantled the carb, cleaned it and partly rebuilt it with a rebild kit ive had for years
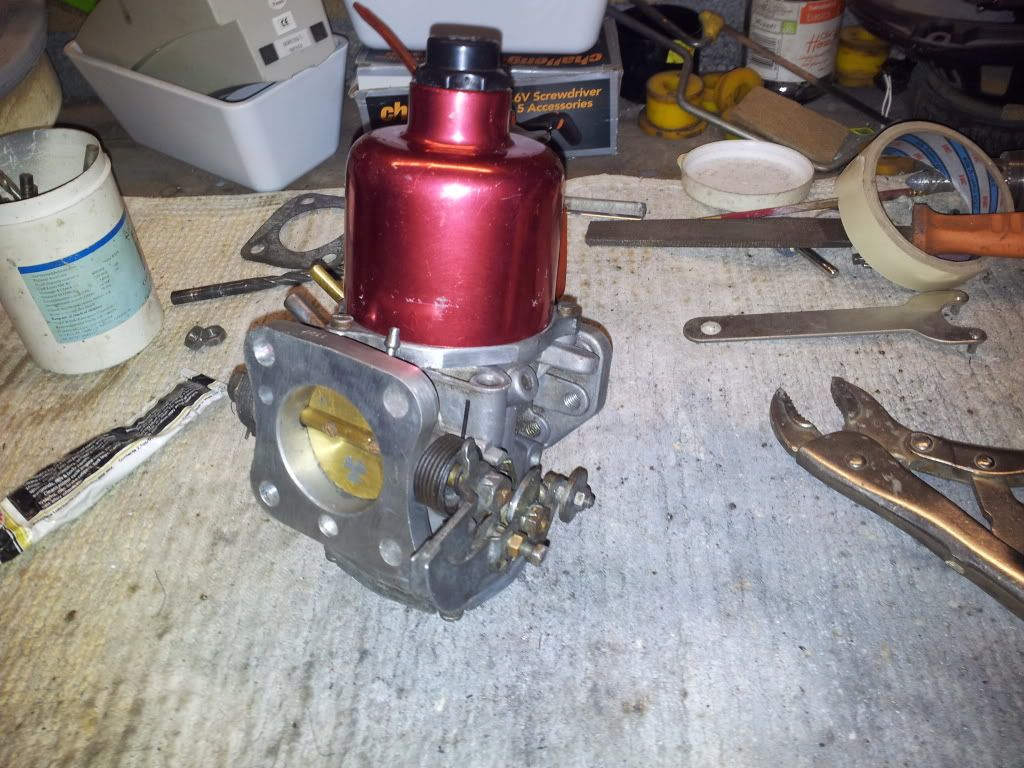
and popped it all together for a picture, need to clean up the engine bay more now tho!
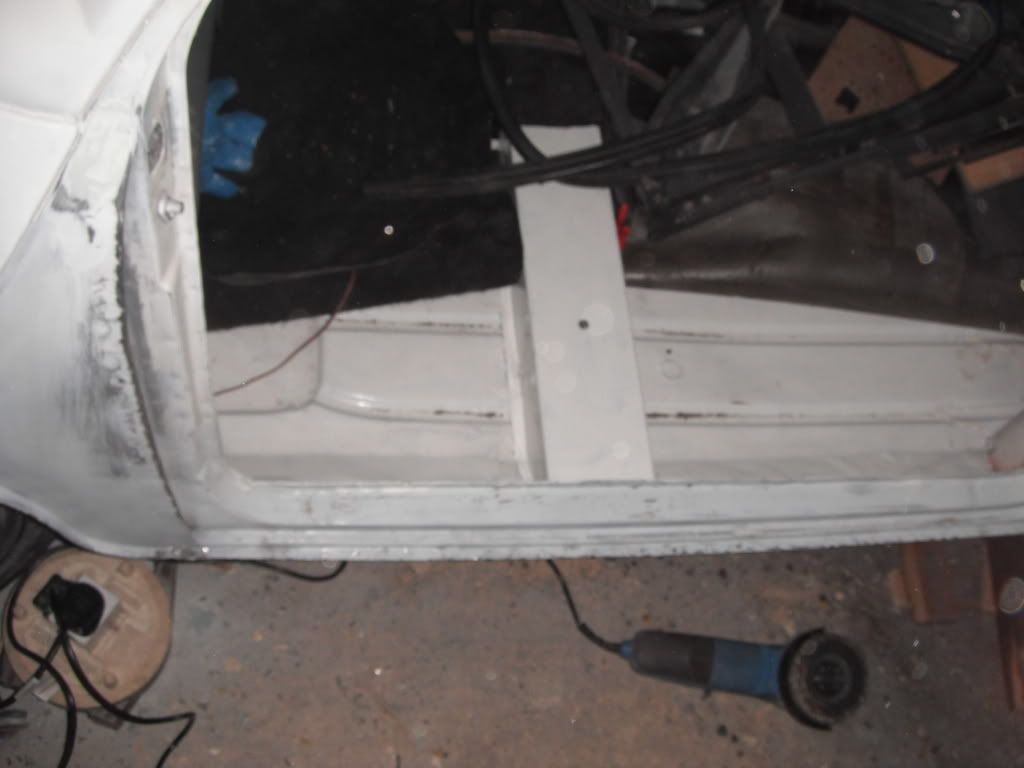
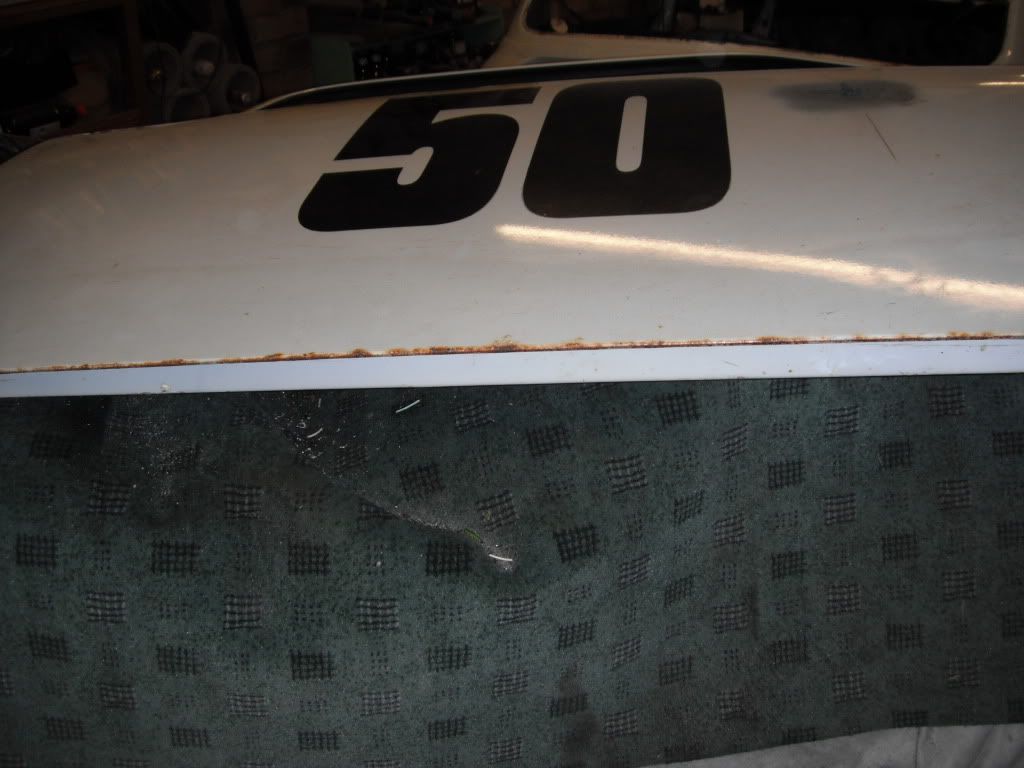
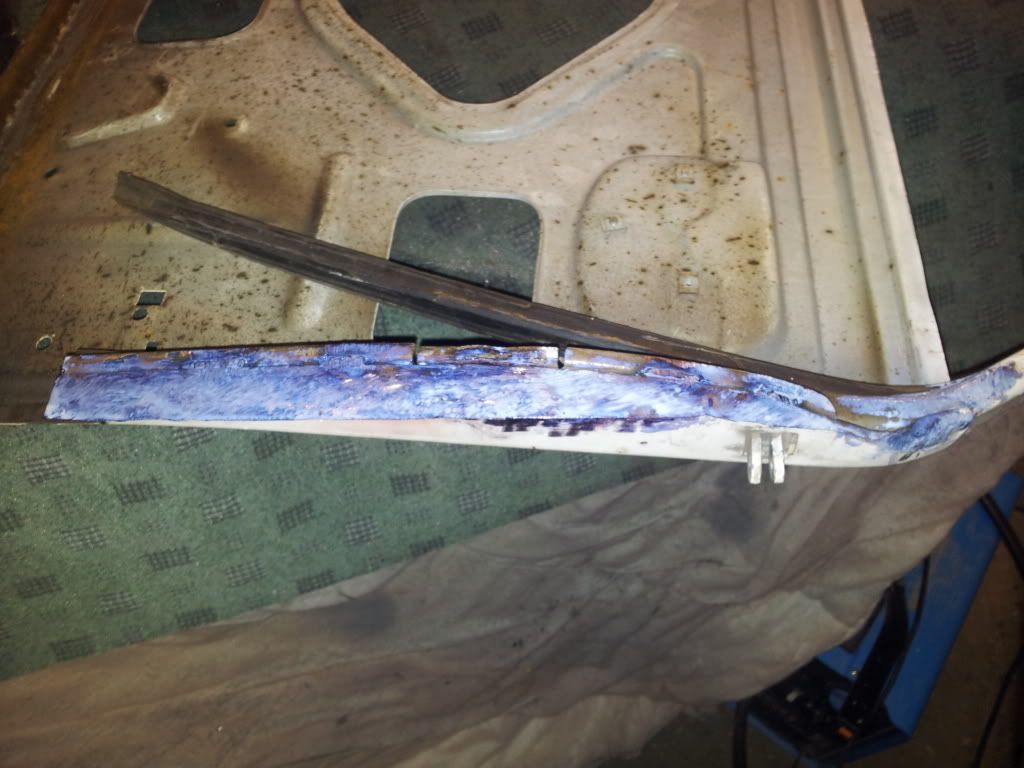
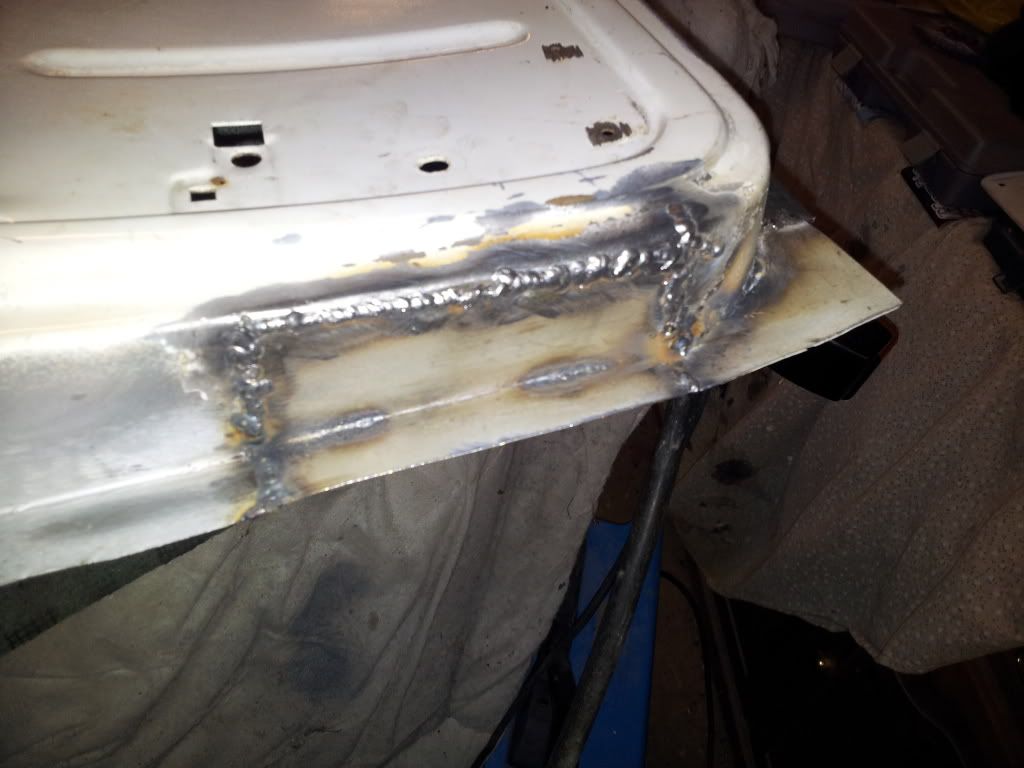
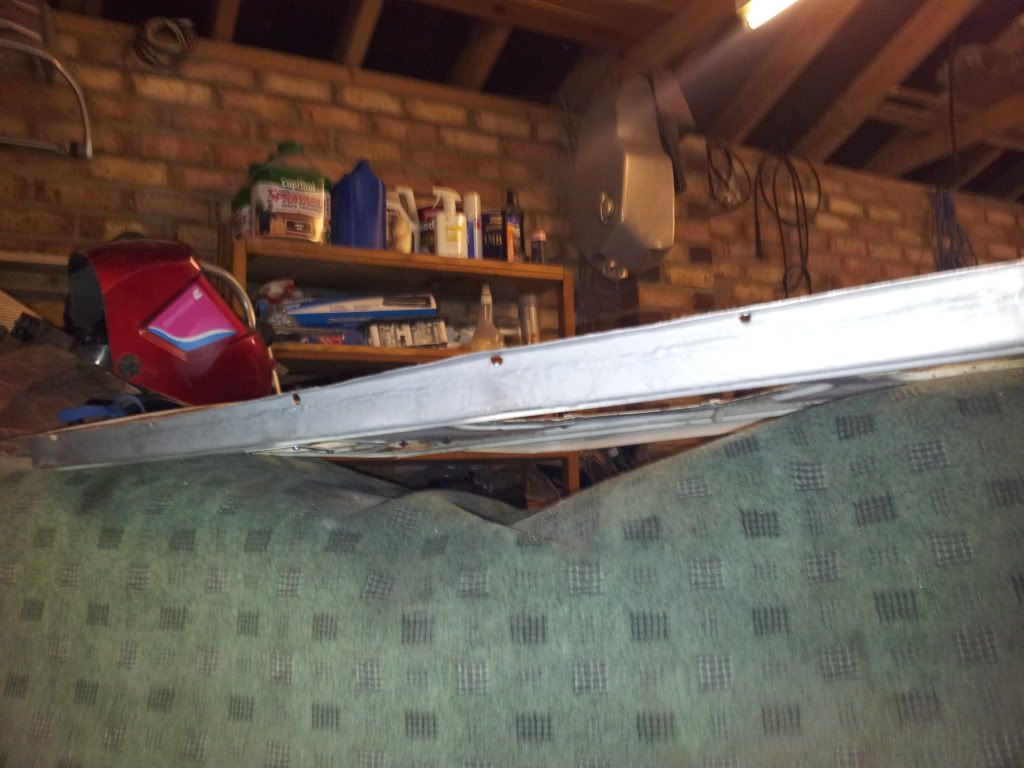
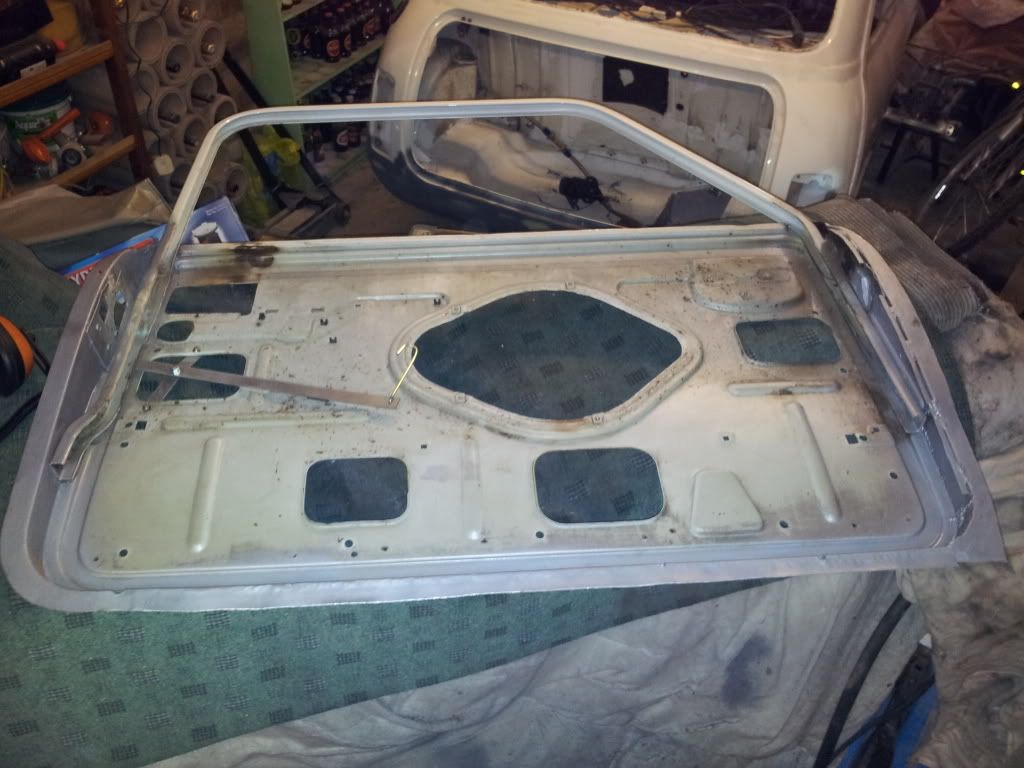
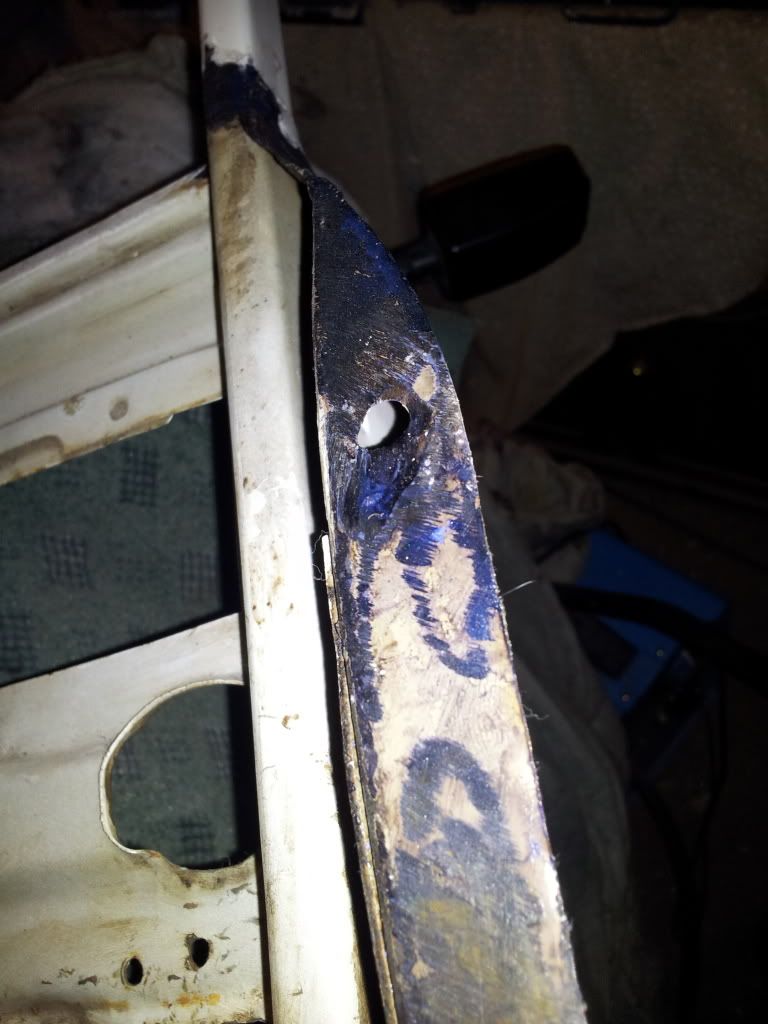
and lastly took apart my other door as it was starting to rust along the bottom
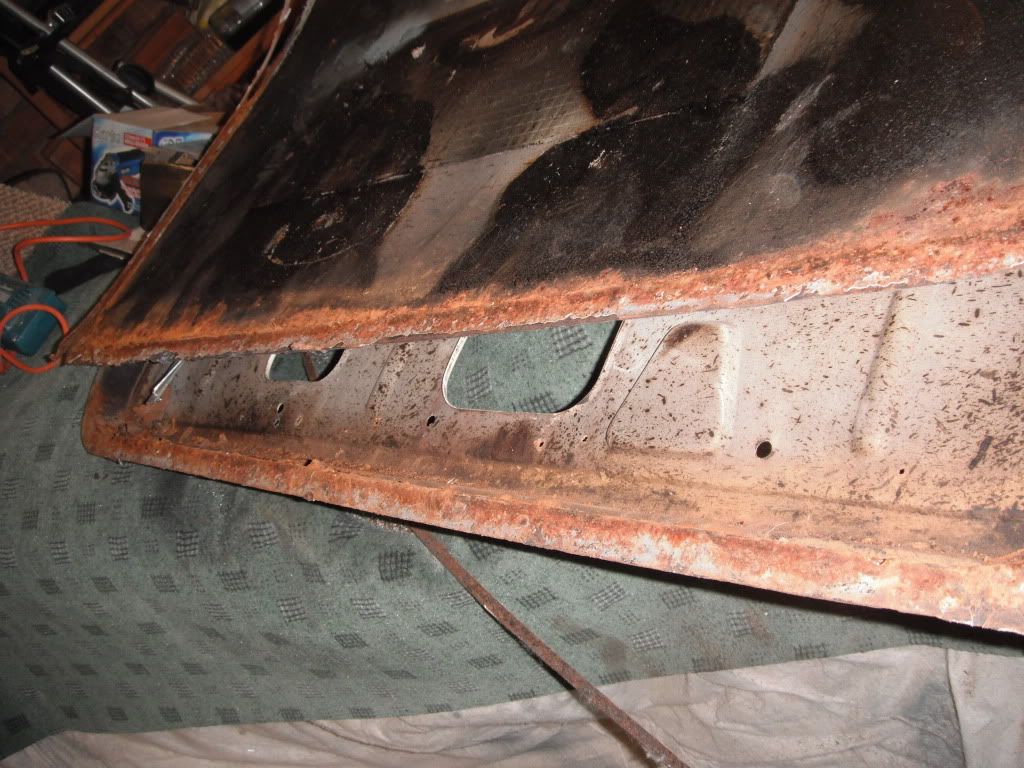
skin separated
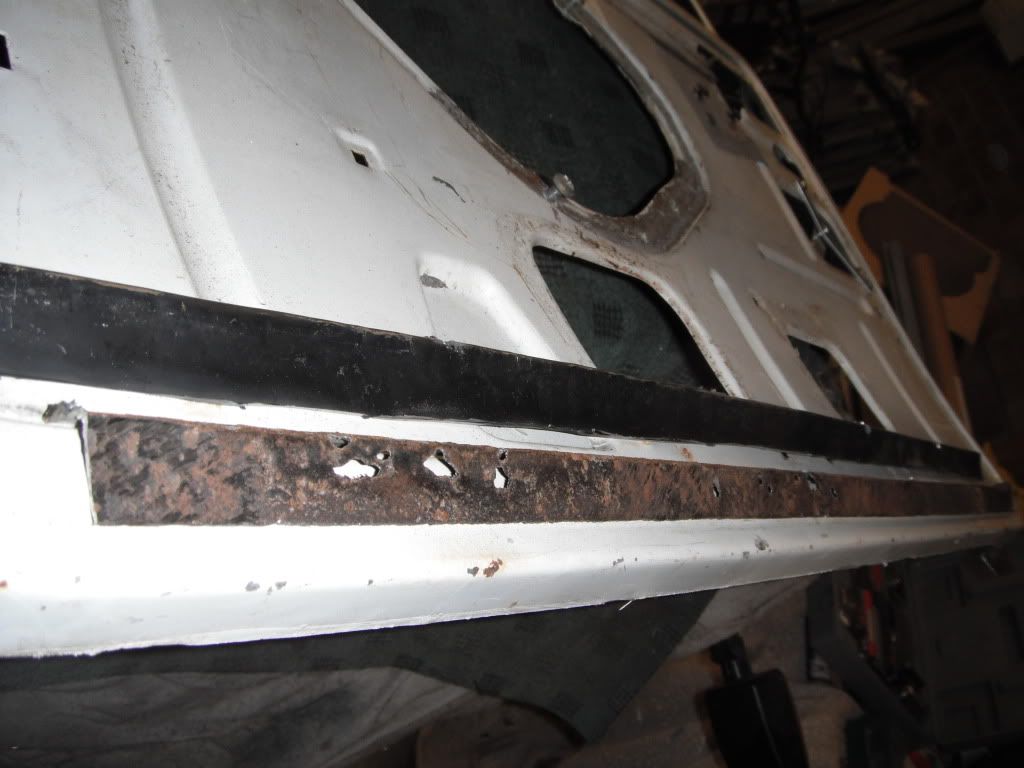
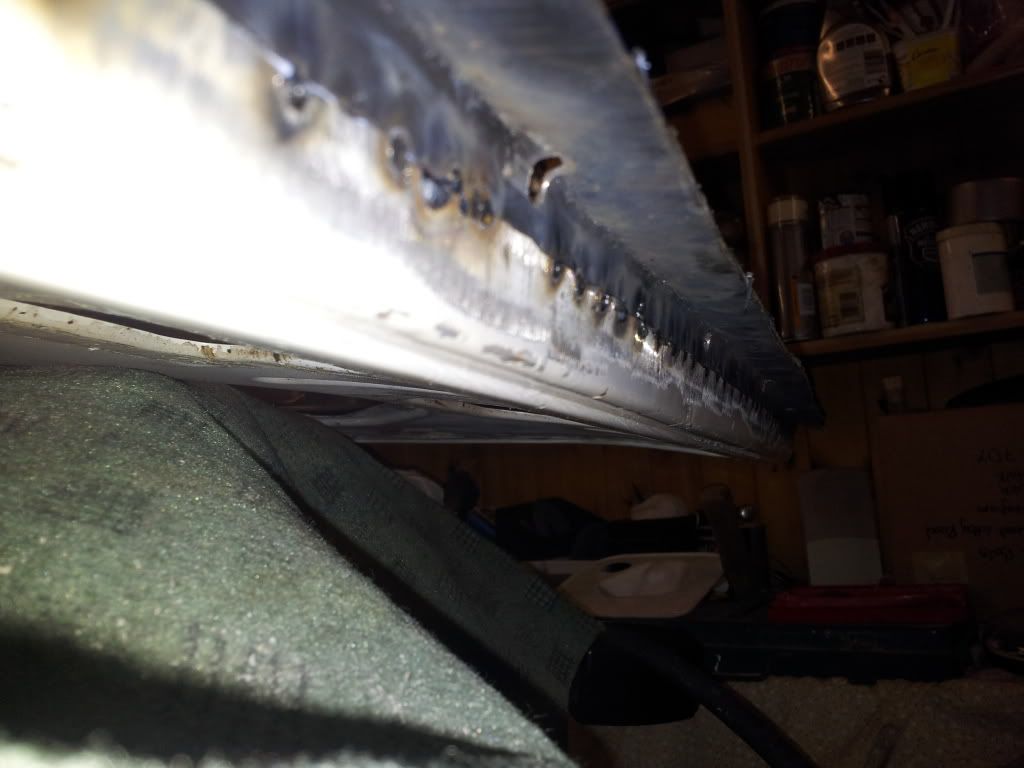
panel made to be welded in
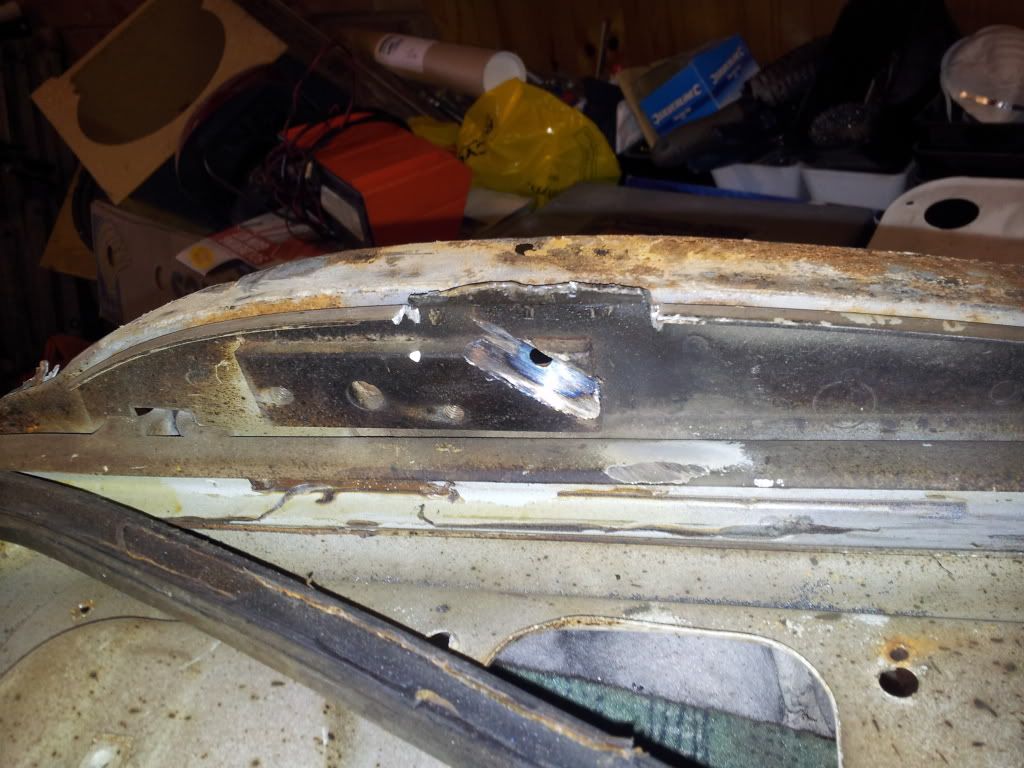
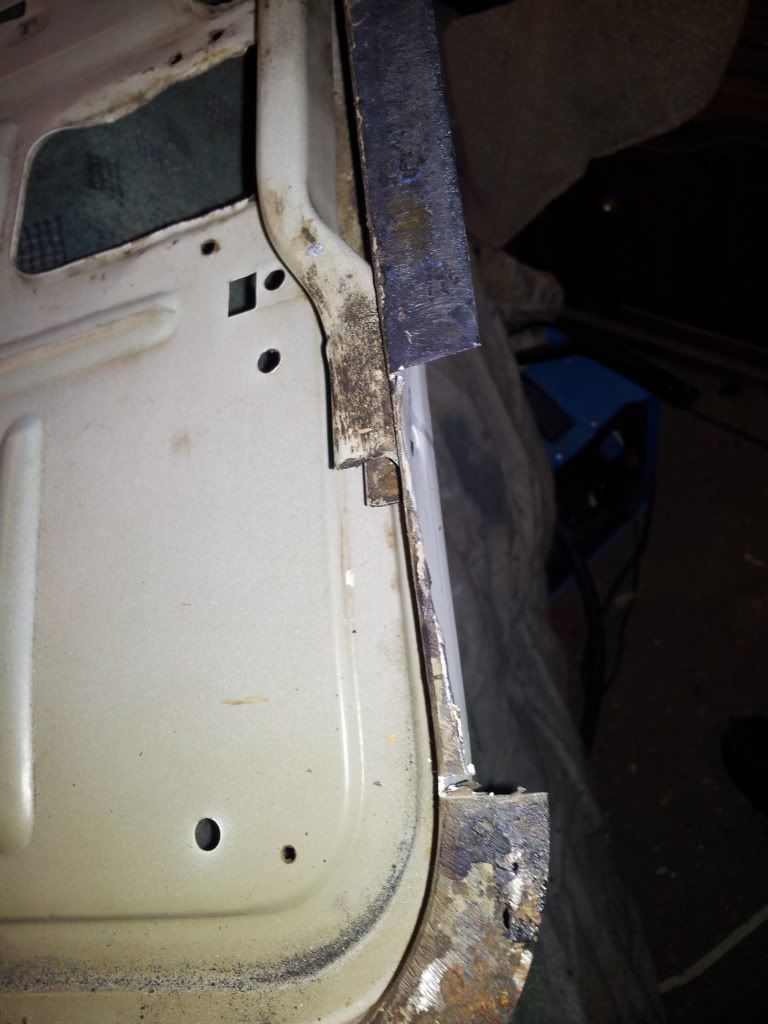
but i then spotted these cracks under the hinges
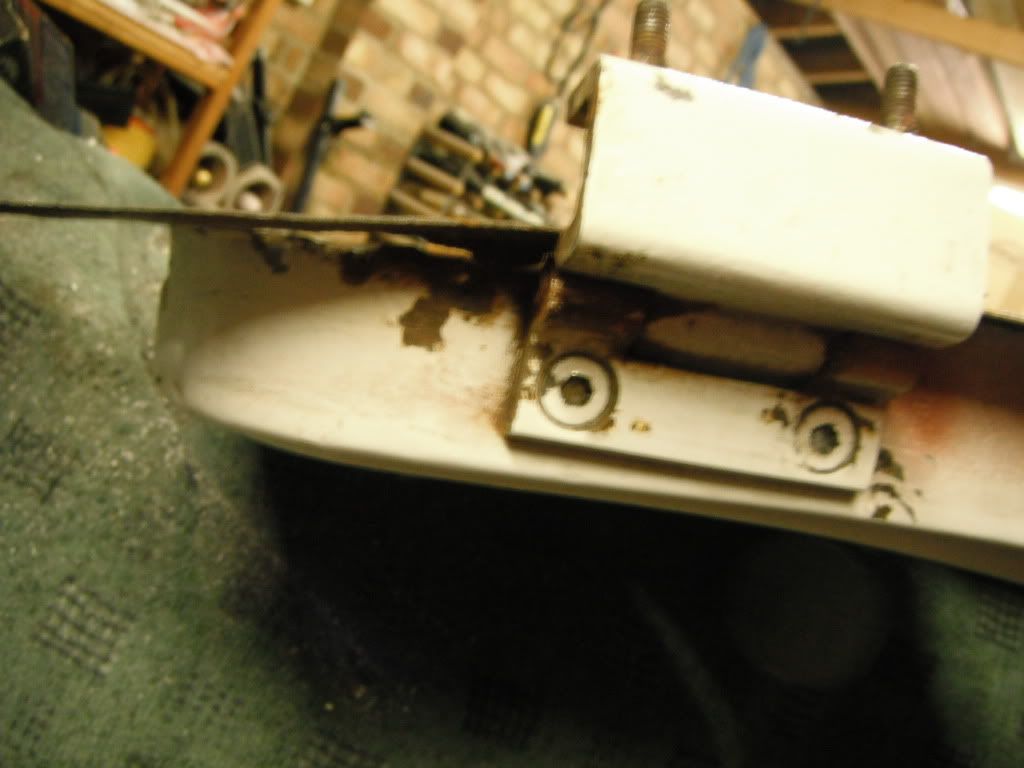
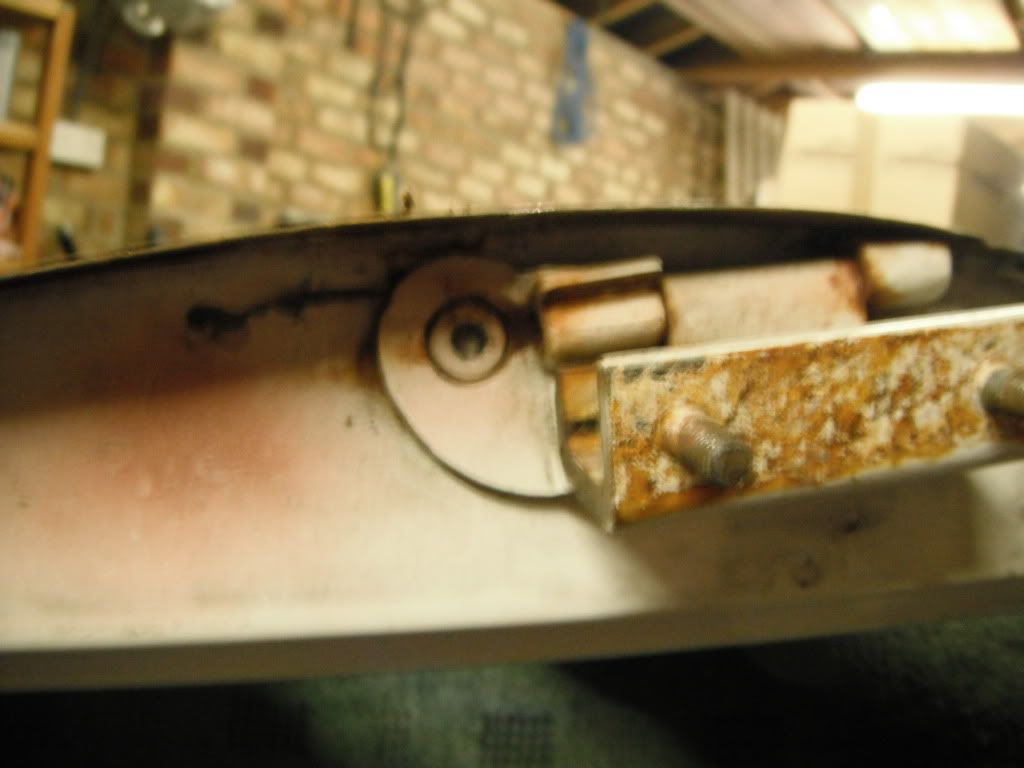
so now im on the lookout for a pair of doors in the norfolk/suffolk area, send a message if youv some for sale
thats all for the moment people, pretty rubbishy update i know but lack of money is killing the progress, there may be a small update sometime next week and i should be getting some more panels ordered soon as my bithdays coming up and mini panels are my main present :)
hope you like the project, feel free to comment
Lawrence
i ran out of money again and due to getting paid short this month along with christmas absorbing money and having to pay car tax i only had about £40 to spend on mini
So armed with very little money i cleaned up the old front windscreen, its covered with marks and blobs from welding but cleaned up better than i hoped! itll get replaced when i can afford it.
I then got myself the parts i needed to finish off the front end
fitted new headlamp bowl
and new side indicators as the others were broken
i also decided to do something a bit different for the visible side seams untill i can afford new seam strips, its the doorstep to sill rubber trim stuff, looks pretty good against the white.
i then decided to do work that wouldnt cost me money so ive profiled down my throttle disk
decided i had to improve the flow on the inlet manifold
as you can see i can remove alot of material
took me a while as i only had access to a file, some sandpaper and a grinder but i got there in the end, a big improvement in the flow of the manifold
wanted to improve the look of the manifold so masked up
painted
bit more painting, think it looks pretty good
i then dismantled the carb, cleaned it and partly rebuilt it with a rebild kit ive had for years
and popped it all together for a picture, need to clean up the engine bay more now tho!
and lastly took apart my other door as it was starting to rust along the bottom
skin separated
panel made to be welded in
but i then spotted these cracks under the hinges
so now im on the lookout for a pair of doors in the norfolk/suffolk area, send a message if youv some for sale
thats all for the moment people, pretty rubbishy update i know but lack of money is killing the progress
, there may be a small update sometime next week and i should be getting some more panels ordered soon as my bithdays coming up and mini panels are my main present :)hope you like the project, feel free to comment
Lawrence
#135
lawrence
-
- Members
-
- 1,341 posts
One Carb Or Two?
Posted 17 January 2012 - 11:11 PM
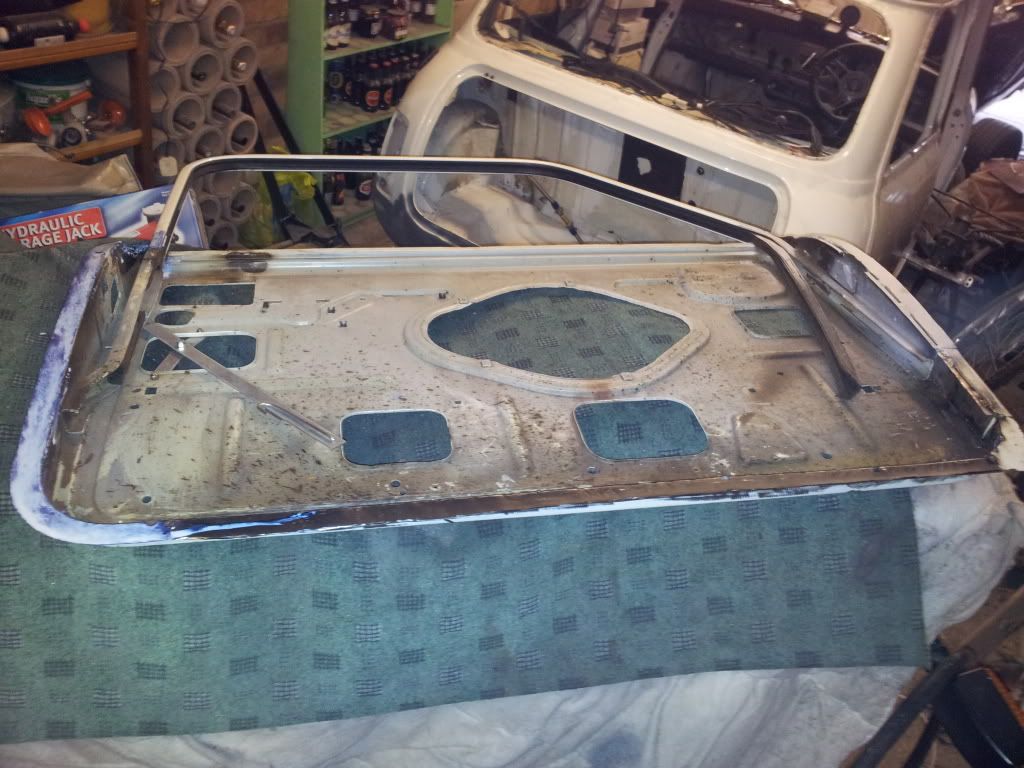
so then people, think its time for another update, today i had another look at my finances and decided i cannot really afford to find another set of doors anywhere so i will repair these instead! :)
starting on the passengers side:
due to all the rubbish screws holding the hinges to the door rounding off i too a grinder to the problem :) ill weld a new nut onto the door at a later time to make up for the damage
threaded area ground away so the hinges can be removed
rusty treats waiting under one of the hinges

new panel made for the area and tacked in, along with the corner piece to the left
ground down as far as i dared and then krusted along the flange
tacked on my repair panel i made the other day
starting to look more like a door now with all the panels tacked in, also ground down and krusted up the left flange
fully welded the bottom panel in
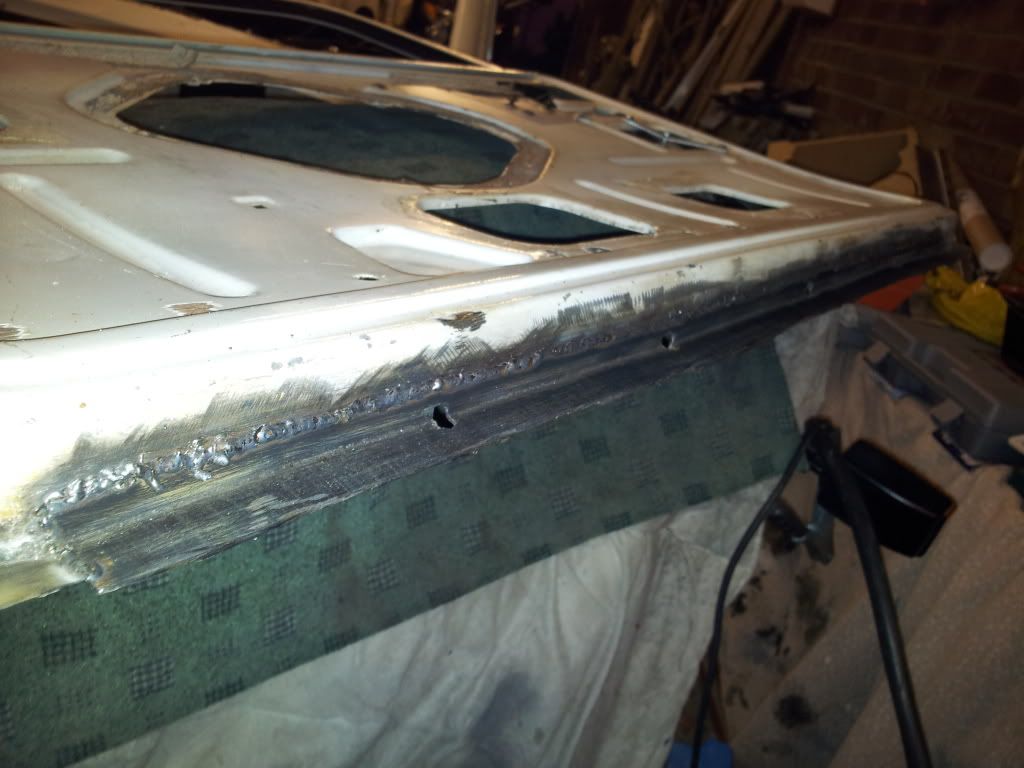
and fully welded the hinge repair panel in, i will need to drill holes for the hinge at a later time, should be fun! also finished of the corner shown in this picture
then ive ground down the bottom repair panel and zinc primered it
and ive tidyed up the rest of the door and zinc primed all the lip
the more observent people will see the flange the skin goes over is a bit roughfly cut, this is because i had nothing to refer to doing my repair so ive left it oversized so it can be trimmed back
and moving onto the other door
all the hinge bolts sheared to again they were ground to oblivion

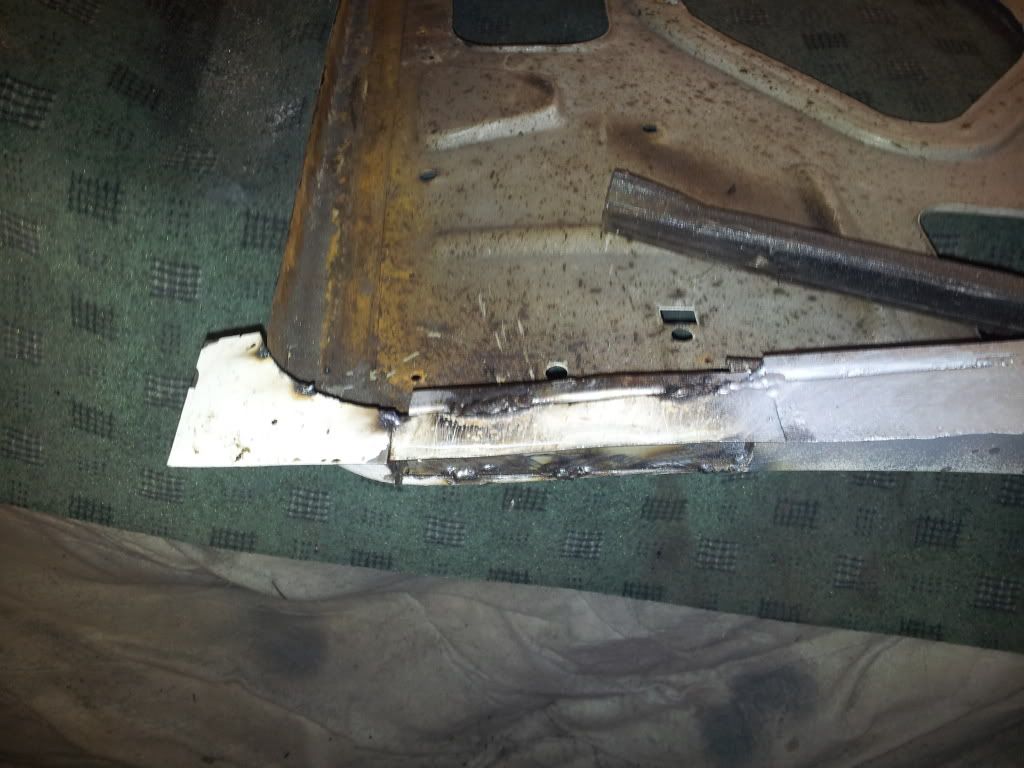
it needed a repair to one flange, a nice and easy flat repair :)
rust cut out
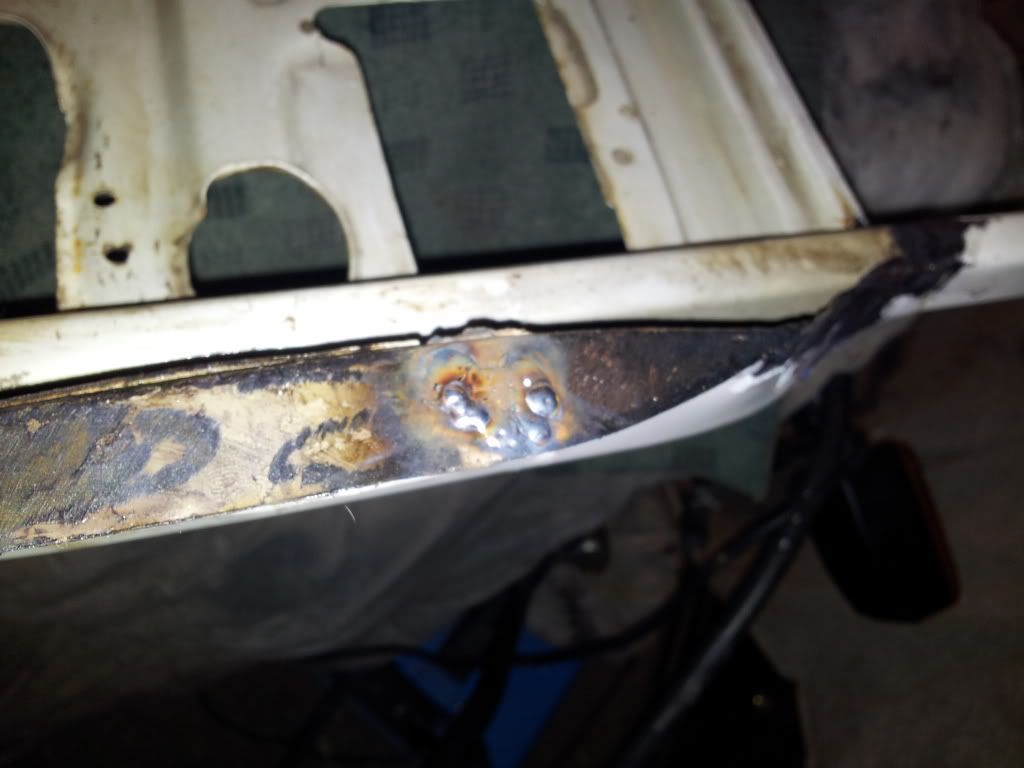
hole on the frame that needed filling
repair patch made
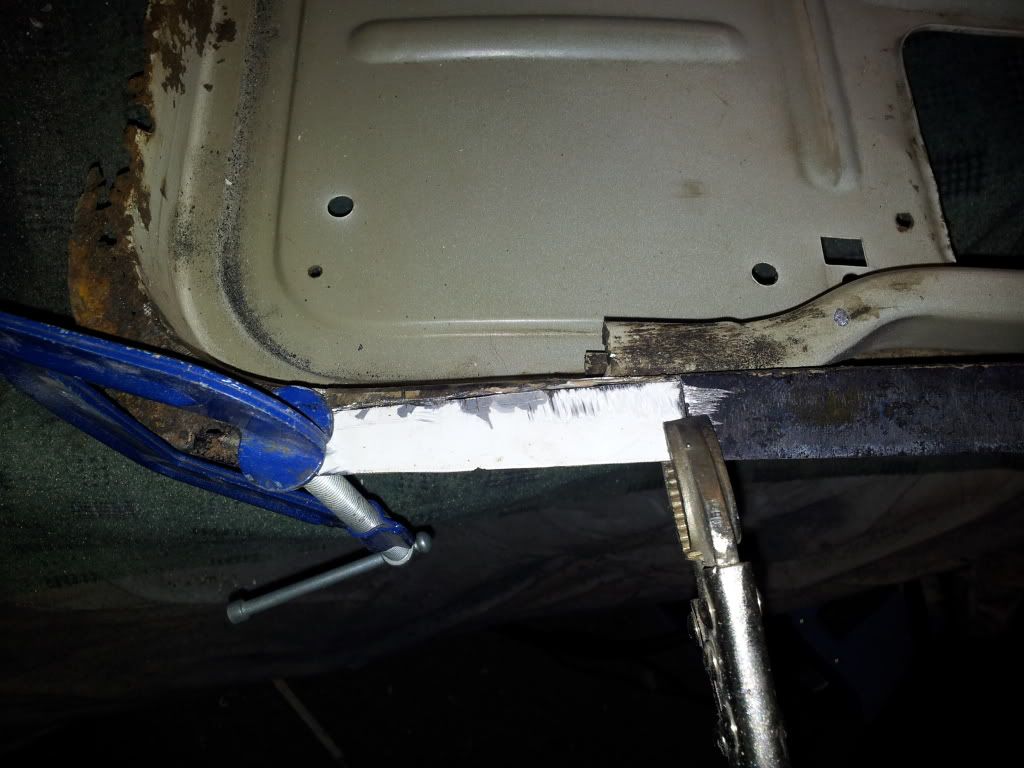
welded
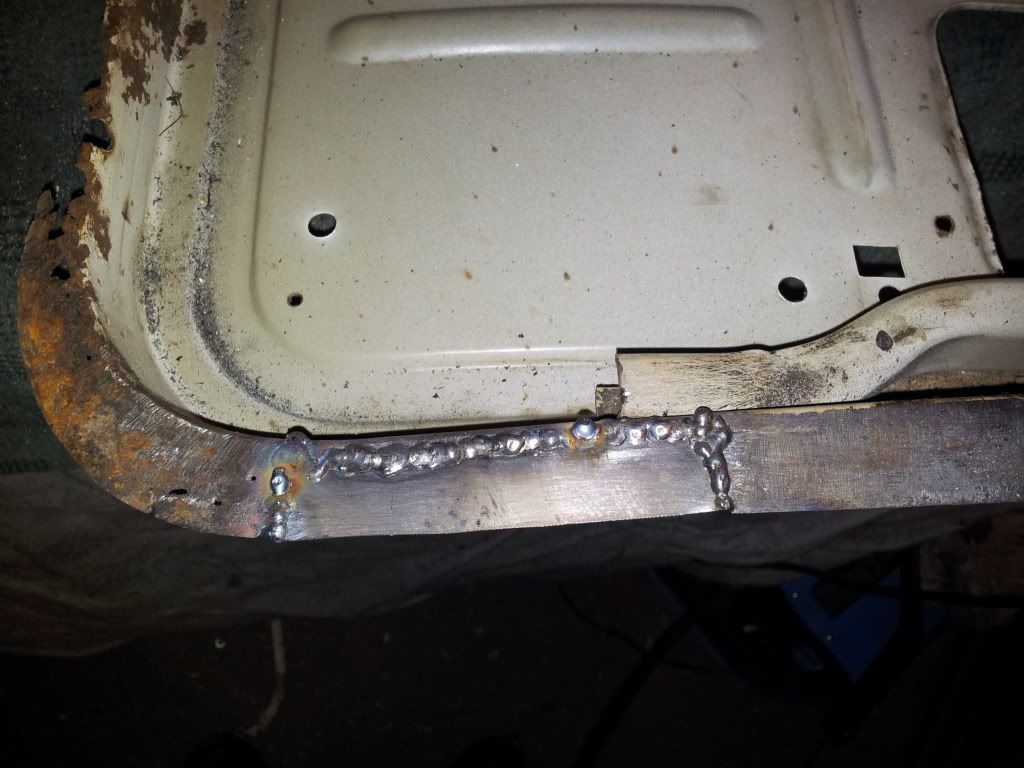
hole welded up too,
thats all up to date so far folks, they need griding still, im going to be ordering some panels in the next few days, gunna get a door frame repair panel for this door to make a better job of it
panels to be ordered are:
>lower door repair panel
>both doorskins
>both rear 1/4 panels
>passengers side rear waist rail
then all i need to complete the project will be a rear subframe and little misc pieces (brake pipes etc)
hope you like this update, think i can see light at the end of the tunnel now! :)
Lawrence
starting on the passengers side:
due to all the rubbish screws holding the hinges to the door rounding off i too a grinder to the problem :) ill weld a new nut onto the door at a later time to make up for the damage
threaded area ground away so the hinges can be removed
rusty treats waiting under one of the hinges
new panel made for the area and tacked in, along with the corner piece to the left
ground down as far as i dared and then krusted along the flange
tacked on my repair panel i made the other day
starting to look more like a door now with all the panels tacked in, also ground down and krusted up the left flange
fully welded the bottom panel in
and fully welded the hinge repair panel in, i will need to drill holes for the hinge at a later time, should be fun! also finished of the corner shown in this picture
then ive ground down the bottom repair panel and zinc primered it
and ive tidyed up the rest of the door and zinc primed all the lip
the more observent people will see the flange the skin goes over is a bit roughfly cut, this is because i had nothing to refer to doing my repair so ive left it oversized so it can be trimmed back
and moving onto the other door
all the hinge bolts sheared to again they were ground to oblivion
it needed a repair to one flange, a nice and easy flat repair :)
rust cut out
hole on the frame that needed filling
repair patch made
welded
hole welded up too,
thats all up to date so far folks, they need griding still, im going to be ordering some panels in the next few days, gunna get a door frame repair panel for this door to make a better job of it
panels to be ordered are:
>lower door repair panel
>both doorskins
>both rear 1/4 panels
>passengers side rear waist rail
then all i need to complete the project will be a rear subframe and little misc pieces (brake pipes etc)
hope you like this update, think i can see light at the end of the tunnel now! :)
Lawrence


3 user(s) are reading this topic
0 members, 1 guests, 0 anonymous users
-
Bing (2)


