Jump to content


Photo
- - - - -

Ken -The 1275 High Compression Engine Micra Mini (Running Project)


  • Please log in to reply
749 replies to this topic

#601 lawrence

lawrence

    One Carb Or Two?

  • Members
  • PipPipPipPipPipPipPip
  • 1,330 posts

Posted 31 July 2017 - 07:02 PM

New update from today.

Photo of the completed handles

36067510161_66c040042b_z.jpg20170727_161813 by Lawrence Balls, on Flickr

And one at night

36165695836_fb0a3bb0ec_z.jpg20170727_213431 by Lawrence Balls, on Flickr


Onwards to today, needed to remake the sensor mount for the fuel injection

35459581994_0b7b340d78_k.jpg20170731_112753 by Lawrence Balls, on Flickr

35459585484_0945837862_k.jpg20170731_114247 by Lawrence Balls, on Flickr

36126244102_5708ce8776_k.jpg20170731_115354 by Lawrence Balls, on Flickr

tacked together

36160627251_6da750486c_k.jpg20170731_123332 by Lawrence Balls, on Flickr

Fits nice

36252212906_5bde432589_k.jpg20170731_124245 by Lawrence Balls, on Flickr


Its stable enough to start running the engine however ill remove it and fully weld and reinforce it when I know that it is aligned properly.


Whilst I was under the wing I also sorted out the washer bottle mount. Made a blanking plate out of an old number plate to cover the heater vent inlet also. With a simple rubber gasket. Not fully sealed on but better then a hole like before!

36160610171_185df5d959_k.jpg20170731_154253 by Lawrence Balls, on Flickr


Went to fit the waterbottle back in and found it had leaked since I refilled it. It got a hole in it a while ago that I filled with liquid metal. Had all corroded so cleaned up and hammered to give a better grip for more liquid metal

36160606401_d2f3ae3f3b_k.jpg20170731_161107 by Lawrence Balls, on Flickr

and refilled

35459529064_3b2154c3c8_k.jpg20170731_161435 by Lawrence Balls, on Flickr


if it fails again ill get a plastic bottle, they are only push bike bottles so nice and cheap.


So that’s that done.

Onwards to the shifter

Its always been a bit slack on the ball part of the shifter so took it off to see if I can tweak it

35898848970_53cd724879_k.jpg20170731_164403 by Lawrence Balls, on Flickr

wrapped the concertina type part together with electrical tape to take up some of the slack between it and the housing

35459527514_2e793c93db_k.jpg20170731_164456 by Lawrence Balls, on Flickr


wow. Its amazing now. Zero play and nice and tight, just need to refit the link arm and the shifter will be sorted!


Plan next is to sort the exhaust out


That’s all for now

Lawrence


#602 lawrence

lawrence

    One Carb Or Two?

  • Members
  • PipPipPipPipPipPipPip
  • 1,330 posts

Posted 01 August 2017 - 07:57 PM

More work done on mini today, its been an exhausting day ;) Haven't touched the exhaust. ill do it another day was its a nice job.


So today basically went from bad to worse today,

I realised I needed to refit the exhaust in order to start the engine due to the lambda etc. So I did a bit of welding


Mock up

36181233701_bba5d6fa00_k.jpg20170801_105002 by Lawrence Balls, on Flickr

perfectly cut metal

35508039263_7b8f2ae674_k.jpg20170801_111159 by Lawrence Balls, on Flickr

weldy weldy

36181230921_4f1d0b30aa_k.jpg20170801_114435 by Lawrence Balls, on Flickr

paintypaint

35508025383_d730345813_k.jpg20170801_114620 by Lawrence Balls, on Flickr

ready to fit

35508016153_9faae5d8ec_k.jpg20170801_155633 by Lawrence Balls, on Flickr


and fitted, ish

36316670015_c93ba8369e_k.jpg20170801_162922 by Lawrence Balls, on Flickr

35507995193_cf745f7fbe_k.jpg20170801_162934 by Lawrence Balls, on Flickr


So I had to cut the upturned bit off. Basically the backbox with the bend towards the centre tunnel was too long to fit under so it stuck out hugely. So I trimmed the pipes, so now it’s a straight exhaust not an upturned one.


Well that was annoying but not the end of the world.

Next I needed to tackle the manifold end. Now the exhaust fell off a while ago and ground out the flexi joint on the road.

Spiky

36148537302_961d680cc8_k.jpg20170801_171826 by Lawrence Balls, on Flickr

so I cut off the spiky bit and water tested it for leaks and its all good. Which is nice

36273961496_2f44d88449_k.jpg20170801_180509 by Lawrence Balls, on Flickr


But the bad bit was the manifold itself.

Removed

36181190001_0af1f82249_k.jpg20170801_171823 by Lawrence Balls, on Flickr

leak in the exhaust that needs fixing

36148538152_5a84a921cf_k.jpg20170801_171907 by Lawrence Balls, on Flickr

and from where the lambda was

35921267750_912ca41da7_k.jpg20170801_171912 by Lawrence Balls, on Flickr


Now I remember when I welded it that the flow wasn’t the best so cut off the two link pipe parts

35921253390_7a54ffcf82_k.jpg20170801_172416 by Lawrence Balls, on Flickr

look at that flow. Its awful. That needs fixing


mani back on the car.

35921254180_e7b84ba21b_k.jpg20170801_180623 by Lawrence Balls, on Flickr


Now I need to make some modification to the manifold which I didn’t really want to have to faff about with but I need my lambda sensor to be accurate with no leaks obviously.


In Addition to this where I welded the back box to the centre silence is a bit wonky. Grr.


Im going to buy some vband clamps for the exhaust and make it into three removable sections, this will help with making the exhaust fit nicely


That’s all for now people. Update Friday potentially

Lawrence


#603 lawrence

lawrence

    One Carb Or Two?

  • Members
  • PipPipPipPipPipPipPip
  • 1,330 posts

Posted 02 August 2017 - 05:49 PM

Right people. Ive been shopping. Got 2 new bobbin mounts for the backbox. Also ordered two Flexi pipes. ones 2inch one and one 1 3/4inch one. Also one 1 3/4 inch V band clamp. Got one 2 inch v band in the garage.


Plan for the exhaust is =

Mani

LCB 2 into 1 link pipe that I will need to modify to keep the flow and allow me to take the manifold off. Its annoying but I can't modify the current exhaust enough to make the manifold and the 2-1 piece as all one bit. The clearances around my frame are too tight. Although I am seriously contemplating cutting a chunk out of the front panel. welding a brace across the subframe and lopping a chunk out of it to make more clearance but that is a big decision to make as no way in hell am I taking the engine and gearbox out!!!! although now the mani is off I may have room to remove the rad, take off both the engine mounts and shove the engine and gearbox combo back to make room for the grinder, that is an avenue I will look into first obviously. I wish I did this before when I swopped engines!!!!!!!grrr.


after the 2-1 ill put a vband

then flexi

then straight pipe

then silencer. 

then 90deg bend


then another v band

then another Flexi to get rid of any alignment issues 

then the rear silencer cutout combo.


Thats the plan. I'm on holiday next week so its likely to happen the week after. I will lay all the parts out and take a photo which will make more sense


Hope that makes sense!

Lawrence 


#604 lawrence

lawrence

    One Carb Or Two?

  • Members
  • PipPipPipPipPipPipPip
  • 1,330 posts

Posted 13 August 2017 - 09:51 PM

Hello again then people,


Been a few days since the last update, I've been on holiday and come back. Been offered a job for when I finish uni which is awesome and have had all the parts I ordered arrive!


So I've got all the clamps and flexies I ordered and dug through my scrap metal bits and so should be able to create something suitable and airtight to remove the exhaust gasses. 


Also finally have got the correct brake pads after having to send some wrongly packaged parts back which took ages.


And I have also received my new headlights that weren't cheap but do look good! Just hoping the indicators will wire up nicely!


So headlights, One fitted

36496664716_a0582cdb26_k.jpg20170812_121614 by Lawrence Balls, on Flickr


And the second

36405346591_6dd74299f8_k.jpg20170812_132010 by Lawrence Balls, on Flickr


Awesome daytime running lights 

35708314494_f6e95e71a0_k.jpg20170812_174541 by Lawrence Balls, on Flickr


They are so bright!

36405340711_2e70502c96_k.jpg20170812_211656 by Lawrence Balls, on Flickr


The beams themselves are really good and have a great cutoff, A flat American style beam but not scattered 


I had to buy new headlights basically as there was no way I could get the wiring to fit in the NS headlamp bowl because of the radiator which is very close behind it, let alone the fact I still had to somehow attach the projector to the bulb unit somehow and seal it to the elements. I wasn't going back to candle beams and these were the next best option!


Lastly and I have to mention it because I promised. Girlfriend bought this

36543072415_eae5c13555_k.jpg20170813_142730 by Lawrence Balls, on Flickr

Newish MINI top spec Cooper SD. Now haters gunna hate I quite like it personally. Its fast and handles well. However the Plastic Chrome is very tacky but luckily she is planning to get it all painted black (good). 


Thats all for now,


Exhausting work coming up soon, then ill have to sort out those bleeding brakes but who knows maybe that will fuel me for the next bit of work and ignite my thinking to get megasquirt finally working ;) #carpuns


Lawrence 


#605 thelegg

thelegg

    Super Mini Mad

  • Members
  • PipPipPipPipPipPip
  • 607 posts
  • Location: Forton

Posted 14 August 2017 - 11:27 AM

Seen those headlights advertised on Facebook I think? They've always tempted me as let's be honest the original lamps and useless. Love the colour of your girlfriends new MINI

#606 lawrence

lawrence

    One Carb Or Two?

  • Members
  • PipPipPipPipPipPipPip
  • 1,330 posts

Posted 14 August 2017 - 08:07 PM

I saw them too and went searching on eBay haha :) I think they suit mini because she's been modernised and modified anyhu so why go back to candle light!!


Right. I didn't do the exhaust I did some bodywork, I hate bodywork. It always reminds me of when I had much to learn and did poor repairs that were structurally fine but look rubbish


firstly I made some brackets to hold the fog lights on and took out the amber ring also.

36175617600_bbadbdbae2_k.jpg20170814_174828 by Lawrence Balls, on Flickr


nice fitting from the front with the seal

36525677946_01fe0f5661_k.jpg20170814_174901 by Lawrence Balls, on Flickr


they look better not amber I think

35762928113_2f1b762da8_k.jpg20170814_174806 by Lawrence Balls, on Flickr


So onto the front seams.

I filled em back in 2012 when the new front end went on. They are seam welded from the back and then tigersealed on the front and back to prevent water ingress. But now look at them :(

36175606520_76ea541570_k.jpg20170814_180024 by Lawrence Balls, on Flickr


OS

36403831422_685f8c65c3_k.jpg20170814_185320 by Lawrence Balls, on Flickr

primed for now

36434143881_d2d2353046_k.jpg20170814_185615 by Lawrence Balls, on Flickr


NS

36403784152_e6fdaea4cb_k.jpg20170814_190024 by Lawrence Balls, on Flickr

rusting under the filler

36572241355_e237fe43f5_k.jpg20170814_190553 by Lawrence Balls, on Flickr


primed

36403784382_4f7827c6b0_k.jpg20170814_195555 by Lawrence Balls, on Flickr


close up

36572228485_0242065a9c_k.jpg20170814_195601 by Lawrence Balls, on Flickr


So I primed em just to protect them and while I have a little think. 

I've got no inner wings on the front so the front end is a little wobbly. 

Not sure what to do with the seams to be honest


Options are

>fill again - will crack but quick and easy

>seam seal and fill - again will crack like this

>fill to remould the front panel and then seam seal - may crack but will be along the sealent line so can be touched up easily, plus then the front will have seams

>lead load the seams - lead is more tolerant to flex and moisture getting in so even if the paint cracks the water won't make its way into the joint - downside is I've never used it before and apparently its a fickle beast to use, plus it'll burn all the sealent off front the back of the joint so that'll need redoing

>Weld the bugger up from the front and fill it - easy peasy , downside is I can never go back to seams but in all honestly I'm not that bothered, its not like I've filled over rust at the end of the day. 


Im leaning towards either lead loading and learning new skill or putting stitch welds in 1cm miss 1cm like that.


Opinions always welcome :)

thats all folks


Lawrence


Edited by lawrence, 14 August 2017 - 08:53 PM.


#607 McMini 22

McMini 22

    Mini Mad

  • Members
  • PipPipPipPip
  • 289 posts
  • Location: East lothian

Posted 14 August 2017 - 11:13 PM

You know the answer is new wings and front panel!
I have in the past made a repair strip with a 1/2 inch fold and formed it by bending and cutting with snips. A fair bit of work but should last a few years if you rust protect it properly.
Lead loading is tricky and the materials ain't cheap. If you can pat your head and rub your tummy you'll be great at it. If not you'll have a burnt hand and a blob of solder on the floor.

#608 Will16

Will16

    Wants a custom member title

  • Members
  • PipPipPipPipPipPipPip
  • 1,090 posts
  • Location: Abingdon, Oxfordshire

Posted 14 August 2017 - 11:47 PM

I like the new headlights and blinkers, suit it well :D If I was you, personally I'd weld the seams from the front, grind back, skim of filler and jobs a goodun!


#609 thelegg

thelegg

    Super Mini Mad

  • Members
  • PipPipPipPipPipPip
  • 607 posts
  • Location: Forton

Posted 15 August 2017 - 12:57 PM

If your not bothered about having seams then just weld them up and then grind it back smooth :) it might burn off the stone chip or seam sealer on the inside but if you don't weld for too long the heat shouldn't build up

#610 lawrence

lawrence

    One Carb Or Two?

  • Members
  • PipPipPipPipPipPipPip
  • 1,330 posts

Posted 15 August 2017 - 06:49 PM

Right then guys, thanks for the comment they are much appreciated and make me think I'm doing the right thing!!

I decided to weld them up in the end, although I've got the stuff for lead loading I just haven't got the time to teach myself a new skill like that, maybe in the future


Ive welded them because they are never going to be a good enough fit to just seam seal them. I'm thinking of doing a flip front for her one day but for now welding will do.


So welded up with multiple tacks 

35756549244_b699d6e3b1_k.jpg20170815_141853 by Lawrence Balls, on Flickr

36545447826_80289a8a28_k.jpg20170815_141857 by Lawrence Balls, on Flickr


ground back

36195203420_5609e15703_k.jpg20170815_143956 by Lawrence Balls, on Flickr

36423228122_51b122d007_k.jpg20170815_144005 by Lawrence Balls, on Flickr


First skim of filler

36591711975_9979361e22_k.jpg20170815_145658 by Lawrence Balls, on Flickr

36195011240_37f749d251_k.jpg20170815_145704 by Lawrence Balls, on Flickr


Second skim

35782423273_7ca554d593_k.jpg20170815_151605 by Lawrence Balls, on Flickr

35782412613_cf948b2353_k.jpg20170815_151609 by Lawrence Balls, on Flickr


And welded up that hole I drilled when I tested moving the arches up

36453794381_793457ffdf_k.jpg20170815_144000 by Lawrence Balls, on Flickr


Its hard to tell in the photos but on the OS I have made a fillet panel a while ago. This links up the wing and front panel and has a bent flange, it was a test to see if it removed the cracking I was getting on the front panel. The NS doesn't have one yet but as there is no cracking on the OS I will make one and weld it in. When I have the welder out I will also make a little bracket to weld to the wing-A panel flange part like the did from standard. This will also help with flexing  in that area.


Plan for tomorrow morning is to do another layer of filler, sand back and then prime. It better not dare crack again now. Interestingly the wing and front panel have alot less flex in the now and feel more rigid


thats all for now

Lawrence


#611 benm

benm

    Mini Mad

  • Noobies
  • PipPipPipPip
  • 111 posts
  • Location: S.Wales

Posted 15 August 2017 - 06:53 PM

careful with filling the front seams, they can crack with stresses, i filled mine and they cracked just with the mini being off the road and being worked on


#612 lawrence

lawrence

    One Carb Or Two?

  • Members
  • PipPipPipPipPipPipPip
  • 1,330 posts

Posted 15 August 2017 - 08:37 PM

I know that too well ben :( I'm hoping this time they will not as they are seam welded internally and externally now! Got my fingers crossed

#613 lawrence

lawrence

    One Carb Or Two?

  • Members
  • PipPipPipPipPipPipPip
  • 1,330 posts

Posted 16 August 2017 - 08:34 PM

Right people, little update from today


Firstly I made my filler panel on the NS, simple flat bit of metal which I then bent up to give a lip. I lap welded it for extra rigidity also. Seam sealed the back.


More fillering

35778527144_8f82c3acd5_k.jpg20170816_180108 by Lawrence Balls, on Flickr

36567365006_edbd4a9504_k.jpg20170816_180103 by Lawrence Balls, on Flickr


Tiger sealed the back of the lip as well as the new fog lights too

36567374026_aedf77fe40_k.jpg20170816_171836 by Lawrence Balls, on Flickr

same both sides but only the one photo


primer

36613769235_9456c23ae0_k.jpg20170816_181221 by Lawrence Balls, on Flickr

36475803281_1ee81e12d1_k.jpg20170816_181228 by Lawrence Balls, on Flickr

36567326396_fa51d80a03_k.jpg20170816_181233 by Lawrence Balls, on Flickr
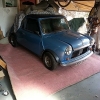
 

So the fillering isn't the best but meh, neither is the paint job but that doesn't bother me.


Painty paint

36444848432_5f9d9e6e97_k.jpg20170816_185225 by Lawrence Balls, on Flickr

36475737181_9832133797_k.jpg20170816_185233 by Lawrence Balls, on Flickr


and bonnet back on, and fitted the fog lights too. 

36217220280_0b06b38a43_k.jpg20170816_192331 by Lawrence Balls, on Flickr


ill pop the lights back in tomorrow. Does look alot better tho. All different shades of white but meh, ill roller it all sometime when I get some more paint.

Lawrence


#614 lawrence

lawrence

    One Carb Or Two?

  • Members
  • PipPipPipPipPipPipPip
  • 1,330 posts

Posted 17 August 2017 - 02:28 PM

Right people,

Little bit done this morning, im doing uni work this afternoon so couldn’t be in the garage all day. It was raining all morning so did a few bits inside, haven’t put the lights back, did repair the light bowls but never took a photo.


Photo of that filler panel from yesterday

36491213451_2b037f92b9_k.jpg20170816_094241 by Lawrence Balls, on Flickr

should add a bit of rigidity.


So today, whilst tidying the back desk of the garage to start the exhaust I found the cruise control from before so spent this morning playing with that instead


Nice tidy work area!

36582980376_df491b8f0a_k.jpg20170817_104304 by Lawrence Balls, on Flickr


Mocked up the bracket on the carbs.

36460192832_3de91dd083_k.jpg20170817_111545 by Lawrence Balls, on Flickr


broke the silly spring thing

36460182722_74ea16b619_k.jpg20170817_114001 by Lawrence Balls, on Flickr

Called starlocks incase anyone is interested, ive ordered a box. Took me ages to find the name of them!


Now for the faffy bit. Need to make the cable guide. So used the old outer from the speedo drive of my old bike (That previously was used for the throttle cable before I replaced it)


Had to drill out a 8mm thread once I had found some long enough, faff of a job


So thread welded to a steel sleeve

35794162574_83c4533794_k.jpg20170817_114918 by Lawrence Balls, on Flickr


ground a hole for plug welding and peeled back some insulation

35794179444_0295fe1e94_k.jpg20170817_115033 by Lawrence Balls, on Flickr


welded, ground back and painted, another quality paint job here!

36232565240_a99ac11eed_k.jpg20170817_115303 by Lawrence Balls, on Flickr


and covered with heatshrink

36582905516_1cbf05da1b_k.jpg20170817_115626 by Lawrence Balls, on Flickr

did the same the other end, use your imagination


making the bracket

36629196175_4f1079102c_k.jpg20170817_121955 by Lawrence Balls, on Flickr


painted

36582885586_d169665711_k.jpg20170817_122737 by Lawrence Balls, on Flickr


fitted

35820033483_c1e56419f3_k.jpg20170817_123855 by Lawrence Balls, on Flickr


And ready to go on the car

35820046633_78e03e8335_k.jpg20170817_130518 by Lawrence Balls, on Flickr


and fitted

36629134615_3756b6b8fa_k.jpg20170817_131604 by Lawrence Balls, on Flickr

its bolted to the back of the cylinder head. Ill make the bracket smaller when it next comes off as its bigger than it needs to be.


It a simple electromagnetic lock that will hold the throttle at the position when its turned on. Plan is it wire it to a momentary push button that ill mount to the steering wheel where I put my hands when im cruising. Momentary button will be wired to a remote control so the button will be wireless.


I will also have a manual on and off switch underneath the dash. Meaning if the worst happens and for some reason the steering wheel switch sticks, or the remote stays stuck on on or the relay in the receiver sticks or whatever I can cut the power to all of it. And if everthing fails which will never happen I just put my foot on the clutch and cut the engine, sorted

Exhaust being done sometime soon J

Lawrence


#615 lawrence

lawrence

    One Carb Or Two?

  • Members
  • PipPipPipPipPipPipPip
  • 1,330 posts

Posted 18 August 2017 - 01:42 PM

Good afternoon,

Its time for this mornings small update before I get my uni work started


Repaired headlights from yesterday

36510586361_1670dec940_k.jpg20170818_091748 by Lawrence Balls, on Flickr


fitted with allen heads bolts

36252484780_30745e7846_k.jpg20170818_090650 by Lawrence Balls, on Flickr


bit of protection to stop the grill rubbing off the new paint

36510575111_93e21ecaa2_k.jpg20170818_101648 by Lawrence Balls, on Flickr


Bonnet off to fiberglass the holes up

36602095636_c97c42de18_k.jpg20170818_114324 by Lawrence Balls, on Flickr


I detest fiberglass, its horrible, its sticky and it doesn’t do what you want it to do and I avoid it where I can


Clean up and roughed the surfaces that need fixing

35839530053_3006b1bf6a_k.jpg20170818_114328 by Lawrence Balls, on Flickr

35839520393_85cdb330a4_k.jpg20170818_114329 by Lawrence Balls, on Flickr


one layer applied on the back

36252454500_7da977827b_k.jpg20170818_115320 by Lawrence Balls, on Flickr

36252423940_f58364ab82_k.jpg20170818_120509 by Lawrence Balls, on Flickr


bit seethrough

36648658625_3267788122_k.jpg20170818_115330 by Lawrence Balls, on Flickr


and flipped over and filled the front

36601994436_822eef2156_k.jpg20170818_123149 by Lawrence Balls, on Flickr


Just need to sand the front back, layer of filler, primer and paint. Out of white paint tho currently


And how ive left her for today

36252422050_18b3694110_k.jpg20170818_123209 by Lawrence Balls, on Flickr


Ive Been shopping online also, got some white versions of the front fogs so now ill be able to wire them in, bought some waterproof connectors for the wiring for them and ive found some new inlet manifold rubbers to replace the cracked ones that I used for mocking the manifold up (must remember to make a inlet manifold gasket also!)


That’s all for now folks, might do an update tomorrow pm, depends how I get on with my work today! It so nice to see the front looking in reasonable condition tho!!


Lawrence


2 user(s) are reading this topic

0 members, 2 guests, 0 anonymous users