Jump to content


Photo
- - - - -

Project Erm


  • Please log in to reply
834 replies to this topic

#61 sonikk4

sonikk4

    Twisted Paint Polisher!!!

  • Admin
  • PipPipPipPipPipPipPipPipPipPipPip
  • 15,998 posts
  • Name: Neil
  • Location: Oxfordshire

Posted 02 February 2010 - 07:27 PM

Posted Image


by the way sorry to sound a bit of a pleb but what are those things you used in the above picture? Where they to help line it up? (I'm an amateur when it comes to welding)


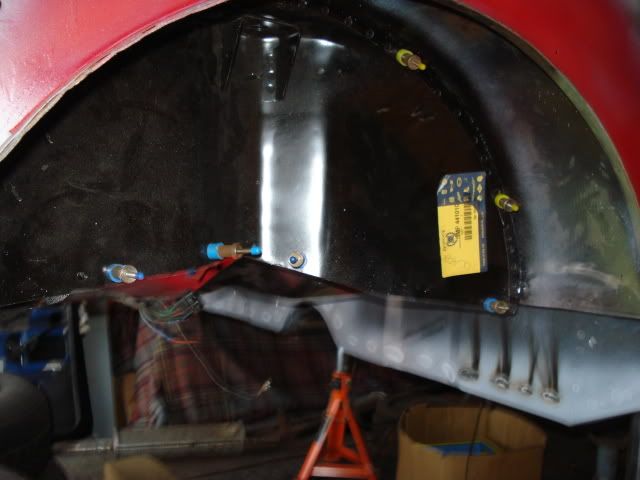
Hi they are called skin pins and we use these in the aviation world when we do skin repairs. Those particular ones in the picture are 5/32 (the blue plastic denotes the size) and 1/8th the yellow ones.

They are good but when you weld near them they have a habit of melting. If you have a look on ebay under skin pins you will find a metal variety (called cleco) but these need special pliers to insert and remove.

Yes i do use them to line up all my panels along with clamps prior to tacking everything in place. They are very easy to use plus when you have removed them just plug weld the hole. You can get them in various sizes 3/32 up to a 1/4 and there are bigger ones but no use on cars. :(

I'm Projects Erms welder, Scotts dad Neil

#62 Twincam

Twincam

    Camshaft & Stage Two Head

  • Members
  • PipPipPipPipPipPipPipPip
  • 1,742 posts
  • Location: Londinium
  • Local Club: SMAG

Posted 02 February 2010 - 09:48 PM

Hi they are called skin pins and we use these in the aviation world when we do skin repairs. Those particular ones in the picture are 5/32 (the blue plastic denotes the size) and 1/8th the yellow ones.

They are good but when you weld near them they have a habit of melting. If you have a look on ebay under skin pins you will find a metal variety (called cleco) but these need special pliers to insert and remove.

Yes i do use them to line up all my panels along with clamps prior to tacking everything in place. They are very easy to use plus when you have removed them just plug weld the hole. You can get them in various sizes 3/32 up to a 1/4 and there are bigger ones but no use on cars. :(

I'm Projects Erms welder, Scotts dad Neil


Thanks Neil :mrcool:

I'll deff have to look into them (I know I'm going to be welding mine soon!)

#63 scsracing

scsracing

    Mini Mad

  • Members
  • PipPipPipPip
  • 276 posts
  • Location: Eastbourne

Posted 03 February 2010 - 08:41 PM

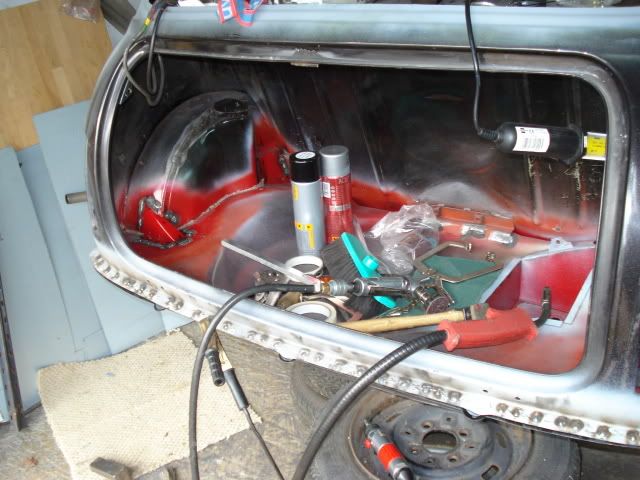
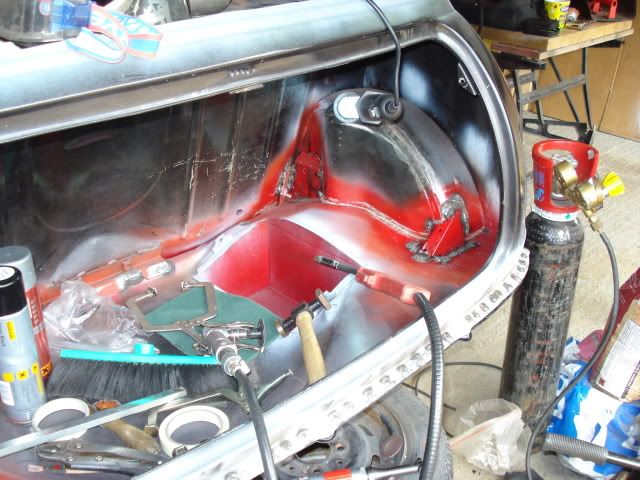
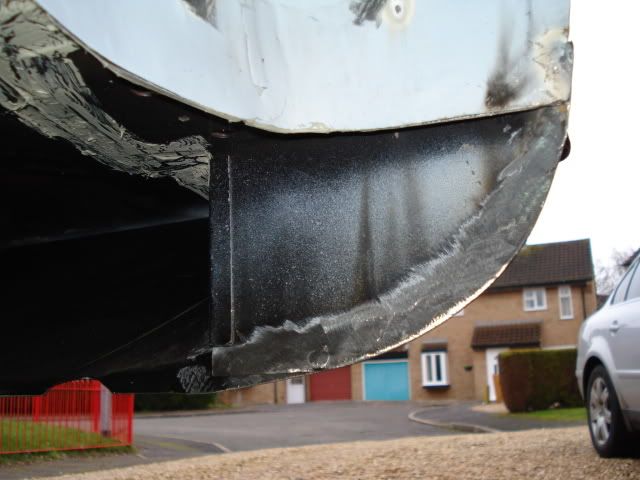
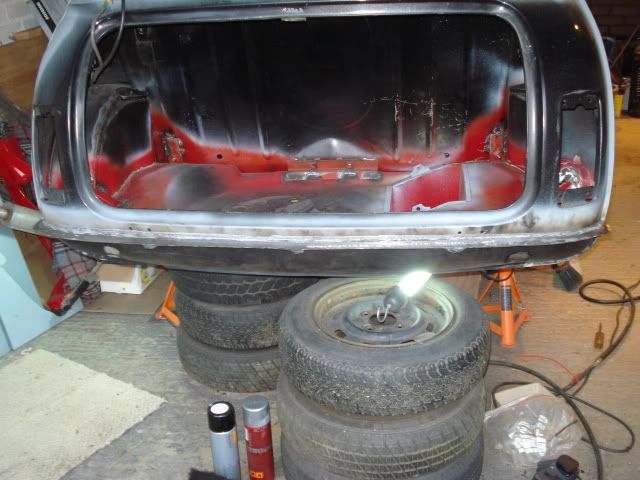
Well my dad spent 7 1/2 hours today welding,grinding and more welding.A few problems with welding on the rear valance and the welds only going through two layers and not three.So holes were drilled and the power cranked up on the welder sorted that out :D

The rear arch supports have been welded in along with the valance close out panels and the rear valance plus grinding down miles of welds in some places that weren't done before.

The seam sealer is terrible and must of reacted with the paint as it has all split but that problem will be sorted shortly.

This is basicly the rear end of the car done bar fitting the full tank mount(tomorrow) and painting/seam sealing.

Next up will be the rear seat pan support strip/companion bin and top of arches on the inside.

Piccy's

Posted Image

Posted Image

Posted Image

Posted Image

#64 scsracing

scsracing

    Mini Mad

  • Members
  • PipPipPipPip
  • 276 posts
  • Location: Eastbourne

Posted 04 February 2010 - 04:54 PM

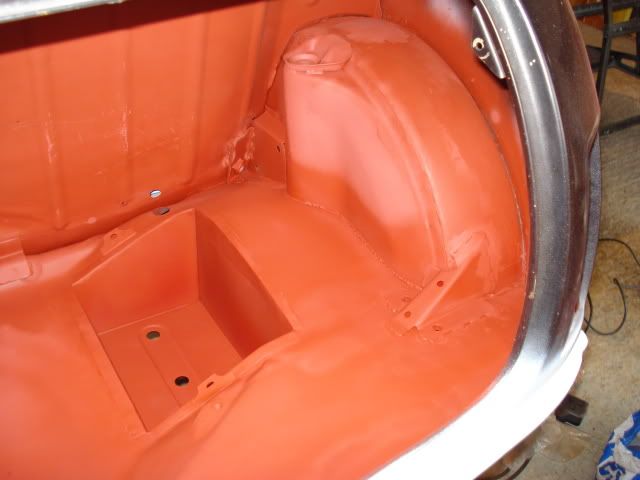
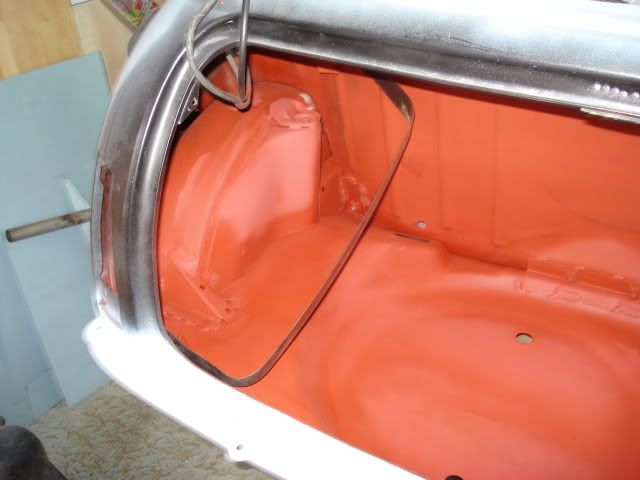
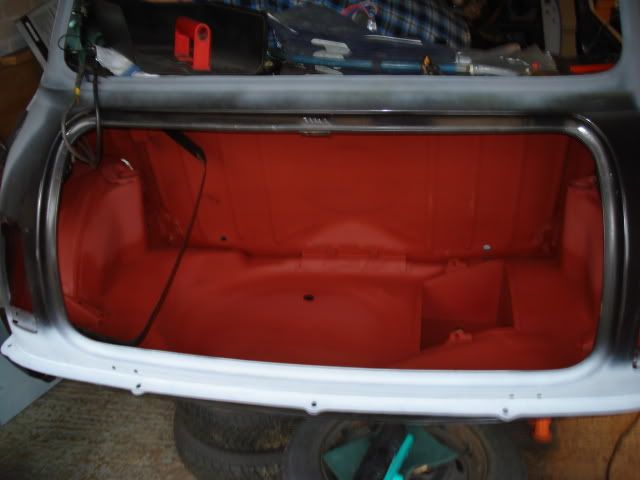
Boot sprayed in some red primer now,just needs seam sealing and painting.

Posted Image

Posted Image

Posted Image

Thats one big stage done now :D

#65 scsracing

scsracing

    Mini Mad

  • Members
  • PipPipPipPip
  • 276 posts
  • Location: Eastbourne

Posted 12 February 2010 - 07:24 PM

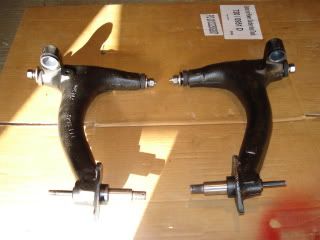
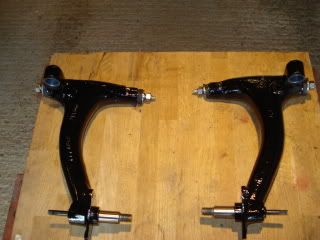
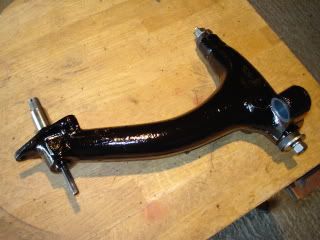
Not a lot done this week but my Dad got these from Gerald Dale's in Ninfield

Posted Image

After he sprayed them with Hammerite

Posted Image

Posted Image

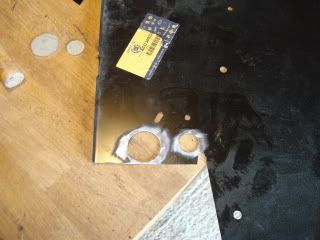
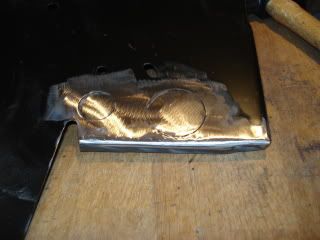
He had to modify the l/h companion box from Heritage and also fill two redundant holes, before

Posted Image

after including chopping back the flange by the holes by 1/4 " and filling the two holes,

Posted Image

He will be welding it in Saturday and then we are jumping to the front of the car to take of the front panel, wings and remaining A panel. :)

#66 scsracing

scsracing

    Mini Mad

  • Members
  • PipPipPipPip
  • 276 posts
  • Location: Eastbourne

Posted 13 February 2010 - 07:34 PM

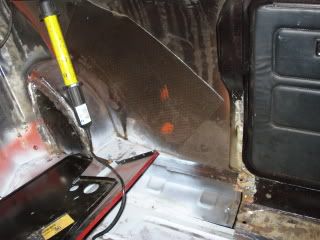
Old l/h companion box gone, the bottom was rotten

Posted Image

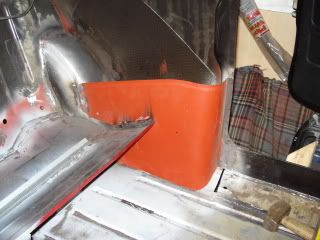
New one welded in.

Posted Image

Now for the front, we will do the remainder of the l/h inner sill and front floor panel later.

#67 veit

veit

    Starting My Mini Up

  • Noobies
  • Pip
  • 3 posts

Posted 18 February 2010 - 07:57 PM

Now for the shiny bits

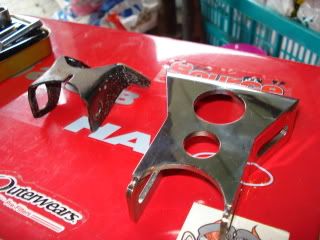
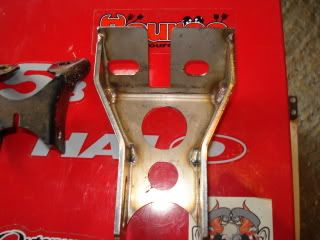
Got this steering rack bracket for lowering the rack,not mine but will hopefully be getting on some.Its a monster and much better than the other ones you can by,made from stainless steel and solid.

Posted Image

Posted Image


If you need such a lowering rack, maybe I know how to get them :unsure:

http://www.veitsworl... ...HTL) 01.jpg


Greets
Veit

#68 scsracing

scsracing

    Mini Mad

  • Members
  • PipPipPipPip
  • 276 posts
  • Location: Eastbourne

Posted 18 February 2010 - 10:02 PM

Now for the shiny bits

Got this steering rack bracket for lowering the rack,not mine but will hopefully be getting on some.Its a monster and much better than the other ones you can by,made from stainless steel and solid.

Posted Image

Posted Image


If you need such a lowering rack, maybe I know how to get them :thumbsup:

http://www.veitsworl... ...HTL) 01.jpg


Greets
Veit


Thanks for that veit.I can get one as the one is the photo was on loan to me just to see if it fitted.

Bet we get it from the same person :unsure: .Although maybe not so if I fail to get one then wILL have to contact you and see where you got yours from.

Edited by scsracing, 18 February 2010 - 10:05 PM.


#69 veit

veit

    Starting My Mini Up

  • Noobies
  • Pip
  • 3 posts

Posted 19 February 2010 - 07:01 PM

Bet we get it from the same person :shifty: .Although maybe not so if I fail to get one then wILL have to contact you and see where you got yours from.


You will loose this bet >_<

Because the one shown here ..... it was originally black powder coated and made in Germany :)

If you´ll get yours, be happy, if not, contact me.
There´s a parts shop here in germany this guy bought the rest of the 50 peaces which had been produced by a machine schop for me....

or take a look at this
http://cgi.ebay.de/H...=item2558f2c168

#70 scsracing

scsracing

    Mini Mad

  • Members
  • PipPipPipPip
  • 276 posts
  • Location: Eastbourne

Posted 19 February 2010 - 08:45 PM

Bet we get it from the same person :shifty: .Although maybe not so if I fail to get one then wILL have to contact you and see where you got yours from.


You will loose this bet :)

Because the one shown here ..... it was originally black powder coated and made in Germany :cry:

If you´ll get yours, be happy, if not, contact me.
There´s a parts shop here in germany this guy bought the rest of the 50 peaces which had been produced by a machine schop for me....

or take a look at this
http://cgi.ebay.de/H...=item2558f2c168


I am not sure who they came from as it's a friend on my dad who can get them so haven't got a clue where there from.Thought they might be from the same place though as there a pretty unique design and both of ours seem pretty dam similar.Anyway its a long time before i will worry about steering rack mounts >_<

Edited by scsracing, 19 February 2010 - 09:01 PM.


#71 scsracing

scsracing

    Mini Mad

  • Members
  • PipPipPipPip
  • 276 posts
  • Location: Eastbourne

Posted 19 February 2010 - 09:00 PM

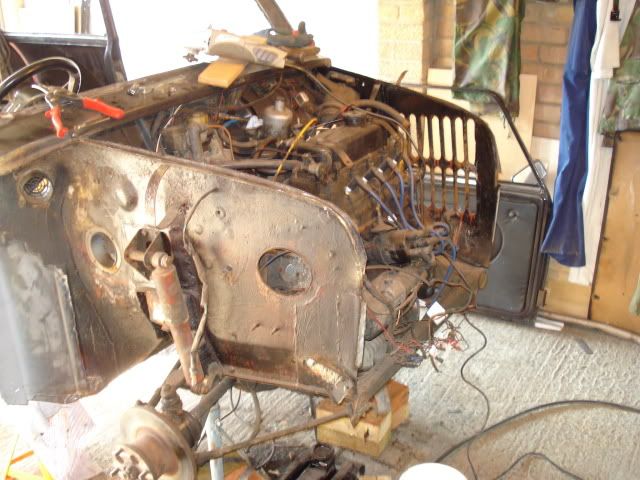
Update again.

Dad has a month off so plan is too sort the front end out,so basicly chopping it all off and putting all new parts on.

New parts require for the front panel wise,

2 genuine complete inner wings
Front end panel
2 outer wings
2 scuttle closing pannels
Bonnet
2 scuttle repair section

Thankfully the scuttle is in good condition apart from the lower window lip part but seeing as a genuine scuttle is nearly £90 and the damage is only a tiny part we will be buying just the end repair sections as only need the lower lip corners of the window frame.

Some of the pannels are just terrible with more patches than original material :shifty:

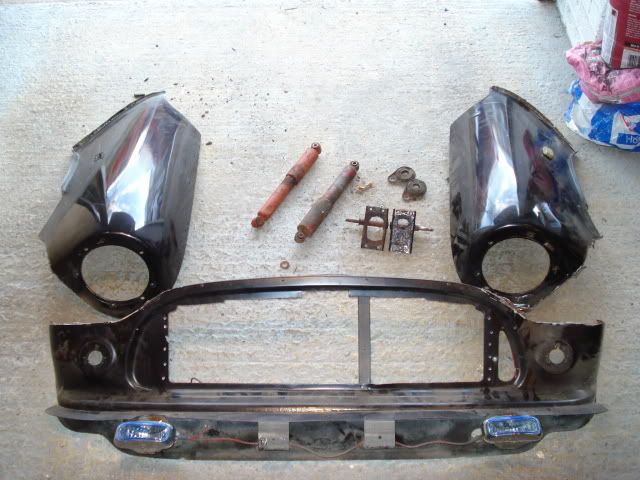
Wings and front panel off.

Posted Image

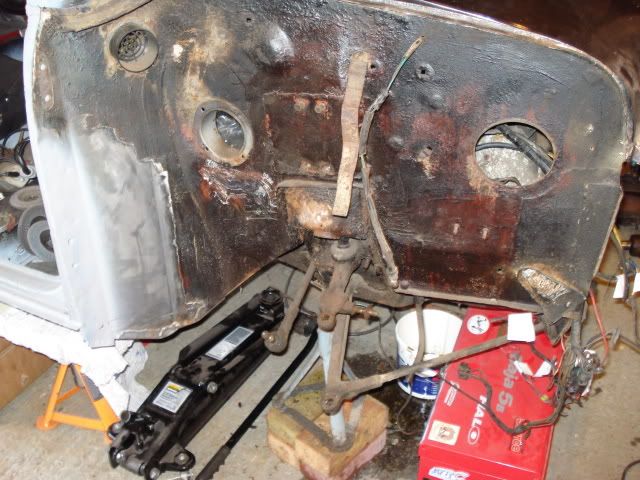
With the wings off all the bad parts started to show :)

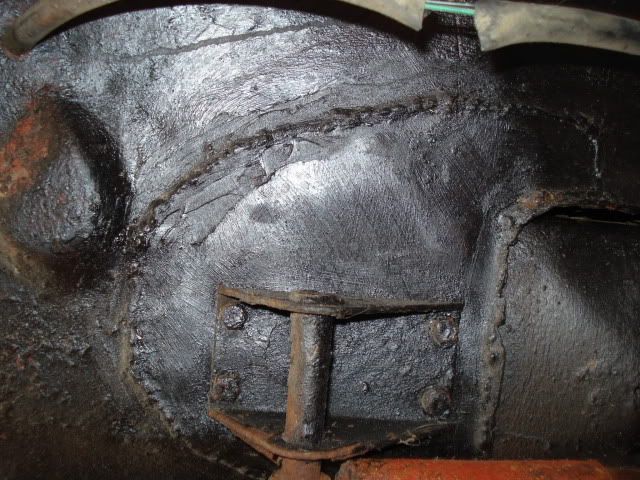
Some crusty old shock mount attached to some more patches.
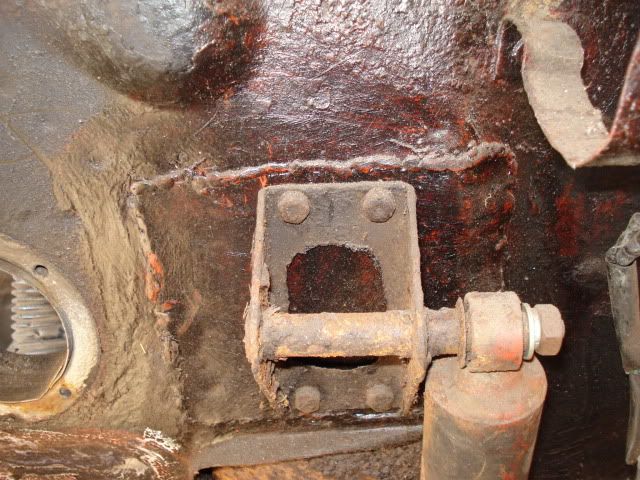
Posted Image

The two shock mounts had huge holes in them so they went straight in the bin
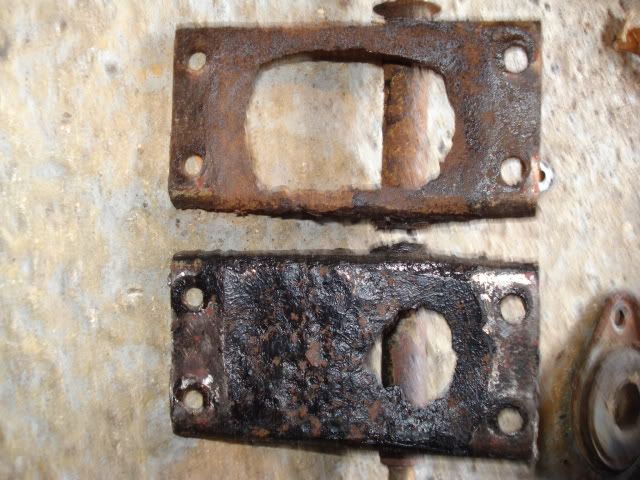
Posted Image

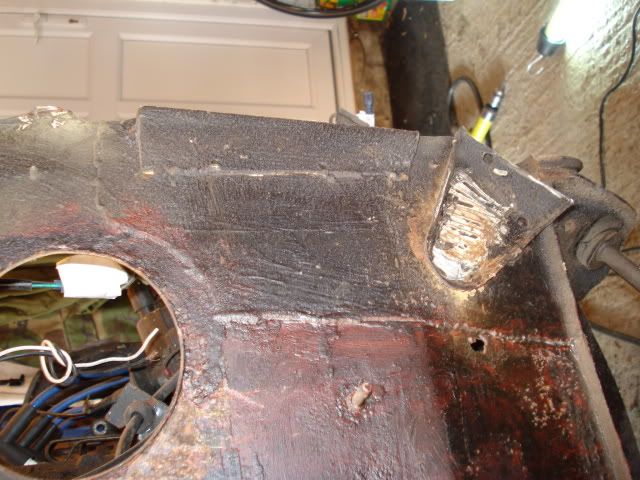
All the horrible patches

Posted Image

Posted Image

Posted Image

Posted Image

Posted Image

The shocks either side where held on my completely different nuts.Plus a massive chunk out of the thread on the mount.
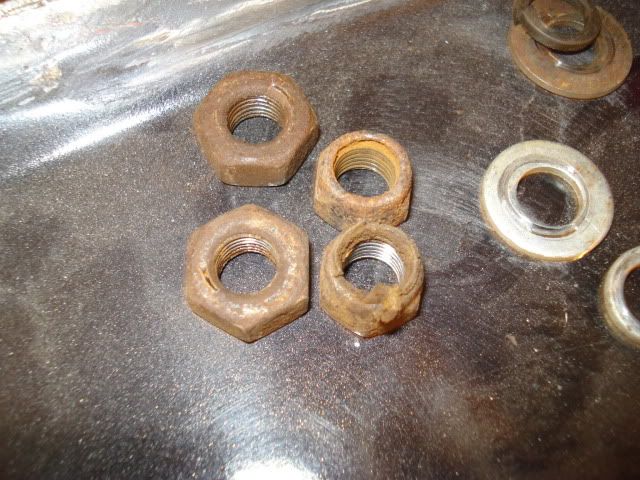
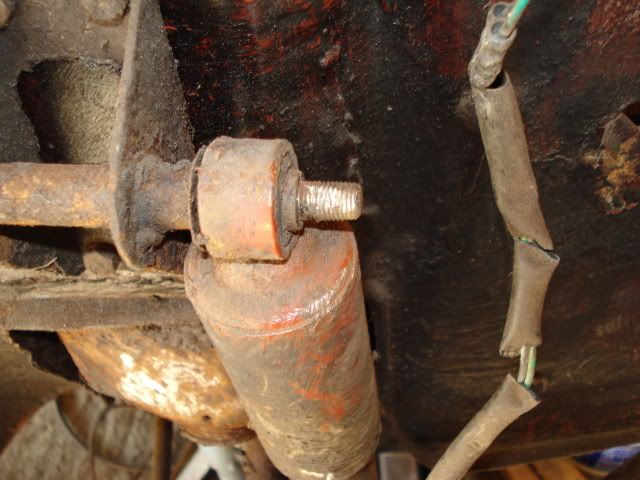
Posted Image

Posted Image

The ball joints where so tight and we managed to strip the thread on the ball joint breaker so that another job for my dad to fix when he gets some time as a new one isn't cheap.

The right hand drive shaft came off lovely with only alittle rust on the outside which is easy to sort.But the left.Its was drier than gandi's fliflop.The grease but must of been the same factory grease and had just completely dried up and ruined the joint.
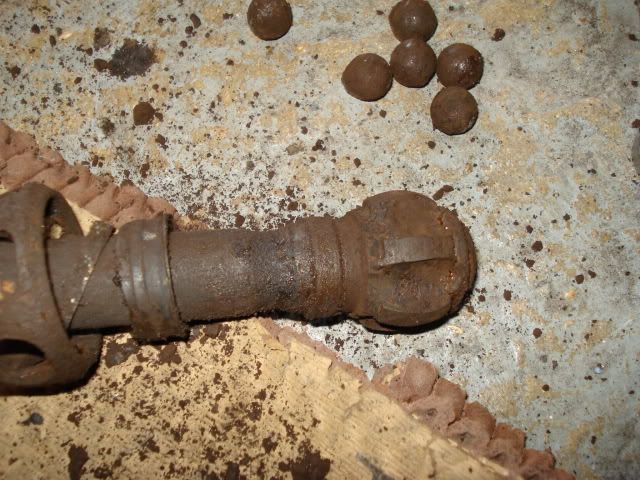
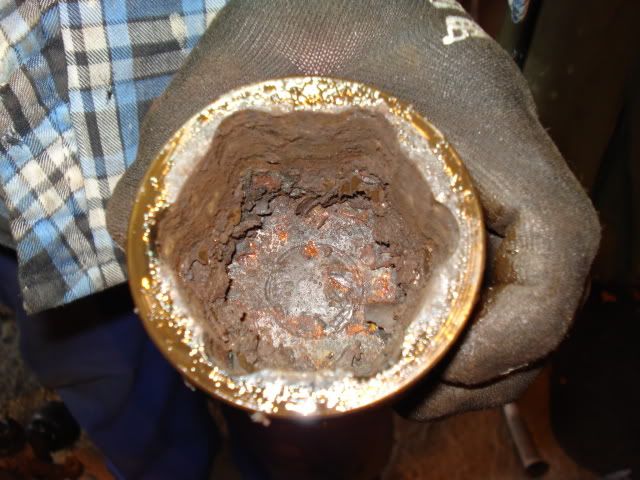
Posted Image

Posted Image

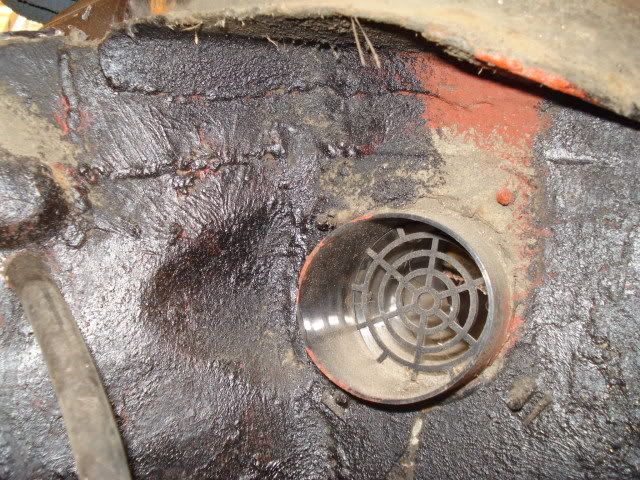
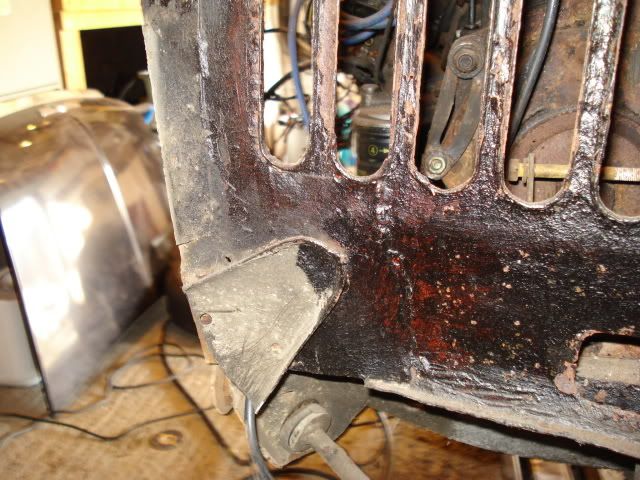
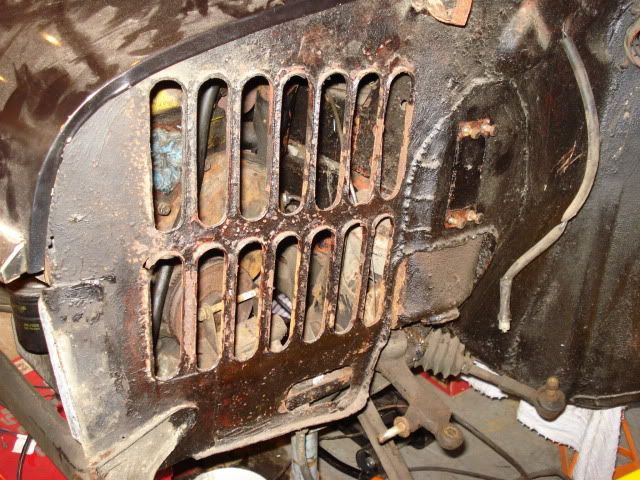
The left hand inner wing is really crusty around the vents and they just push out with a little pressure from your hand.
Posted Image

Smile!!!!!!

Posted Image

On sunday we should be borrowing a engine hoist off a friend so we can get the engine out.Once its out subframe and all the suspension parts should be getting bead blasted then powder coated in due course.

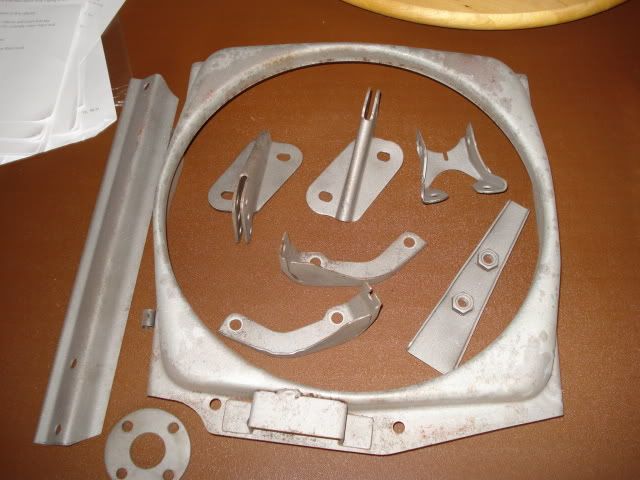
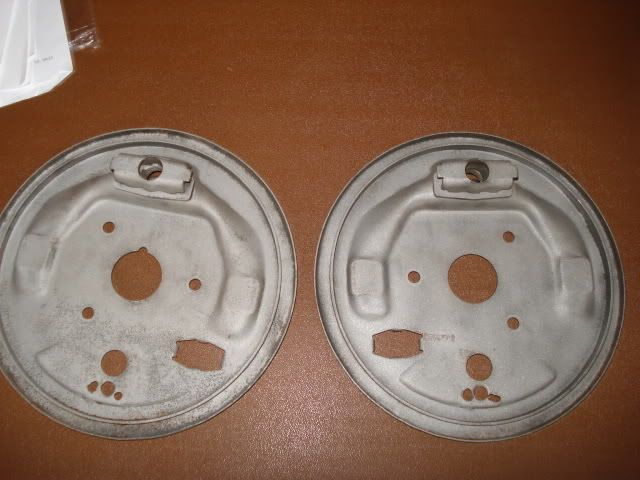
A few parts which were bead blasted by my uncle.There at the powder coaters now as i need the backplate to build the rear subframe
Posted Image

Posted Image

Now i get to go order lots of parts from minispares to keep my dad busy for the next month >_<

Edited by scsracing, 19 February 2010 - 09:08 PM.


#72 scsracing

scsracing

    Mini Mad

  • Members
  • PipPipPipPip
  • 276 posts
  • Location: Eastbourne

Posted 19 February 2010 - 10:28 PM

Right this is the basket so far

  • INNER WING L/H COMPLETE
  • INNER WING R/H COMPLETE
  • FRONT PANEL LATE RUBBER MOUNTED 1976on
  • WING FRONT L/H WITH SIDE IND,NON GEN EXCEPT DIPPING H/LAMPS
  • WING FRONT R/H 1988 ON NON GEN EXCEPT DIPPING HEADLAMP CARS
  • SUPPORT PANEL W/SCREEN CORNER R/H
  • WINDSCREEN CORNER PANEL R/H
  • SUPPORT PANEL W/SCREEN CORNER L/H
  • WINDSCREEN CORNER PANEL L/H
  • HINGE A PANEL MK3 RH
  • HINGE A PANEL MK3 LH
  • FRONT FLOOR PAN R/H PRESHAPED
  • FRONT FLOOR PAN L/H PRESHAPED
  • DOOR STEP SHAPED PANEL MK3 LH
  • DOOR STEP SHAPED PANEL MK3 RH
  • SHOCK ABSORBER TOP BRACKETS FOR LOWERED SUSPENSION
  • Rear Brake Adjuster kit
  • Handbrake Lever set, pair
  • Rear wheel Bearing Kit - Taper Roller type - Drum, 1959-01

Scary thing is this is mostly pannels,dreading all the other parts i still need to get >_< .Minis are expensive little things :shifty:

Edited by scsracing, 19 February 2010 - 10:29 PM.


#73 jayare

jayare

    Up Into Fourth

  • TMF+ Member
  • PipPipPipPipPipPipPipPipPip
  • 2,093 posts

Posted 20 February 2010 - 12:28 AM

Thankfully the scuttle is in good condition apart from the lower window lip part but seeing as a genuine scuttle is nearly £90 and the damage is only a tiny part we will be buying just the end repair sections as only need the lower lip corners of the window frame.


If you are spending the money on a pair of complete inner wings, I'd spend the extra and get a full scuttle - I've just had the same type of should I, shouldn't I dilemma with my estate but decided that as the rest of my front-end panels were going to cost me £500+ I may as well get the full scuttle. The end result will be MUCH better - all of the scuttle corners I've seen are all a rubbish fit!

JR

Edited by jayare, 20 February 2010 - 12:31 AM.

#74 scsracing

scsracing

    Mini Mad

  • Members
  • PipPipPipPip
  • 276 posts
  • Location: Eastbourne

Posted 20 February 2010 - 10:55 AM

Thankfully the scuttle is in good condition apart from the lower window lip part but seeing as a genuine scuttle is nearly £90 and the damage is only a tiny part we will be buying just the end repair sections as only need the lower lip corners of the window frame.


If you are spending the money on a pair of complete inner wings, I'd spend the extra and get a full scuttle - I've just had the same type of should I, shouldn't I dilemma with my estate but decided that as the rest of my front-end panels were going to cost me £500+ I may as well get the full scuttle. The end result will be MUCH better - all of the scuttle corners I've seen are all a rubbish fit!

JR


I can see where your coming from but the ends aren't being replaced.I was going to get one but apon inspection the scuttle is perfect and after spending nearly £500 on panels for the front and some other little bits another £90 for a scuttle is something i can't afford at the moment.Also the scuttle has been replaced recently anyway.

The scuttle corners are actually for replacing the windscreen lip.We are just going to cut them off and it would seem stupid buying a £90 scuttle to cut the lip off of it.My dad would of probably just made the lip from scratch but the ends were only £5 each so saves some time.

#75 jayare

jayare

    Up Into Fourth

  • TMF+ Member
  • PipPipPipPipPipPipPipPipPip
  • 2,093 posts

Posted 20 February 2010 - 11:49 PM

I see - yes making the windscreen lip up from scratch would be a pain! If the repairs don't have enough metal in them, I have the scuttle I cut off mine still in the garage which was carefully removed by drilling out the spot welds which you could have if you can pick it up,

JR


4 user(s) are reading this topic

0 members, 4 guests, 0 anonymous users