Jump to content


Photo
- - - - -

Project Erm


  • Please log in to reply
834 replies to this topic

#211 vaughn1

vaughn1

    Mini Mad

  • Members
  • PipPipPipPip
  • 194 posts

Posted 24 July 2010 - 09:32 PM

ah right that clears things up for me, it was the outer by the way, i have already welded up the jacking points as i dont want them but that has really cleared things up for me at the heelboard end so thank you :)

vaughn

#212 sonikk4

sonikk4

    Twisted Paint Polisher!!!

  • Admin
  • PipPipPipPipPipPipPipPipPipPipPip
  • 15,998 posts
  • Name: Neil
  • Location: Oxfordshire

Posted 29 July 2010 - 06:28 PM

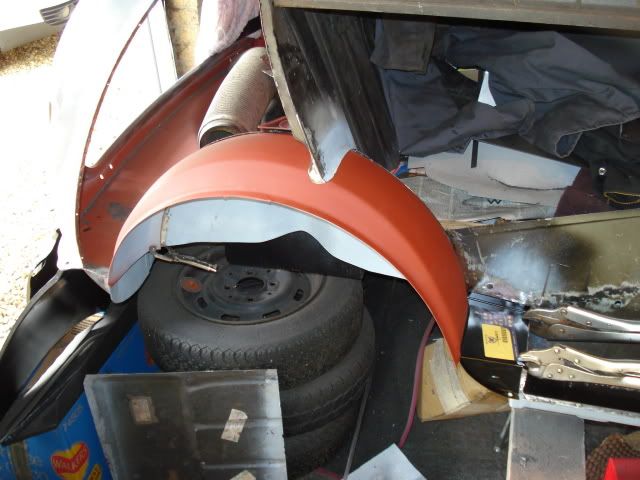
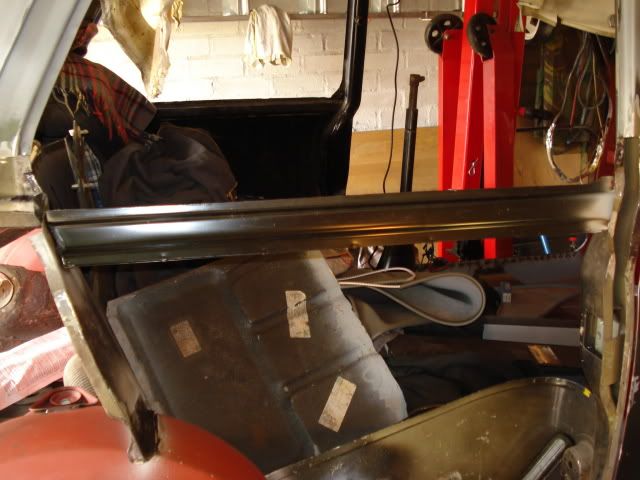
Busy day today, removed the old r/h hand inner arch outer section and pinned in the new section.
Posted Image

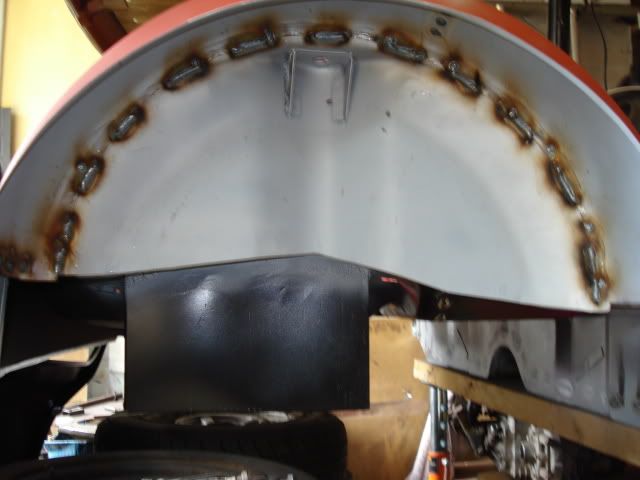
New one welded in place
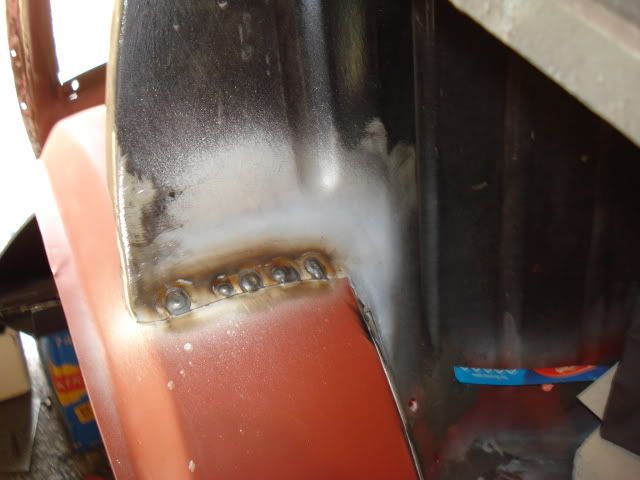
Posted Image
Posted Image

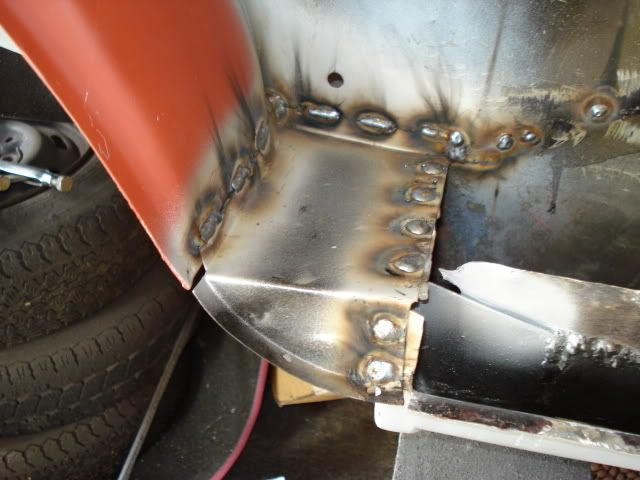
New closing panel installed
Posted Image

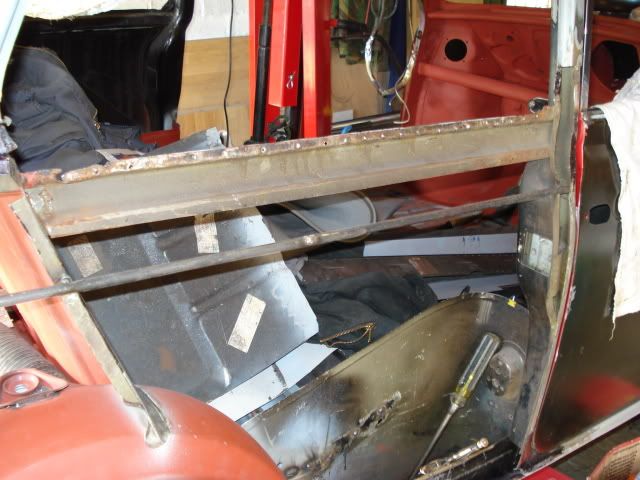
Waist rail bracing in place ready for rail replacement
Posted Image

New waist rail installed
Posted Image

Everything will be ground down tomorrow treated and painted.

#213 Brams96

Brams96

    Up Into Fourth

  • Members
  • PipPipPipPipPipPipPipPipPip
  • 2,308 posts
  • Local Club: Kentish Mini Club

Posted 30 July 2010 - 02:02 PM

Awesome thread dude. Your dad's a legend with that welder!!

#214 scsracing

scsracing

    Mini Mad

  • Members
  • PipPipPipPip
  • 276 posts
  • Location: Eastbourne

Posted 30 July 2010 - 06:10 PM

Cheers for that, i would have been truly stuffed if he couldn't weld as i haven't learnt to yet! anyway he was busy today finishing off the grinding and prep work for fitting the rear quarter next week.

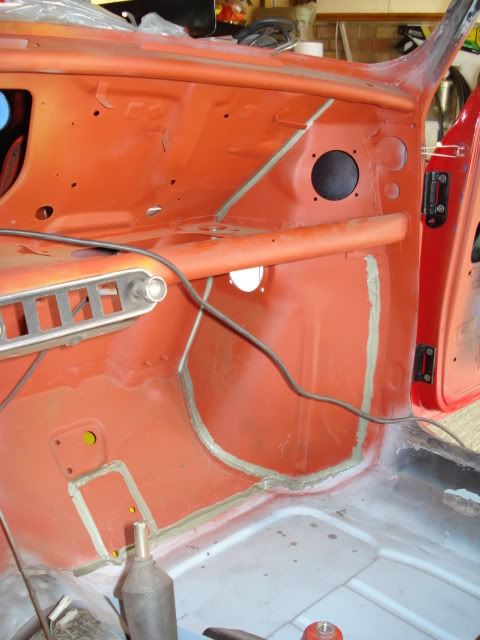
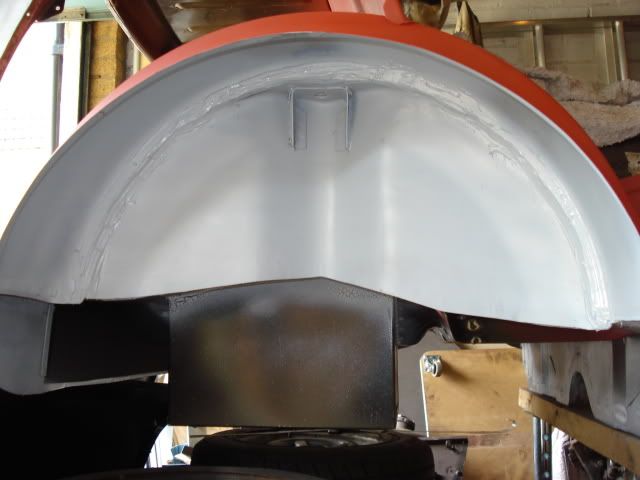
New arch welding ground down, sealed and primed
Posted Image

Both sides of the front bulkhead and floor sealed
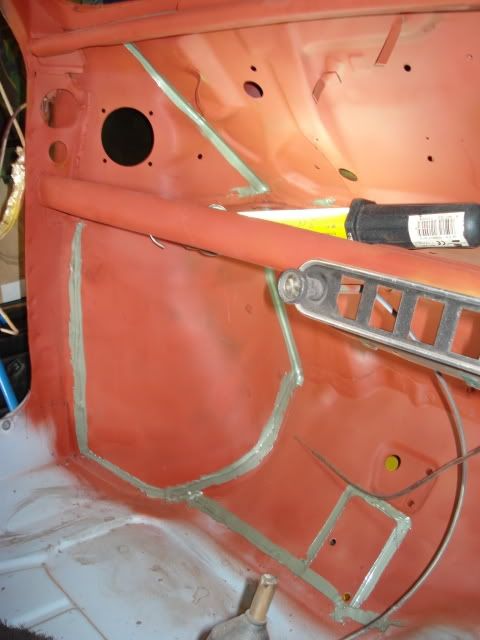
Posted Image
Posted Image

All primed and top coated ready for the rear quarter
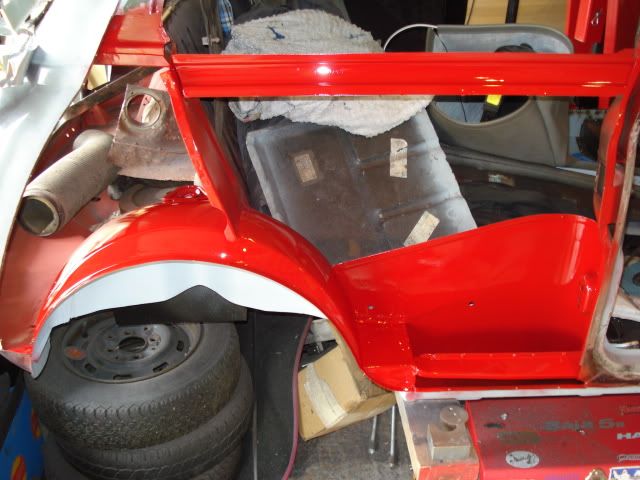
Posted Image

Edited by scsracing, 30 July 2010 - 06:21 PM.


#215 deemo

deemo

    Mini Mad

  • Members
  • PipPipPipPip
  • 185 posts
  • Local Club: LCMOC

Posted 30 July 2010 - 07:26 PM

Oooh shiny

Wow, what an epic weldathon! Really good to see the both of you are doing a proper job of this. It's going to be amazing when it's done.

#216 sonikk4

sonikk4

    Twisted Paint Polisher!!!

  • Admin
  • PipPipPipPipPipPipPipPipPipPipPip
  • 15,998 posts
  • Name: Neil
  • Location: Oxfordshire

Posted 30 July 2010 - 08:00 PM

Oooh shiny

Wow, what an epic weldathon! Really good to see the both of you are doing a proper job of this. It's going to be amazing when it's done.


Cheers for your comments, a weldathon sort of sums it up really, epic definitely, the paint does shine, not bad for rattle cans at least by doing all this i can guarantee paint has got to all those hard to get places and hopefully keeping the rust bug away.

Although Scott has not done a lot he is working his socks off paying for all the panels and other shiney goodies that will be fitted later this year. Defo a father son project.

#217 scsracing

scsracing

    Mini Mad

  • Members
  • PipPipPipPip
  • 276 posts
  • Location: Eastbourne

Posted 05 August 2010 - 06:12 PM

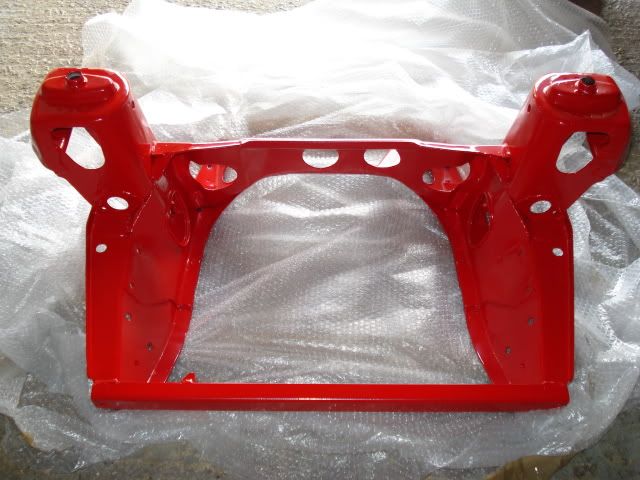
Received the front end parts from the powder coaters today,was'nt the cheapest of jobs but the finish is good with only a few bad spots.

Posted Image

The extra welds my dad did aren't visible and have come out well :mmkay:
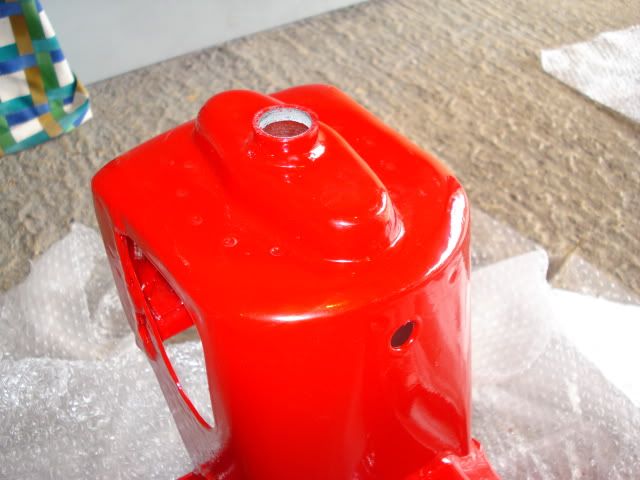
Posted Image

The hubs,flanges and other small parts.
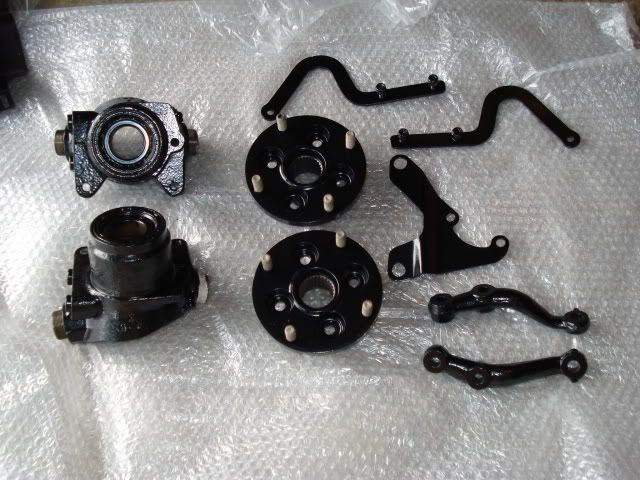
Posted Image

#218 miniallsort

miniallsort

    Up Into Fourth

  • Members
  • PipPipPipPipPipPipPipPipPip
  • 4,723 posts

Posted 05 August 2010 - 07:29 PM

looks great

#219 DaveJH

DaveJH

    Speeding Along Now

  • Members
  • PipPipPipPipPip
  • 393 posts

Posted 05 August 2010 - 10:01 PM

Wow, such a good job being done here. I'll be keeping my eye on this one :mmkay:

#220 c.reading69

c.reading69

    Stage One Kit Fitted

  • Noobies
  • PipPipPip
  • 64 posts
  • Local Club: not yet...hopefully soon

Posted 09 August 2010 - 01:07 PM

can i hire your dad to do the boot floor and lh sills please :unsure:
i think there is more new metal than old just the roof left (y)

cheers

#221 lewis

lewis

    Up Into Fourth

  • Traders
  • PipPipPipPipPipPipPipPipPip
  • 2,322 posts
  • Location: Jersey C.I
  • Local Club: Mini Club Jersey

Posted 09 August 2010 - 08:22 PM

amazing attention to detail love looking through the project

wont be long and youll have a freshly painted shell, yummy!

#222 Deathrow

Deathrow

    Have you tried turning it off and on again?

  • TMF IT Specialist
  • PipPipPipPipPipPipPipPipPipPip
  • 5,734 posts
  • Name: Adam
  • Location: Manchester, UK

Posted 09 August 2010 - 10:18 PM

Absolutely stunning work on this car!

I wish I had the time and patience to be as in depth with the rust prevention as you have been. I'll just have to place my trust in shedloads of waxoyl keeping the moisture away and thus, the rust.

Erm is going to be a thousand times better than when he left the factory!

#223 willie.annall

willie.annall

    Just On Tickover

  • Noobies
  • Pip
  • 5 posts

Posted 12 August 2010 - 09:07 AM

I'm going to sound like a right noob (which i am ) :thumbsup: when i ask this but........... whats the orange paint stuff? is it rust prevention, if so what kind (make) . Im in the process of buying my first mini which i have wanted since i was like 3, Now 22, im looking to invest some love to a mini :). Whats the process you use in your rust prevention, i.e what do you do to the bare metal work after welding has been ground down ( in order )? therse might seem like simple questions but if i wernt to ask i would just, weld, grind, primer, then paint which is pretty much why minis are always rusty second hand because thats what the factory used to do in the early years lol. Any advice is good advice to me lol :thumbsup: Oh by the way, most in depth work ive seen been done to a mini on these kind of forums, great work, im keeping my eye on this and "Elliot" anothjer great project.

#224 sonikk4

sonikk4

    Twisted Paint Polisher!!!

  • Admin
  • PipPipPipPipPipPipPipPipPipPipPip
  • 15,998 posts
  • Name: Neil
  • Location: Oxfordshire

Posted 13 August 2010 - 01:51 AM

Hi you are not the first to ask this question so the process i use is as follows.

For bare metal once any welding grinding etc is done i first off degrease thoroughly then etch prime. then several coats of red primer (halfrauds etc.) The reason i am using this red primer is the car will be sprayed Mazda Classic Red so this is the required process for this topcoat colour. (it will all be rubbed down again prior to spraying)

Any surface rust etc i either wire brush (grinder with wire cup brush) or use 3" Abra pads to remove then a good coating of Kurust. Once dry then numerous coats of primer. (etch first)

Any joins, flanges etc i have been primering then topcoating before and after welding. Once welded then all of the flanges gaps will be topcoated again for good measure before sealing. (For plug welding once you have drilled your 1/4" holes then use a spike to remove the painted surface then weld through)

Other areas that have been welded i use Zinc rich primer which is weldable so ideal for spot welds etc then primered and topcated and sealed if required.

When the underside of the car is completed i will seal every flange, gap join etc then stonechip then topcoat. All recesses, box sections, sills will be pumped with either Dinitrol or Waxoyl after painting.

Basically i have pumped topcoat into every gap i can find after priming that is so hopefully this will keep the dreaded rot away plus the sealing.

There can never be enough paint as far as i'm concerned and other products.

#225 willie.annall

willie.annall

    Just On Tickover

  • Noobies
  • Pip
  • 5 posts

Posted 13 August 2010 - 07:43 AM

thanks man, big help lol, i wudda just primed and painted had i not asked the question. You mentioned kurust, for you sand it off after it is dry as it has then served its purpose has it not? or do you keep it on and etch, primer then paint over it? i read sumwhere that it doesnt give the best finish with kurust on it.


2 user(s) are reading this topic

0 members, 2 guests, 0 anonymous users