Jump to content


Photo
- - - - -

Project Erm


  • Please log in to reply
834 replies to this topic

#181 sonikk4

sonikk4

    Twisted Paint Polisher!!!

  • Admin
  • PipPipPipPipPipPipPipPipPipPipPip
  • 15,998 posts
  • Name: Neil
  • Location: Oxfordshire

Posted 25 June 2010 - 07:40 PM

really impressed with the quality of the work going into this car, i have used this thread as reference a number of times.

looking forward to seeing the progress on the inner sill as i am doing the same thing although i done mine in 2 peices.


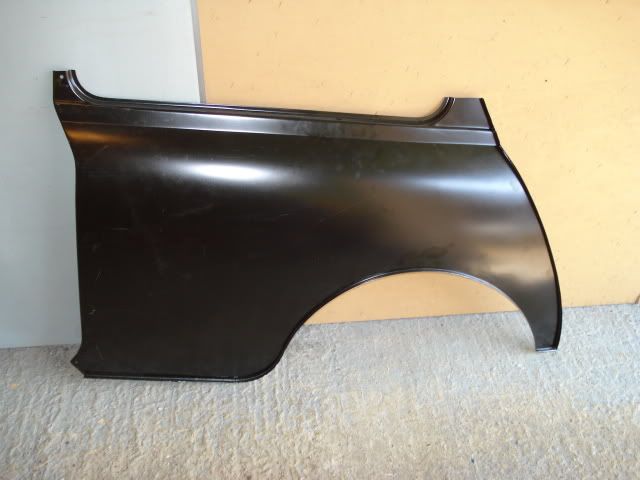
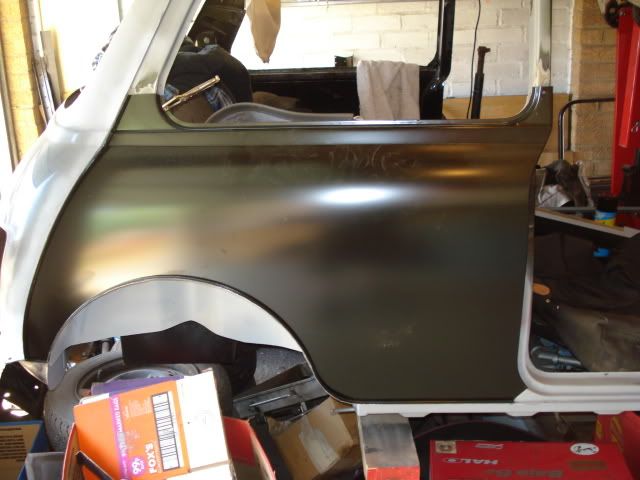
Cheers for that i'm glad what i've been doing has helped other people. Scott has spent a few more pennies this week and had bought the remaining body panels, 2 rear quarters and 2 door skins. We have gone heritage for all four and i have to say when i opened the box today the panel quality is so much better.

Expensive i know but after the problem i had with the last door skin i did these ones are so much better (may have been operator error) anyway i need to tap my mate up for a spot welder to fit the quarters.

Once iv'e finished painting the garage doors (got to keep her indoors happy) i will hopefully finish the l/h inner sill and then crack on with the l/h floor pan replacement.

It's never ending. :) :thumbsup:

#182 mini670

mini670

    Mini Mad

  • Members
  • PipPipPipPip
  • 293 posts

Posted 27 June 2010 - 07:17 AM

Coming along very nice mate, this car will be well solid when you have done! Liking what you have done with the inner sill at the ends. I made one very similar, but butted it up onto ther heel board and welded, wish id done it like you have now.

#183 sonikk4

sonikk4

    Twisted Paint Polisher!!!

  • Admin
  • PipPipPipPipPipPipPipPipPipPipPip
  • 15,998 posts
  • Name: Neil
  • Location: Oxfordshire

Posted 28 June 2010 - 09:28 PM

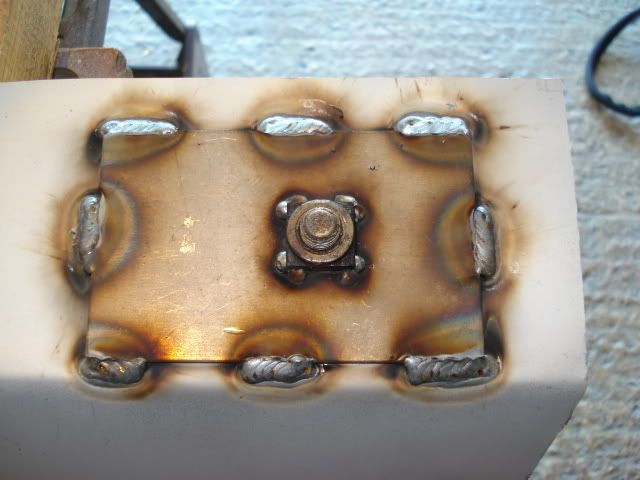
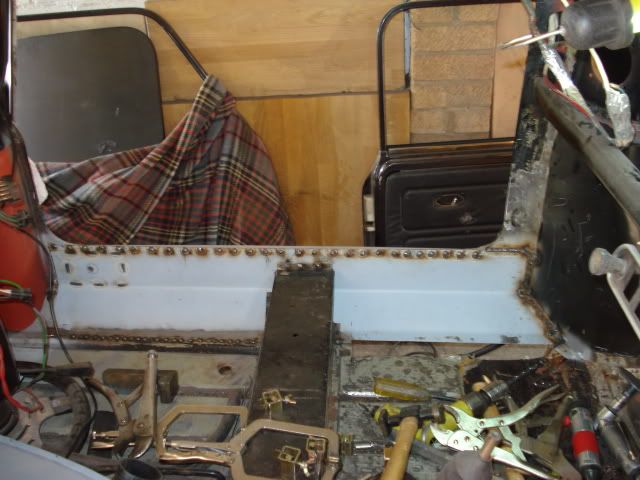
Finished fitting the seat belt mount plate and captive nut and trimmed the sill to size
Posted Image

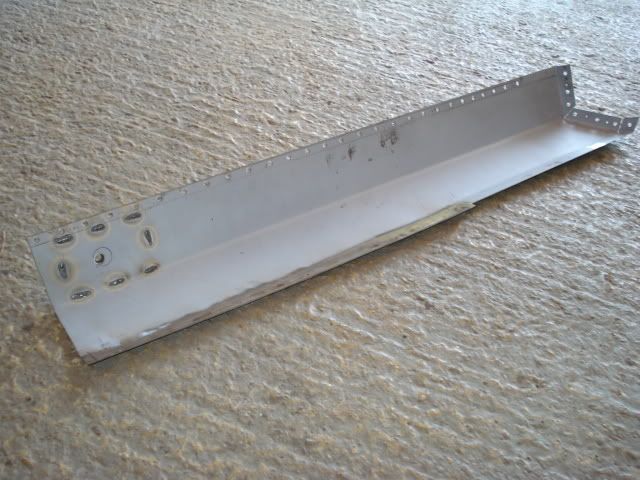
Trimmed sill
Posted Image

I will tack the inner sill in tomorrow and then will cut out the front floor pan. Once the car is turned around i will replace the inner sill section under the companion box again to match the new front when i cut out the old quarter panel.

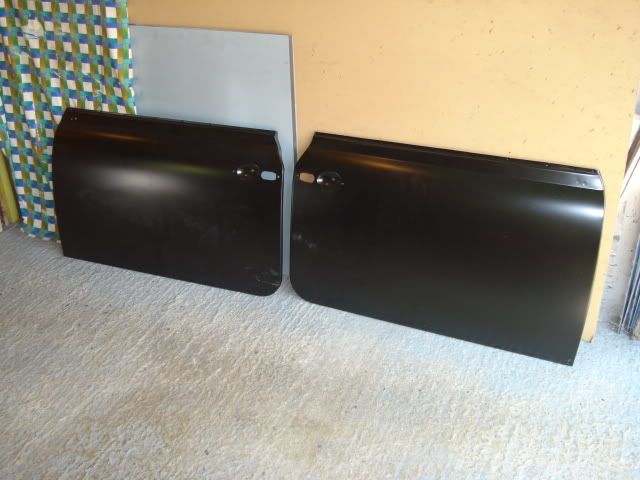
New door skins
Posted Image

New rear quarters
Posted Image
Posted Image

#184 sonikk4

sonikk4

    Twisted Paint Polisher!!!

  • Admin
  • PipPipPipPipPipPipPipPipPipPipPip
  • 15,998 posts
  • Name: Neil
  • Location: Oxfordshire

Posted 29 June 2010 - 06:03 PM

Inner sill tacked in place now and front floor cut out. There will be some repairs to do on the front heel board before the floor is welded in place. Once the floor is in the remainder of the inner sill will be left until the has been spun round.

Inner sill tacked in
Posted Image

#185 martcambs

martcambs

    Learner Driver

  • Noobies
  • PipPip
  • 24 posts

Posted 29 June 2010 - 06:18 PM

its nice to see this happening as im literally now heading down to my workshop to get cracking on my project ill get lots of piccies as im going to have a crack at doing this trouble is my todo list grows everytime i see it

#186 sonikk4

sonikk4

    Twisted Paint Polisher!!!

  • Admin
  • PipPipPipPipPipPipPipPipPipPipPip
  • 15,998 posts
  • Name: Neil
  • Location: Oxfordshire

Posted 04 July 2010 - 07:11 PM

its nice to see this happening as im literally now heading down to my workshop to get cracking on my project ill get lots of piccies as im going to have a crack at doing this trouble is my todo list grows everytime i see it


Both of us know that feeling, what started as a tidy up paint refresh etc has turned into a full blown restoration. By the time we have finished the only original panels will be the roof and rear panel. Everything else has either been replaced or overhauled. Cost, toooo much.

Will Scott sell the car once its finished only if hell has frozen over, its now 9 months and counting.

Where about's are you in Cambs??? we are in Glinton just above Peterborough.

Good luck with your car.

Edited by sonikk4, 04 July 2010 - 07:14 PM.


#187 rick.spi

rick.spi

    Camshaft & Stage Two Head

  • Members
  • PipPipPipPipPipPipPipPip
  • 1,686 posts
  • Local Club: "WOT NO BRAKES"

Posted 04 July 2010 - 09:31 PM

this project is getting more and more intense evry time i check up...

still looking forward to a subby build with those lovely bits :D

#188 sonikk4

sonikk4

    Twisted Paint Polisher!!!

  • Admin
  • PipPipPipPipPipPipPipPipPipPipPip
  • 15,998 posts
  • Name: Neil
  • Location: Oxfordshire

Posted 05 July 2010 - 09:26 PM

Don't hold your breathe Rick it's going to be a little while yet for the subbies although the front is now at the powder coaters getting it's nice red covering.

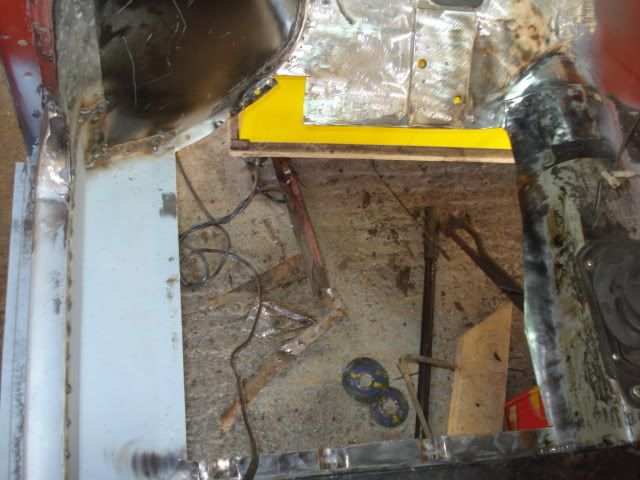
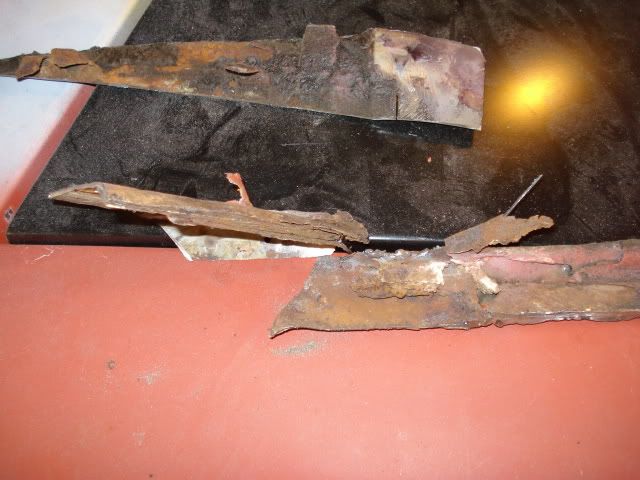
Anyway more done today, old floor pan out and it was well bodged
Posted Image

Bodged bits
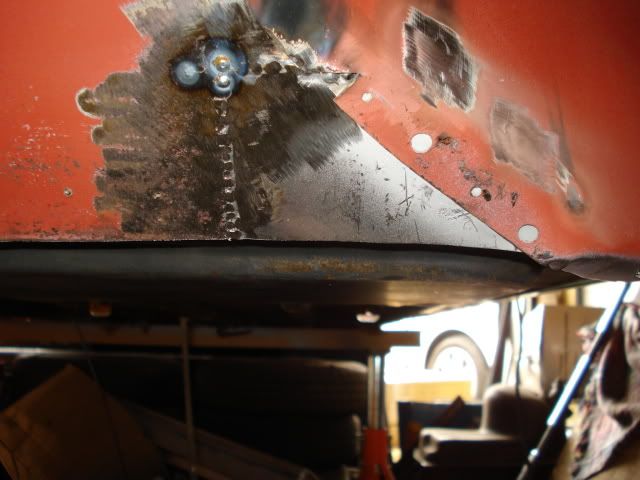
Posted Image

Old rusty section replaced just needs a final clean up
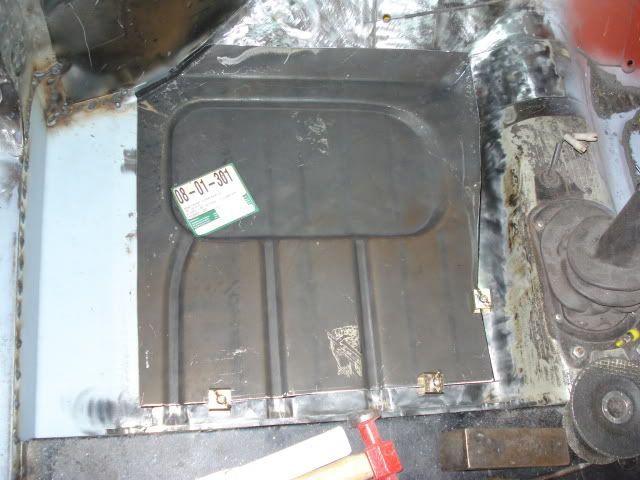
Posted Image

New panel cut to size and final trimming to do
Posted Image

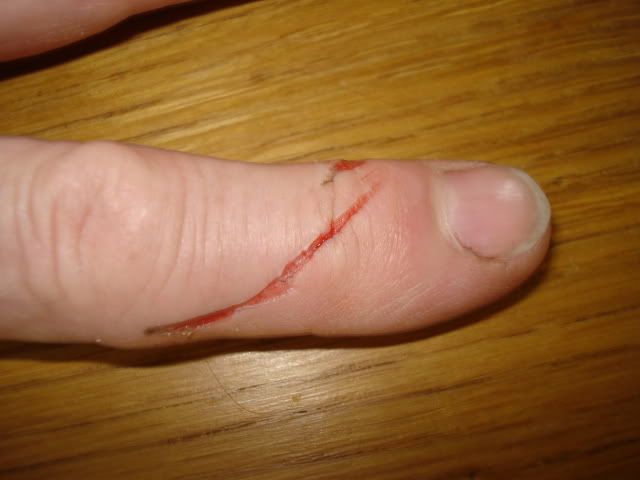
Oh and finger meets 1mm thick cutting disc. OUCH!!!!
Posted Image
That will teach me not to wear my gloves

#189 Hekmat

Hekmat

    Mini Mad

  • TMF+ Member
  • PipPipPipPip
  • 246 posts
  • Location: Coulsdon, London

Posted 05 July 2010 - 10:46 PM

I am surprised you only have 1 cut, my hand are full of cuts (I also keep on forgetting the gloves). Following you project closely since I am doing some of the same work as yourself.

#190 Down&Out

Down&Out

    The King Of Retro Cool

  • Traders
  • PipPipPipPipPipPipPipPipPip
  • 4,847 posts
  • Location: -

Posted 05 July 2010 - 11:52 PM

That is a LOT of new metal going in, very tidy though, liking this.

#191 sonikk4

sonikk4

    Twisted Paint Polisher!!!

  • Admin
  • PipPipPipPipPipPipPipPipPipPipPip
  • 15,998 posts
  • Name: Neil
  • Location: Oxfordshire

Posted 06 July 2010 - 07:04 PM

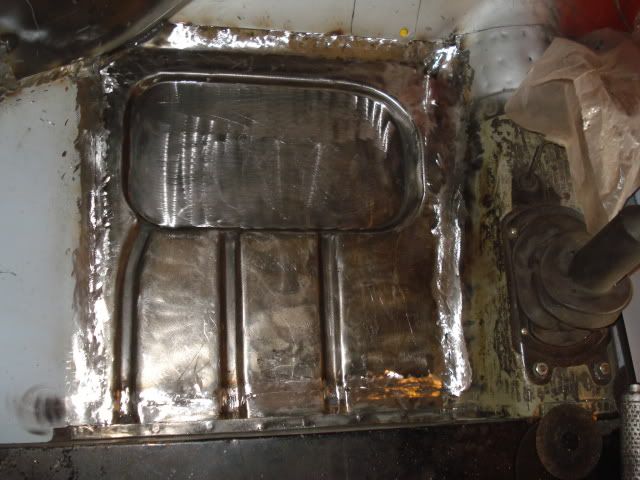
Floor pan is now in and ground down, just some final cleaning up to do and a little more hammer and block work.

Posted Image

All of the e coat was stripped off as it was rubbish it took less than 10 mins with a 4 1/2 inch grinder with a wire cup attachment. It may be tempting to leave it as its only a floor panel but whatever coating that would have been applied would have degraded very quickly.

Next job now will be reskinning the door i skinned last year (not happy with it) and cutting out the old r/h rear quarter.

#192 sonikk4

sonikk4

    Twisted Paint Polisher!!!

  • Admin
  • PipPipPipPipPipPipPipPipPipPipPip
  • 15,998 posts
  • Name: Neil
  • Location: Oxfordshire

Posted 13 July 2010 - 05:35 PM

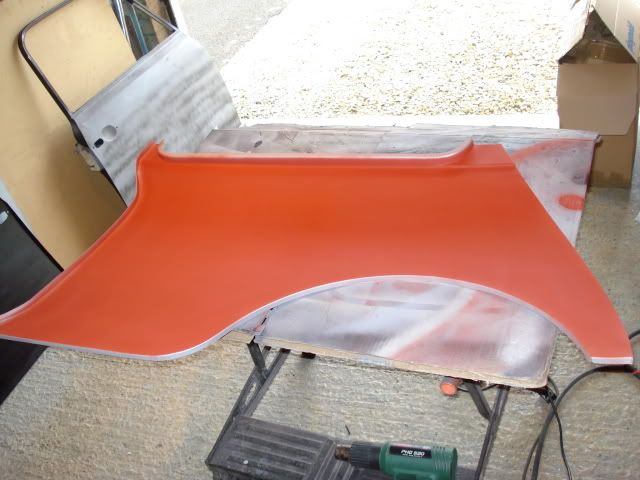
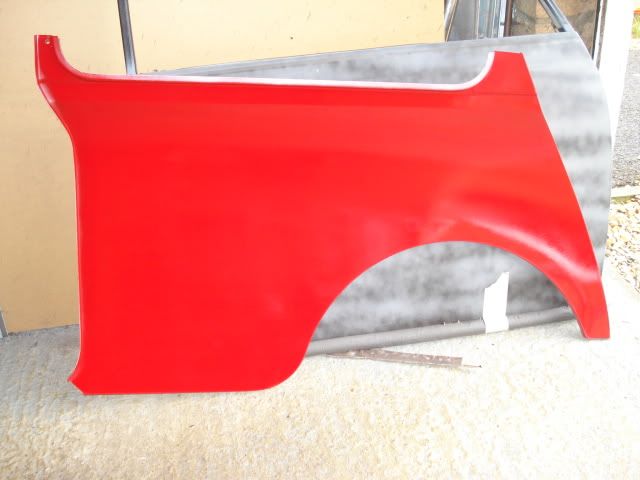
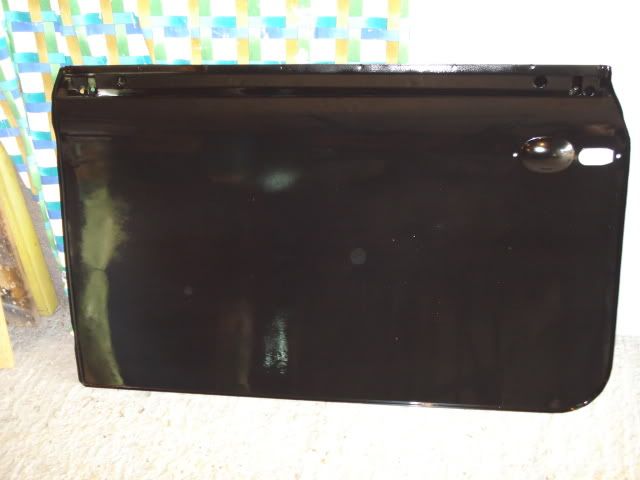
Lots of prep work today on both the new r/h door skin and r/h rear quarter. With them both being Heritage panels the E coat was left on so both panels had primer and top coat applied to both inner surfaces

quarter panel
Posted Image
topcoated
Posted Image
Door skin
Posted Image

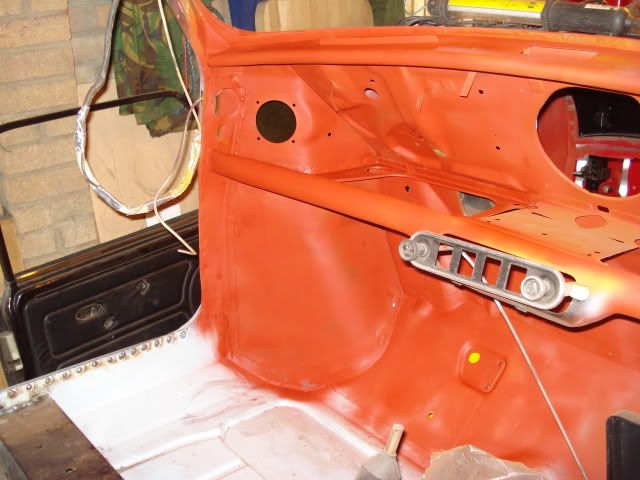
Scott had been busy on the l/h inner bulkhead
Posted Image
Posted Image

Also fitted a new window lifter support on the r/h door so just need to clean up the door frame edges and repaint them red this time as Scott had changed his mind for the car colour since the first reskin attempt.

#193 analogue_radio

analogue_radio

    Up Into Fourth

  • TMF+ Member
  • PipPipPipPipPipPipPipPipPip
  • 4,897 posts
  • Location: Melton Mowbray, UK.

Posted 13 July 2010 - 07:28 PM

Brilliant work, everything is so tidy.

I'm at the messy stages at the moment of cutting everything out.. can't wait to get some fresh metal in and have things looking a little like yours!

Are you coating everything in red oxide from spray can?

#194 scsracing

scsracing

    Mini Mad

  • Members
  • PipPipPipPip
  • 276 posts
  • Location: Eastbourne

Posted 13 July 2010 - 07:34 PM

Brilliant work, everything is so tidy.

I'm at the messy stages at the moment of cutting everything out.. can't wait to get some fresh metal in and have things looking a little like yours!

Are you coating everything in red oxide from spray can?


Nope its red primer as the colour i want is 'Mazda classic red' which requires red primer.This coat is only a base coat so isn't the final coat of primer to be applied.

#195 sonikk4

sonikk4

    Twisted Paint Polisher!!!

  • Admin
  • PipPipPipPipPipPipPipPipPipPipPip
  • 15,998 posts
  • Name: Neil
  • Location: Oxfordshire

Posted 13 July 2010 - 07:39 PM

Brilliant work, everything is so tidy.

I'm at the messy stages at the moment of cutting everything out.. can't wait to get some fresh metal in and have things looking a little like yours!

Are you coating everything in red oxide from spray can?


Its not red oxide as such just red primer but underneath that is etch primer as well, the welded areas are covered in zinc rich primer as well although i have been top coating a lot of the flanges as well before welding, the reason behind that is the more paint the merrier. Once all of the welding is completed though every seam will be repainted and sealed with aircraft spec sealant. That stuff is much better you apply it with a sealant gun getting a very neat finish. :thumbsup:

Ahhh beaten to the reply by Scott, sneaky so and so although fair play it is his thread but i am chief welder and metal fabricator so i think i can post a few replies. :thumbsup:

Edited by sonikk4, 13 July 2010 - 07:44 PM.


2 user(s) are reading this topic

0 members, 2 guests, 0 anonymous users