Jump to content


Photo
- - - - -

Project Erm


  • Please log in to reply
834 replies to this topic

#166 rick.spi

rick.spi

    Camshaft & Stage Two Head

  • Members
  • PipPipPipPipPipPipPipPip
  • 1,686 posts
  • Local Club: "WOT NO BRAKES"

Posted 18 May 2010 - 04:21 PM

mmm wheels looking good.

its basically a whole new mini now then lol.

is there going to be a subframe build soon with all the shineys on it? :-

#167 sonikk4

sonikk4

    Twisted Paint Polisher!!!

  • Admin
  • PipPipPipPipPipPipPipPipPipPipPip
  • 15,970 posts
  • Name: Neil
  • Location: Oxfordshire

Posted 18 May 2010 - 04:23 PM

mmm wheels looking good.

its basically a whole new mini now then lol.

is there going to be a subframe build soon with all the shineys on it? :-


Hopefully soon, we are waiting for a few small bits and pieces then Scott will dummy build it up. Going to look for some minifins to finish the rear brakes off.

#168 rick.spi

rick.spi

    Camshaft & Stage Two Head

  • Members
  • PipPipPipPipPipPipPipPip
  • 1,686 posts
  • Local Club: "WOT NO BRAKES"

Posted 18 May 2010 - 04:27 PM

look forward to that. didnt you say your subby has been seam welded, cant remeber, or have you got a new one?

ive heard to be careful with minifins as some of the cheap ones dont compare/ dont have the steel lining?. i am also looking into this but am thinking it may be a job for later.

#169 paul1275s

paul1275s

    Stage One Kit Fitted

  • Noobies
  • PipPipPip
  • 55 posts
  • Location: Eastbourne
  • Local Club: EDMC

Posted 20 May 2010 - 07:23 PM

You are doing well Boys.. Yer don't get the cheapo minifins, they are chinese chocolate.. Liking the calipers, they may walk when your Dad brings them to work....

#170 sonikk4

sonikk4

    Twisted Paint Polisher!!!

  • Admin
  • PipPipPipPipPipPipPipPipPipPipPip
  • 15,970 posts
  • Name: Neil
  • Location: Oxfordshire

Posted 20 May 2010 - 07:38 PM

look forward to that. didnt you say your subby has been seam welded, cant remeber, or have you got a new one?

ive heard to be careful with minifins as some of the cheap ones dont compare/ dont have the steel lining?. i am also looking into this but am thinking it may be a job for later.


I welded the front subframe mainly the turrets plus i ran some other welds around the edges, unfortunately and much to my regret i did not weld the rear subframe before we got it powder coated. Such is life. The minifins will be the real deal and not some knock off specials. It all depends when Scott can afford to buy them.

#171 sonikk4

sonikk4

    Twisted Paint Polisher!!!

  • Admin
  • PipPipPipPipPipPipPipPipPipPipPip
  • 15,970 posts
  • Name: Neil
  • Location: Oxfordshire

Posted 20 May 2010 - 07:39 PM

You are doing well Boys.. Yer don't get the cheapo minifins, they are chinese chocolate.. Liking the calipers, they may walk when your Dad brings them to work....


They may walk mate but they will be walking back to my car, thanks for reminding me to bring them in.

#172 mk1leg

mk1leg

    Crazy About Mini's

  • Members
  • PipPipPipPipPipPipPipPipPipPip
  • 9,343 posts
  • Location: Jersey
  • Local Club: Mini Club Jersey, MCR

Posted 20 May 2010 - 09:44 PM

Just read this thread all the way through ...well I'm godsmacked with all that welding .....you could of got yourself a brand new shinney shell with out rust ............for £3500.............but there's sattisfaction in repairing an old shell well done so far............. :D

#173 rick.spi

rick.spi

    Camshaft & Stage Two Head

  • Members
  • PipPipPipPipPipPipPipPip
  • 1,686 posts
  • Local Club: "WOT NO BRAKES"

Posted 20 May 2010 - 10:18 PM

look forward to that. didnt you say your subby has been seam welded, cant remeber, or have you got a new one?

ive heard to be careful with minifins as some of the cheap ones dont compare/ dont have the steel lining?. i am also looking into this but am thinking it may be a job for later.


I welded the front subframe mainly the turrets plus i ran some other welds around the edges, unfortunately and much to my regret i did not weld the rear subframe before we got it powder coated. Such is life. The minifins will be the real deal and not some knock off specials. It all depends when Scott can afford to buy them.


ah. after that last buy im thinking the minifins wont be coming anytime soon if thats te case ;) lol. :D

Edited by rick.spi, 20 May 2010 - 10:18 PM.


#174 ghostfighter22

ghostfighter22

    Learner Driver

  • Noobies
  • PipPip
  • 11 posts
  • Location: Swindon

Posted 21 May 2010 - 04:03 PM

Great job...top quality finish cant wait to see the out come of your project...keep posting i will be following your progress...this is a very good guide as i just started my mini project a couples of weeks back and doing it with not a great knowledge on mini's....keep up the good work...cheers

#175 scsracing

scsracing

    Mini Mad

  • Members
  • PipPipPipPip
  • 276 posts
  • Location: Eastbourne

Posted 27 May 2010 - 04:47 PM

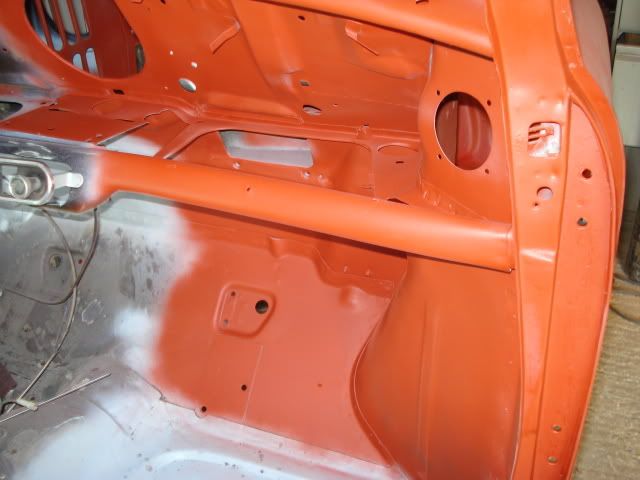
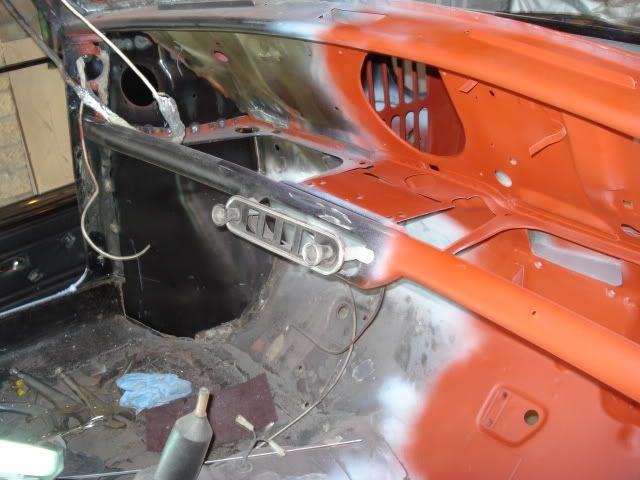
On study leave this week so managed to help out on the mini for what seems like ages.

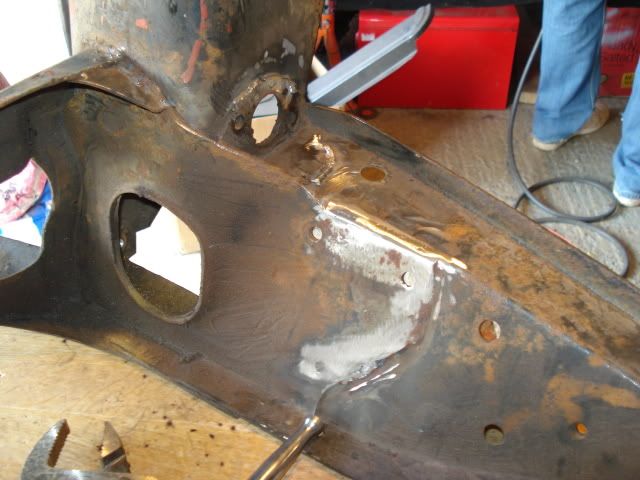
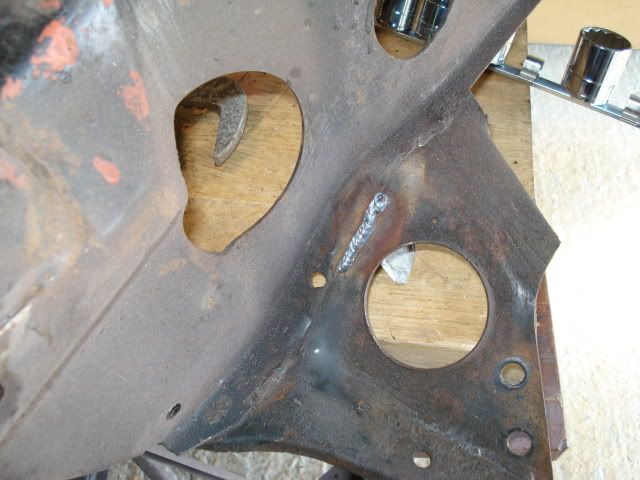
I managed to clean up all the welds where dad had welded in the new inner wing to the dash rail area plus got rid of all of the old crud.
Posted Image
Posted Image

I also removed the old vinyl dash rail covering as well as it was well past its sell by date.

Dad meanwhile was finishing off making a new door step from scratch for the l/h side and after much much much cursing and swearing he ended up with this
Posted Image
and welded in but not ground down
Posted Image

once we rotate the car around he will finish fettling it so he will be really happy with it. At least now with it welded in place he can make a start on replacing the inner sill.

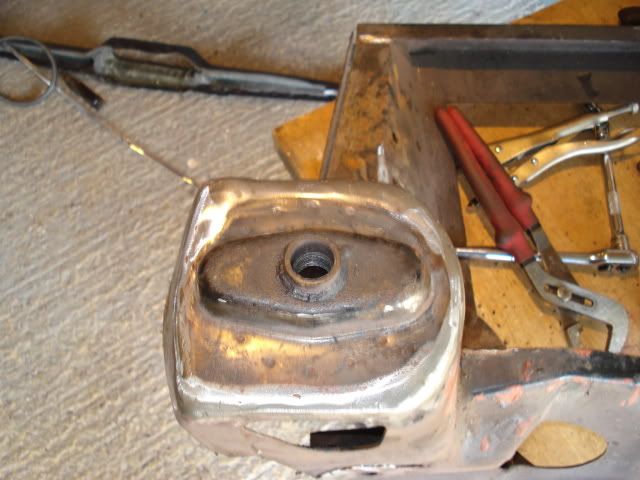
Forgot to add the front subframe that dad reinforced with some extra welds and smoothed of top mount.

Posted Image
Posted Image
Posted Image

Edited by scsracing, 27 May 2010 - 06:20 PM.


#176 scsracing

scsracing

    Mini Mad

  • Members
  • PipPipPipPip
  • 276 posts
  • Location: Eastbourne

Posted 27 May 2010 - 05:04 PM

Just read this thread all the way through ...well I'm godsmacked with all that welding .....you could of got yourself a brand new shinney shell with out rust ............for £3500.............but there's sattisfaction in repairing an old shell well done so far............. ^_^


I think if the welding had cost more than tea and biscuits a new shell might of been a cheaper option.Panels have probably come to around 1.5k -2k so if i had to pay welding costs on top of that it would of probaly come in at near 5k ;D

Great job...top quality finish cant wait to see the out come of your project...keep posting i will be following your progress...this is a very good guide as i just started my mini project a couples of weeks back and doing it with not a great knowledge on mini's....keep up the good work...cheers


Well when we started this project our knowledge of minis was minimal as can be seen with the first few pages of this project and what we thought might need doing,now we both know pretty much the ins and outs of every panel and panel type.Just got to get our heads round the running gear now as that is the next big step.Good luck with your project and hope you don't find as many nasty bits as we did :wub:

#177 scsracing

scsracing

    Mini Mad

  • Members
  • PipPipPipPip
  • 276 posts
  • Location: Eastbourne

Posted 11 June 2010 - 06:38 PM

Well dad's back of holiday and he's done a bit more.
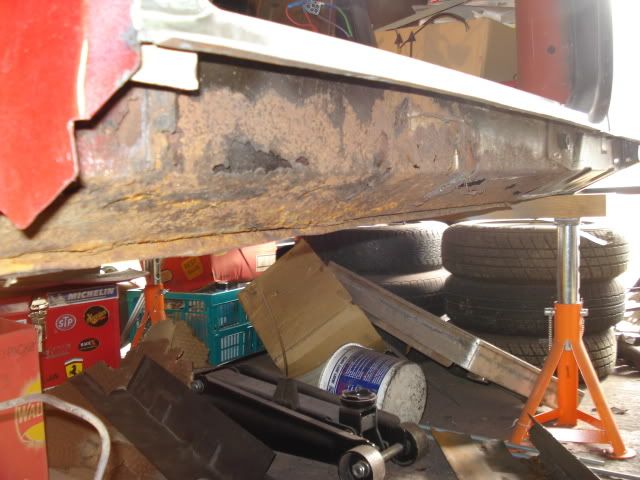
First off he cut off the remainder of the dodgy oversill
Posted Image

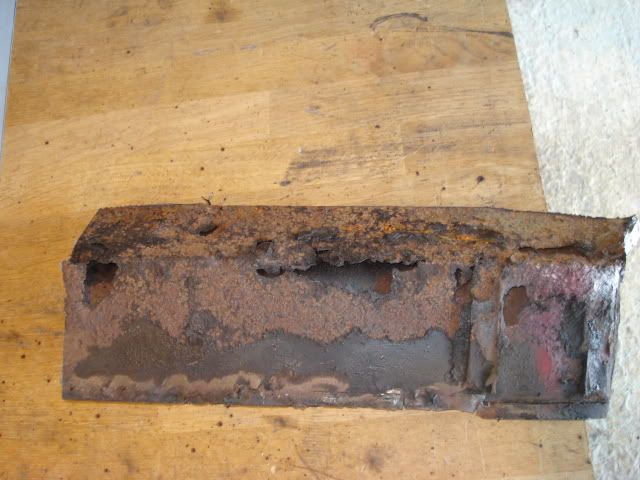
What's left of the inner sill before cutting it out
Posted Image

Here's the lashed up front section of the inner sill
Posted Image
Posted Image

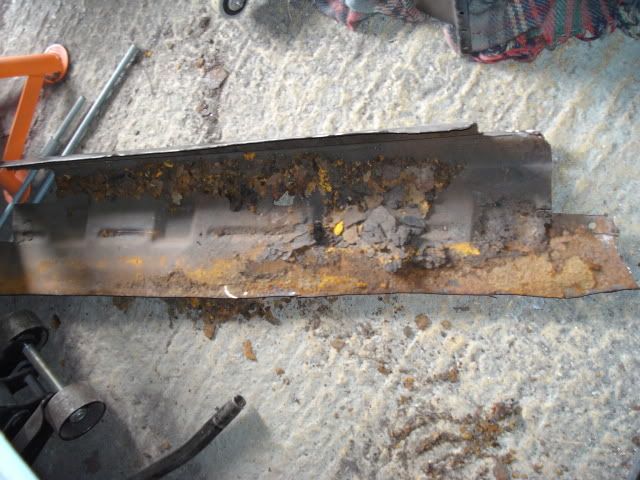
As you can see no effort was spared in removing all the rusty sections before the they did all the repairs but in their defence they did pump in some waxoil onto all the old rust. Dad did say it was a bodge job and he was very right.

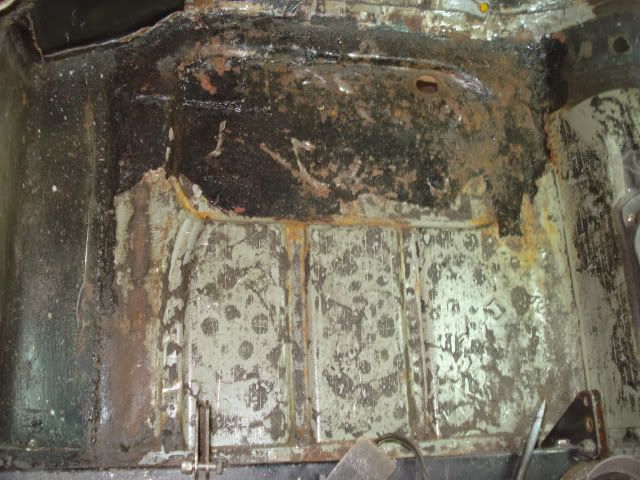
He chipped off all the old sound proofing from the l/h floor pan only to reveal more cack welding and damage caused by incorrect jacking
Posted Image
Posted Image

He had made a new inner sill but as the rust has spread a bit more into the rear floor pan he will make another to take out this damage.

#178 Adcuz

Adcuz

    One Carb Or Two?

  • Members
  • PipPipPipPipPipPipPip
  • 843 posts

Posted 19 June 2010 - 06:48 PM

Nice project! Those tyres are fitted to my car and they seem pretty good despite the low price, and I went from Yoko A032R!
#179 scsracing

scsracing

    Mini Mad

  • Members
  • PipPipPipPip
  • 276 posts
  • Location: Eastbourne

Posted 19 June 2010 - 07:18 PM

Nice project! Those tyres are fitted to my car and they seem pretty good despite the low price, and I went from Yoko A032R!


Thanks for the comments, i just wish we were further ahead with the car or at least on its wheels to see what they look like on the car.

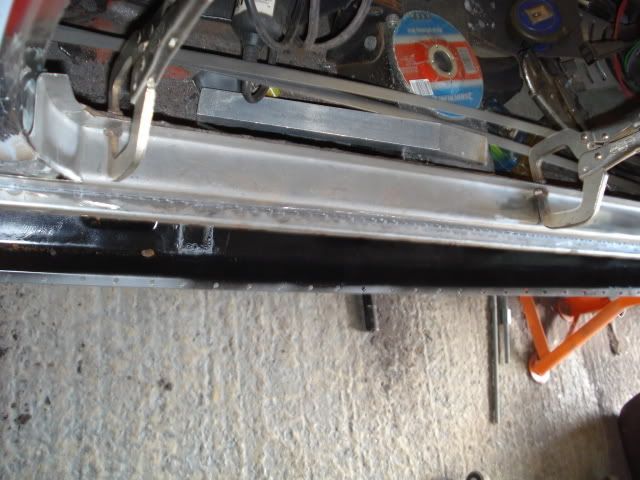
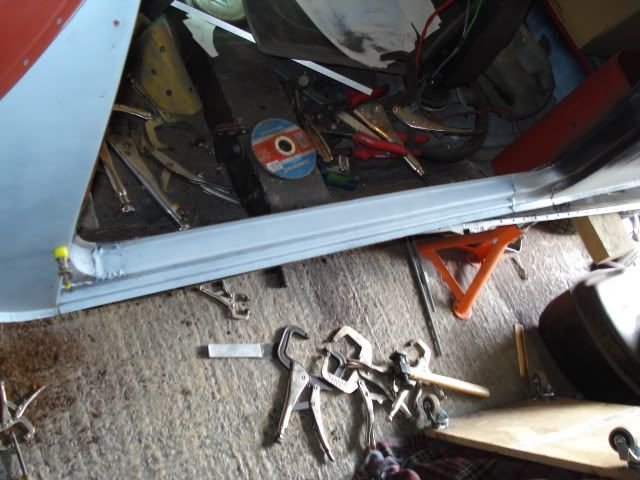
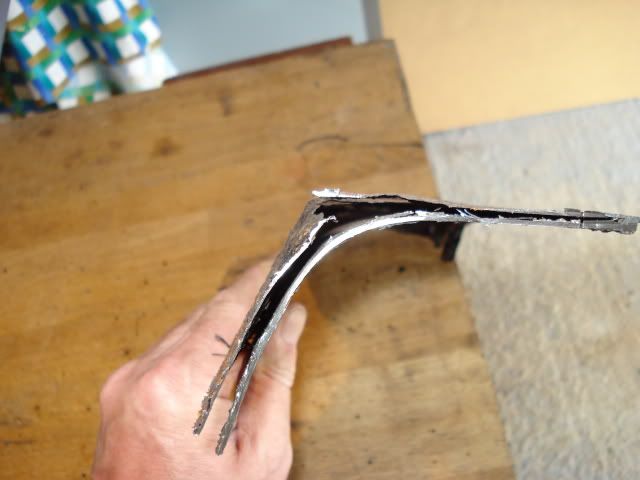
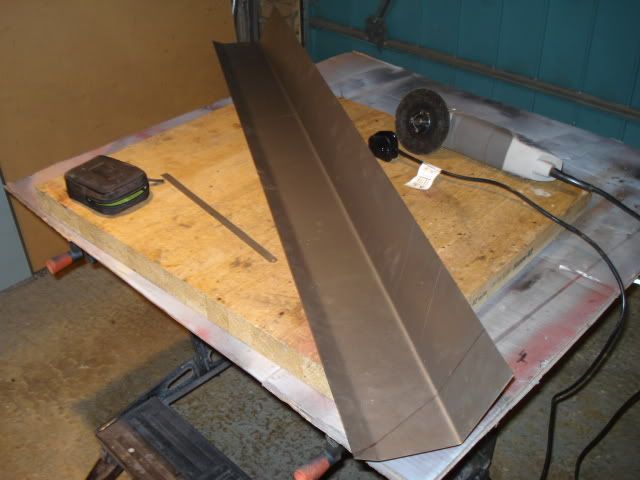
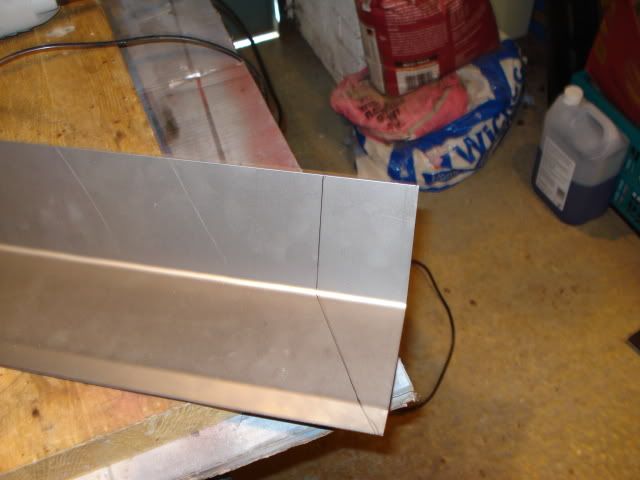
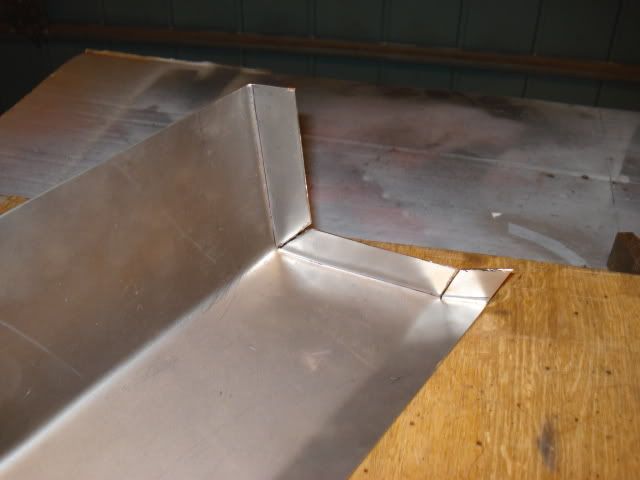
Anyway Dad has fabricated yet another inner sill to take up more of the damage caused by the previous owner, one step forward two steps back.
New sill
Posted Image
Contours marked out
Posted Image
Cut and folded
Posted Image

He's modified it a bit more and is roughly trimmed and clamped in place. He's got to weld in the reinforcement plate and captive nut for the seat belt mount and then he can cut out the rest of the rot and finally fit it then its onto the l/h front floor pan.

#180 vaughn1

vaughn1

    Mini Mad

  • Members
  • PipPipPipPip
  • 194 posts

Posted 19 June 2010 - 10:35 PM

really impressed with the quality of the work going into this car, i have used this thread as reference a number of times.

looking forward to seeing the progress on the inner sill as i am doing the same thing although i done mine in 2 peices.


4 user(s) are reading this topic

0 members, 4 guests, 0 anonymous users