Jump to content


Photo
- - - - -

1979 Austin Mini 1000 Restoration


  • Please log in to reply
157 replies to this topic

#76 Bash Master

Bash Master

    Mini Mad

  • TMF+ Member
  • PipPipPipPip
  • 150 posts
  • Location: Blackpool, Lancashire

Posted 27 June 2011 - 09:13 PM

how old are you and how come you know hot restore a car SO EXCELLENT?


thanks for the compliment mate :) 
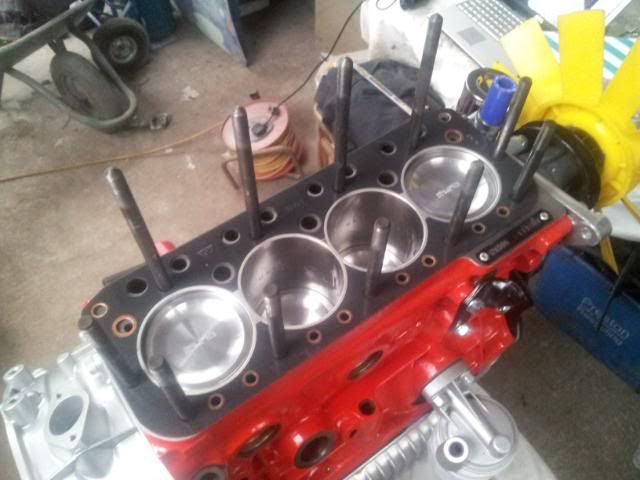
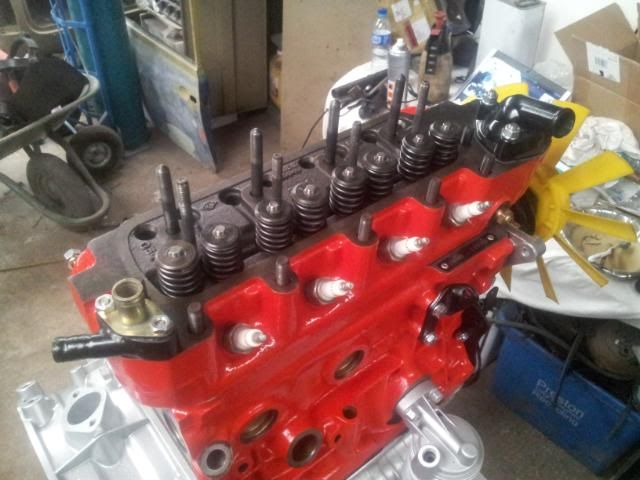
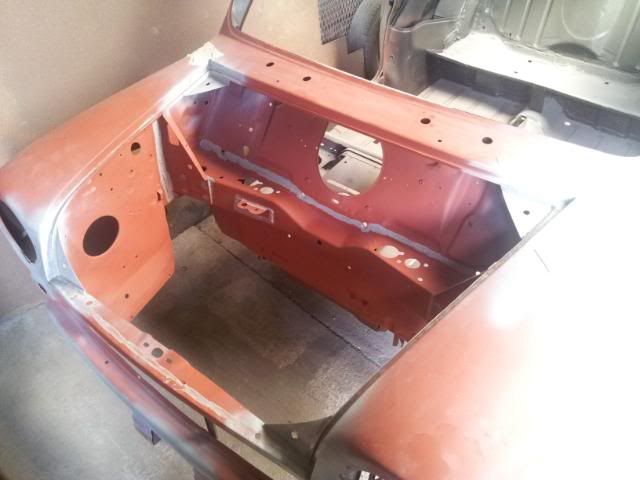
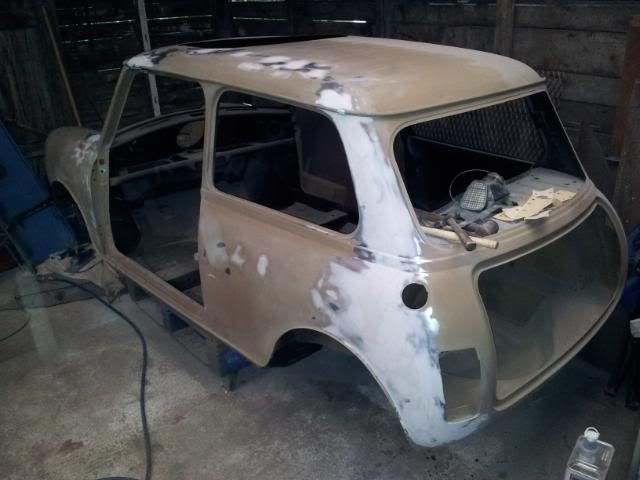
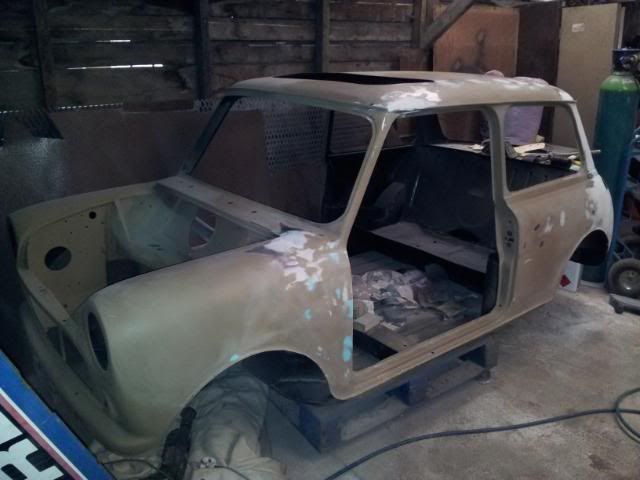
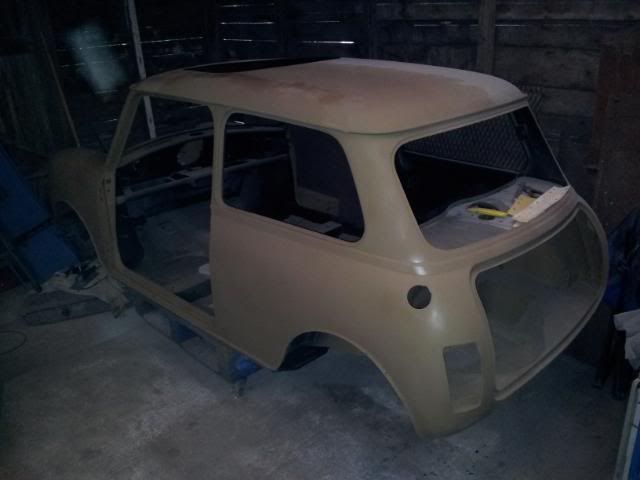
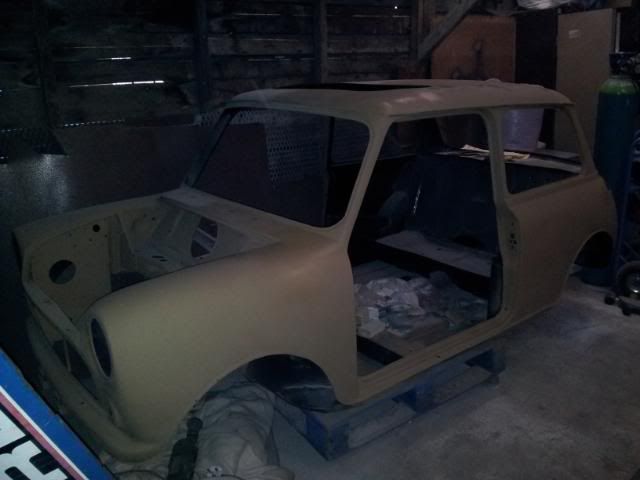
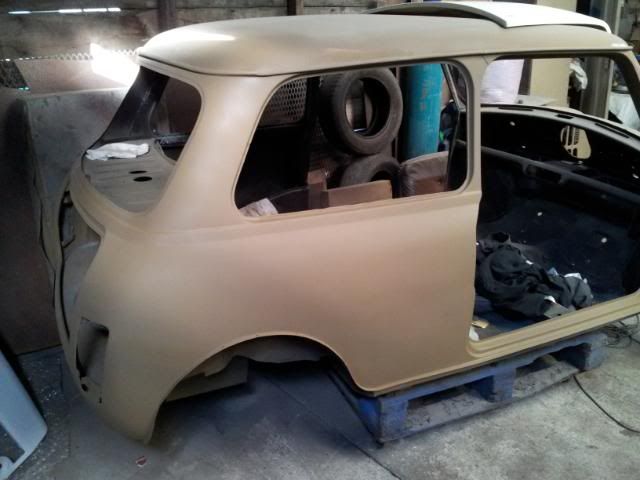
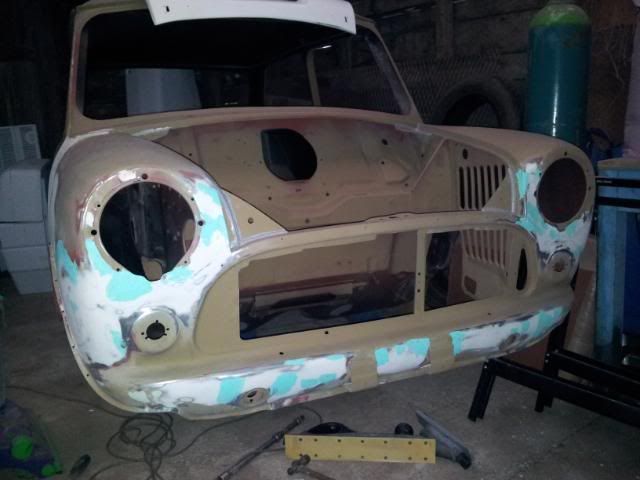
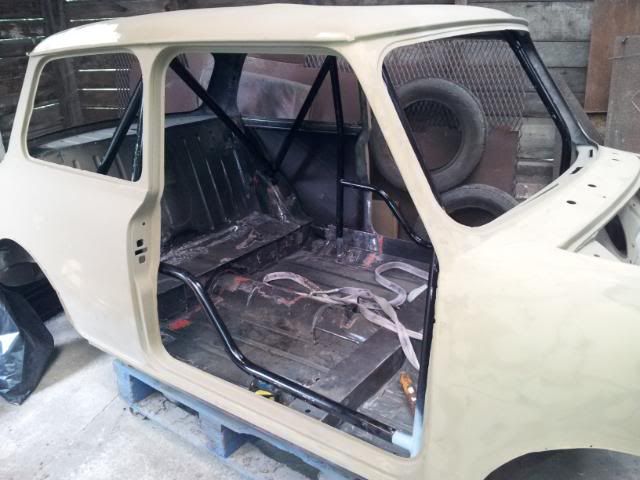
i'm 19 now but i bought the mini when i was 17. i did a vehicle maintenance course at college for 2 years (bit of a waste of time to be honest) but apart from that no other qualifications or anything. i've always been into cars and engineering stuff from an early age, just picked up skills from past experiences and lots of research. this is the first car engine i have built up from scratch however i have rebuilt a couple of broken lawn mower engines in the past and got them running so i could understand how they worked. taught myself how to mig weld with a bit of practice on scrap metal and then got cracking on the shell.

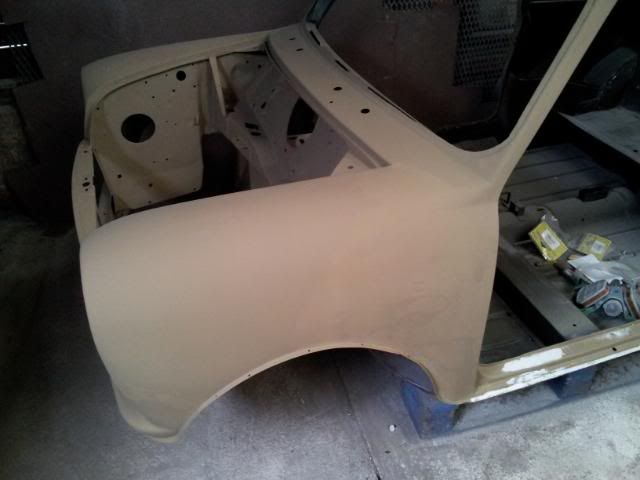
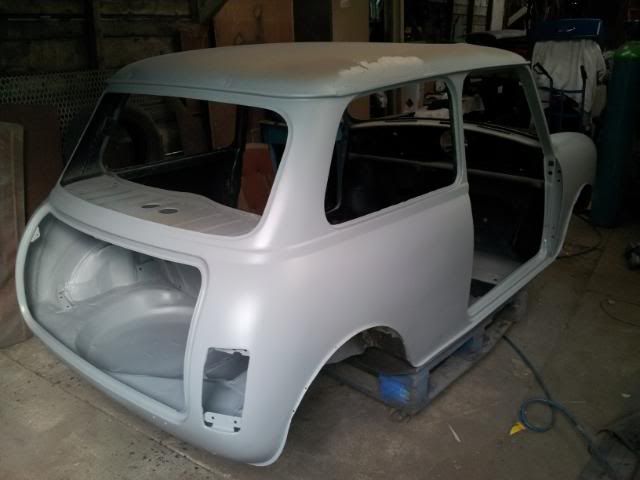
i've been thinking of spraying the shell myself at some point. i don't think i'll be able to afford to pay someone else to do it. i have the space, compressor, paint gun etc just need some paint and time off work!

#77 Jean-Paul

Jean-Paul

    Stage One Kit Fitted

  • Noobies
  • PipPipPip
  • 75 posts

Posted 28 June 2011 - 04:48 AM

:D :D :dozing:

EXCELLENT !!! really. i wish i had your knowledge !!! now i am just forced to get a car that is almost ready so that someone can fix it for me with not a lot of money :cry:

#78 minimuk

minimuk

    Camshaft & Stage Two Head

  • Members
  • PipPipPipPipPipPipPipPip
  • 1,946 posts
  • Location: Midlands

Posted 29 June 2011 - 11:07 PM

great job, love the engine and the attention to detail. Fab car in the end ,no doubt about that.

will keep visiting your tread, good luck!

#79 JonnyBMX

JonnyBMX

    One Carb Or Two?

  • Members
  • PipPipPipPipPipPipPip
  • 865 posts
  • Location: Bedfordshire
  • Local Club: Rebels

Posted 30 June 2011 - 12:32 PM

nice work there.. coming along nicely! look foward to the updates

#80 Bash Master

Bash Master

    Mini Mad

  • TMF+ Member
  • PipPipPipPip
  • 150 posts
  • Location: Blackpool, Lancashire

Posted 05 July 2011 - 08:51 PM

So after waiting since the 26th of june for a head gasket from minispares, it turned up today. I could finally get the cylinder head fitted :o.

Posted Image

Posted Image

however, when i came to fit the new roller rockers i noticed the adjusters were right at the bottom of their travel and the pushrods were rubbing against the rocker :D i worked out this problem was due to the cylinder head which has been skimmed quite a lot causing the level of the rockers to be lower than normal. i've had to purchase 4 rocker spacers to compensate for this :thumbsup:

Posted Image

Posted Image

meanwhile, i have continued filling and sanding the body. it's taking a while to do but i'm slowly getting there. have bought some special sanding equipment which will hopefully make the job a bit easier and improve the surface finish.

have also fitted the fibreglass bonnet. one side of the bonnet seems to be a bit higher than the wing for some reason. will have to see if i can do anything about this, if not i'm not too fussed.

Posted Image

Posted Image

Posted Image

Posted Image

#81 izzy

izzy

    Mini Mad

  • Members
  • PipPipPipPip
  • 190 posts

Posted 05 July 2011 - 09:46 PM

i think your doing brilliant for your age, im 18 and dont really have the confidence to do major jobs on my mini build, i wait to get assistance of my bigger brother, i will try try and well patches up, but my welding stinks. I dont even know how to use the settings on the welder, ill try and get mor confident tommorrow when i do some work on my mini and hope i dont cause a disaster.

good luck with your build! :)

#82 Simon998

Simon998

    Stage One Kit Fitted

  • Noobies
  • PipPipPip
  • 74 posts
  • Location: N. Ireland

Posted 12 July 2011 - 09:04 AM

Coming on well dude, however I would go for a colour that would stand out more than white or black. I have had both colours and to be honest they just weren't special enough. I loved the colour of this mini when I owned it.

Posted Image

All the best with the build,
Simon.

#83 Simon998

Simon998

    Stage One Kit Fitted

  • Noobies
  • PipPipPip
  • 74 posts
  • Location: N. Ireland

Posted 12 July 2011 - 09:23 AM

Oh, and the filler in the seams below the window/wing will crack once it's painted, theres about 4 guys in our mini club with smoothed cars and every one of them has cracked paint. One of the guys said the only way to get it smooth without it cracking is to weld it and then smooth it.

#84 Bash Master

Bash Master

    Mini Mad

  • TMF+ Member
  • PipPipPipPip
  • 150 posts
  • Location: Blackpool, Lancashire

Posted 12 July 2011 - 09:14 PM

Hi Simon, thanks for your comments. I have thought about the colours i'm going to spray for some time now and i keep coming back to white body with black roof and arches. Other minis with this colour scheme just look brilliant in my opinion. However, your blue mini looks very nice though :-
The wings were welded up along the seams so hopefully there will be no threat of any cracks there.

I have some updates to report

Shell is coming along now. My special sanding equipment turned up last week which has made the job much easier. Finished filling and flatting the boot lid yesterday and i'm happy with he results.

Posted Image

Posted Image

Posted Image

Posted Image

also had some developments to the engine. Had a little trouble with the valve springs compressing too much at full lift so the head will have to come off and replace the springs with uprated ones. Thought i'd show off my rockers cover all refurbished and polished :D Also, some pics of the smoothed out inlet manifold.

Posted Image

Posted Image

Posted Image

#85 Bash Master

Bash Master

    Mini Mad

  • TMF+ Member
  • PipPipPipPip
  • 150 posts
  • Location: Blackpool, Lancashire

Posted 17 July 2011 - 07:56 PM

Some more updates

Bodywork is coming along

Posted Image

Posted Image

Posted Image

Posted Image

Also managed to get hold of some replacement valve springs capable of the valve lift created by the 286 cam and 1.5:1 ratio rockers, so i've fitted those too. Had to use a new head gasket of course.

Below is a picture of the old spring (left) and new spring (right)

Posted Image

And fitted:

Posted Image

Perfect! There's a nice big gap between each coil now :)

Sorry about the poor picture quality but it has been very gloomy and wet today.

#86 MJWarren

MJWarren

    One Carb Or Two?

  • Members
  • PipPipPipPipPipPipPip
  • 705 posts
  • Local Club: DCMOC

Posted 19 July 2011 - 06:28 PM

Looking really good mate!

engine looks lovely, hope it all goes well!

#87 Bash Master

Bash Master

    Mini Mad

  • TMF+ Member
  • PipPipPipPip
  • 150 posts
  • Location: Blackpool, Lancashire

Posted 25 July 2011 - 06:12 PM

Finished filling and smoothing the back end now.

Posted Image

Posted Image

Posted Image

Have also aquired a 6 point roll cage thanks to MJWarren :thumbsup:

Posted Image

#88 Bash Master

Bash Master

    Mini Mad

  • TMF+ Member
  • PipPipPipPip
  • 150 posts
  • Location: Blackpool, Lancashire

Posted 18 August 2011 - 07:14 PM

It's been a while since my last update. I have been getting on with filling and sanding and i am glad to say it is almost done :D

i went to MITP last sunday and thought it was the best show i've been to this year. I got some great inspiration and had fun watching some very fast minis going up the drag strip. I'm hoping next year when my mini is finished i'll drive down there and get involved as it looked ace. Anyway, whilst i was there i bought a new door skin, a pair of timken front wheel bearings at a good price of £20 each, 2 breather filters and a dipstick. Should keep me going for a bit...

Posted Image

Posted Image

Posted Image

Posted Image

Posted Image

Posted Image

Posted Image

Posted Image

This is the door that had the skin replaced. Whilst removing the old skin i managed to cut my finger across what must have been a really sharp piece of metal as it sliced straight through my welding gauntlet glove as well! It was one of those cuts where it doesn't bleed for a minute or so but when it did it poured out! plastered it up and carried on, here are the results:

Posted Image

The majority of the bottom edge was rusted through so i had to cut it out and replace with new metal (well, recycled strips from the old door skin to be exact).

Posted Image

Posted Image

Posted Image
Finally, one finished door. the fitment wasn't too bad considering it was only a cheap pattern. in hindsight i probably should have replaced the passenger side door skin as well instead of filling it as it wasn't such a difficult job after all. At least i can continue with filling the drivers side wing now.

#89 Bash Master

Bash Master

    Mini Mad

  • TMF+ Member
  • PipPipPipPip
  • 150 posts
  • Location: Blackpool, Lancashire

Posted 31 August 2011 - 08:04 PM

Few more updates

99% of the filling and sanding has now been completed. I put a coat of grey high build primer on the body earlier on today and think it's looking much nicer than when it was horrible brown. Once i have left it week or so to harden, there are just a few small imperfections to sand out and a light skim of filler needed here and there to get it looking right. Next thing on the shopping list is a fibreglass roof skin as i don't want the sun roof any more and the roof has far too many dints and waves in it than i can be bothered to smooth out. I'm hoping i won't have to cut any of the original roof skin out and i can just stick the FG one over the top, if not i'm not too fussed.

I have also trial fitted the 6 point roll cage and drilled the holes out for it. A few of the feet had to be shortened slightly to get it to fit nicely under the roof. i decided i would remove the rear companion bins and part of the rear seat as they won't be needed, also makes it easier to fit the cage.

Posted Image

Posted Image

Posted Image

Posted Image

Posted Image

Posted Image

#90 Zeemax Adventure

Zeemax Adventure

    Speeding Along Now

  • TMF+ Member
  • PipPipPipPipPip
  • 301 posts
  • Location: Llandudno

Posted 01 September 2011 - 08:14 AM

Good work fella. Nice cage too, i want one for mine!!! will be watching this thread from now on. I want to rebuild my 1275 as a 1380 but am scared as to where to start, as ive never done the engine strip and rebuild :s


1 user(s) are reading this topic

0 members, 1 guests, 0 anonymous users