Jump to content


Photo
- - - - -

1979 Austin Mini 1000 Restoration


  • Please log in to reply
157 replies to this topic

#16 Bash Master

Bash Master

    Mini Mad

  • TMF+ Member
  • PipPipPipPip
  • 150 posts
  • Location: Blackpool, Lancashire

Posted 26 September 2009 - 07:16 PM

not done an update in a while. got a few things to report.

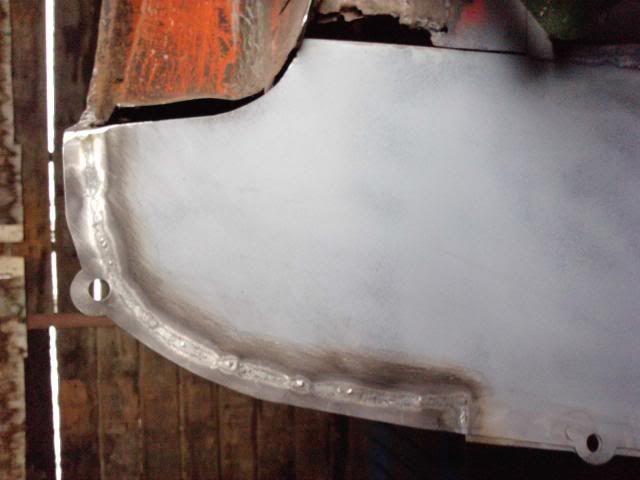
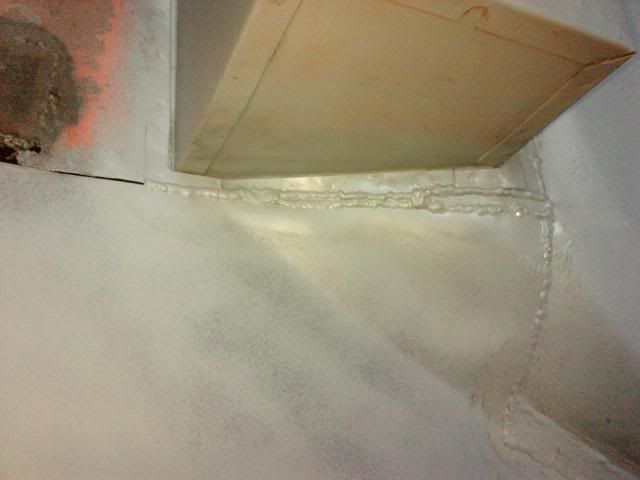
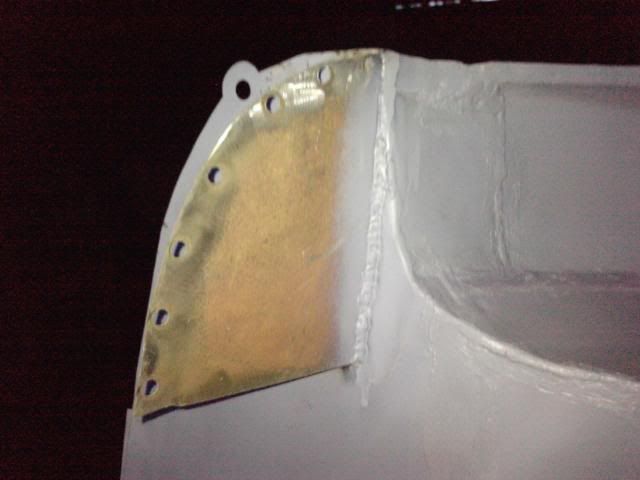
i have seam sealed the rear end of the car as much as i could.
Posted Image

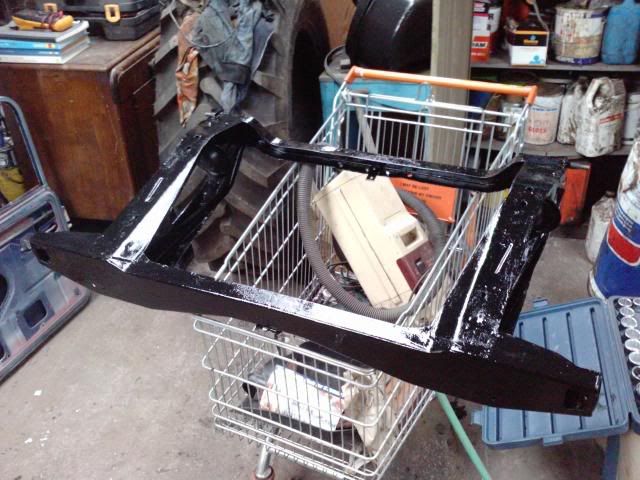
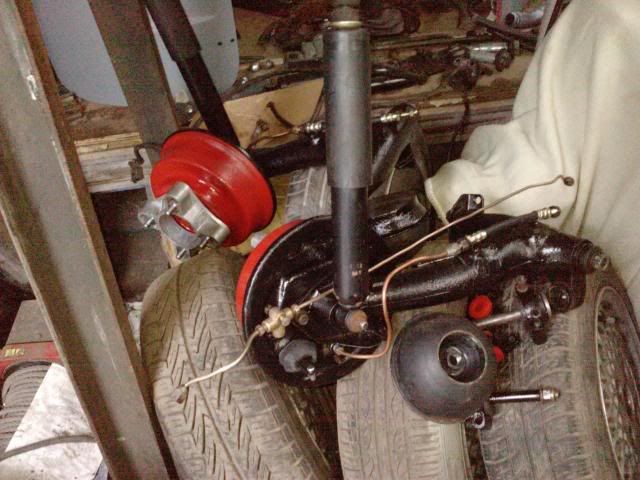
both rear radius arms and suspension components are all cleaned, painted and parts have been renewed as necessary. just got to clean and paint the subframe now.
Posted Image

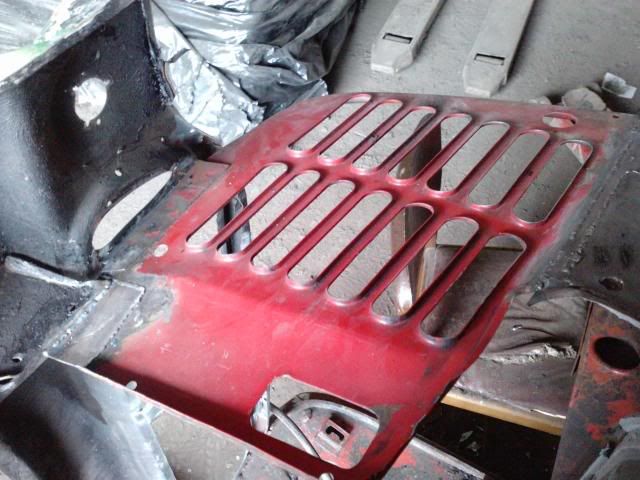
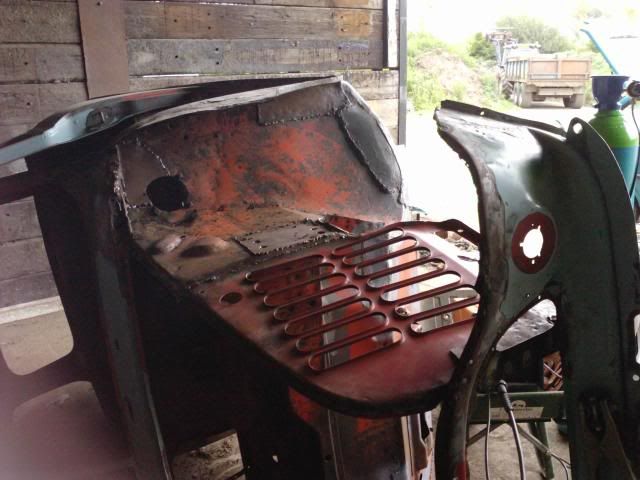
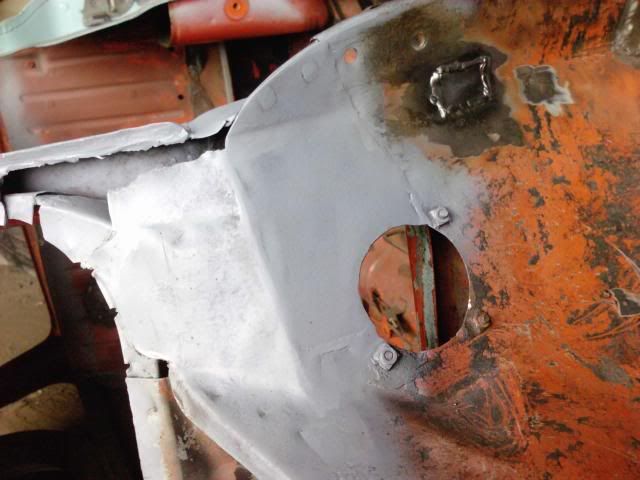
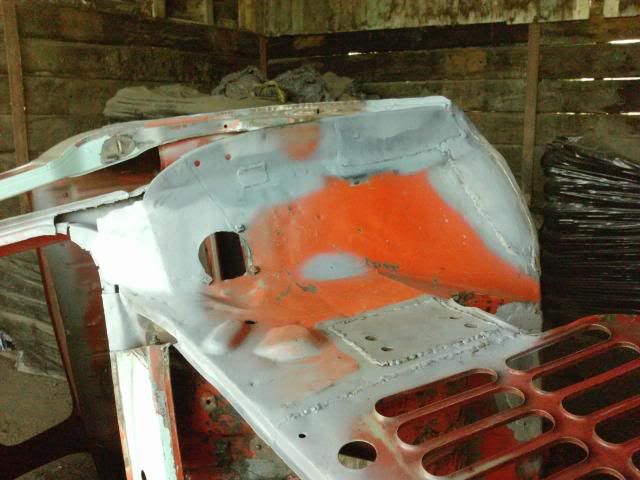
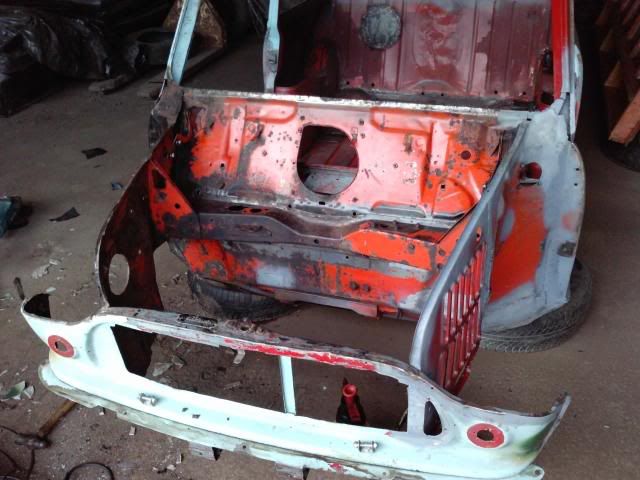
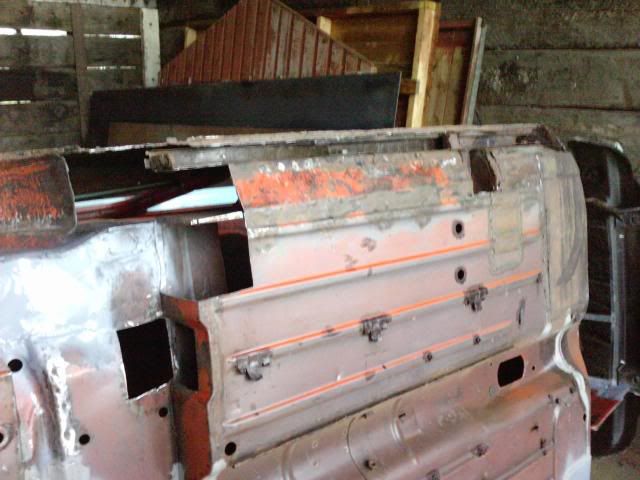
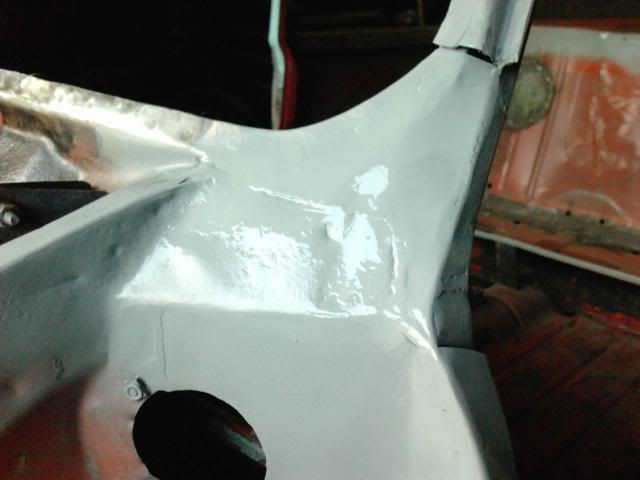
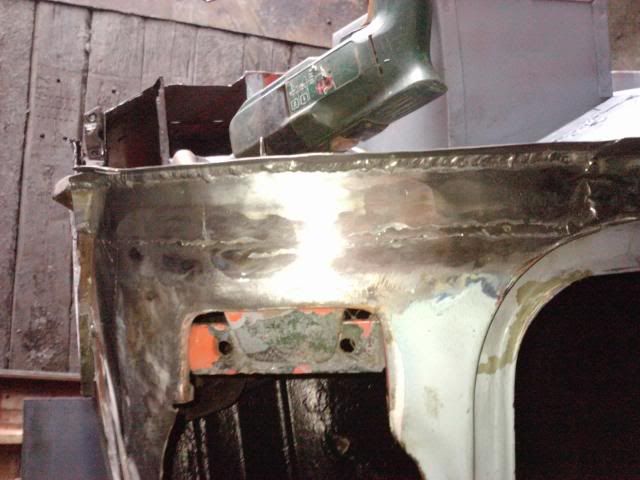
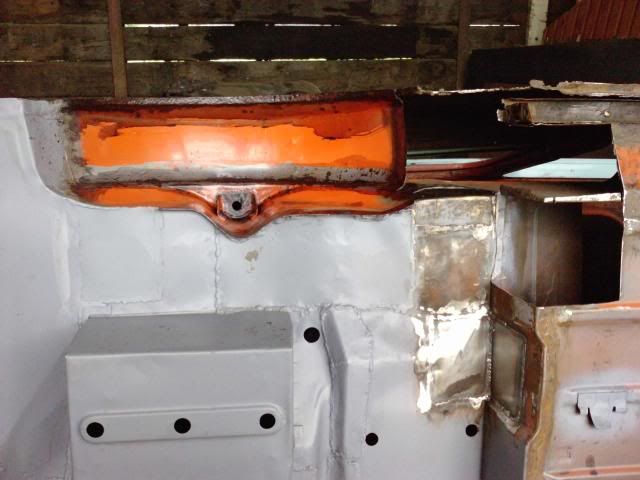
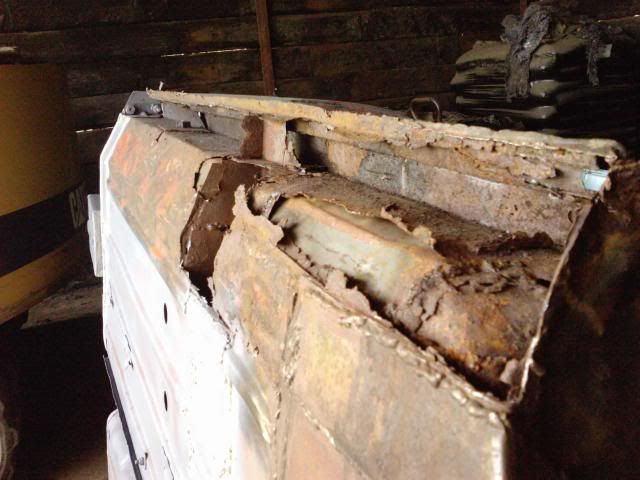
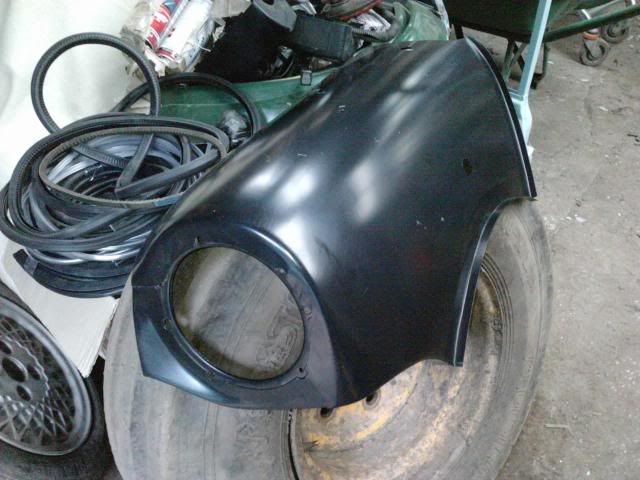
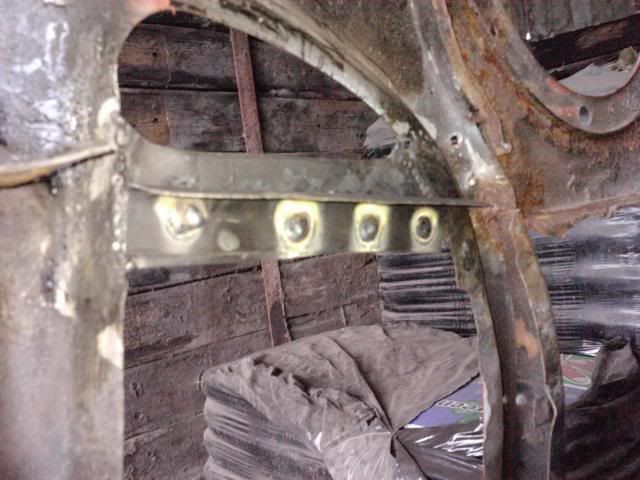
also started work on the front end at last. managed to get hold of some second hand inner wings and a new wing.
Posted Image
Posted Image

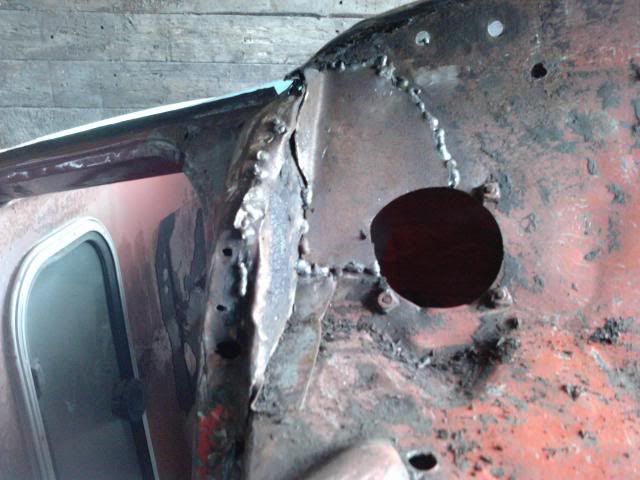
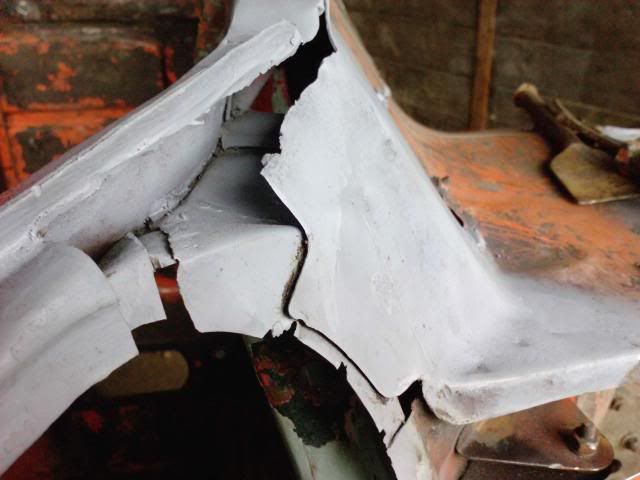
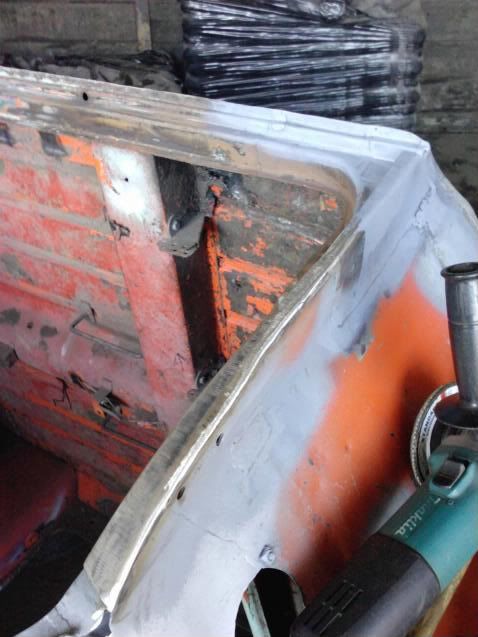
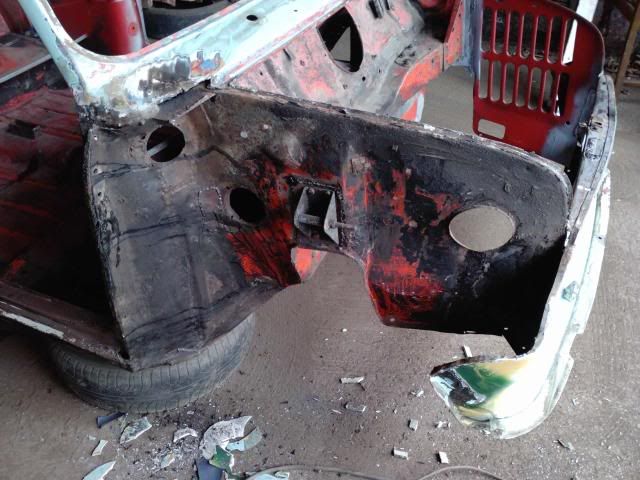
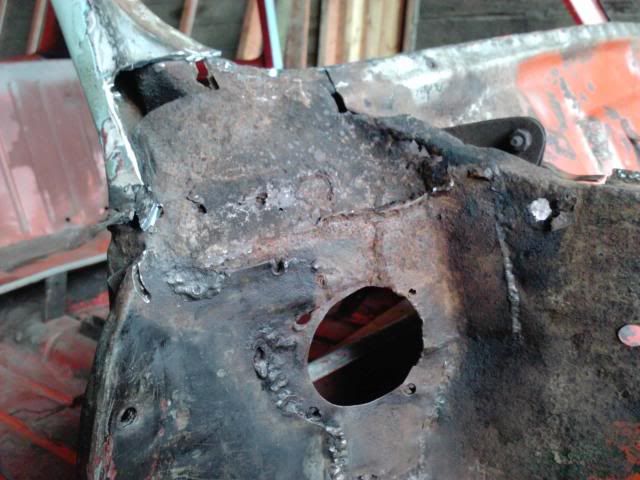
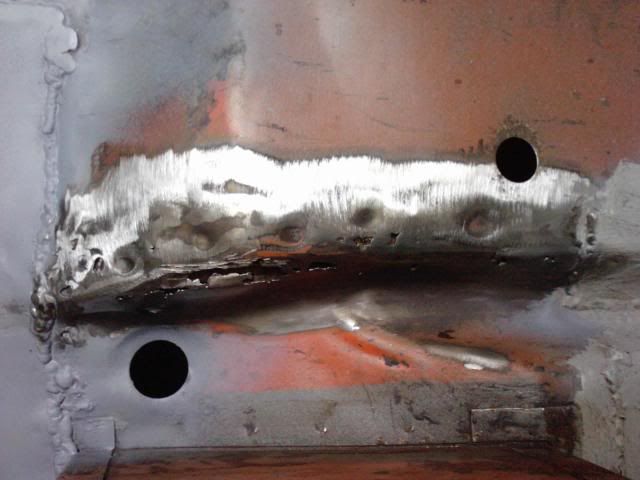
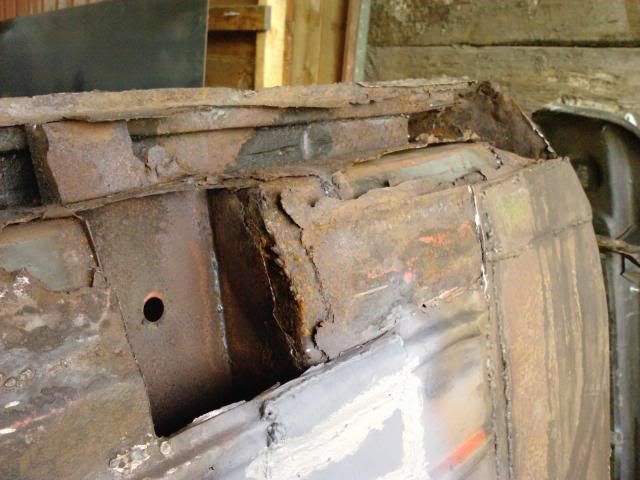
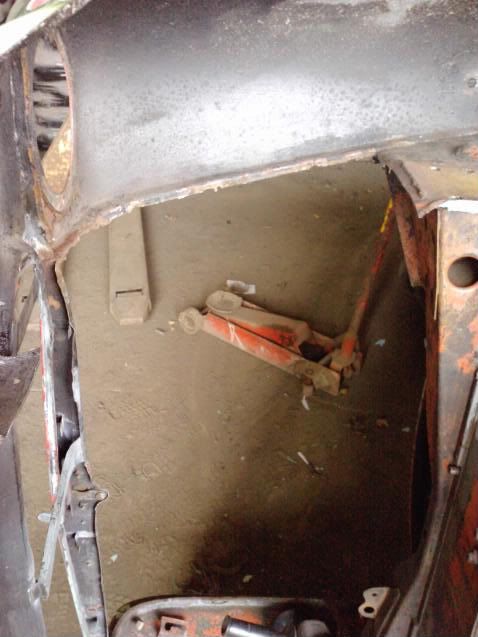
removed the old inner wing.
Posted Image

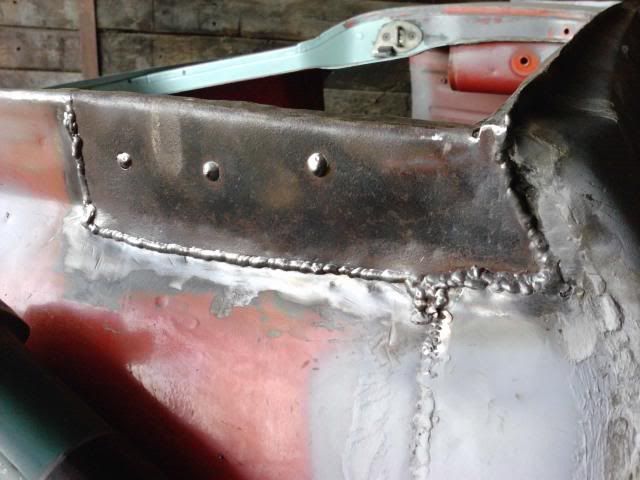
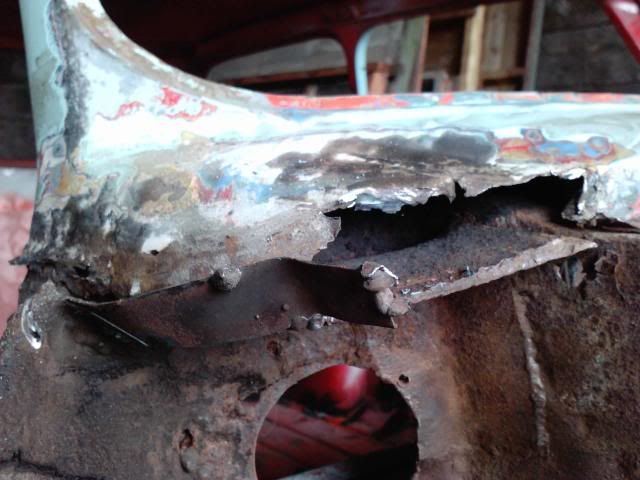
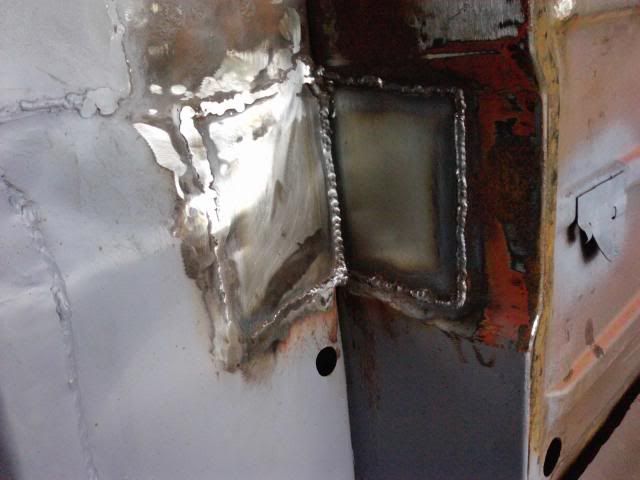
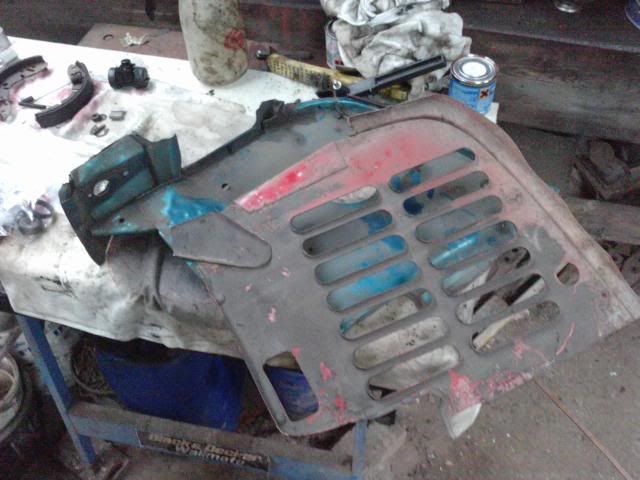
had to replace a section of the front panel as i had made a hash of removing the spot welds that were holding the old inner wing in place.
Posted Image
Posted Image

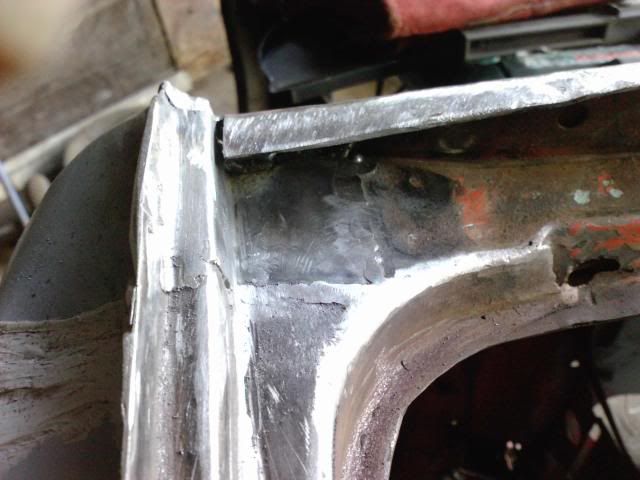
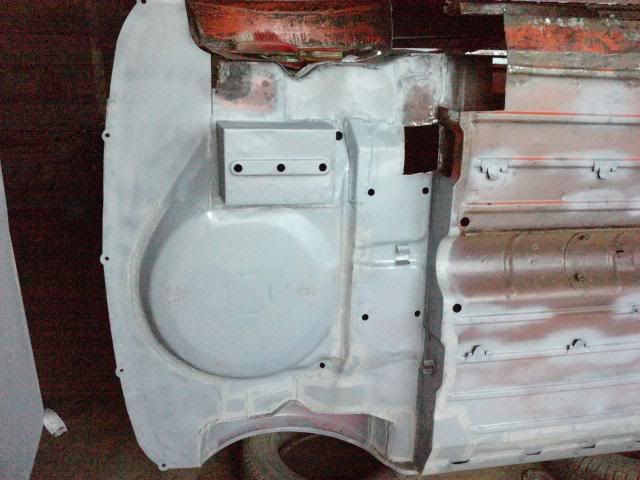
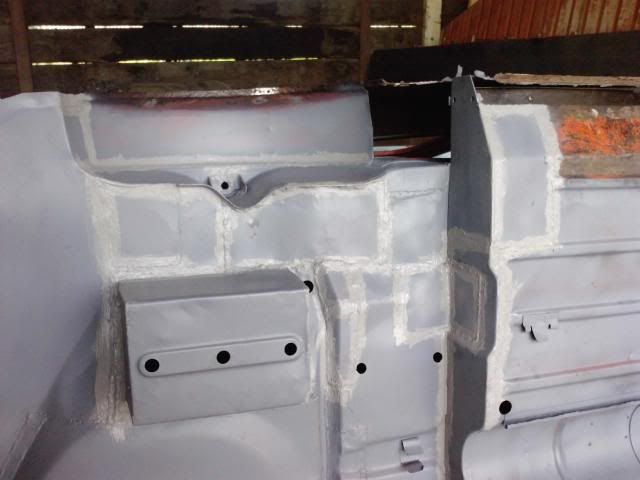
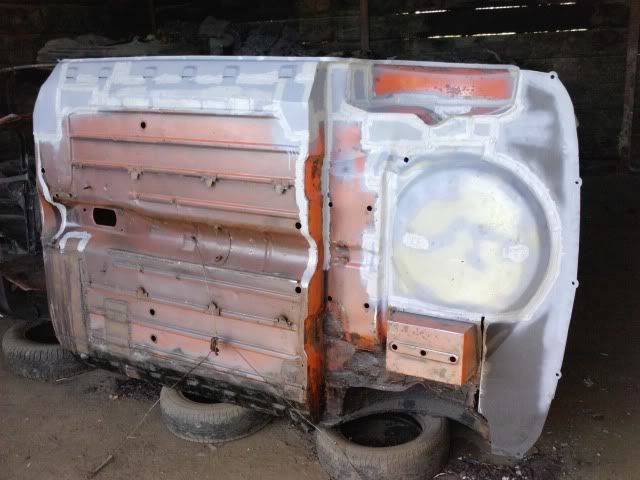
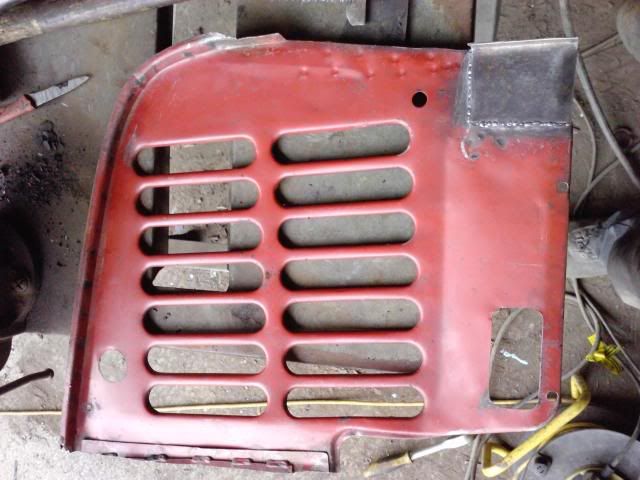
the new inner wing is almost ready to go in.
Posted Image

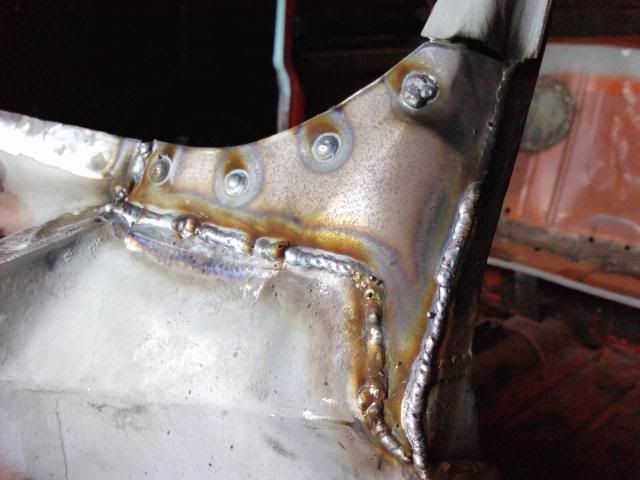
tomorrows objective is to get the inner wing fitted and hopefully the new wing as well :dontgetit:

#17 Bash Master

Bash Master

    Mini Mad

  • TMF+ Member
  • PipPipPipPip
  • 150 posts
  • Location: Blackpool, Lancashire

Posted 27 September 2009 - 05:16 PM

more updates.

the new inner wing is in!
Posted Image

i have also removed the rusted through wing. i think whilst it is off i may as well replace part of the rusted scuttle, area around the air vent and a i'll fit a new A panel too. then i won't have to be worried about this side falling apart anytime soon :) will get these new panels ordered asap me thinks :D
Posted Image

Posted Image

also cleaned and painted the rear subframe. even a trolley gets turned into storage space i'm that short of it lol Posted Image

that's it for now. more updates later on this week :)

Edited by Bash Master, 27 September 2009 - 05:21 PM.


#18 Bash Master

Bash Master

    Mini Mad

  • TMF+ Member
  • PipPipPipPip
  • 150 posts
  • Location: Blackpool, Lancashire

Posted 03 October 2009 - 07:02 PM

this weeks update:

not as much to report as i'd like. my new A panel, scuttle corner and support panel turned up the other day so i began getting them to fit... which they don't >:) next time i'm only getting the genuine panels not cheap copies. i've been working on repairing other areas around the scuttle before i fit the new corner piece. forgot to take before pics but hopefully you can make out where i welded in the new patches.

Posted Image

Posted Image

Posted Image

Posted Image

Posted Image

also, i have been to the local car breakers looking for an alternator for my daily driver but i stumbled across something else instead. i spotted a mini sat in the corner of the yard rotting away! i've had a quick look round it and it's probably fair to say the shell has seen better days but it has some good parts i would like off it. i'm going to see if he'll let me have the whole car next time i'm there and use it as a donor.

that's it for this week, i'm off doing my other hobby tomorrow - racing 1/8th scale RC rallycross buggys round a track :) this is my other money pit:

Posted Image

Edited by Bash Master, 03 October 2009 - 07:02 PM.


#19 daemonchild

daemonchild

    Up Into Fourth

  • Members
  • PipPipPipPipPipPipPipPipPip
  • 2,341 posts
  • Location: Pontypridd
  • Local Club: Unknown

Posted 03 October 2009 - 07:40 PM

Hey Nathan,

This project is looking very very good matey.
You're far ahead of me and I am seriously jealous of your space.
(Yes, and I know you recon you're short of it!!)

Keep it up.. I want to see this one on the road... :)

Tom

#20 miniQ

miniQ

    Speeding Along Now

  • Members
  • PipPipPipPipPip
  • 497 posts
  • Location: Manchester

Posted 03 October 2009 - 07:47 PM

nice cant wait to see it in primer

#21 Bash Master

Bash Master

    Mini Mad

  • TMF+ Member
  • PipPipPipPip
  • 150 posts
  • Location: Blackpool, Lancashire

Posted 03 October 2009 - 08:43 PM

thanks for the comments :)

sometimes i'd rather be working in a cramped garage than in the building i have to use. every time it rains heavily it floods the whole place. good job i have the mini raised up on tyres!

#22 Bash Master

Bash Master

    Mini Mad

  • TMF+ Member
  • PipPipPipPip
  • 150 posts
  • Location: Blackpool, Lancashire

Posted 11 October 2009 - 08:03 PM

very little to report this week. i've been busy working on my daily driver a lot lately. don't buy a rover (unless of course it's a rover mini :P ) as they're electrics are terrible :thumbsup: i've been chasing a stupid battery drain on it since i bought the thing and nothing seems to help. even had the alternator replaced twice. i'll get to the bottom of it one day...

back on topic, i have finished the rear subframe. all ready to go back on the car some day. don't mind the cluttered workbench, that's my dads mess NOT MINE lol!

Posted Image

not much done on the front apart from an area around the A panel which was repaired.

Posted Image

i've also tried fitting the new wing which surprise surprise doesn't fit properly! going to have to get a genuine one instead. can anyone recommend somewhere i can get genuine wings for a MK4? minispares only do MK1/2 and i don't even know if they will post them?

more to come later in the week :thumbsup:

#23 Bash Master

Bash Master

    Mini Mad

  • TMF+ Member
  • PipPipPipPip
  • 150 posts
  • Location: Blackpool, Lancashire

Posted 18 October 2009 - 07:14 PM

this weeks update.

not much to report unfortunately. i have been racing again today and have also been busy working on other projects. i did manage a day on the mini this week though. i tipped it back over and started work on the other side removing the old wing and A panel. i've had a good look at what needs doing and first impressions are pretty bad. this side has a lot more rust and repaired areas on it that need sorting.

Posted Image

Posted Image

i decided it was probably best to replace the entire scuttle panel so i removed the old one.

Posted Image

Posted Image

i have the new scuttle, wing and A panel ready to be fitted just didn't get round to it this week. it's half term is next week though so i'll hopefully have some more time to work on the mini then :(

#24 Bash Master

Bash Master

    Mini Mad

  • TMF+ Member
  • PipPipPipPip
  • 150 posts
  • Location: Blackpool, Lancashire

Posted 26 October 2009 - 05:57 PM

a few updates from the past couple of days.

i decided i would put the car onto its other side and start work on the sill and rear wheel arch. so i started by removing the old over-sill which turned out to be hiding a load of rust underneath so plenty of work to be done there :D i thought i'd finish the rear end off first before starting on the middle/front of the car. chopped out all the rusted areas and patched a few areas. a few pics from then to now:

Posted Image

Posted Image

Posted Image

Posted Image

Posted Image

i did this area under the scuttle panel before the car was tipped on its side:

before:
Posted Image

after:
Posted Image

Posted Image

it's half term this week so i've got lots of spare time to work on the mini provided the weather holds out. not been too good recently...

#25 miniallsort

miniallsort

    Up Into Fourth

  • Members
  • PipPipPipPipPipPipPipPipPip
  • 4,723 posts

Posted 27 October 2009 - 10:07 PM

great work mate

#26 Down&Out

Down&Out

    The King Of Retro Cool

  • Traders
  • PipPipPipPipPipPipPipPipPip
  • 4,847 posts
  • Location: -

Posted 28 October 2009 - 01:55 PM

This deserves more replies :(.

Your welding is fabbo, and all your work is generally very tidy.

I'm also liking the pictures :lol:.

Looking forward to future updates :P.

#27 PhilipGCaldwell

PhilipGCaldwell

    One Carb Or Two?

  • Members
  • PipPipPipPipPipPipPip
  • 870 posts

Posted 28 October 2009 - 02:13 PM

impresse with the workmanship on display here. that engine looks excellent in red and black, and also the brakes look fab :lol:
The welding looks of a great standard as well, I think me and 'down&out' wish we were that good at welding. The amont of rust shown is something similar to project gravy, the is one seriously restored mini!
good luck

#28 Down&Out

Down&Out

    The King Of Retro Cool

  • Traders
  • PipPipPipPipPipPipPipPipPip
  • 4,847 posts
  • Location: -

Posted 29 October 2009 - 04:25 PM

I wish i could weld in the first place :D

Luckily mine isnt this rusty :dontgetit:.

#29 Bash Master

Bash Master

    Mini Mad

  • TMF+ Member
  • PipPipPipPip
  • 150 posts
  • Location: Blackpool, Lancashire

Posted 31 October 2009 - 06:21 PM

thanks for the comments, they're always appreciated ^_^

i have got plenty of welding done this week. quite happy with myself :lol:

Posted Image

also managed to return the rear light cluster hole (or whatever it's called) back to rectangular instead of having a round hole in them but forgot to take pics :D

Posted Image

Posted Image

Posted Image

Posted Image

seam sealed all joints and welds.

Posted Image

started work on the valance closing panels. i had bought some non genuine ones in hope they would fit but they are poo so made my own. just the inner pieces to do then i can get the valance on. sorry about the bad picture quality it was taken in the dark.

Posted Image

next job in the list is this;

Posted Image

Posted Image

i've ordered the panels to repair the sills, door step and flitch but they must be caught up in the postal strike... twiddling my thumbs until they turn up :D

don't know if i can do anything tomorrow as the weather report looks bad for the hole country ^_^

#30 benno1275

benno1275

    Speeding Along Now

  • Members
  • PipPipPipPipPip
  • 391 posts
  • Local Club: bmc

Posted 31 October 2009 - 07:19 PM

well done so far mate took some balls to even think of taking that on

keep it up


1 user(s) are reading this topic

0 members, 1 guests, 0 anonymous users