Jump to content


Photo
- - - - -

1979 Austin Mini 1000 Restoration


  • Please log in to reply
157 replies to this topic

#1 Bash Master

Bash Master

    Mini Mad

  • TMF+ Member
  • PipPipPipPip
  • 150 posts
  • Location: Blackpool, Lancashire

Posted 13 August 2009 - 07:20 PM

Hi all. I've been restoring my mini since about mid april but only recently thought of posting the updates on here :)

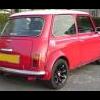
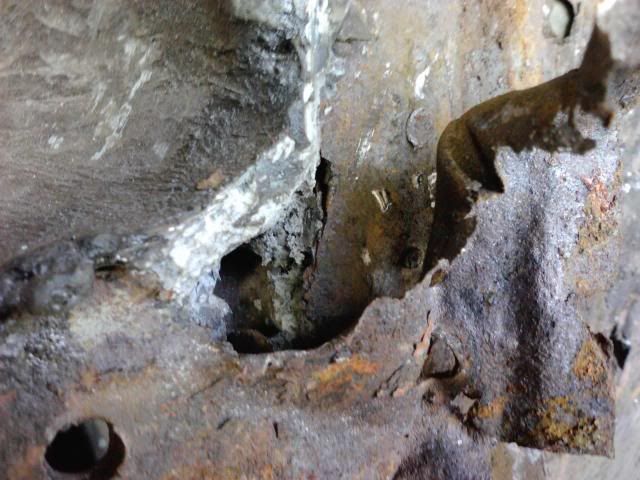
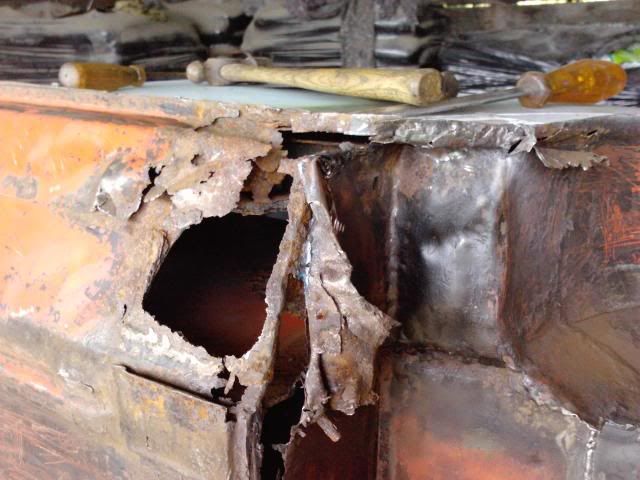
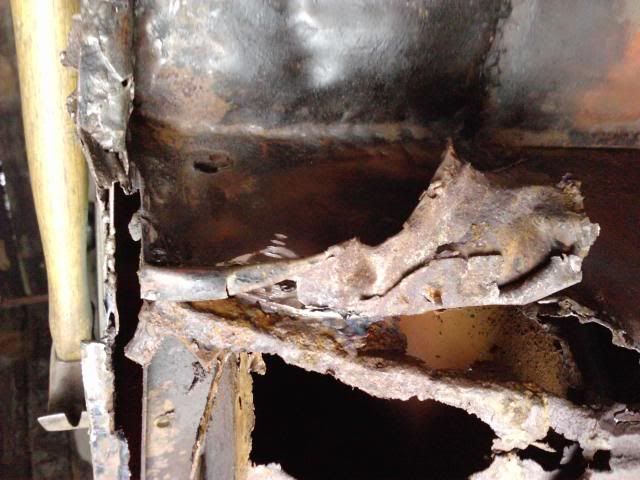
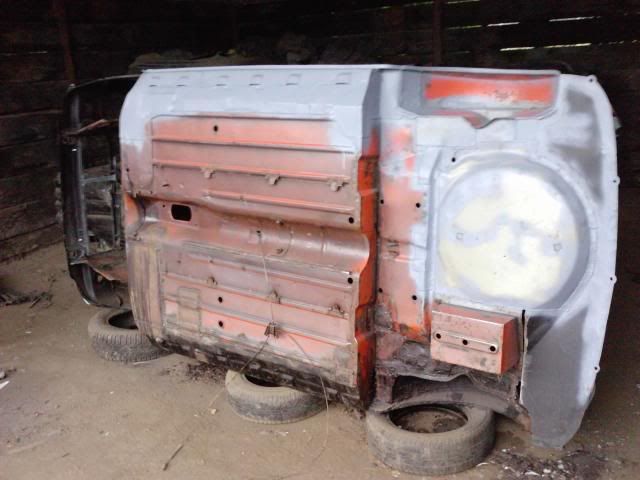
basically it's a 1979 Austin Mini 1000 i bought off ebay for the grand total of £360 which didn't sound too bad judging by the photos of it, and then i went to collect it... now, the original intention was for me to do a quick job and get it on the road as my fist car ready for college in september. that idea was out the door when i realised just how much work needed doing to it. not much point trying to rush it so i'm now restoring it to the best of my abilty and i will be doing all the work myself, including the welding and a full respray.

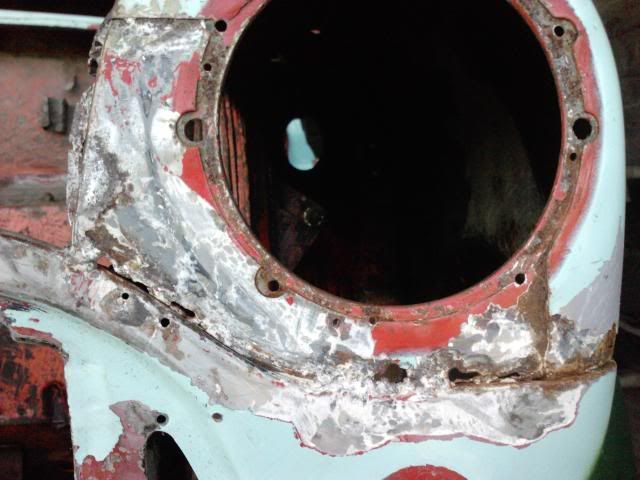
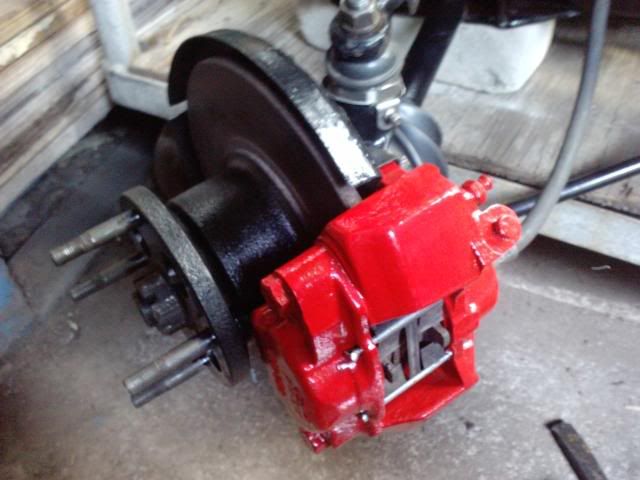
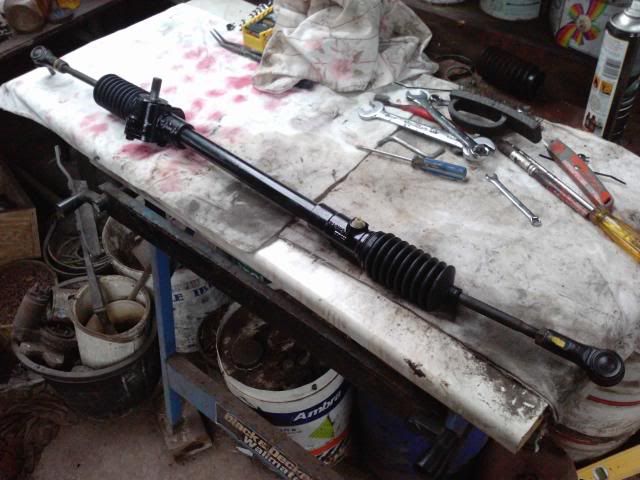
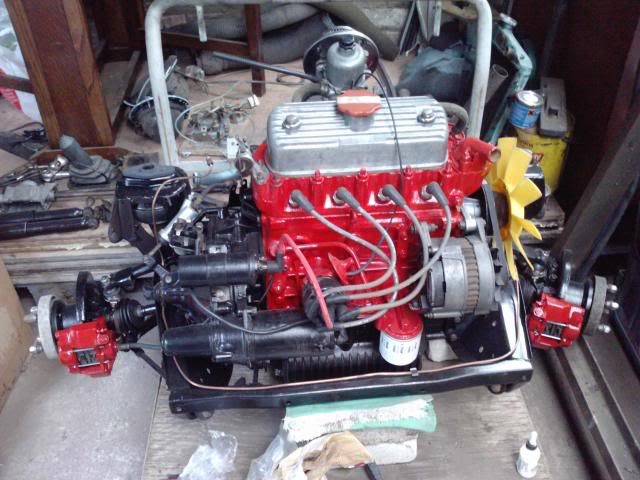
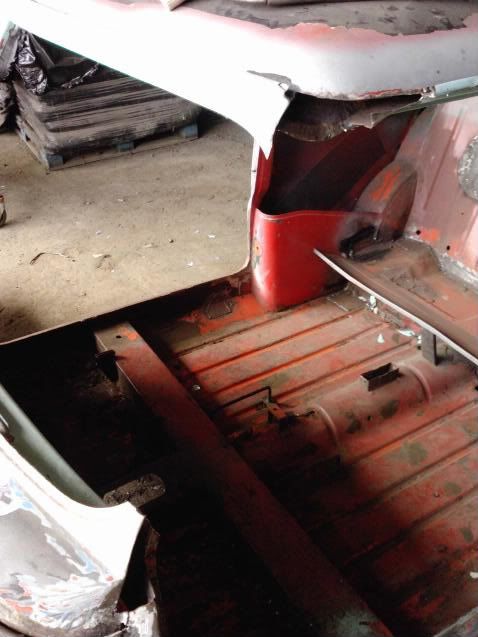
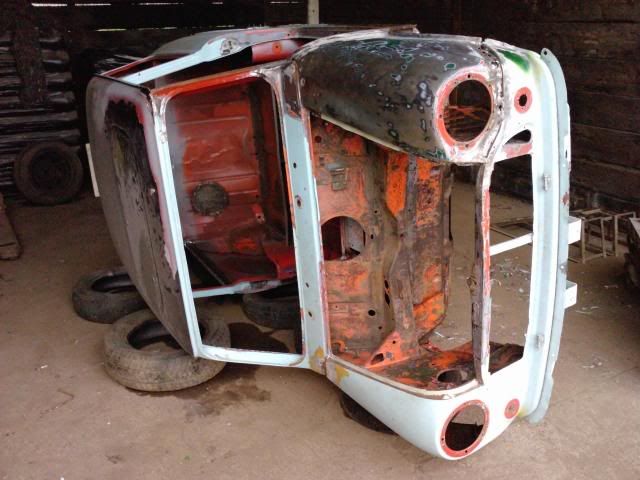
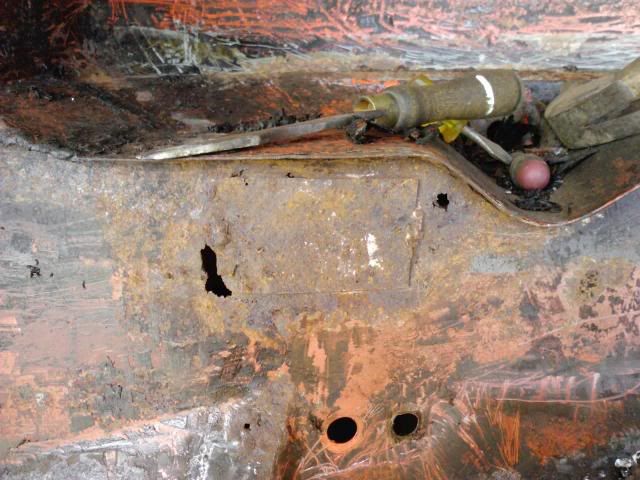
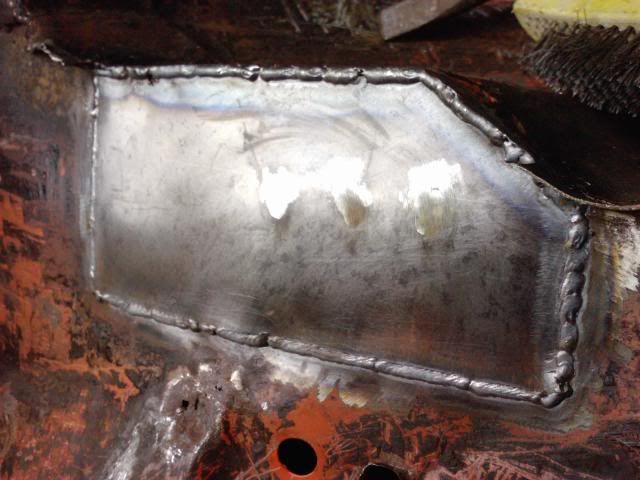
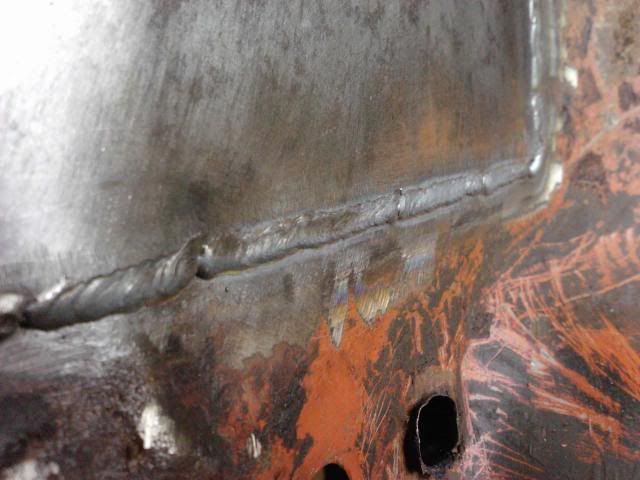
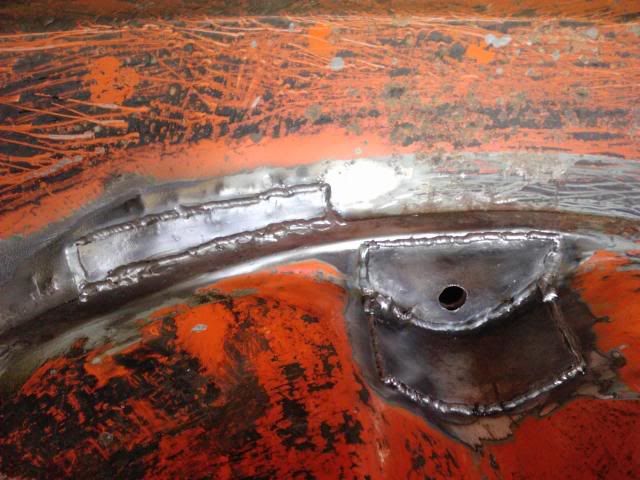
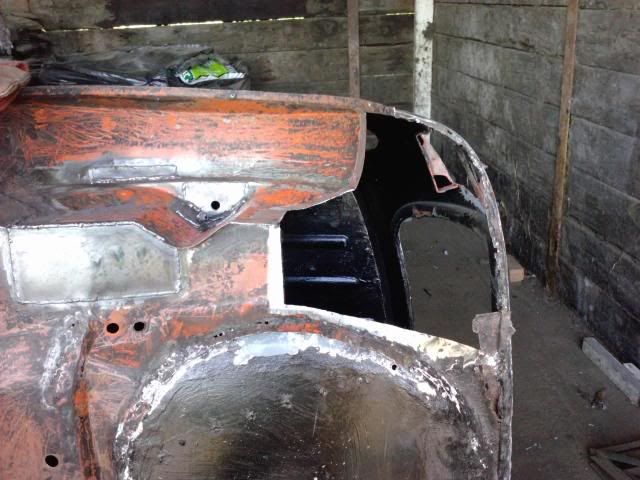
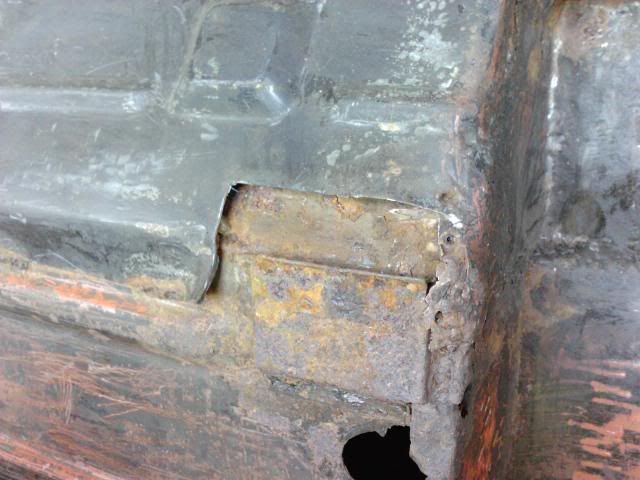
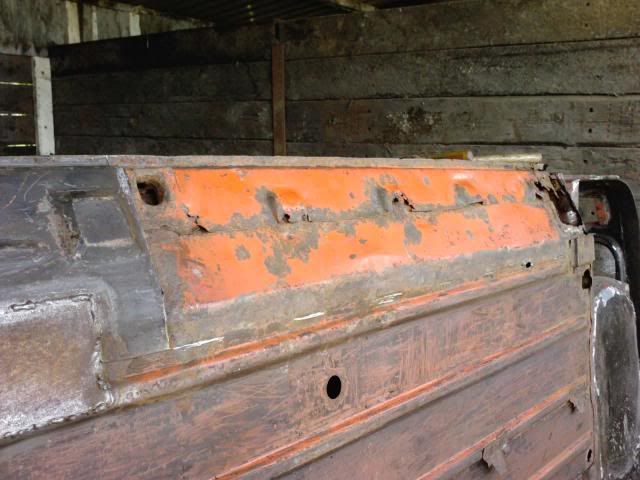
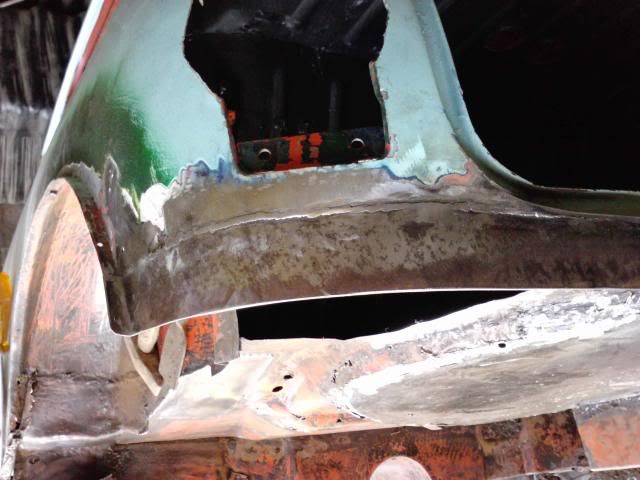
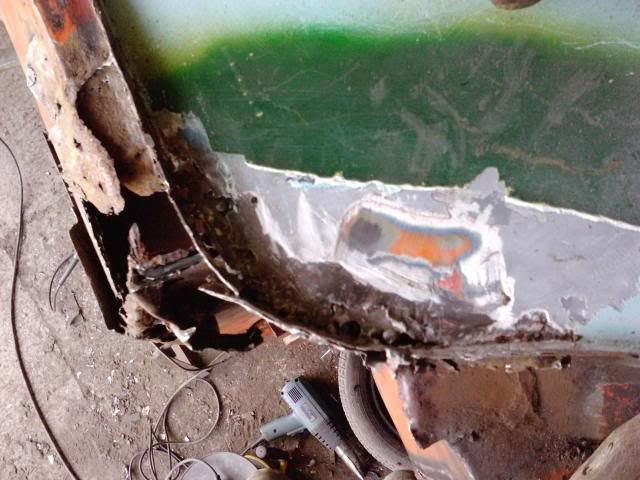
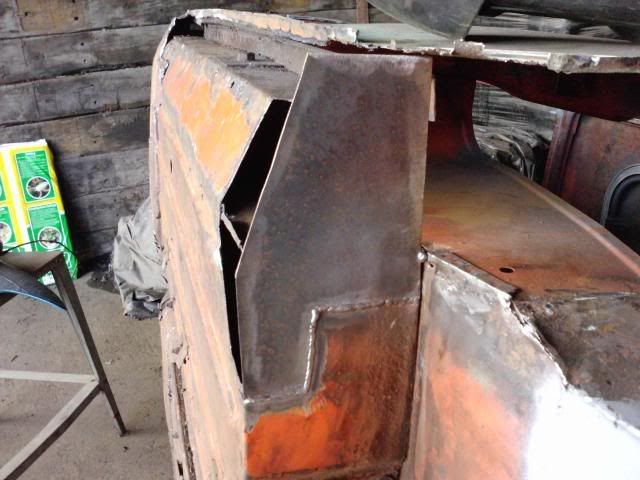
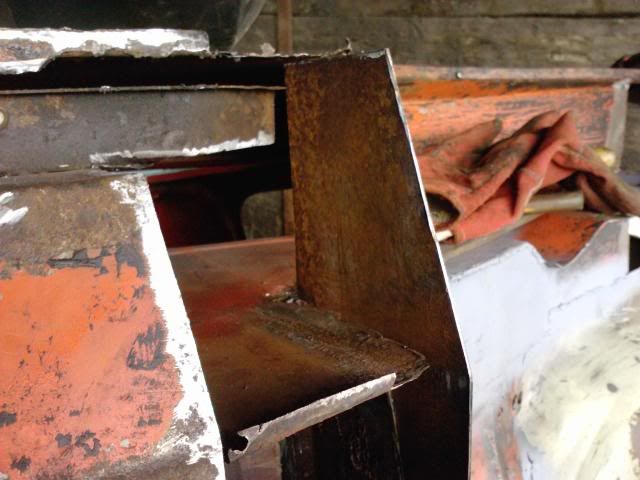
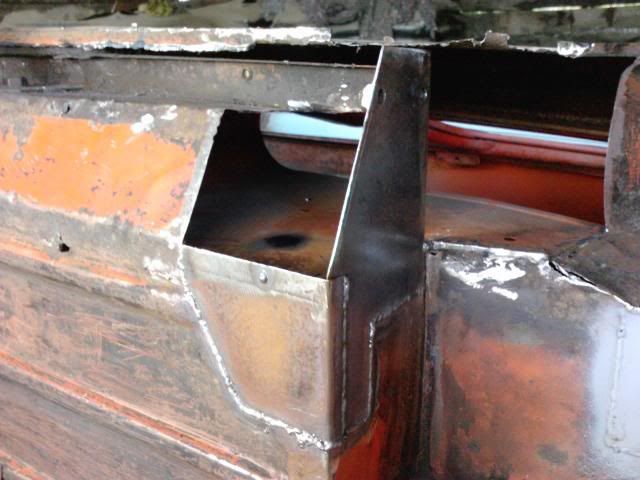
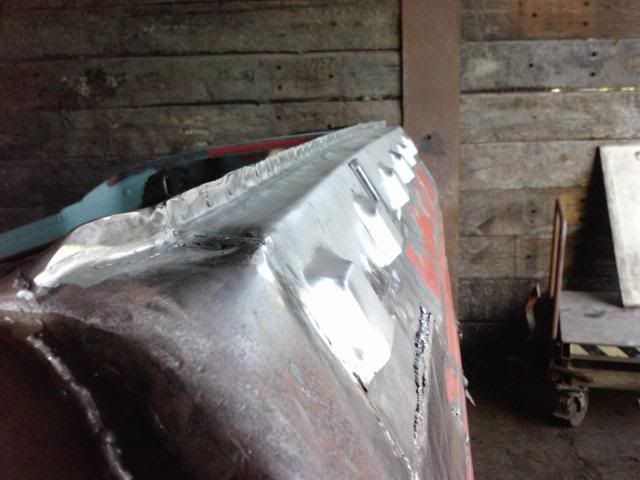
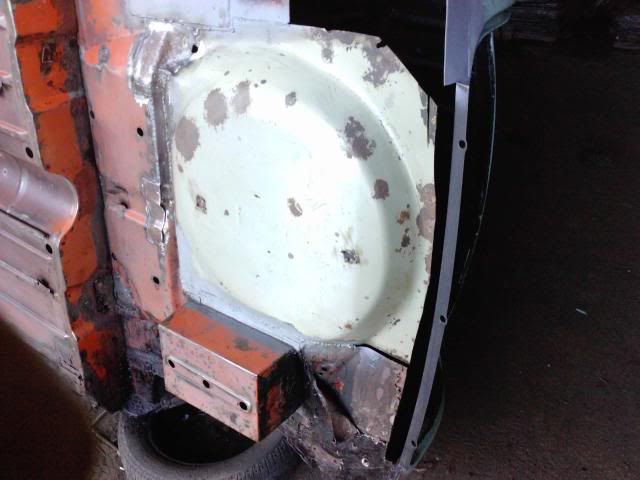
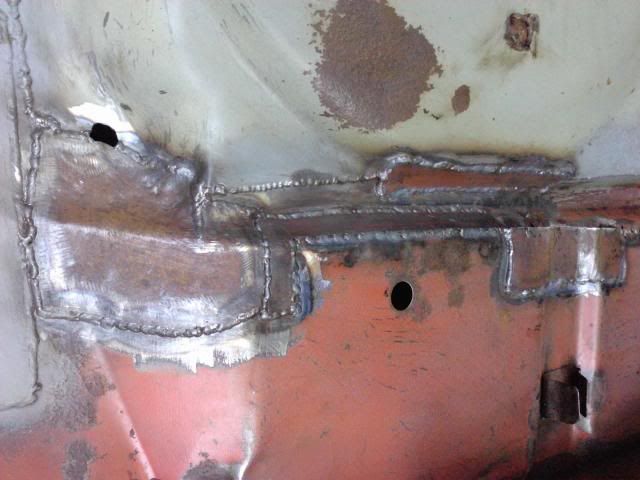
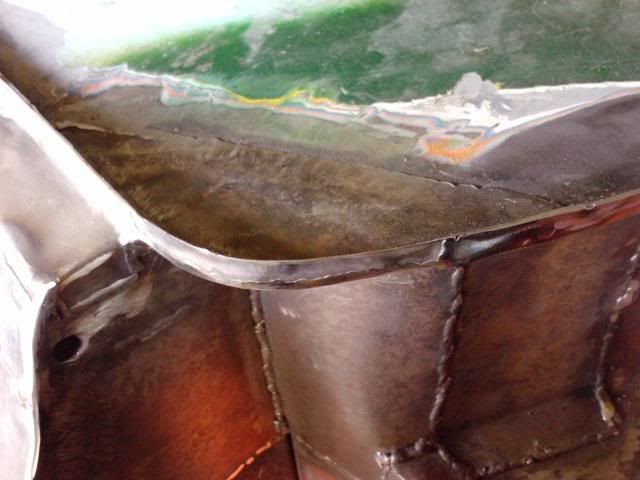
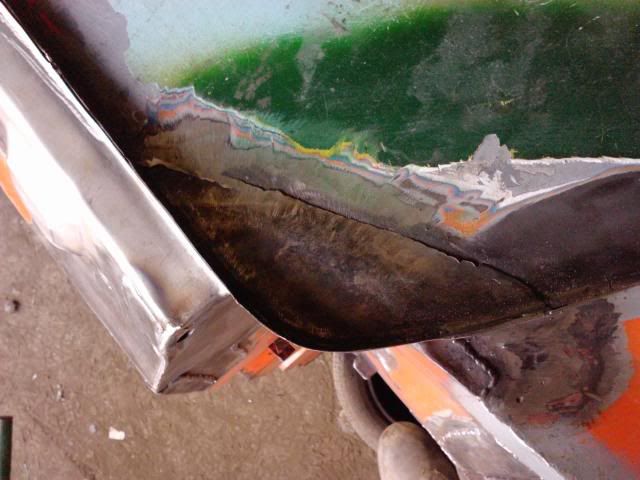
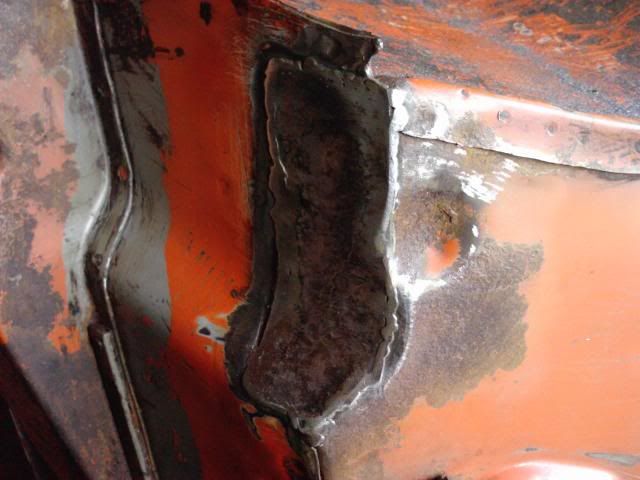
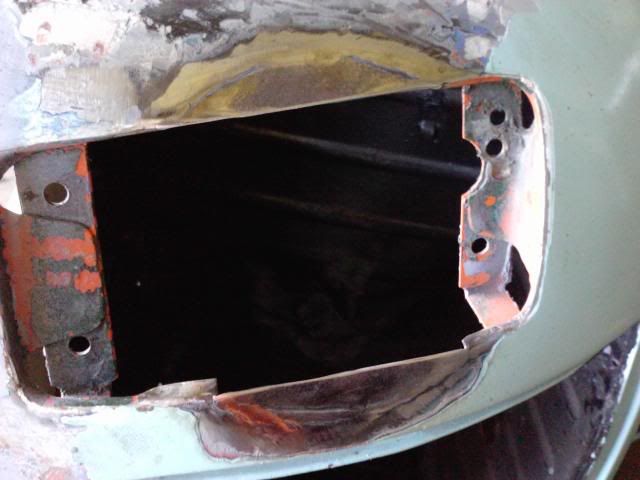
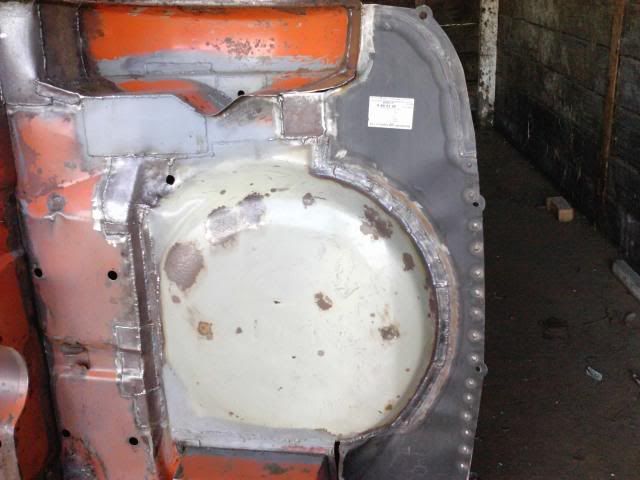
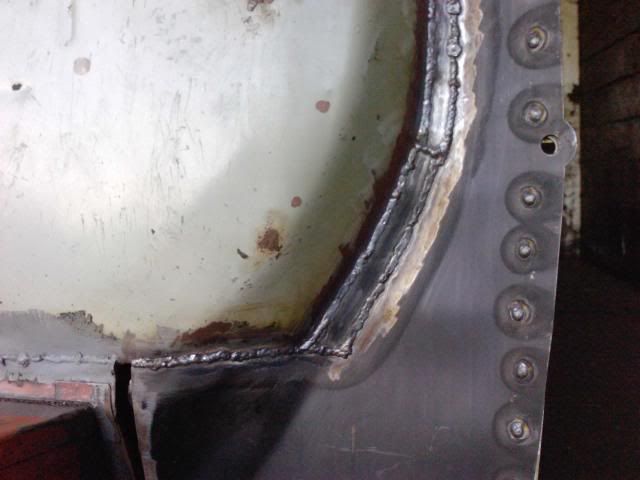
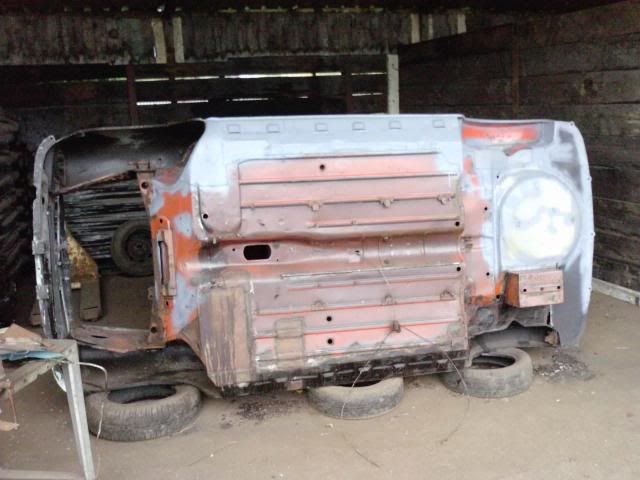
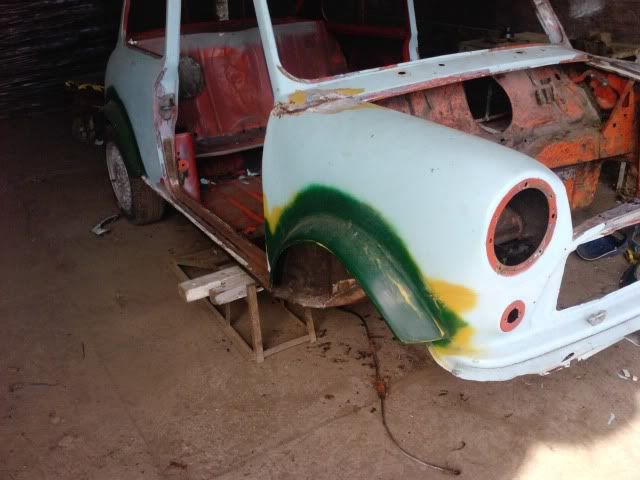
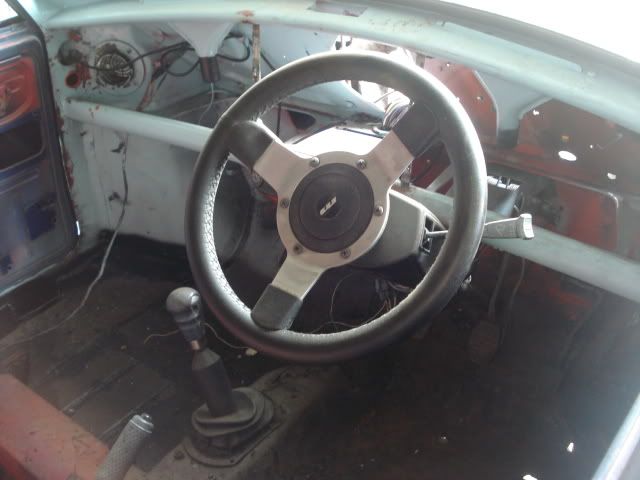
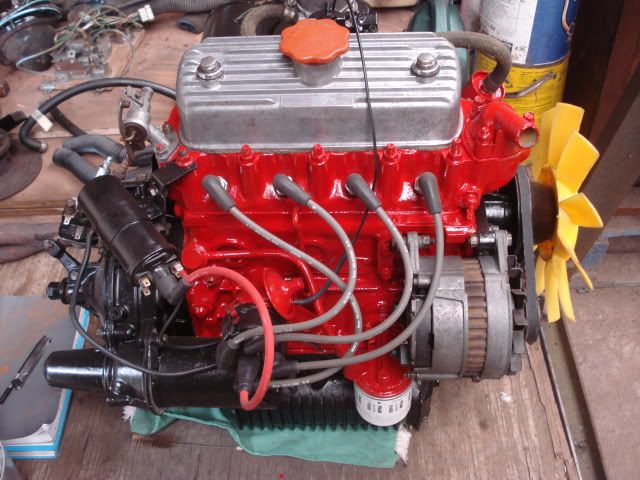
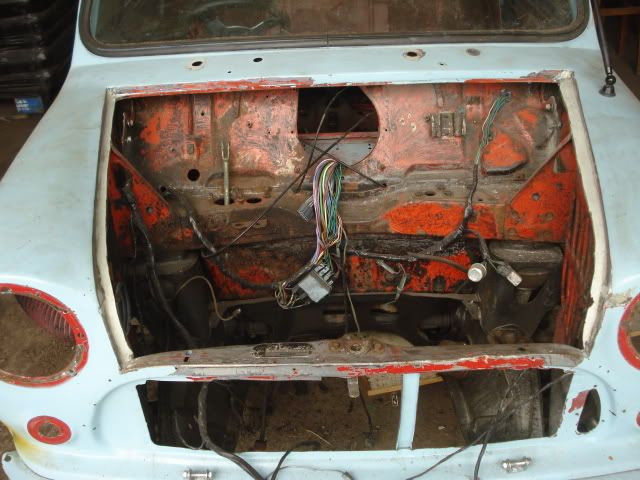
so, at present the progress on the mini has started to get somewhere finally. most welding has been done underneath on both floor pans, sills and back seat etc. engine is all cleaned up and painted up and is now all bolted into it's subframe ready for installation back into the car. i was going to rebuild the engine but it ran fine and the gearbox felt ok so i'm going to leave it alone.

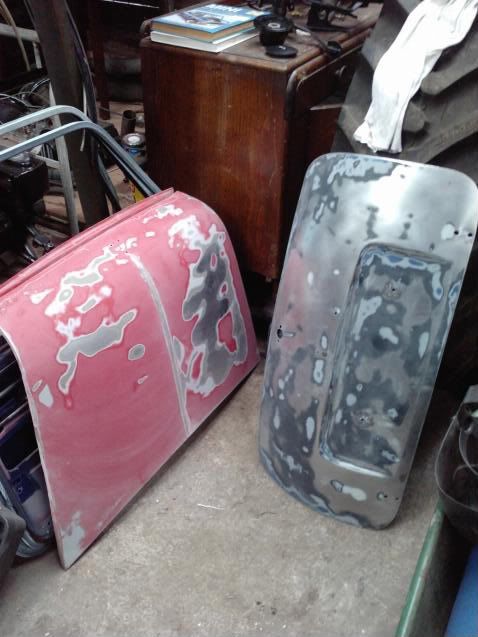
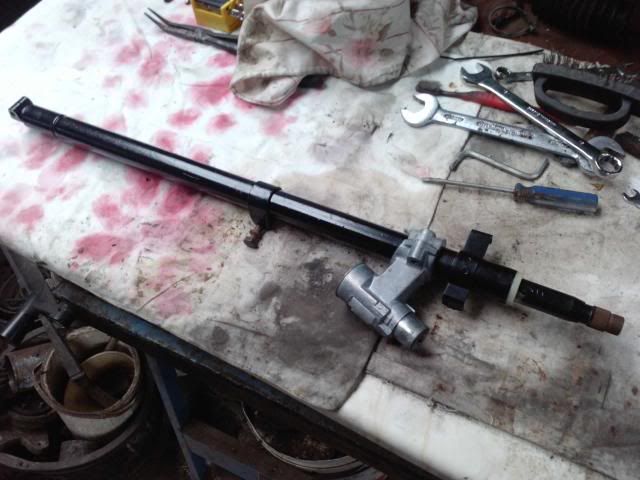
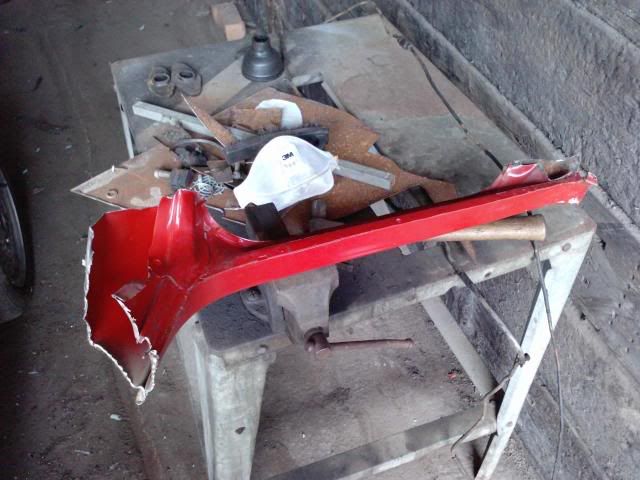
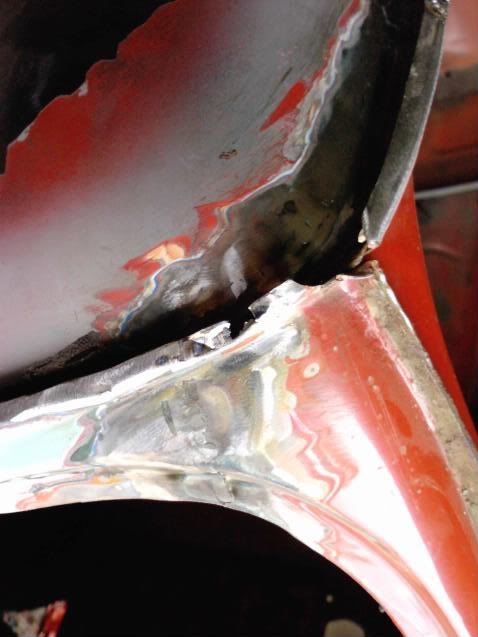
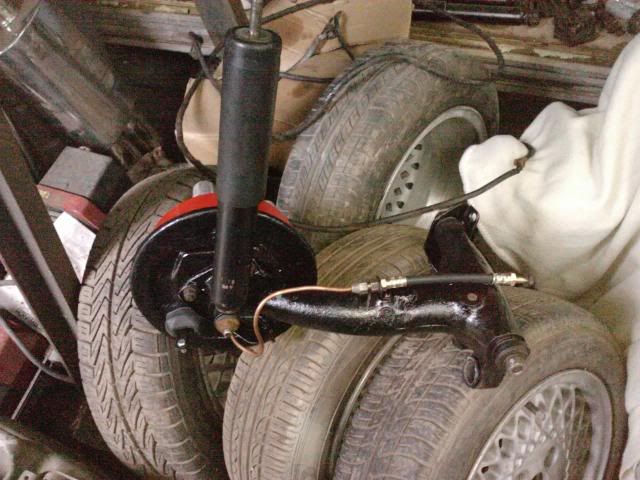
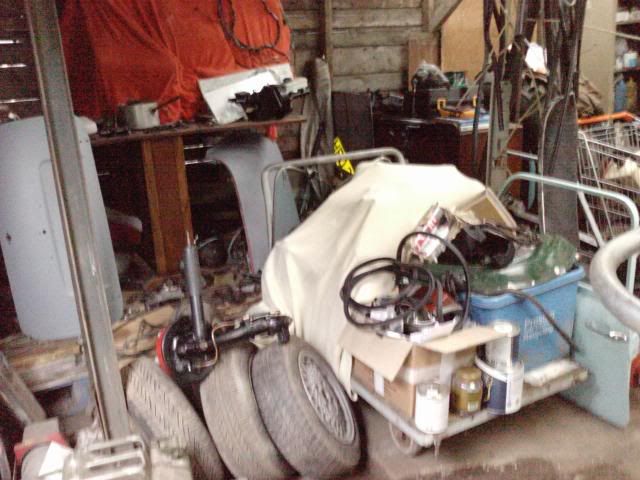
might not seem as though i have done an awful lot of work and it's probably not really but i've spent most of my time removing, cleaning, painting and renewing parts as i go. at the moment things seem to be going very slowly, i can't wait till i can start putting parts back on the car rather than taking them off!

anyway enough talk some photos of some of the progress made. i'll take some more photos tommorrow and post them up.

Most recent:
Posted Image

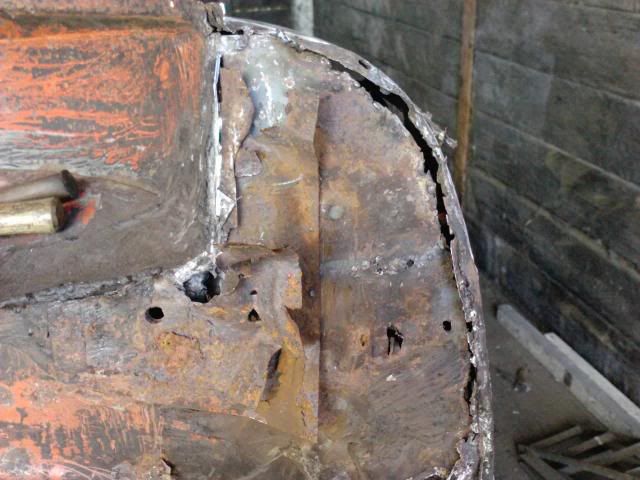
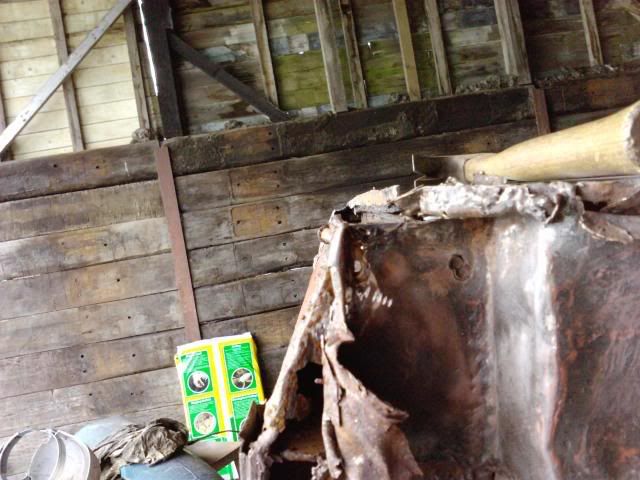
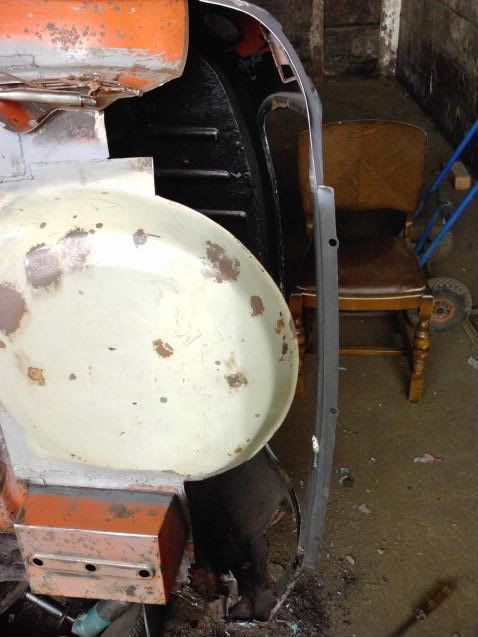
Some older ones when the subby was still in:
Posted Image

Posted Image

Posted Image

oh yeah, i've been trying to think of a name for it but i can't really think of a good one so any input on that would be great.

nathan

#2 dm91dm

dm91dm

    Mini Mad

  • Noobies
  • PipPipPipPip
  • 149 posts

Posted 13 August 2009 - 07:32 PM

Looks like a good project, what are the plans for it?

#3 Down&Out

Down&Out

    The King Of Retro Cool

  • Traders
  • PipPipPipPipPipPipPipPipPip
  • 4,847 posts
  • Location: -

Posted 13 August 2009 - 07:34 PM

Nice mini mate.

Many of us on this forum know what its like to find rust in a car we thought was fairly solid.

Best of luck.

#4 Bash Master

Bash Master

    Mini Mad

  • TMF+ Member
  • PipPipPipPip
  • 150 posts
  • Location: Blackpool, Lancashire

Posted 13 August 2009 - 08:21 PM

thanks guys

i was hoping i could replace the metro gta wheels with deep dish minilites at some point. would also like a roll cage fitting as well just for that added protection if (fingers crossed) i have an accident on the road.

i haven't decided what colour to spray it yet. i'm torn between white or black, hmmm? it's definately having a checkered roof though :)

#5 Down&Out

Down&Out

    The King Of Retro Cool

  • Traders
  • PipPipPipPipPipPipPipPipPip
  • 4,847 posts
  • Location: -

Posted 14 August 2009 - 02:53 PM

Rollcages dont neccesarily offer much extra protection on the road. Unless you fit proper bucket seats and harnesses, it's pretty much a big lump of metal a few inches from your head that your likely to brain yourself on if you crash.

I'm not trying to put you off one, im just saying that you arent really likely to properly roll your mini. Plus not having one will leave you some money to spend on something else :D.

Although, if you want one simply for aesthetics, go for it, just keep in mind its not going to offer you hosts of extra protection :xxx:

Good luck :lol:

#6 Bash Master

Bash Master

    Mini Mad

  • TMF+ Member
  • PipPipPipPip
  • 150 posts
  • Location: Blackpool, Lancashire

Posted 14 August 2009 - 06:32 PM

thanks for the input. it was just an idea that having a roll cage would keep the car a bit more rigid if i have an accident, looks come second. i thought about bucket seats but this car will more than likely be my daily driver so i want something comfortable.

i have some more pics.

going to try and repair this panel.
Posted Image

Posted Image

Posted Image

Posted Image

Posted Image

Posted Image

#7 Bash Master

Bash Master

    Mini Mad

  • TMF+ Member
  • PipPipPipPip
  • 150 posts
  • Location: Blackpool, Lancashire

Posted 20 August 2009 - 06:00 PM

UPDATE

i've been working on the nearside windscreen pillar recently. had to chop the old piece out first.

Posted Image

new pillar ready to fit:

Posted Image

took a while to get the new pillar to fit in but it got there eventually. just a few bits to finish up and it's done.

Posted Image

so, with that done it was time to turn my attention to turning the car on it's side and concentrating on the rear end.

Posted Image

subframe is now out and ready for a clean up and a coat of paint. i can now have a good look at what state the rear end is in. found a few areas that want some attention. this was an area below the nearside arch i did today:

Posted Image

so out came the angle grinder and chopped out the rust. in goes a new patch:

Posted Image
Posted Image

hopefully some more updates will come tommorrow.

#8 Bash Master

Bash Master

    Mini Mad

  • TMF+ Member
  • PipPipPipPip
  • 150 posts
  • Location: Blackpool, Lancashire

Posted 21 August 2009 - 06:57 PM

UPDATE

got some more welding on the rear end done today, mainly in the wheel arch. cut a section of a sill off to see what's underneath and it doesn't look good so they'll be coming off. i've also uncovered some severe bodging by the previous owner. looks like they've just tacked on layers of steel over the rusty areas and covered it up with under shield. fortunately thay had fitted a new rear valence but rather badly so that had to be removed. i had to take it off anyway so i could get to the bad rust.

hopefully i'll be getting some if not all of this section done tommorrow. i'll leave you with some pics of todays progress.

Posted Image

Posted Image

Posted Image

Posted Image

Posted Image

#9 Bash Master

Bash Master

    Mini Mad

  • TMF+ Member
  • PipPipPipPip
  • 150 posts
  • Location: Blackpool, Lancashire

Posted 23 August 2009 - 12:42 PM

UPDATE

cut out the old rusty lip that was under the bottom of the boot lid and fitted a new strip. unfortunately, i only had enough mig gas left for this small job so i will need to refill on monday. also cut back the over sills to reveal what was underneath. not a pretty site so i will need to get some new sills. a new boot floor will is need to be bought as i don't think there will be much point welding lots of patches in. bit suprised to find out they cost £100 + P+P so i might have to get a second hand one cut out an old mini.

a few more pics

Posted Image

Posted Image

Posted Image

Posted Image

#10 Bash Master

Bash Master

    Mini Mad

  • TMF+ Member
  • PipPipPipPip
  • 150 posts
  • Location: Blackpool, Lancashire

Posted 11 September 2009 - 06:49 PM

sorry it's been so long since my last update but i've been working hard on the mini getting things done before college starts. as a result i have got plenty of new things to show you guys. i'll let the pictures do the talking...

started out like this:
Posted Image

Posted Image

...cut out and replaced with this:
Posted Image

Posted Image

...then to this:
Posted Image

...and this:
Posted Image

new sill:
Posted Image

new boot floor welded in>
Posted Image

more patches:
Posted Image

finished off the arch today and a few other places patched up:
Posted Image

Posted Image

Posted Image

i've also upgraded my mig welding gas supply to a huge bottle as i was sick of having to drive half an hour to a back street garage to fill my small bottle :) don't have to worry about running out of gas now!

also, i am due a large order of parts and panels from mini spares so i can finish off the rest of the boot floor and rear subframe. more updates soon i'm sure :)

Edited by Bash Master, 11 September 2009 - 06:51 PM.


#11 Down&Out

Down&Out

    The King Of Retro Cool

  • Traders
  • PipPipPipPipPipPipPipPipPip
  • 4,847 posts
  • Location: -

Posted 12 September 2009 - 10:36 AM

Nice welds man.

It's nice to see you dont hang around :).

Best of luck with the rest of it!

#12 Bash Master

Bash Master

    Mini Mad

  • TMF+ Member
  • PipPipPipPip
  • 150 posts
  • Location: Blackpool, Lancashire

Posted 12 September 2009 - 05:29 PM

thanks for your comment :kiss: first one i've had in a while lol

i have welded a few more little bits today. didn't enjoy it so much in the hot sun (yes, it was actually hot today) so i went inside for a bit and cleaned up and painted a few parts of the rear subframe. didn't get any pics of them finished though.

anyway, here are a few pics of the welding:

this used to be a round hole for some stupid looking circular rear lights. didn't like them so much so i welding new pieces in. back to rectangular now, yay
Posted Image

forgot to take before pics of the round holes but you can kind of make out what it looked like in this pic:
Posted Image

also cut out and patched a small area of bad rust on the door step/rear quarter.
Posted Image

i won't have any more updates until thursday at least as i'm at college full days monday to wednesday :) . my parts will be here for then though so plenty to get on with when they turn up :-

#13 mighty mini jack

mighty mini jack

    Mighty Before a Pint

  • Members
  • PipPipPipPipPipPipPipPipPipPip
  • 5,095 posts

Posted 18 September 2009 - 12:14 AM

Some really good work going on here, spent 2 nights looking for this thread as i think most of these pictures will come in use for my project.

Well done mate !

#14 Bash Master

Bash Master

    Mini Mad

  • TMF+ Member
  • PipPipPipPip
  • 150 posts
  • Location: Blackpool, Lancashire

Posted 18 September 2009 - 06:32 PM

some more updates

big hole
Posted Image

Posted Image

Posted Image

boot floor is almost finished now. took a whole day to get it done and there's still work to do. as you can see it didn't go terribly well. the panels didn't line up as well as i'd hoped so i had to weld in extra plates to fill the huge gaps.

i actually got this yesterday but by the time i had finished it had gone dark outside so i waited till today to take pics. the days are getting shorter... not good as i rely on day light to work on the mini :lol:

unfortunately i didn't get anything done miniwise today because i had to work on my daily driver. damn rovers are junk :) maybe tomorrow i'll get something done.

#15 Bash Master

Bash Master

    Mini Mad

  • TMF+ Member
  • PipPipPipPip
  • 150 posts
  • Location: Blackpool, Lancashire

Posted 19 September 2009 - 07:17 PM

got a little done today. mostly spent the day working on my other car again but managed to get a bit done on the mini as well. i have now finished the welding on the rear end (on one side) as much as i can so now my attention will be turned to the front of the car. i've had a good look at the front end today and i have decided new inner wings and wing panels will be needed. i just need to get round to ordering them now.

anyway, some pics of what i have done today.

one side of the rear suspension is complete with some nice new parts.
Posted Image

Posted Image

and some pics of how the mini is looking so far. i have primed the areas that were welded to protect them from rust.
Posted Image

Posted Image

and a pic of all my mini stuff taking up a huge chunk of space in the workshop

Posted Image

that's it for today but i have a whole day to work on it tomorrow :D


1 user(s) are reading this topic

0 members, 1 guests, 0 anonymous users