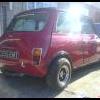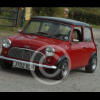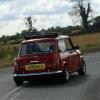
Mini Clubman estate 2 pick up conversion
Started by
cooper_shaz
, Sep 23 2005 02:41 PM
27 replies to this topic
#16

Posted 21 February 2006 - 02:49 PM
looks awesome
#17

Posted 22 February 2006 - 10:31 AM
very nice! keep up the good work!!
#18

Posted 10 March 2006 - 08:42 AM
Well at the weekend i decided it was time to finish the estate of as the paint had long enough to cure.
Sorry about the poor pics, left the camera at home, so used the phone camera,
Although the finish was good, it could be better

So first thing to do was to clean down the car
and then using wet and dry 1500, and soapy water the flatting process began
I did this in a way that anyone can follow, no special tools etc.
So the first step was to wet the bonnet, for this I use a spray bottle with soapy water.
The paint is rubbed with the 1500 until all the little shiny bits of paint including dimples etc have turned dull.

I tend to use a Hydra blade, but here a wiper blade was used to clean away the water so you can look closely at the paint for shiny bits. If you look closely at the pic below you can see a couple little bits, this is fine but the smoother your paint the better your shine.

The effect you are looking for is this pic below

But keep looking at the paint otherwise you can rub through it.
Work your way round the car flatting all the paint down in the same method

Then after using G3 (will come back to this) and the buffer this was the effect

It has not been polished at this point...!

It does take alot of effort so work on one panel at a time
The polishing after the flatting procedure.
You need a buffer (Not angle Grinder) you are looking for a variable speed buffer that goes from about 1000 - 3000 rpm ish
Use a G3 compound and loads of water and polish the panel until you see it shine.
Do not let the panel go dry, keep putting water on it or it will scorch the paint.
This should leave the following effect

You can see better in this pic what it looks like after a quick wipe

and again

and after a quick hand polish

Nice and shiny

and another

and look at the reflection of the tail light on the door all worth it

Sorry about the poor pics, left the camera at home, so used the phone camera,
Although the finish was good, it could be better

So first thing to do was to clean down the car
and then using wet and dry 1500, and soapy water the flatting process began
I did this in a way that anyone can follow, no special tools etc.
So the first step was to wet the bonnet, for this I use a spray bottle with soapy water.
The paint is rubbed with the 1500 until all the little shiny bits of paint including dimples etc have turned dull.

I tend to use a Hydra blade, but here a wiper blade was used to clean away the water so you can look closely at the paint for shiny bits. If you look closely at the pic below you can see a couple little bits, this is fine but the smoother your paint the better your shine.

The effect you are looking for is this pic below

But keep looking at the paint otherwise you can rub through it.
Work your way round the car flatting all the paint down in the same method

Then after using G3 (will come back to this) and the buffer this was the effect

It has not been polished at this point...!

It does take alot of effort so work on one panel at a time
The polishing after the flatting procedure.
You need a buffer (Not angle Grinder) you are looking for a variable speed buffer that goes from about 1000 - 3000 rpm ish
Use a G3 compound and loads of water and polish the panel until you see it shine.
Do not let the panel go dry, keep putting water on it or it will scorch the paint.
This should leave the following effect

You can see better in this pic what it looks like after a quick wipe

and again

and after a quick hand polish

Nice and shiny

and another

and look at the reflection of the tail light on the door

#19

Posted 10 March 2006 - 09:17 AM
That is one really great looking clubby estate!!!!!
I want it!
Good work!
I want it!
Good work!
#20

Posted 10 March 2006 - 09:58 AM
Am I the only one not seing a difference between these two pics?  :'(
:'(
The effect you are looking for is this pic below
#21

Posted 10 March 2006 - 06:24 PM
A very well documented project, and a good result. Well done! 
#22

Posted 11 March 2006 - 01:16 PM
That looks stunning, I love the red and black contrast. The finish on the paint looks amazing 
#23

Posted 11 March 2006 - 01:45 PM
that looks really nice and you havent messed about to get it all done.
well done
well done
#24

Posted 11 March 2006 - 04:58 PM
look great!
#25

Posted 17 June 2006 - 09:53 PM
Great work!! must be very awarding...
#26

Posted 19 June 2012 - 02:55 AM
any pics more i cant see pics now
#28

Posted 13 March 2013 - 04:06 PM
i wish that the photos will be back online. would be a very interesting build!
1 user(s) are reading this topic
0 members, 1 guests, 0 anonymous users


