Metallic Paint Repair
#1

Posted 25 July 2009 - 07:19 PM
Can I just mask of the area and then flat down the edge ? and whats the best way to put the lacquer coat on.
Any tips would be a great help.
#2

Posted 25 July 2009 - 09:57 PM
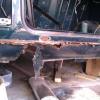
Hi all my Dad's car needs a repair to the rear arch ( sorry not a mini ) the pain is the car is metallic, now I want to do this using rattle cans but I am after some help in the correct steps to take as I have never sprayed metallic before.
Can I just mask of the area and then flat down the edge ? and whats the best way to put the lacquer coat on.
Any tips would be a great help.
I have had a steep learning curve with my metallic BRG cooper, doing small repair sections. The problem with metallic as you know is that you need to apply a clear coat (lacquer) over the colour base coat. Masking a small area on a panel, doing repairs, and then trying to get rid of the line is very difficult - you would be trying to do this using fine wet and dry, then cutting paste, most likely with a polisher. Trouble is the new lacquer cuts totally differently than the old lacquer, so you end up with a blend line. The more you try to get rid of it the worse it gets!!
For the very skilled, I believe there is some kind of blending solvent you can spray on to soften the old lacquer, but thats moving it away from rattle cans.
By far the best thing to do if you can is to do the repair, filler, colour base coat etc, in the area required but clear coat the whole panel, or at least up to any sort of natural 'edge'. For example on a mini, you could do a repair under the headlamps, going round on the wing ( common area!), then spray the repaired area, and clear coat the repair area AND up to the A panel / wing join, and (if you have one) the coach line running along the wing. Or you could clear coat the whole wing. What I did was try to blend old and new lacquer half way along the wing, and it doesnt work. I kicked myself, because it would have taken an extra minute each lacquer coat to just do the whole wing!
I guess its a trade off though - I must admit I just tidied up rust under my back window. I knew that the only way to avoid blend lines was to clear coat the entire back panel, but in the end I opted to live with a blend line at each edge of the window, as I couldnt face doing the whole panel! So if you think you can live with a line then fair enough, but if you want to do it 'right' you really are as well to clear the entire panel
The proper spraying procedure is to do your colour coats, and then within 30 mins of the last colour coat going on, apply your lacquer coats. This however does mean that you dont get the chance to flat the colour coats, and so it makes life a bit trickier as if you build up too much of an edge on the colour coats it could be visible under the lacquer.
Anyway, the following is assuming you are going to clear coat the whole panel. Make sure that you have lighltly keyed the surface of the whole panel beyond the repair area, using say 800 grit wet with soapy water. You would do all this before you start applying base coat.
Do your colour coats, trying to blend the colour in by extending the painted area a little with each coat - don't wory about orange peel, as you will achieve a flat finish on the cured lacquer. Then do your lacquer coats - 3 decent coats should be enough.
Let the lacquer cure for a few days, then using 1200 grit wet and dry with plenty of soapy water, flat the lacquer. Then use a cutting/rubbing paste (halfords, G3 etc) with clean water to bring up the shine. Its much easier if you have a polisher - just dont lean heavy, regularly mist the area you are polishing, and check your progress regularly so you dont take off more than you need.
It really is just one of these things you need to have a go at, and even if you dont get it right first time, you will improve. I'm no expert at it, but last year I had no clue at all how to get good results from painting repairs on the mini, now after a couple of goes at it I can get a really nice mirror like shiny repair, with good colour match - thats a point too, don't use halfords etc, get the correct paint mixed up at a proper paint place based on your paint code. So much better match, and quality.
Good luck.
#3

Posted 26 July 2009 - 08:11 AM
will let my old man no the problems we could hit trying to do it and let him say yes or no.
thanks again.
Steve.
#4

Posted 26 July 2009 - 08:31 AM
#5

Posted 26 July 2009 - 09:19 AM
you can buy fade out thinners in a rattle can, will try to get the name. works a treat
Never heard of that stuff is it easy to use ?
#6

Posted 26 July 2009 - 12:01 PM
you can buy fade out thinners in a rattle can, will try to get the name. works a treat
I'd be really interested in that... does that let you blend the old and new clear then? I guess it just opens up the old clear does it?
Cheers
Craig
#7

Posted 26 July 2009 - 12:03 PM
At least you'll only pay them for doing it the first time rather than wasting your time and money trying yourself first.
#8

Posted 26 July 2009 - 03:12 PM
Im all for people 'having a go' but if your not sure on what your doing then take it somewhere that does.
At least you'll only pay them for doing it the first time rather than wasting your time and money trying yourself first.
Take it you are short of work then, sorry but my dad is over 70 with a crap pension so he can not afford to go to a garage.
Thanks to others for their help.
#9

Posted 27 July 2009 - 09:28 AM
SYSTEM 20 Thinner - Fade Out
FEATURES
*
High quality blending clear to dissolve the edges of clear coats and solid colours
*
Fast and convenient aerosol.
* Can be used with both MS and HS coatings.
* Ideal for SMART repairs.
BENEFITS
* Gives an invisible blend to repairs.
* Confines repairs to a single panel.
* Ideal for use with both MS and HS Clears.
* 100% UV stable.
* Saves time and money.
You do need to be careful and don't spray it too heavy as it will run. You will need to be given a rough guide to using it to do it right.
#10

Posted 27 July 2009 - 05:20 PM
UPOL
SYSTEM 20 Thinner - Fade Out
FEATURES
*
High quality blending clear to dissolve the edges of clear coats and solid colours
*
Fast and convenient aerosol.
* Can be used with both MS and HS coatings.
* Ideal for SMART repairs.
BENEFITS
* Gives an invisible blend to repairs.
* Confines repairs to a single panel.
* Ideal for use with both MS and HS Clears.
* 100% UV stable.
* Saves time and money.
You do need to be careful and don't spray it too heavy as it will run. You will need to be given a rough guide to using it to do it right.
Top marks for this one, will do some research on its use, I wonder how many other people on here would find this a great use.
Steve.
#11

Posted 29 July 2009 - 05:07 PM
Im all for people 'having a go' but if your not sure on what your doing then take it somewhere that does.
At least you'll only pay them for doing it the first time rather than wasting your time and money trying yourself first.
Take it you are short of work then, sorry but my dad is over 70 with a crap pension so he can not afford to go to a garage.
Thanks to others for their help.
No, we have too much for 2 people really.
You would be surprised how many of our customers are pensioners with 'crap pensions' that are always delighted with the repairs and the price.
I'd just rather not see people waste time, money and spoil their cars further when they are unsure of what they are doing.
Apologies if you are offended by this.
By the way, fade out thinner is brilliant but nothing beats just re laquering the panel for an edgeless repair.
1 user(s) are reading this topic
0 members, 1 guests, 0 anonymous users


