Im thinking about getting a no fog light kit but im sure that ive seena guide on how to do the conversion yourself. Anyone got a link?
Thanks, Jam2005 :grin:
No Fog Light Kit/Guide
Started by
jam2005
, Sep 19 2005 07:16 PM
6 replies to this topic
#1

jam2005
-
- Members
-

- 1,297 posts
One Carb Or Two?
- Local Club: None
Posted 19 September 2005 - 07:16 PM
#2
Guess-Works.com
-

- Traders
-
- 19,838 posts
Gearbox Guru
- Local Club: Rugby Classic Mini Owners Club
Posted 19 September 2005 - 10:06 PM
Simple. splice out you reversing wire and connect your fog light wire... change buld to 21w red or put in a red gel film to colour lense..
Once this is done. do not go to mot with it installed as you will fail, if it is any 1/2 decent testing station...
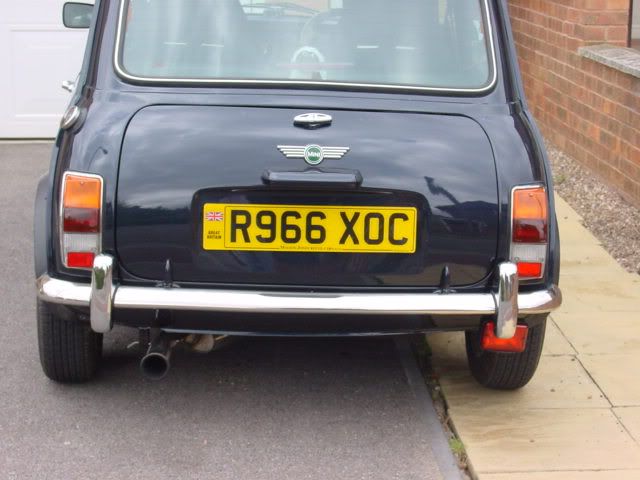
Fog light MUST be positioned at least 100mm from the brake light
Once this is done. do not go to mot with it installed as you will fail, if it is any 1/2 decent testing station...
Fog light MUST be positioned at least 100mm from the brake light
#3
jam2005
-
- Members
-
- 1,297 posts
One Carb Or Two?
- Local Club: None
Posted 19 September 2005 - 10:34 PM
Found this and thought it might help people who are wanting to do the same conversion. Ideal for the FAQ's 
so here goes:
Time needed: A hour tops inc removing the fog light bracket.
Tools / Parts needed:
1 red fog light bulb (dont bother with the expensive chrome bulbs they arent worth it, you'll see why later on.)
Soldering iron and solder
Wire cutters (only 1 wire is cut, dont panic there is no hacking of the loom)
cross head screw driver (to remove the reversing light lens)
electrical tape
Step 1
Firstly remove the fog light lense and bulb and put them to one side. Then remove the bracket holding the unit to the rear valance. This may be held in place by large headed screws or in Roxies case large pop rivets.
If they are pop rivets they will need to be carefully drilled out, find a drill bit the same size as the middle of the rivet and drill through, then move up to the next size bit. Now put a thing flat head screw driver under the rivet head and leaver it off, they are only cheap metal so snap easily.
Now remove the bracket and dont foget when you have finished to clean up the area and paint over any exposed metal like in the screw holes to stop it rusting.
Step 2
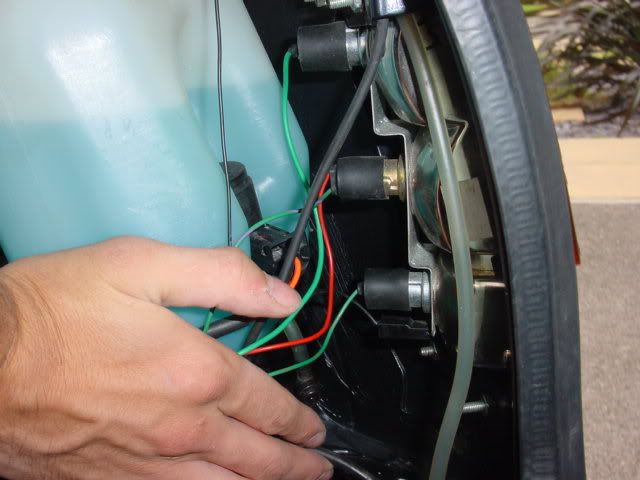
Find the 2 wires shown in the photo, these are the live and earth wires for the fog light. Once found they can be disconected.
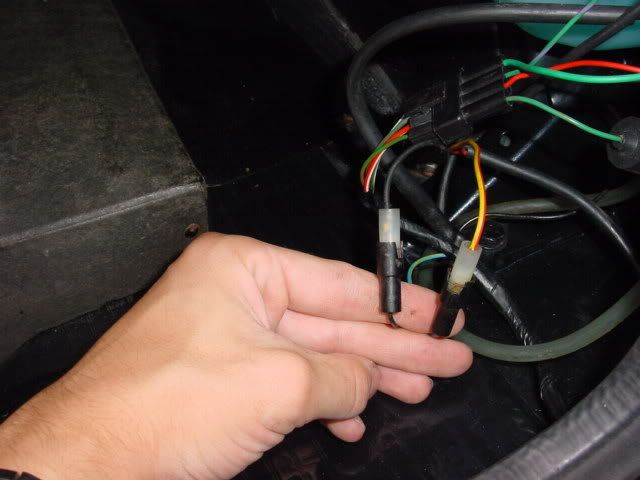
Now working on the back of the fog light unit, disconect the back earth wire and cut the yellow and orange live wire.
Now feed the 2 wires through the back of the fog light unit and up through the valance and into the boot floor. From this point on the earth wire is no longer needed, so this can be put to one side with the old fog light unit. The live wire will be needed again later so keep it to hand.
Step 3
Now working back in the boot, remove the rubber boot from the back of the reverse lamp, (bottom boot in the photo).
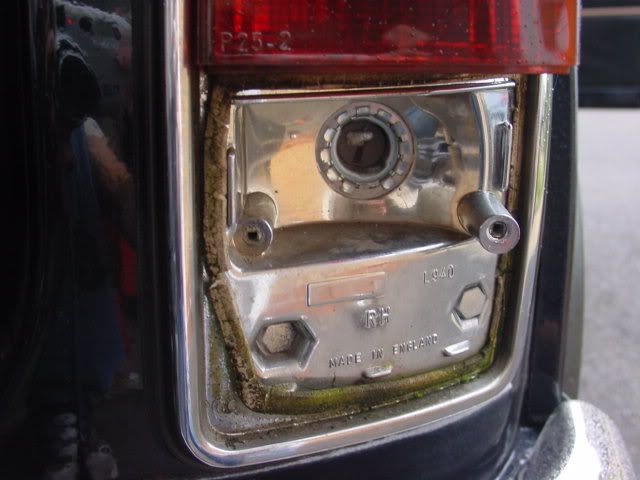
Now go back outside and remove the reverse light lense from the drivers side and remove the reverse light bulb.
Now push the reverse light wire through from the boot to remove the wire from the front of the light unit.

(remember how the wires go as you will be repeating this soon, but with the fog light wire.)
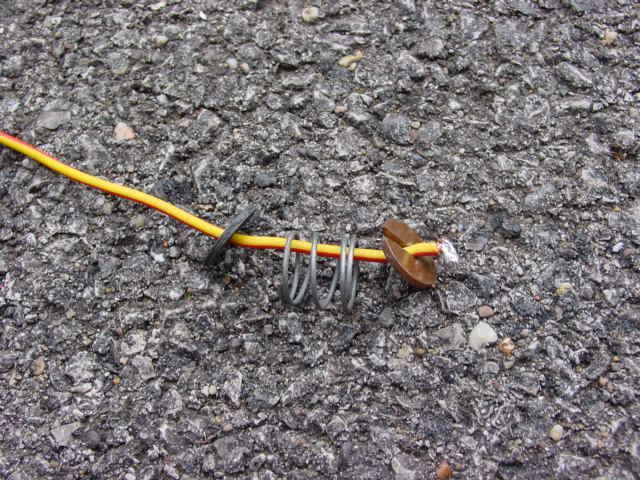
Remove the brown disc from the wire by twisting it through 90deg and then pulling it clear of the wire, then remove the spring and black disc.
Step 4
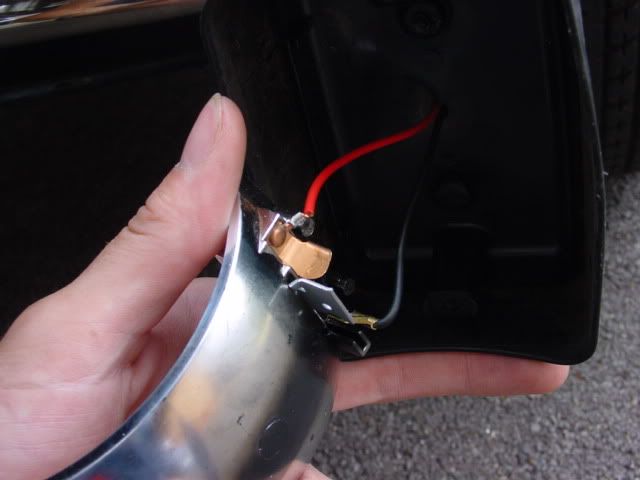
Take the yellow and red fog light wire and strip the sleave off the end of the wire exposing a couple of mm of bare wire. Now place the brown disc, removed from the reversing light wire, on the fog light wire and put it at the top of the wire.
Now fan out the exposed wire on top of the disc and place a big blob of solder on it to hold the wires in place, provide a contact for the bulb and also give the brown disc something to push against.
Now thread the rubber boot, also removed from the reversing light wire, over the fog light wire and then feed the wire through the light unit from inside the boot to outside. Then place the black disc on the fog light wire, then the spring and finally the brown disc.
Once its all in place pull the wire through in to the boot and push the wire in from the front at the same time so it all sits in place nice and snug.
(like so, but in place through the light, unit like on the photo showing the reversing light wiring.)
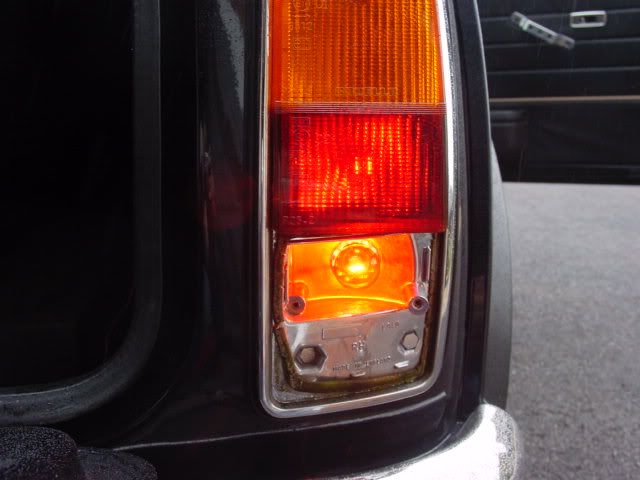
Wiring all finished and back in place.
Step 5
Now all the wiring is done all thats left to do is to wrap up the end of the now un-used reverse wire so its nice and safe and also a good idea of to tape it to the rest of the rear light loom so its out of the way and wont get snagged on anything.
Finally place the red bulb in the holder, switch on the head lights, and then flick the fog light switch and stand back to admire your handy work.

Once you are happy with it all, put the lense back on and you are done.
so here goes:
Time needed: A hour tops inc removing the fog light bracket.
Tools / Parts needed:
1 red fog light bulb (dont bother with the expensive chrome bulbs they arent worth it, you'll see why later on.)
Soldering iron and solder
Wire cutters (only 1 wire is cut, dont panic there is no hacking of the loom)
cross head screw driver (to remove the reversing light lens)
electrical tape
Step 1
Firstly remove the fog light lense and bulb and put them to one side. Then remove the bracket holding the unit to the rear valance. This may be held in place by large headed screws or in Roxies case large pop rivets.
If they are pop rivets they will need to be carefully drilled out, find a drill bit the same size as the middle of the rivet and drill through, then move up to the next size bit. Now put a thing flat head screw driver under the rivet head and leaver it off, they are only cheap metal so snap easily.
Now remove the bracket and dont foget when you have finished to clean up the area and paint over any exposed metal like in the screw holes to stop it rusting.
Step 2
Find the 2 wires shown in the photo, these are the live and earth wires for the fog light. Once found they can be disconected.
Now working on the back of the fog light unit, disconect the back earth wire and cut the yellow and orange live wire.
Now feed the 2 wires through the back of the fog light unit and up through the valance and into the boot floor. From this point on the earth wire is no longer needed, so this can be put to one side with the old fog light unit. The live wire will be needed again later so keep it to hand.
Step 3
Now working back in the boot, remove the rubber boot from the back of the reverse lamp, (bottom boot in the photo).
Now go back outside and remove the reverse light lense from the drivers side and remove the reverse light bulb.
Now push the reverse light wire through from the boot to remove the wire from the front of the light unit.
(remember how the wires go as you will be repeating this soon, but with the fog light wire.)
Remove the brown disc from the wire by twisting it through 90deg and then pulling it clear of the wire, then remove the spring and black disc.
Step 4
Take the yellow and red fog light wire and strip the sleave off the end of the wire exposing a couple of mm of bare wire. Now place the brown disc, removed from the reversing light wire, on the fog light wire and put it at the top of the wire.
Now fan out the exposed wire on top of the disc and place a big blob of solder on it to hold the wires in place, provide a contact for the bulb and also give the brown disc something to push against.
Now thread the rubber boot, also removed from the reversing light wire, over the fog light wire and then feed the wire through the light unit from inside the boot to outside. Then place the black disc on the fog light wire, then the spring and finally the brown disc.
Once its all in place pull the wire through in to the boot and push the wire in from the front at the same time so it all sits in place nice and snug.
(like so, but in place through the light, unit like on the photo showing the reversing light wiring.)
Wiring all finished and back in place.
Step 5
Now all the wiring is done all thats left to do is to wrap up the end of the now un-used reverse wire so its nice and safe and also a good idea of to tape it to the rest of the rear light loom so its out of the way and wont get snagged on anything.
Finally place the red bulb in the holder, switch on the head lights, and then flick the fog light switch and stand back to admire your handy work.
Once you are happy with it all, put the lense back on and you are done.
#4
simong6
-

- Members
-
- 799 posts
One Carb Or Two?
Posted 20 September 2005 - 05:26 PM
looks a bit on the orange side
#5
Pooky
-

- TMF+ Member
-
- 5,691 posts
Crazy About Mini's
- Location: Sunny Sussex
Posted 20 September 2005 - 05:40 PM
the fog light also has to be at least 100 mm from brake lights i think!
this is a big grey area! :erm:
:erm:
this is a big grey area!
:erm:
#6
Guess-Works.com
-
- Traders
-
- 19,838 posts
Gearbox Guru
- Local Club: Rugby Classic Mini Owners Club
Posted 20 September 2005 - 10:38 PM
Nope, not a grey area, it's atually very clear in the legislation...this is a big grey area!
Flick to foglight FAQ
#7
jam2005
-
- Members
-
- 1,297 posts
One Carb Or Two?
- Local Club: None
Posted 21 September 2005 - 09:10 AM
Still looks better though


1 user(s) are reading this topic
0 members, 1 guests, 0 anonymous users


