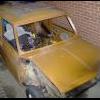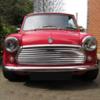
First Car- A Blue Project Mini!
#76

Posted 31 January 2011 - 11:08 PM
#77

Posted 01 February 2011 - 12:38 AM
I takeit your dad is helping you with alot of the work?
I need to get cracking with my estate that i have just braught, similar state that yours is in
Good luck for the future
Nick
#78

Posted 01 February 2011 - 04:42 PM
#79

Posted 08 February 2011 - 11:04 PM
Part 1 Crank and Pistons.
so, having recived my new bearing shells from a very helpfull man who works for the company which makes them, i set about fitting my crankshaft:
uncovered the block from the rubbish piling up on the desk:

and flipped it over;


popped out the old shells and put new ones in (i did take a picture but you cant tell)
and set about the straps, gunk is wonderfull stuff:

all laid out to dry:

oiled up the journals and shells:

stick it in:


and proptly realise i forgot to get new lock tabs....
so, pistons! they were filthy after nearly 30 years of use so i gave 'em a clean (one on the left is uncleaned):


so then after some oil and a bit of fun with circlip pliers (couldn't find any proper ring pliers) put the rings on:

then with a bit of time and effort (during which my hands were far to oily to take photos) all four pistons were put in:


thats it for now, once again any horrible mistakes ive made, please tell me. next up is the camshaft, just trying to decide what to use, ive got a 12g295 head for it, so i was thinking an SW5, as they seem to be popular but will i notice any difference over the standard item?
thanks for reading,
tom.
edit: realised my camera was awfull when i put the crank in, tried to find better pics
Edited by tomgale, 08 February 2011 - 11:09 PM.
#80

Posted 26 February 2011 - 07:19 PM
Part 2 Camshaft and Oil Pump.
right, time to put this in:

standard 998 camshaft, was going to put an sw5 in but funds are, shall we say.. limited
the engine was tipped over to allow the cam shaft to drop in:


camshaft in:

fitted a new oil pump to one end:

and the timing plate to the other:

and replaced the chain:


timing marks are lined up
distributor drive:

old oil pressure release at the bottom, new ball bearing and cooper s spring top:

this is heading of to guessworks now for a bit of tlc:

thats it for now, water pump and timing cover are now on but ill get pics next time.
as always if ive made mistakes or done somthing stupid, please tell me!
thanks for reading, tom.
#81

Posted 13 March 2011 - 07:32 PM
remember this hole?


it had a floorpan repair panel bolted and glued in it. and some random bits of galv steel attached by a teeny bit of welding (previous owners
small repair to the end of the crossmember:

inner sill repair in place, (running behind the doorstep as per factory)

floorpan that ws bolted in, cleaned and cut properly goes back in:

then this patch was cut for the bottom of the flitch:

and tacked in:


then i finished off the welding and it currently looks like this:


nice solid floor, more engine when the gearbox gets here,
cheers for reading,
tom
#82

Posted 01 June 2011 - 10:03 PM
first up, remember this very important spacer ring I foolishly forgot to put beetween the front wheel bearings? (you probably dont, I kept forgetting the damn thing)

well I finally got round to putting it in, and got my new cones and minisport adjusta-rides in at the same time:

engine time:
Part 3: Mating Gearbox to Block
Moved into the new garage, got the engine on the table ready to start, then I got my reconditioned gearbox back from guessworks:

amusingly I was able to watch over every step of the build, as this is the gearbox used in John's rebuild guide videos!
Block lifted on top of the gearbox:

Idler gear fitted:

cam followers replaced with new isky type ones:


(incedentally, cleaned out cam followers make good emergency shot glasses....)
Fuel pump and tappet covers fitted:


When I came to fit the transfer case all the bolts and studs went on perfectly, apart from one, where the stud pulled right out of the gearbox, so the hole in the gearbox was drilled and tapped for an M10 bolt, and the transfer case and gasket were enlarged to suit, not ideal, but it holds it well. (it's the bottom one on the left by the way)

fitted the head studs and the engine currently looks like this:

Decided to refurbish a gear change mechanism:

thanks to my wonderfully bodge happy previous owners, one has been removed from a car by angle grinding the rod near the end, and the other has no gear lever. However i have combined the best parts from the two, lots of grease and some paint, to produce a single fully functional one:

as you can see i have also repainted my blue 12g295 head yellow, I'm really pleased with how it looks on the engine:

thank you for reading, comments welcome (particularly if they warn me of potentially massive errors!
Tom.
Edited by tomgale, 01 June 2011 - 10:04 PM.
#83

Posted 02 June 2011 - 07:28 AM
you're doing really well, nice and methodical with the rebuild mechanicals. Just a quick one, the oil pressure ball bearing you fitted, where does it go as I don't remember that on my 998 !!
Keep it up.
Graham
#84

Posted 02 June 2011 - 09:28 AM
Hi,
you're doing really well, nice and methodical with the rebuild mechanicals. Just a quick one, the oil pressure ball bearing you fitted, where does it go as I don't remember that on my 998 !!
Keep it up.
Graham
thanks Graham! oil pressure release is on the right hand side of the block, about half way down. should be a sort of tapered brassy couloured nut I think. hope this helps!
#85

Posted 14 August 2011 - 01:10 PM

anyway, progress:
firstly the other outer sill and the rear valance closing plates were welded on:


the paint is rustbuster epoxy mastic, its a two part one, supposed to be very good.
stripped to bare-metal then seam sealed and ready for paint:

all painted:

nice to have it all shiney and solid underneath, just the bulkhead to do before the front end panels now.
rear subframe assembled:

not a great picture, ill get better ones at some point.
comments appreciated!
Tom.
#86

Posted 11 November 2011 - 08:05 PM
for now though, as photobucket is misbehaving, a photo of the front end.

enjoy,
Tom.
#87

Posted 17 December 2011 - 05:14 PM


I'm really happy with it!
Tom
#88

Posted 17 December 2011 - 06:10 PM
The only problem i noticed in all of it is on the pictures of the brake calipers it doesn't look like you've bent over the ends of the split pins? could be wrong but just thought i would say incase you had forgotten
Keep up the good work!
#89

Posted 17 December 2011 - 06:15 PM
Just read through all this. Loads of great work and the car looks awesome in that colour scheme
The only problem i noticed in all of it is on the pictures of the brake calipers it doesn't look like you've bent over the ends of the split pins? could be wrong but just thought i would say incase you had forgotten
Keep up the good work!
thank you! yeah I bent them over before I built up the subframe I think.
#90

Posted 17 December 2011 - 07:28 PM
1 user(s) are reading this topic
0 members, 1 guests, 0 anonymous users


