Jump to content


Photo
- - - - -

Daughter Zoe's Mini - Yeah Right!


  • Please log in to reply
723 replies to this topic

#436 stevede

stevede

    As seen on TV

  • Members
  • PipPipPipPipPipPipPip
  • 1,164 posts
  • Local Club: None

Posted 17 October 2010 - 02:21 PM

Little bit of an update to be going on with.

Not a huge amount although I have been "collecting" a few parts for a little modification I'll tell you about another time.

Thank you all for the comments, appreciated as always.

Chrisandsarah: I was't sure about the lights myself when I first fitted them. They are growing on me now and the view from inside is quite good with the top two just popping up over the bonnet.

reallybig: Give it a go. You'll be amazed what you can achieve with a little practice

mk3cortina: Great minds! look forward to seeing some pictures when you fit them.

JGunn: I remember chatting to you at Stanford but it didn't twig when I read your project pages. The headlining is quite stretchy but it is far from perfect. There are still a couple of areas where I may re-visit when I come to do the interior properly. Look forward to seeing more progress on your car.

shellspeed: Glad you like. You wouldn't want to be coming the other way if I'd not switched them off quick enough!!

On with the update.

After getting the lamps fitted & working, I thought I'd put the mesh on the bonnet. It meant I could cross another job off with only the grille now needed for the front.

An offcut roll of stainless mesh

Posted Image

Cut to size

Posted Image

Good old silicone

Posted Image

Finished job

Posted Image

Back on the car

Posted Image


Another job I had outstanding was to put trim on the arches. I bought the trim at Stanford but before I could fit it, I needed to sand the arch edges to give a uniform size all round.

Posted Image

What I thought would be a quick job turned out to be quite a long one as the difference on the arch edge was a lot between one side & the other.

Posted Image

Much sanding & testing later & the trim went on.

Posted Image

Posted Image

Posted Image

Gives quite a nice finish and will protect against knocks.

I've done a couple of bits on the doors as well but I'll save them for another post.

Thanks for looking

Regards

Steve

#437 grahama

grahama

    Up Into Fourth

  • Members
  • PipPipPipPipPipPipPipPipPip
  • 2,442 posts
  • Location: Warrington
  • Local Club: None in my area !!

Posted 17 October 2010 - 03:29 PM

Hi Steve,

well I love the lights and the bracket but would have gone a little smaller maybe ?? Was that your pal doing a little tig welding for you as it's very tidy welding?? Also are the bonnet holes just for show or cooling too, either way they look good.

Graham

#438 stevede

stevede

    As seen on TV

  • Members
  • PipPipPipPipPipPipPip
  • 1,164 posts
  • Local Club: None

Posted 17 October 2010 - 03:37 PM

Hi Steve,

well I love the lights and the bracket but would have gone a little smaller maybe ?? Was that your pal doing a little tig welding for you as it's very tidy welding?? Also are the bonnet holes just for show or cooling too, either way they look good.

Graham


Thanks Graham.

I bought the lamps before I knew how I was going to mount them. I'd had some similar brackets on my first mini when I was 17.

The bar might be a bit OTT but at least they don't wobble and I don't need any steady bars for them.

Yes it was my pal doing the tig work. I haven't progressed to that stage yet and as it is all stainless and on show, I wanted it to look good.

Holes in the bonnet? They are there because the air intake for the supercharger will sit just behind. One sliiiight teeeny weeeny problem, I don't have a supercharger!! Maybe one day!

Did you get gas sorted for yours?

#439 grahama

grahama

    Up Into Fourth

  • Members
  • PipPipPipPipPipPipPipPipPip
  • 2,442 posts
  • Location: Warrington
  • Local Club: None in my area !!

Posted 17 October 2010 - 03:45 PM

Just waiting for an account to be set up, had to set up via snail mail so takinh it's time. Was doing ok with the co2 welding but will do a little prcticing with the argon mix then blow holes in the mini !! Was very nervous starting but it's surprising how quickly you pick things up, wil be upto your standard soon with a bright shiny mini !!!

Regards,

Graham

#440 stevede

stevede

    As seen on TV

  • Members
  • PipPipPipPipPipPipPip
  • 1,164 posts
  • Local Club: None

Posted 27 October 2010 - 06:55 PM

Hi everyone.

Thought another small update was overdue.

I've been doing a few bits and pieces over the last couple of weeks and have a little project for the interior on the go.

But first I have to tell you about a little "incident" on the way to work last Friday morning......

If any of you heard reports about bright lights in the sky over the city centre, or talk about possible UFO's, panic not, I can explain.

You will recall the lamps on the front of the mini. How could you possibly miss them? Well, on my way to work last Friday, (early morning - still dark) I had decided to take the mini for some enjoyment on an otherwise dreary commute. Coming over the A57M Mancunian way, a car wants to pull onto the carriageway from the slip road. Me being the courteous driver that I am (most of the time) gave a quick flash of the lights and move out a lane.

As I come over the bridge, I am aware of a very bright reflection off the road signs. I check I haven't caught the lights but I'm getting some funny looks from other drivers. I realise that although I have switched off the main beam, one of the relays must have stuck and the (very bright) top set of lamps are still on!

As I am on a motorway flyover, I cannot possibly stop so have no option but to continue on, to the exit roundabout and eventually, I turned into the nearest safe spot where I had to remove the bonnet to pull the fuse.

Bit of excitement not just for me but for the half blinded drivers going the other way. (Apologies if one of them was you).

On with the update.


When I was doing the wiring, I had a few more ideas up my sleeve and one of them was for a warning light in the doors. As I had already run the wires, it was a simple job to pop an LED in, wired to the courtesy lamp circuit.

Posted Image

Posted Image

I also tried to cover up the inner holes to address the problem I have with water getting in when it rains.

Posted Image

The Cookster was really impressed !

Posted Image

Project for the interior?

Well I have a few more additions to the wiring and I think an alarm system has to be on the cards. I have also been hankering after some MPI switchgear (better quality and action im my opinion) so..........................

Some of these

Posted Image

All (hopefully) the bits needed for the MPI column conversion and a few more updates on the wiring.

I have some pictures but not a complete set so I'll update with the lot when the stages are completed.

One thing I have done, is replaced and upgraded the relays on the front lamps! Don't want to go there again!

Thanks for looking

Regards

Steve

#441 Stevee

Stevee
  • Members
  • 0 posts
  • Local Club: #

Posted 04 November 2010 - 12:28 PM

Looking good :thumbsup: and bet them spot lights light the backroads up like day time!

#442 Dolly 89

Dolly 89

    Previously known as suzzy 273

  • Members
  • PipPipPipPipPipPipPip
  • 1,366 posts
  • Location: louth
  • Local Club: Humberside moc

Posted 04 November 2010 - 03:13 PM

looking very good loving them spots i used to have 2 of them and they would light the roads up like daylight i bet they look like just white light lol looking awesome though the spots really look amazing

#443 Bean

Bean

    Queen of 'shoppin, Voted Miss TMF 2011

  • Members
  • PipPipPipPipPipPipPipPipPipPip
  • 8,054 posts
  • Name: Jean
  • Location: Malvern

Posted 04 November 2010 - 03:36 PM

The Cookster was really impressed !

Posted Image


Snap! :thumbsup:

Posted Image

#444 analogue_radio

analogue_radio

    Up Into Fourth

  • TMF+ Member
  • PipPipPipPipPipPipPipPipPip
  • 4,897 posts
  • Location: Melton Mowbray, UK.

Posted 04 November 2010 - 03:57 PM

Nice idea with the LEDs, very subtle.

#445 Zac

Zac

    Stage One Kit Fitted

  • Noobies
  • PipPipPip
  • 64 posts

Posted 04 November 2010 - 04:22 PM

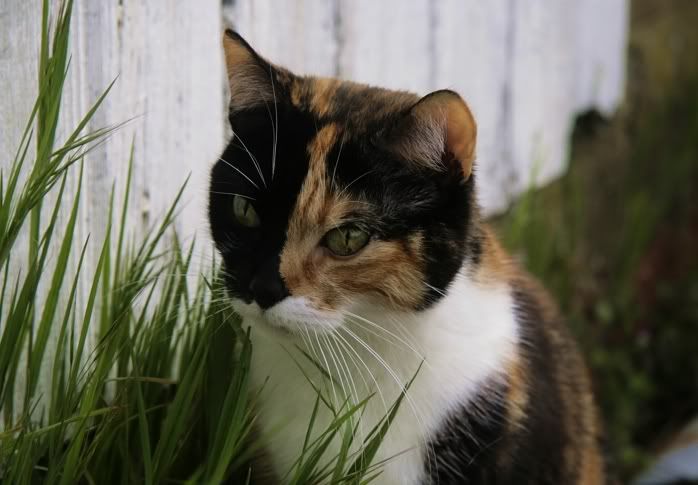
What is it about mini's and cats?

Posted Image

Love the build stevede :thumbsup:.

#446 SomethingNew71

SomethingNew71

    Speeding Along Now

  • Traders
  • PipPipPipPipPip
  • 455 posts
  • Location: Charlotte, NC, USA
  • Local Club: Carolinas Classic Minis United

Posted 04 November 2010 - 08:03 PM

I don't know I think it's just an animal thing..... :thumbsup:

Posted Image

#447 miniman86

miniman86

    Camshaft & Stage Two Head

  • Members
  • PipPipPipPipPipPipPipPip
  • 1,939 posts
  • Location: Near Southend, Essex!
  • Local Club: smag, Waltham Abby

Posted 05 November 2010 - 02:28 PM

that car is so impressive!! its all the little details that really make it!! hats off to you sir!! :D

#448 stevede

stevede

    As seen on TV

  • Members
  • PipPipPipPipPipPipPip
  • 1,164 posts
  • Local Club: None

Posted 07 November 2010 - 02:44 PM

Hi everyone

Bit more of an update coming along for you.

Many thanks for the comments again, much appreciated.

Iv'e got 4 bits on the go at the moment, all linked with each other, so bear with me as I seem to be doing a bit on them all at the same time.

Apologies, update on pause, I've got to nip out and rescue my daughter as the 500 has a puncture and she can't get the wheel off. - Back soon

Edited by stevede, 07 November 2010 - 04:12 PM.


#449 stevede

stevede

    As seen on TV

  • Members
  • PipPipPipPipPipPipPip
  • 1,164 posts
  • Local Club: None

Posted 07 November 2010 - 05:29 PM

Wheel swapped and back on with the update.....

I had said previously that I was updating the swithgear to MPI. I like the idea of the better quality & action (my opinion) switches and it also saves me having to have 2 switches for the lights with the Savage switches.

I bought a column quite cheap from a guy in Bristol, won some switches & cowl for peanuts on good old flea bay, bracket from R1minimagic, a local MGF breaker sorted the steering wheel & air bag, (says MG on it but he did give it to me and I'm planning on swapping the wheel at a later stage). And then I needed a steering lock..... I think I may have been bent over a little on that one but they do seem as rare as the proverbial hens teeth. I also managed to obtain a piece of wiring loom so I had all the plugs.

So with all that lot to play with.......Off we go!

Posted Image

Did some working out with the multimeter as I wanted to splice the MPI loom and std loom so that if I ever put an earlier column back in, its simply a plug & play option.

Wired all the bits with choc blocks for testing before I soldered & shrink sealed them all.

Posted Image

Most matched colour for colour and woked a treat. I was actually quite surprised how straight forward it was. If anyone wants the colour matched info, drop me a PM.

Lights worked spot on, including the new style main / dip beam switch over. Wipers worked okay also but I now need to figure out the intermittent option. If anyone has done this and has tips, please let me know.

I have had a dash rail cover from Retro for a little while now but the fitting was put on hold whilst I collected the bits for the MPI switchover.

Posted Image

Trademark turquoise stiching in evidence

Posted Image

Fairly straightforward to fit with 2 of us.

Switch panel mocked up

Posted Image

I didn't take lots of pictures of the wiring etc, suffice to say that I followed the guides on here with great ease and have implemented the 2 stage lighting effect.

I have wired them to the accessories rather than lights for the first stage so that they are on all the time the car is is running. I also only used one diode to stop feedback to the main loom, rather than the 2 per switch on the original TMF topic guide.

I have also fitted a start switch, (just because I could), which I have connected to a relay wired in parallel with the column switch.

Again, if anyone wants more detail or wiring diagrams, give me a shout.

The fitted dash rail cover and switch panel all wired up.

Posted Image

Posted Image

Posted Image


If anyone is wondering where the choke is, look again at the pictures!!

The rest of the messy wiring is because I am fitting one of the alarm units from A-Series spares and need some more spade terminals & loom tape etc before moving on.

The pictures aren't great I'm afraid as the flash seems to cover the light effect, and without flash the picture quality was poor.

4th item on the go is some rear speakers. I have had some "spare" surround sound speakers sat in the front as a temporary option for a while now but it was time to fit some properly. A money off offer at Halfrauds helped as well.

I didn't want to go mad, (well I did, but funds didn't allow it), but I managed to get some 6" speakers squeezed into the stock holes as I had an MDF shelf which sat them slightly higher from the metal.

Wasn't sure what to cover the board in. Carpet or cloth. Carboy001 has a superb carbon fibre shelf but I couldn't justify the cost. Good old 3M to the rescue with some carbon lookalike vinyl.

Posted Image

Had to take the screen out to drill the fixing holes though.

Posted Image

Looking good and original metal not cut at all.

Posted Image

All back in place

Posted Image

They sound quite good. Not up to the standard of the 12 speaker component system in the Passat but for £40 I can't complain much.

That's about it for this update. Quite a bit done, still a bit to do to finish it all off and then I'll be able to drive it again. Even though I've only had the thing on the road a couple of months, I'm already missing not being able to potter around in it.

Thanks for stopping by.

Regards

Steve

Edited by stevede, 08 November 2010 - 07:17 PM.


#450 yousmeg

yousmeg

    One Carb Or Two?

  • Members
  • PipPipPipPipPipPipPip
  • 839 posts
  • Local Club: Not yet...

Posted 07 November 2010 - 06:42 PM

:thumbsup: I keep coming back every now and then to this thread and it just gets better and better

Definitely loving the spots by the way


1 user(s) are reading this topic

0 members, 1 guests, 0 anonymous users