Jump to content


Photo
- - - - -

Daughter Zoe's Mini - Yeah Right!


  • Please log in to reply
723 replies to this topic

#316 carboy001

carboy001

    One Carb Or Two?

  • TMF+ Member
  • PipPipPipPipPipPipPip
  • 1,065 posts

Posted 29 June 2010 - 09:47 PM

Yeh the dash rail doesn't fit Steve :thumbsup: Bet your heart sank when you realised that. A much cleaner look without it in my opinion anyway, as it is set a fair bit more forward.

Might seam a bit overkill but you want to see the lamps I've got for the front!!

The lamps are monsters, i'm looking forward to seeing how your mounting them from what you've told me.

Faultless quality of work as usual :thumbsup:

#317 darky32

darky32

    Mini Mad

  • TMF+ Member
  • PipPipPipPip
  • 272 posts
  • Location: Bournemouth
  • Local Club: Not yet !!

Posted 04 July 2010 - 09:09 PM

Just spent the past hour or so reading this from the beginning ...outstanding work Steve you should be proud of yourself

Mark

#318 JayBox

JayBox

    Mini Mad

  • Members
  • PipPipPipPip
  • 150 posts
  • Location: Bath
  • Local Club: Mendip Minis

Posted 07 July 2010 - 02:40 PM

Wow.

Just spent the past hour and a half reading all of this. Such a good read. Doing all of this is pretty much one of my goals. I'm not going to uni or anything now, I'm a freelance graphic designer, which will hopefully leave me enough time to do something like this. (Hopefully with a cooper S)

This must be one of the most satisfying things in the world for you to read through where you started.

Best choice in colour too. Brilliant. You are a natural. Good luck with the rest of the build.

*Bookmarks and thinks "mine sucks now" =/*

#319 mini-mee

mini-mee

    Learner Driver

  • Noobies
  • PipPip
  • 22 posts

Posted 07 July 2010 - 06:07 PM

Well. fair play Steve. I've spent the best part of a sick day being ill at home reading this and credit where credit is due. Your an inspiration buddy and it truely has inspired me to get another mini (after my first mini come to an unfortunate end thanks to a motorcyclist) and make it my own.
Can't wait for the next update, really looking forward to the engine going in.
Also, insurance for a 17 year old on a 1275 is cheap as chips as thats what i had. £800 a year fully comp in my own name with Footman James.
Kind Regards,
Ben

#320 JayBox

JayBox

    Mini Mad

  • Members
  • PipPipPipPip
  • 150 posts
  • Location: Bath
  • Local Club: Mendip Minis

Posted 10 July 2010 - 03:37 PM

I keep checking back every day. So eager to see where you're up to!

#321 lawrence

lawrence

    One Carb Or Two?

  • Members
  • PipPipPipPipPipPipPip
  • 1,340 posts

Posted 10 July 2010 - 04:37 PM

i really love your build,
out of interest what you have done with the leds in the indicators is awesome, i was looking for something like that,
was it hard to do and wire up?
many thanks
L

#322 DaveVader

DaveVader

    One Carb Or Two?

  • Members
  • PipPipPipPipPipPipPip
  • 942 posts

Posted 10 July 2010 - 04:53 PM

I keep checking back every day. So eager to see where you're up to!


Haha, snap, I think this is one of my, if not the, favourite builds on this forum.

#323 josh.evans

josh.evans

    One Carb Or Two?

  • Members
  • PipPipPipPipPipPipPip
  • 1,439 posts

Posted 11 July 2010 - 11:03 PM

any updates steve??


josh

#324 stevede

stevede

    As seen on TV

  • Members
  • PipPipPipPipPipPipPip
  • 1,164 posts
  • Local Club: None

Posted 12 July 2010 - 08:28 PM

Hi folks,

A bit overdue once again but time for another update.

Haven't been doing as much lately as I seem to have lots of other things to do that take priority. (Mainly work related but then it does pay for the mini).

Many thanks for the kind comments, they are appreciated.

Chris: The lamps are a bit monster like and I still can't decide whether to go with the 4 or stay with 2. I'll give you a call.

Darky32: Many thanks for you comments

Jaybox: To do a rebuild on a Cooper S would be superb. Probably mean you would have a car that was worth more than it had cost you at the end as well. Looking back at the early pictures does make it seem worthwhile, especially when you then look out of the window and see the current car.

Mini-mee: Hope you manage to get another mini soon. The engine is not too far away I hope. £800 maybe cheap relatively speaking but having just paid £130 for me, fully comp, agreed value, unlimited mileage with european breakdown thrown in, I'll wait until Zo' passes her test before tackling that one.

Lawrence: The indicators were very straight forward to wire up. I ran 2 circuits, (3 led's one resistor), soldered them all up and ran 2 wires through the existing holes. Drop me a PM if you want more detail.

DaveVader: Thank you for your comments, it's nice that people are following my progress.

Josh: You asked....Here it is.

On with the update.


After stripping the heater to check all was well, (it was like new), the usual cleaning off of the yellow paint overspray and then it was re fitted to the car.

Now that I have fitted the centre binacle, I will have to re-route the heater pipes. I'm thinking of the blanking plate for the LHD brake cylinder. All other suggestions / experiences welcomed.


Now that the wiring was nearing completion at the front, time to start adding some of the interior fittings.

Retro covered sun visors.

Posted Image

Still need to finish off the headlining edges.


Another play around with an led module and the hot glue gun and the interior lamp was in.

Posted Image

Did the other side as well but no picture sorry.

Had a bit of a clean up on the seatbelt fittings. More yellow overspray!!

Posted Image

Posted Image

Have a plan for these having seen a thread by Luna mini. They are now all packed up and waiting to go. - Thanks Luna

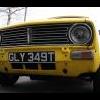
Given the plans for some of the electrics, especially in the lighting department............ Did I mention the spotlights?.................. No?

Here you go then.....

Posted Image

Fitted with 100 watt bulbs so will be quite useful for those dark country lanes!

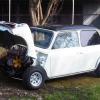
Back to the electrics. I thought I had better give the alternator a once over.

The date label suggests it is the original and looking at the wear, it probably is.

Posted Image

Posted Image

I think a new uprated one is on the cards.

I also binned the rear screen as I wasn't happy with the tint I had put on. A factory green one from R1minimagic, thanks Dale and it now looks much better.

Whilst the new screen was going in, I needed to get the "C" pillar trims in place.

More led's!!!!

Posted Image

With wiring taken from the original interior lamp circuit.

Before.

Posted Image

Rear parcel shelf as well to do the whole fitting in one go

Posted Image

After

Posted Image


As always I'm a little further on than the pictures suggest but as I have slowed down somewhat, I'll pace myself and give you another update later in the week

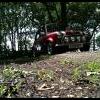
But just a sneaky peak to keep you going...........

The engine is no longer in the shed!

Posted Image

Thanks for dropping by.

Regards

Steve

#325 JayBox

JayBox

    Mini Mad

  • Members
  • PipPipPipPip
  • 150 posts
  • Location: Bath
  • Local Club: Mendip Minis

Posted 13 July 2010 - 01:21 PM

Nice. I like those rear LED's. :thumbsup: ALOT. :thumbsup:

#326 oldman

oldman

    Mini Mad

  • Members
  • PipPipPipPip
  • 150 posts

Posted 13 July 2010 - 07:18 PM

Hi Steve,
once again fantastic work with great ideas, I'm afraid that I read all the rebuilds and
never comment!
Could you please tell me what colour/paint type you used for the master cylinders?

Many thanks

John

#327 stevede

stevede

    As seen on TV

  • Members
  • PipPipPipPipPipPipPip
  • 1,164 posts
  • Local Club: None

Posted 13 July 2010 - 08:15 PM

Nice. I like those rear LED's. :thumbsup: ALOT. :thumbsup:


Good old Flea Bay - Caravan side marker lamps - self adhesive!

#328 stevede

stevede

    As seen on TV

  • Members
  • PipPipPipPipPipPipPip
  • 1,164 posts
  • Local Club: None

Posted 13 July 2010 - 08:19 PM

Hi Steve,
once again fantastic work with great ideas, I'm afraid that I read all the rebuilds and
never comment!
Could you please tell me what colour/paint type you used for the master cylinders?

Many thanks

John


Thanks John

The paint is straight forward Halfords aerosol. I can't remember the exact colour, I just picked a random tin of gold. The initial primer was U-Pol etch.

I have chosen Silicone brake fluid also as one of the qualities is that it doesn't damage the paint.

Regards

Steve

#329 JayBox

JayBox

    Mini Mad

  • Members
  • PipPipPipPip
  • 150 posts
  • Location: Bath
  • Local Club: Mendip Minis

Posted 19 July 2010 - 12:12 PM

Well the gold looks f-ing brilliant.

I have a haynes manual, so I can know how to take off one component of the engine for painting. (So I will be able to still use the car the next day) For example the radiator. I know how to drain the coolant, but how hard is it actually?

#330 stevede

stevede

    As seen on TV

  • Members
  • PipPipPipPipPipPipPip
  • 1,164 posts
  • Local Club: None

Posted 19 July 2010 - 06:50 PM

Well the gold looks f-ing brilliant.

I have a haynes manual, so I can know how to take off one component of the engine for painting. (So I will be able to still use the car the next day) For example the radiator. I know how to drain the coolant, but how hard is it actually?


Jaybox: Painting bits using aerosols is quite straightforward. Make sure the part you are painting is cleaned properly and any rust removed. Just take your time. You can buy etch primer in a can and top coat in any colour you like. Specialist paints are also available for specific purposes. Radiators & engine blocks etc.

Good luck

Regards

Steve


1 user(s) are reading this topic

0 members, 1 guests, 0 anonymous users