Jump to content


Photo
- - - - -

Daughter Zoe's Mini - Yeah Right!


  • Please log in to reply
723 replies to this topic

#166 panelbeaterpeter

panelbeaterpeter

    Crazy About Mini's

  • Members
  • PipPipPipPipPipPipPipPipPipPip
  • 5,606 posts
  • Location: Scotland
  • Local Club: n/a

Posted 14 March 2010 - 06:13 PM

Looking spot on! I like the LED idea in the centre dials.. regarding your paint choice, cellulose is a wise choice if you haven't got a booth, you can obtain a very good finish if you're patient, as you clearly are.

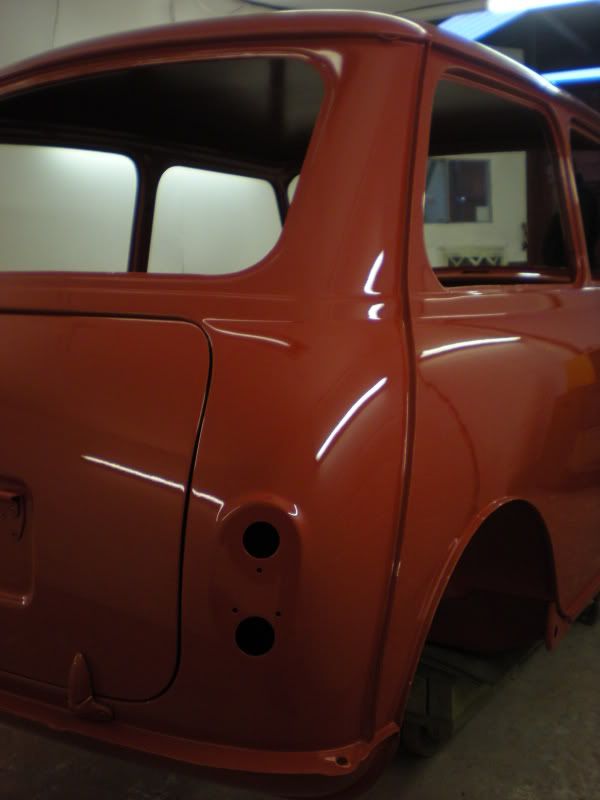
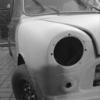
Proof if needed, I painted this mini in cellulose without a booth last month

Posted Image

#167 stevede

stevede

    As seen on TV

  • Members
  • PipPipPipPipPipPipPip
  • 1,164 posts
  • Local Club: None

Posted 15 March 2010 - 09:20 AM

Hi everyone and thanks once again for the kind comments and words of encouragement. It's really good to know that others are out there having similar successes and mishaps as I am.

Bean. I found the basics of welding quite easy, it's getting the strong joints without blowing holes everywhere that takes the practice. If I can give any advice from my limited knowledge, it would be to get proper gas (BOC account or similar). Avoid the gasless kits. I know many people use them but even my pal who's forgotten more about welding that I will ever know finds them hard work.

Peter. The cellulose choice was partly because of where I have to work and because it's the only finish I have any experience with. Not to mention if I make a "town halls" of it, I can flat it back to an acceptable finish. Speaking of which, if mine comes out half as good as the red one looks I'll be chuffed.

On to a fairly brief update and a little bit of news.


Put the brake master cylinder together last week along with the clutch parts. Re assembled a few other bits that had been painted also.

Posted Image

Posted Image

A recent work trip to London and I thought I'd pop in to minispares as they were only a junction up from where I was. (Bit disappointed in the lack of display in the showroom though). A trip to mini sport also and I hopefully now have all the bits needed for the final subframe rebuilds.

Posted Image


More wet sanding of the primer showed up some blemishes I had missed so a bit more stopper, re flatted and a top up of primer and we're not far off ready to go.


I have had the finish paint for a little while now and couldn't resist. So, as the boot needed painting and I can mask it off afterwards, I thought why not.


Posted Image

Posted Image

Posted Image

Makes me feel like I'm really getting somewhere.


And the news?

My pal has just signed a lease on an additional work unit. There's lots of space and a long bank holiday weekend looming..............

No prizes for guessing where I'll be over Easter!


Thanks for dropping by

Steve

#168 danny2009

danny2009

    Previously 'gerrard'

  • Members
  • PipPipPipPipPipPipPip
  • 1,069 posts

Posted 15 March 2010 - 10:53 AM

love it mate, really coming on now, keep up the great work :)

#169 daemonchild

daemonchild

    Up Into Fourth

  • Members
  • PipPipPipPipPipPipPipPipPip
  • 2,341 posts
  • Location: Pontypridd
  • Local Club: Unknown

Posted 15 March 2010 - 12:01 PM

This is looking fab mate! :)

#170 owensy

owensy

    Starting My Mini Up

  • Noobies
  • Pip
  • 4 posts

Posted 15 March 2010 - 01:04 PM

Wow! i've spent my morning at work reading this from start to finish and your work is simply fantastic! :)

I'm inspired by what you have done and i'm in the process of looking for my first Mini! and this has given me the push even harder (not that i needed it) :(

Cheers

Owensy =]

#171 Mini Basher

Mini Basher

    Speeding Along Now

  • TMF+ Member
  • PipPipPipPipPip
  • 424 posts
  • Location: Forest of Dean
  • Local Club: Mini Foresters

Posted 16 March 2010 - 12:11 AM

Hi Steve

It's all looking SWEEEEET, love how the brake master cylinder turned out and am loving what you did with the speedo, more information and a wiring diagram and a components list would be well appreciated if you feel up to divulging the information.

I think that colour is going to look ;) :D


Cheers

Andy

#172 Ethel

Ethel

    ..is NOT a girl!

  • TMF Team
  • PipPipPipPipPipPipPipPipPipPipPip
  • 25,922 posts
  • Local Club: none

Posted 16 March 2010 - 02:55 AM

Nice job on the speedo, the charge warning light will need a resistor adding or the alternator won't get enough current to kick it in to life. It really ought to flow in both directions to function fully too - the indicators light is bi directional too..

#173 stevede

stevede

    As seen on TV

  • Members
  • PipPipPipPipPipPipPip
  • 1,164 posts
  • Local Club: None

Posted 16 March 2010 - 07:32 PM

Thanks for the replies again gents, much appreciated.

Andy, I'll bob you a PM over re the LED's and maybe post an update once I know it all works okay.

Ethel. Thanks for the heads up. I did wonder about the charge light, bit of a suck it & see. It's 5v LEd with a 270 ohm resistor. Any suggestions welcome.
Is the indicator tell tale in the circuit in series then? If so I may have to do a bit of a re wire from each side of the indicator stalk and use a couple of diodes to stop the current feeding back to the opposite indicator channel.


Bought the roof paint today also. Old English White. Roll on easter !!!!!!!

#174 mini.cooper998

mini.cooper998

    Super Mini Mad

  • Members
  • PipPipPipPipPipPip
  • 685 posts
  • Local Club: looking

Posted 17 March 2010 - 09:48 PM

looking great steve although with all the adjustable suspension its looking less like a first car for a daughter and more like a bit of fun for dad lol

cant wait to see it after easter if it goes ok how much would you charge to spray another lol only round the corner and could drop the shell off for a few weeks

#175 johnjamessims

johnjamessims

    Stage One Kit Fitted

  • Noobies
  • PipPipPip
  • 66 posts

Posted 26 March 2010 - 08:48 PM

This is looking great,
I love the little touches like the gold clutch cylinder and the LED dial. Little idea, a piece of plexi behind the dial will spread the light out more evenly but it looks great .

Cant wait to see the next update and pictures

- John

#176 Gingerjoe

Gingerjoe

    Camshaft & Stage Two Head

  • Members
  • PipPipPipPipPipPipPipPip
  • 1,908 posts
  • Local Club: Tmf

Posted 27 March 2010 - 12:30 AM

beautiful mate, I wish I had the time, space, know how & money to do this, I bet your daughter is fully stoked, good luck with the rest of the project * bookmarked *

#177 Ethel

Ethel

    ..is NOT a girl!

  • TMF Team
  • PipPipPipPipPipPipPipPipPipPipPip
  • 25,922 posts
  • Local Club: none

Posted 27 March 2010 - 12:47 AM

The indicators light bridges between the two sides - when you indicate left it earths through the right side 'n vice versa. Yeah a couple of diodes and its own earth would sort it out. The charge light is similar - it goes out when the alternator kicks in and matches the battery voltage so no current flows. It will light up if the voltage on either side drops to show a battery or alternator fault. A bulb has the advantage that the brightness increases with the current, so if it gets brighter with revs the alternator must be overcoming the battery voltage, if it dims with more revs the alternator is to blame.

#178 stevede

stevede

    As seen on TV

  • Members
  • PipPipPipPipPipPipPip
  • 1,164 posts
  • Local Club: None

Posted 27 March 2010 - 07:29 PM

Hi all and many thanks for the replies

Andy, I'm flattered that you think I could do your project justice with the paint but I wouldn't want to take money for doing something which I am far from qualified to do. However, I am happy to pop over and give any advice I can from my limited knowledge to assist.

John, thanks for the tip on the plexi. The centre unit of the speedo goes right back so would have to use a piece with the centre cut out. Might give it a go.

Gingerjoe, I'm making the time as it keeps me away from my work laptop at the weekends. As for space, what you see is what I got. The know how is learning as I go and as for the money? Well the wife may read this so we'll leave that one there!

Ethel, thanks for the additional info. I'll do the indicators and wait & see with the alternator light. May have to go back to a bulb with that one.


Update:

After a brief spell in sunnier climes I have 3 non work days to get the shell finalised for the easter paintathon.

I decided that the more I could do before, the more time we would have to get a better finish rather than having to rush.

So, painted the inside, (again I can mask this).

Posted Image

Posted Image

Posted Image

And I also did around the door shuts to give me a bit of a head start.

Posted Image

Posted Image

And I'm also going to give the roof a go at home because if we do it all in one, I'll be putting masking tape onto soft paint. So, I decided to paint the outside of the gutters in body colour so I could mask off ready for the roof and get a good edge all round.

Posted Image

Painted the backs of the bonnet & boot as well.

Posted Image

Posted Image

That's it for today. Short & sweet. News on the roof tomorrow.

Thanks for dropping by.

#179 Bean

Bean

    Queen of 'shoppin, Voted Miss TMF 2011

  • Members
  • PipPipPipPipPipPipPipPipPipPip
  • 8,054 posts
  • Name: Jean
  • Location: Malvern

Posted 28 March 2010 - 12:16 AM

Ahhh - Love this project more and more every time I drop in :P

Excellent work as usual, Steve ;)

#180 James182

James182

    Speeding Along Now

  • Members
  • PipPipPipPipPip
  • 433 posts

Posted 28 March 2010 - 01:12 AM

what blue is that? looks like surf but cant be sure?


1 user(s) are reading this topic

0 members, 1 guests, 0 anonymous users