Jump to content


Photo
- - - - -

Daughter Zoe's Mini - Yeah Right!


  • Please log in to reply
723 replies to this topic

#151 stevede

stevede

    As seen on TV

  • Members
  • PipPipPipPipPipPipPip
  • 1,164 posts
  • Local Club: None

Posted 17 January 2010 - 06:45 PM

Thanks for all the kind comments folks, it's really appreciated.

Just a quick update today. I managed to get some primer on the car just before all the snow but haven't had the cover off since beacuse it's been too bad.

Definately not mini working weather!!!
Posted Image

Coupled with driving up & down the country with work, the mini has had a bit of a back seat.

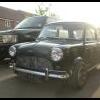
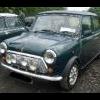
However, free day today and some half decent weather so off with the cover to see what lay beneath.

I was pleasantly surprised to see that the paint had stood up well especially since the cover was put on straight after the primer and just left for 2 weeks in freezing weather! It now needs some stopper / putty in many places before a gentle rub down and some more primer.

Posted Image

Posted Image

Posted Image

Posted Image

Posted Image

Posted Image

Plans now are to get the underside painted with brush on paint, black gloss or similar as if I wait until I can spray body coloured paint I'll be waiting forever. (I can't get the whole car in the garage so have to work outside)

Get the inside of the boot painted (body colour I can do that in the garage) and the engine bay along with the inside of the passenger compartment so that I can then paint the subframes and rebuild fully with all the new bits that I have. (brakes, bearings etc)

I have ordered some brake line from fleabay whilst the fuel line will clean up okay. I think I may replace the rubber cones as well. Bit of an expense but I suspect they are the originals and the job will be much easier at this stage rather than take a chance and have to do them later on.

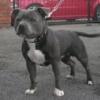
Last but not least, a belated pressie for the little girl.

Posted Image

That's it for now, look out for lots of questions heading your way once I start to recondition all the mechanicals & put them back together.

Thanks for stopping by

Regards

Steve

p.s. Hope to meet a few of you on the stand at Bingley. I'll make sure I pop along and say hello!

#152 Bean

Bean

    Queen of 'shoppin, Voted Miss TMF 2011

  • Members
  • PipPipPipPipPipPipPipPipPipPip
  • 8,054 posts
  • Name: Jean
  • Location: Malvern

Posted 18 January 2010 - 05:24 PM

I think I may replace the rubber cones as well. Bit of an expense but I suspect they are the originals and the job will be much easier at this stage rather than take a chance and have to do them later on.


How about replacing them with a Mini-tastic spring setup? :D

http://www.minitastic.co.uk/home1.htm


:unsure:

#153 stevede

stevede

    As seen on TV

  • Members
  • PipPipPipPipPipPipPip
  • 1,164 posts
  • Local Club: None

Posted 15 February 2010 - 08:12 PM

Is it a bird? Is it a plane? No it's an update!!

Hi Guys

Time seems to have flown by since I last did an update. Bad weather & manic at work means I haven't done as much on the mini as I would have liked.

Eventually found some time and a decent day to fully rub dowm the primer & stopper to get a better finish before spraying another full coat or 3 all over.

I wasn't happy with the coverage from the gun so I upped the pressure from 50 to 60psi and the difference was quite spectacular, both in the spray pattern and in the amount of paint used. Still, a nice health covering of primer now.

Posted Image

Posted Image

Posted Image

Posted Image

Not much difference from before at a glance but on close up, most of the marks have now been rubbed out or filled with paint.

Second wave of rubbing down planned soon and then maybe, just maybe I can start to think about some colour.

A trip to Bingley Hall saw the purchase of some last subframe bits & bobs, bolts etc. Once I take the subframes back off to paint the final colour underside, I want to be ready to refit them will all the required new parts. I did call by the stand but no one was there and we were ready to go at that point. Maybe next show??

Have managed to do some work in the warmth of the garage with the brake and clutch master cylinder assemblies.

From this.....

Posted Image

Posted Image

To this...

Posted Image

Posted Image

Posted Image

Posted Image

Posted Image

I also made another small purchase for my ever changing design brief and have started some work on it.

You'll have to wait and see for that one though

That's all for today, short & sweet, hopefully the next one won't be too far away.

Thanks for looking

Regards

Steve

#154 Shifty

Shifty

    Sponsored by Fosters (tm)

  • Admin
  • PipPipPipPipPipPipPipPipPipPipPip
  • 13,139 posts
  • Name: Sean
  • Location: Shropshire(sunny)
  • Local Club: TMF

Posted 15 February 2010 - 08:20 PM

I thought this would have been finished by now Steve!!!

What are you playing at!!!

(heh heh heh!!)

Nice work though dude.

#155 Mini Basher

Mini Basher

    Speeding Along Now

  • TMF+ Member
  • PipPipPipPipPip
  • 424 posts
  • Location: Forest of Dean
  • Local Club: Mini Foresters

Posted 15 February 2010 - 11:06 PM

Nice work Steve,
I think your definately ahead of me in the build and paint department, keep up the god work

Cheers

Andy

#156 danie garry

danie garry

    I love BMW minis

  • Members
  • PipPipPipPipPipPipPipPipPip
  • 2,296 posts
  • Location: malmo
  • Local Club: IMOC-Irish Mini Owners Club

Posted 15 February 2010 - 11:14 PM

i love it!! great work on the car and the brake master turned out brilliant.
looks like alot of time and effort has gone into this, cant wait to see the finished article

#157 trafficface09

trafficface09

    One Carb Or Two?

  • Members
  • PipPipPipPipPipPipPip
  • 757 posts
  • Local Club: not yet but soon

Posted 23 February 2010 - 10:31 PM

This is my new favorate project. its simple but has some nice little quirky extras like that fog-light, its great, i hope i will meet you at a show one day, i wish knew sombody with your welding and spraying skills, i have all the equipment but i im still slowly learning

#158 stevede

stevede

    As seen on TV

  • Members
  • PipPipPipPipPipPipPip
  • 1,164 posts
  • Local Club: None

Posted 28 February 2010 - 06:09 PM

Edit: Computer error, multiple post.

Edited by stevede, 28 February 2010 - 06:30 PM.


#159 stevede

stevede

    As seen on TV

  • Members
  • PipPipPipPipPipPipPip
  • 1,164 posts
  • Local Club: None

Posted 28 February 2010 - 06:29 PM

Many thanks for the comments. Once again, they are appreciated.

Traffic face, keep practicing with your welding & spraying & don't be afraid to have a go. It's the only way to learn.

Still a bit cold outside although I did take the cover off today to check all was well. The footprints suggest the cat is keeping guard!!

Been keeping up with some cleaning & painting of bits in the garage where it's a little warmer.

Few more bits smartened up with a spray over of smoothrite.

Posted Image

Posted Image

And a few pieces brought up into the house to let them harden off properly.

Posted Image

Luckily they are in my office which keeps the wife happy.


Another little "indoors" project I have on the go is a recent purchase.

Posted Image

I decided that I liked the idea of the classic look clocks but wanted to update them a little.

Some before's:

Posted Image

Posted Image

A few extra holes and a clean up.

Posted Image

Posted Image

Before getting to work with some electronics

Posted Image

Posted Image

Is it just me that thinks the last picture looks like someting from a Woody Allen film? It's probably just my age and I can imagine all the youngsters thinking "who's Woody Allen"?

Anyway, on with the clocks.

7 LED's wired and working

Posted Image

Not too sure how bright this is compared to standard (anyone know) but even if I can't see how fast i'm going, at least I'll know if i'm running out of fuel!!

Posted Image

Also replaced the standard warning lights with LED's as well. I need to pop back and get an amber one for the oil and I will replace the spare yellow with a flashing one for the alarm that will eventualy be fitted.

Posted Image

I have another bit on the go for LED's which involves the front indicators and an idea from an Audi A4.... Watch this space.

That's about it for now. Nothing too exciting but at least is shows I am still doing some work as & when I can.

Cheers for looking

Steve

#160 xBR4DLEY

xBR4DLEY

    >>mine's still gay<<

  • Members
  • PipPipPipPipPipPipPipPip
  • 1,618 posts

Posted 28 February 2010 - 06:36 PM

Nice , are the red , green and blue lights not too bright though?
What resistors and wire you using and what you wiring it up to?
Might have given me an idea :(

#161 stevede

stevede

    As seen on TV

  • Members
  • PipPipPipPipPipPipPip
  • 1,164 posts
  • Local Club: None

Posted 28 February 2010 - 06:46 PM

Nice , are the red , green and blue lights not too bright though?
What resistors and wire you using and what you wiring it up to?
Might have given me an idea :(


Hi Bradley

It's probably the camera that makes them look bright. Having said that, if a warning light is coming on, might as well be able to see it.

The red LED is a 12v so connected direct, the others are 5v and put through a 1/2w 270 ohm resistor.

If you need any more info, give me a shout.

Cheers

Steve

#162 mighty mini jack

mighty mini jack

    Mighty Before a Pint

  • Members
  • PipPipPipPipPipPipPipPipPipPip
  • 5,095 posts

Posted 28 February 2010 - 06:56 PM

All those bits look great Steve, would be interested in the center clock lights myself sometime.

Nice work!

#163 G-baby158

G-baby158

    Mini Mad

  • Members
  • PipPipPipPip
  • 212 posts

Posted 28 February 2010 - 07:33 PM

Just read through the hole of the build and i am amazed by how much effort you put into this, it's a truly fantastic build. Did you self teach yourself to weld? In the pictures at the start the welds look really good for someone who has just started. I'm wanting to learn to weld and need all the help i can.

#164 stevede

stevede

    As seen on TV

  • Members
  • PipPipPipPipPipPipPip
  • 1,164 posts
  • Local Club: None

Posted 28 February 2010 - 09:47 PM

Just read through the hole of the build and i am amazed by how much effort you put into this, it's a truly fantastic build. Did you self teach yourself to weld? In the pictures at the start the welds look really good for someone who has just started. I'm wanting to learn to weld and need all the help i can.


Hi

Thanks for the comments.

No, I didn't teach myself to weld. I have a pal who has been welding for the last 25 years. He's more of an artist than a welder if you understand what I mean. He got me the kit, gave me some lessons and was there to guide me as I went along. Some of the pictures at the beginning are his welds, not mine.

I can confidently get 2 pieces of metal joined together but I am far away from the stage where I don't have to rely on the grinder to make it look acceptable.

The only advice I can give is practice, practice and more practice. Get it wrong, understand why and learn from it. That's what I have done and for the record, i'm still getting it wrong and still learning. It's all part of the fun.

Thanks again and good luck

Regards

Steve

#165 Bean

Bean

    Queen of 'shoppin, Voted Miss TMF 2011

  • Members
  • PipPipPipPipPipPipPipPipPipPip
  • 8,054 posts
  • Name: Jean
  • Location: Malvern

Posted 28 February 2010 - 10:15 PM

I have to agree - I love this build & am hugely impressed at the effort in teaching yourself the skills! Loving the LED lighting though - it's incredible! And yes ... the standard lighting is utterly rubbish, lol. If you can do the same to the oil pressure and the temp sensor, you're on to a definite winner...

There might even be a gap in the market for it... :)

Looking to learn how to weld, myself - Truly inspirational, Steve :dontgetit:


1 user(s) are reading this topic

0 members, 1 guests, 0 anonymous users