Rust deviates too much from standard

The Rise And Fall Of Sir Reginald!
#136

Posted 28 August 2009 - 04:16 PM
Rust deviates too much from standard
#137

Posted 28 August 2009 - 04:54 PM
Bit of progress today - Wiring loom is now all converted to pre-engaged and appears to work, I whacked an old battery in the boot to see what happened -
Everything appears to work - Although i think my sender unit for Oil pressure is Duff as I didn't get an orange light on the dash - first things first is to check the bulbs though.
Fan works, Rear demister works, Horn works, Interior light works, Lights all work and brake fluid indicator works.
Must remember to get some flasher relays...
#138

Posted 29 August 2009 - 07:11 AM
#139

Posted 29 August 2009 - 09:50 AM
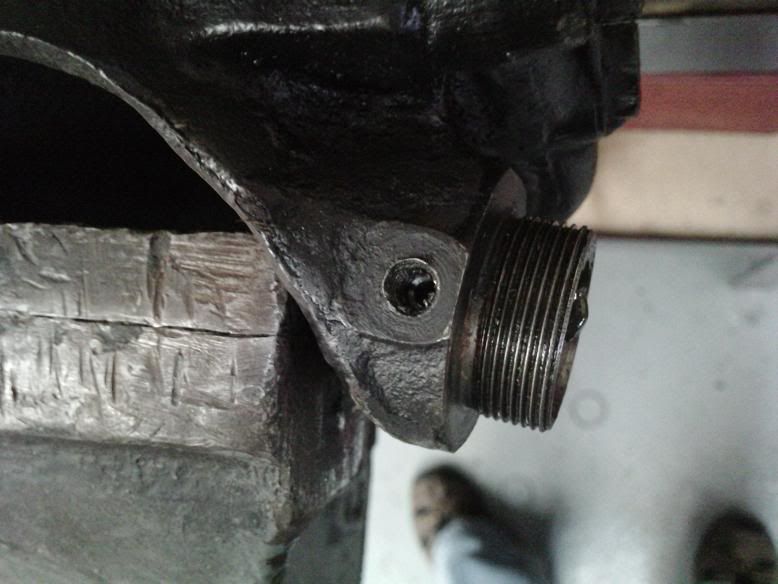
Just need to find my spare nips now
#140

Posted 30 August 2009 - 04:16 PM
New ball joints fitted, Wheel Bearing washed out and re-packed with grease, Hub fitted, disc fitted, caliper fitted:
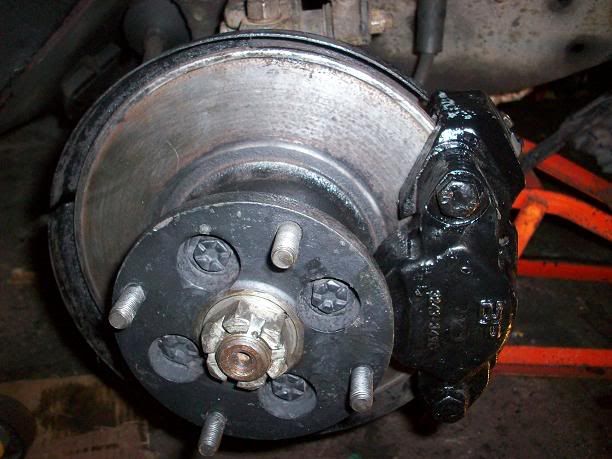
Just need to get a large flat washer to pre-load the bearing before fitting the conical washer and split pin, which I'll do tomorrow hopefully.
Wiring conversion on the starter from Inertia to Pre-engaged is complete and attached:
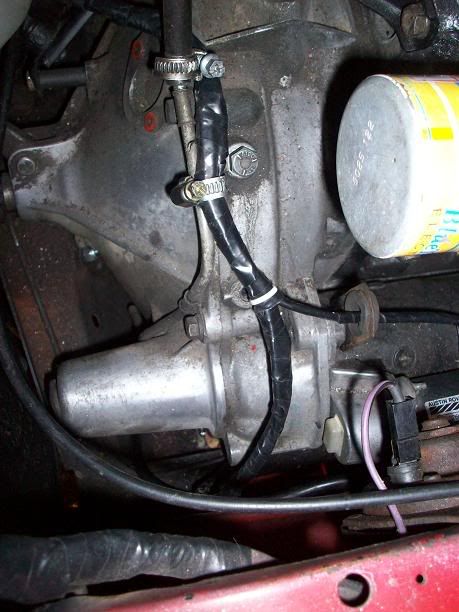
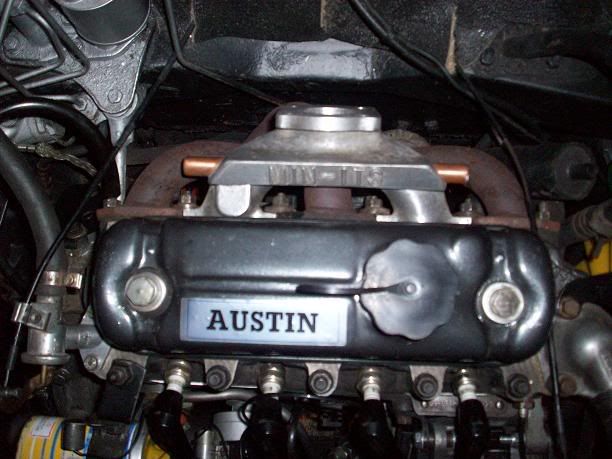
And the Min-its Inlet and Cooer Freeflow manifolds are fitted up:
Oh, and I have another stencil planned
#141

Posted 30 August 2009 - 04:27 PM
Edited by Down&Out, 30 August 2009 - 04:27 PM.
#142

Posted 30 August 2009 - 09:12 PM
Off to see if i can get my snapped nipple Removed today,... fingers crossed it flies out.
sounds painfull, men don't need them anyways... just cosmetic.
#143

Posted 30 August 2009 - 09:16 PM
That manifold looks noice
Cheers.
Just been fiddling about in the garage - I need a battery for the project as the one I have is well past it's best - however I had a eureka moment and hooked the battery charger up to the battery and in turn to the car....
There's life in the old girl yet! Everything lights up nicely and appears to work, The dash needs a new bulb as one blew, but I've just ordered 6 from Minispares and will replace them all, as far as i can see they might be the original ones so it's time to replace them anyway. So I got busy with some a nail file and cleaned all the light connections on the cluster underneath the Slampanel - and it all worked!
The only thing that needs sorting is a new hazard flasher unit, and I think the oil pressure sender has died as I'm getting no orange light at all.
sounds painfull
I tried twisting my nipple but it wouldn't budge!
#144

Posted 30 August 2009 - 09:20 PM
That manifold looks noice
Cheers.
Just been fiddling about in the garage - I need a battery for the project as the one I have is well past it's best - however I had a eureka moment and hooked the battery charger up to the battery and in turn to the car....
There's life in the old girl yet! Everything lights up nicely and appears to work, The dash needs a new bulb as one blew, but I've just ordered 6 from Minispares and will replace them all, as far as i can see they might be the original ones so it's time to replace them anyway. So I got busy with some a nail file and cleaned all the light connections on the cluster underneath the Slampanel - and it all worked!
The only thing that needs sorting is a new hazard flasher unit, and I think the oil pressure sender has died as I'm getting no orange light at all.sounds painfull
I tried twisting my nipple but it wouldn't budge!

sadomasocist !!!
#145

Posted 31 August 2009 - 03:07 PM
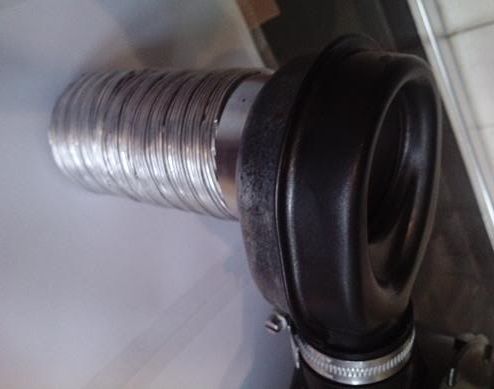
Then I made a little modification - Almost all minis that run this sort of air box have a problem where the carb elbow doesn't fully seal against the underside of the box - Potentially letting in unfiltered air that 'could' knacker a perfectly good engine.
So I found a strip of rubber in the garage and bonded it to the box.. as you can see the elbow now completely seals up against the box.
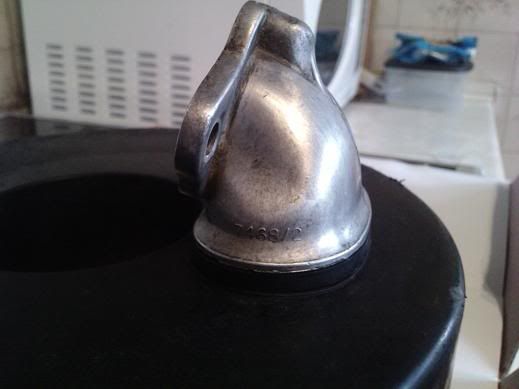
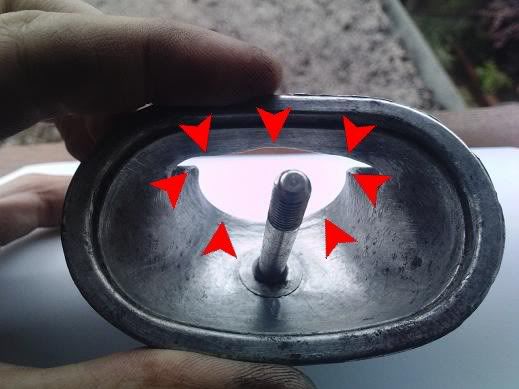
Then i had some fun with a drill and some cutting stones!!! The Carb elbow casting is pretty crude at the best of times and i figured i could improve on the design by ironing out some of the flaws. The outlet flange of the elbow has some little 'ears' that stick out, these are stepped rather than smooth, they disrupt the air flow into the carb, so i smoothed them out.
There is also a large step right around the circumference of the outlet so the whole lot was smoothed out and then sanded with 80 grit paper to get a smoother (but still grainy) finish. hopefully this should all add towards smooth power delivery.
If you have an elbow kicking about, take a look at it and compare,.. the difference is quite considerable now that i've finished working it.
Can't wait to get the car on the rollers (if it runs!) and see what all the little modifications I've done will add up to!
#146

Posted 31 August 2009 - 05:36 PM
#147

Posted 01 September 2009 - 02:58 PM
Off to see if i can get my snapped nipple Removed today,... fingers crossed it flies out.
Sounds painfull, ha ha.
I've got spare pair of nipples I hardly ever use, if you need them
I realy like this car. Whats the inlet tract on your inlet manifold like? Mine has rough casting marks all over it, and a seam going down the length of it.
Ben
#148

Posted 01 September 2009 - 03:04 PM
I really like this car.
Thanks mate!!! I appreciate the comment
What's the inlet tract on your inlet manifold like
I've worked the inlet as it was horrendous quality on the inside - Here's the link to the post - you can see how much work was needed.
>>click me<<
#149

Posted 01 September 2009 - 03:14 PM
Amazingly, mine is alot worse than that, I need to get a better grinding stone so I can rework mine.
Looks good, you should have a brilliantly flowing inlet tract. I could look back through the thread but it will take ages seeing there has been so much progress on this. Have you done the carb aswell. A few cheaky vizard inspired mods?
Ben
#150

Posted 01 September 2009 - 03:21 PM
* Butterfly spindle has been halved and and aerofoil profiled
* Throttle plate itself has been knife edged and the retaining screws have been cut and countersunk.
* Piston leading edge has been chamfered at a 15% angle where it over hangs into the carb throat.
I'm about (tonight) to Carry out the modifications to the airbox that David Vizard recommends doing, but with my own idea incorporated.
you should have a brilliantly flowing inlet tract
I hope so - that's what all this has been working towards... with the outlet being a Cooper Freeflow manifold and RC twin box system i know it's a good quality system - so the inlet HAS to match... The rollers will hopefully prove the work worthwhile, and I imagine (pure speculation) that I should be able to 'feel' the difference in the form of smoother power delivery.
1 user(s) are reading this topic
0 members, 1 guests, 0 anonymous users


