"project Cosworth" - Ford Sierra Cosworth 4x4
#616
Posted 12 March 2014 - 06:31 PM
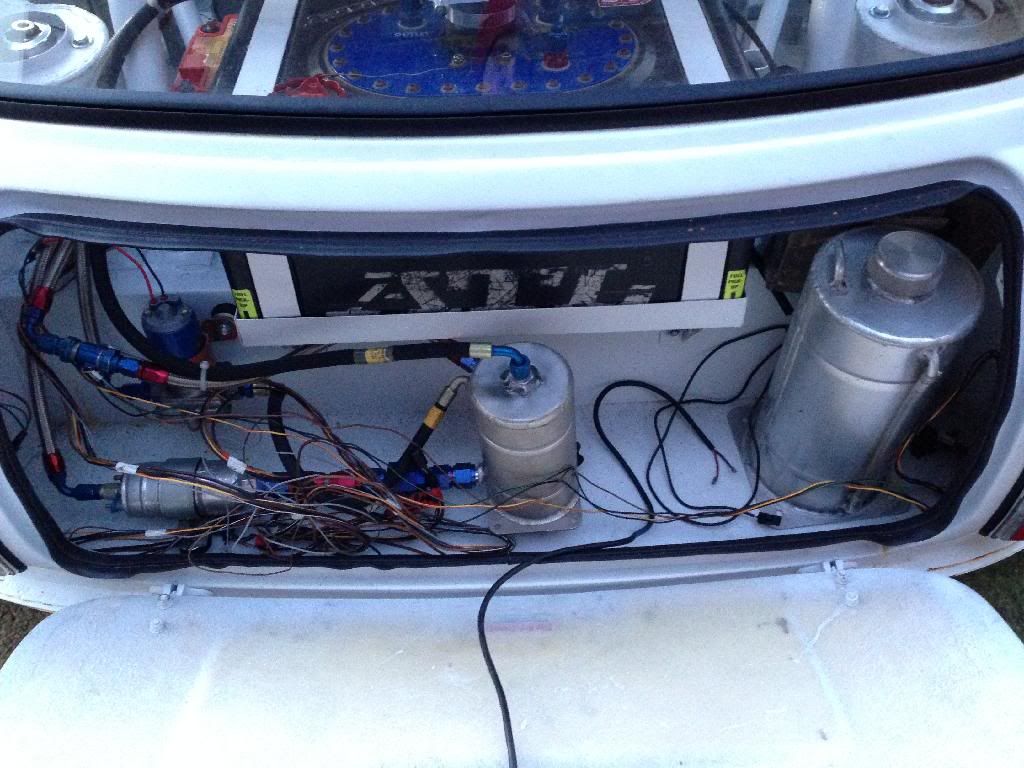
Made the second fuel pump bracket from a piece of metal that I found laying about.
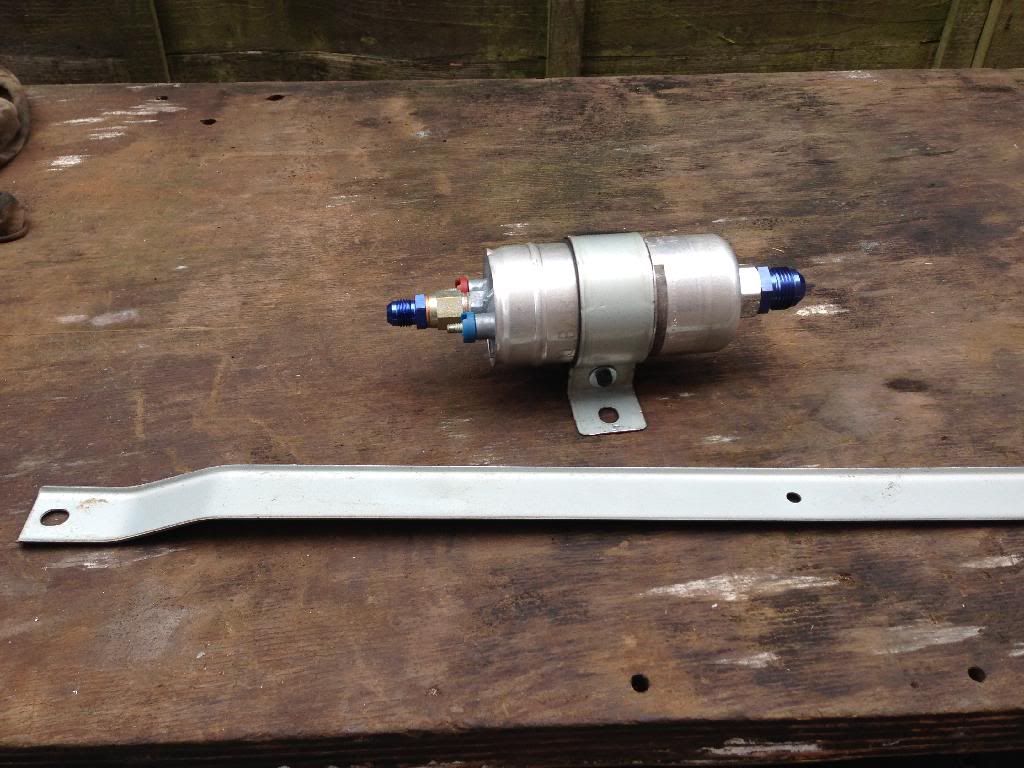
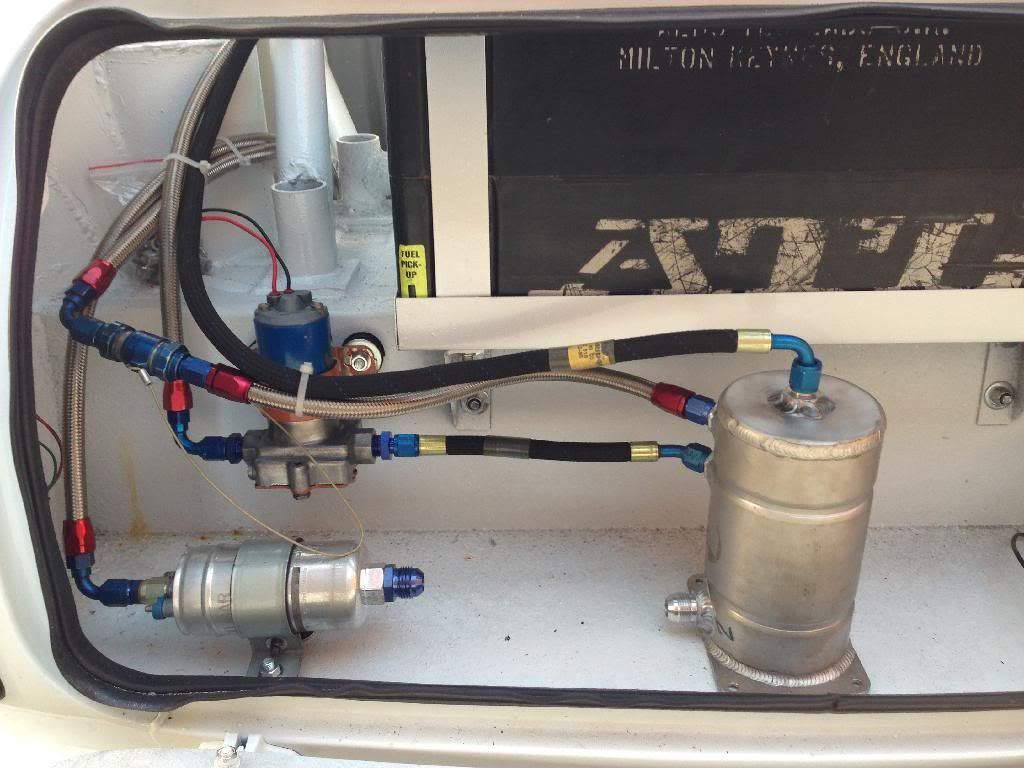
I decided to run the fuel lines down the passenger side of the car.
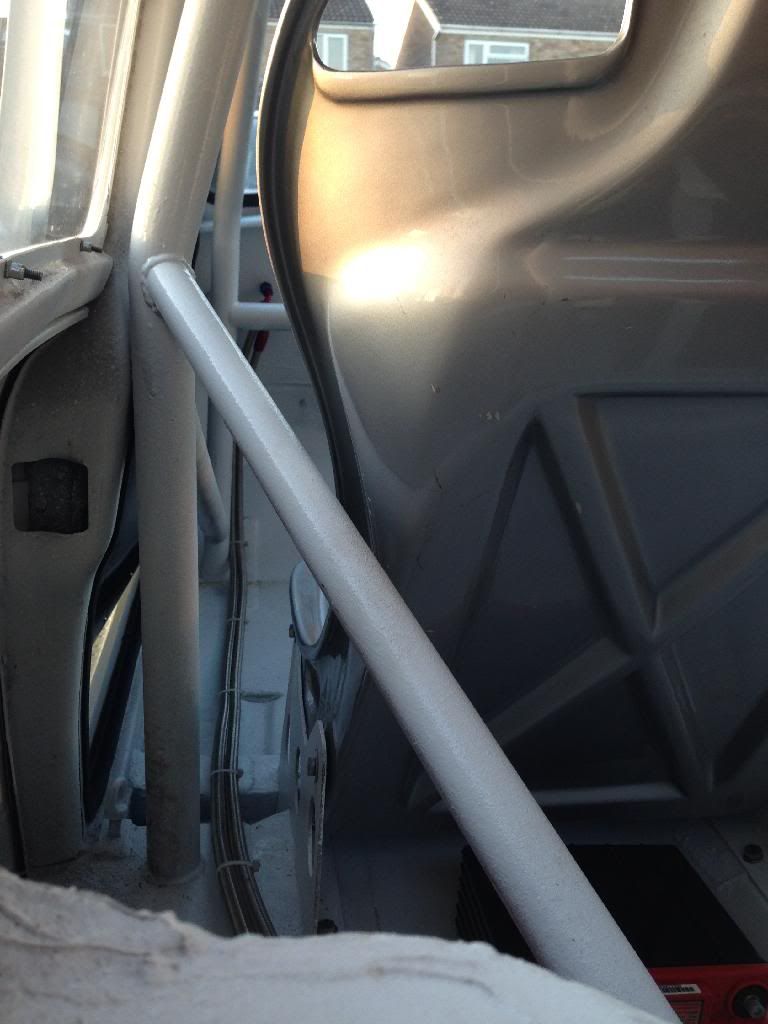
Lift pump supply with filter and swirl pot return both coming from the tank. I think I need to update those labels on the fuel tank.
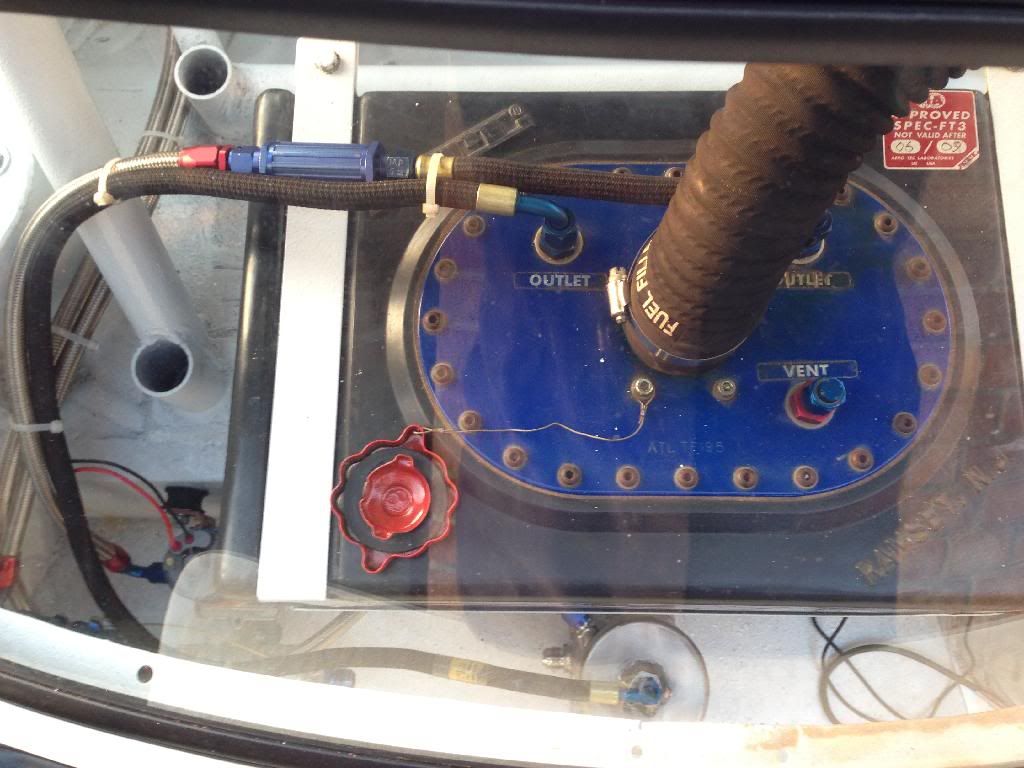
Now the spaghetti of lines at the back of the car with everything in situ
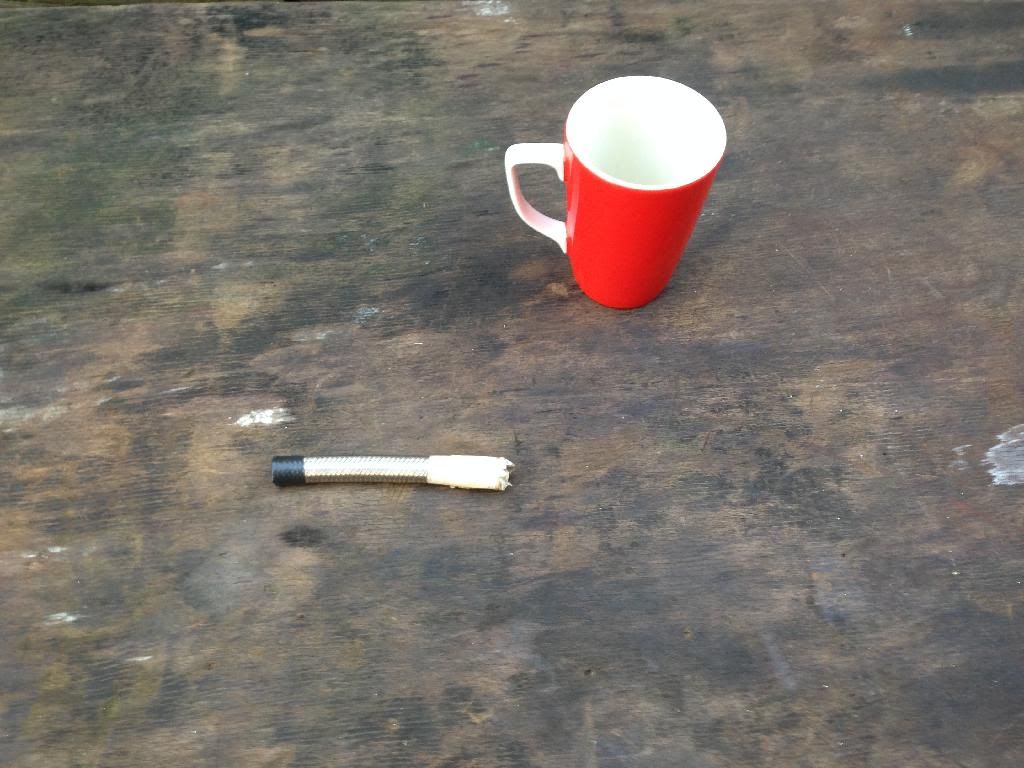
And this is what I was left with of the 6an fuel hose at the end of the day, talk about cutting it close.
I was wondering, for those eagle eyed, you can see that the fuel pick up point is at the rear corners of the tank. This is fine due to the acceleration of the car but my fuel tank is slightly tilting forward and so would struggle to pick up fuel if just sat normally.
Do you think I should flip the fuel tank around so the pick up points are at the front of the car?? (After all I have a swirl pot to eliminate fuel surge)
#617
Posted 13 March 2014 - 09:03 PM
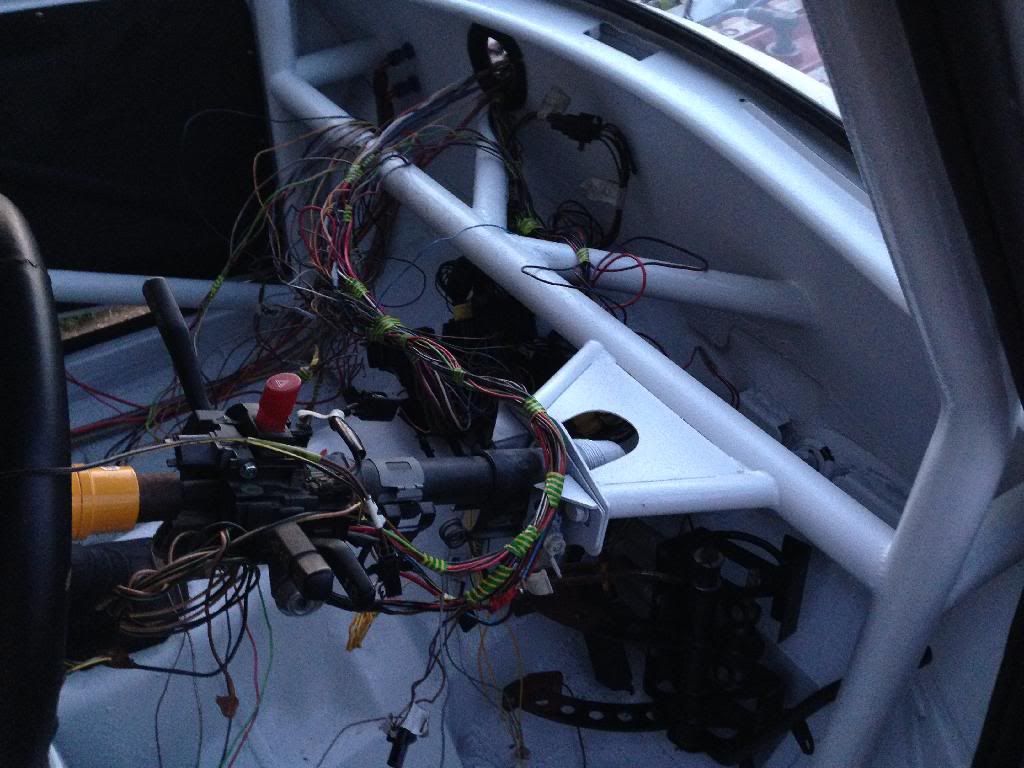
Blimey I hate wiring. I remember when I removed it I labelled things so it would go nicely back together.... I boxed it all up and forgot about it until today..... It's a mess.... And trying to get it all nice and neat is was a nightmare.
Obviously the method of removal from the cosworth does have any resemblance to how I want it in the mini.
Anyhow after spending the day doing it with a friend (thank you very much Mr B) it now looks like this and is in some sort or order ready to be chopped and soldered back together as it's 50 times to big.
Feeds for rear lights and boot light. (Huge surplus)
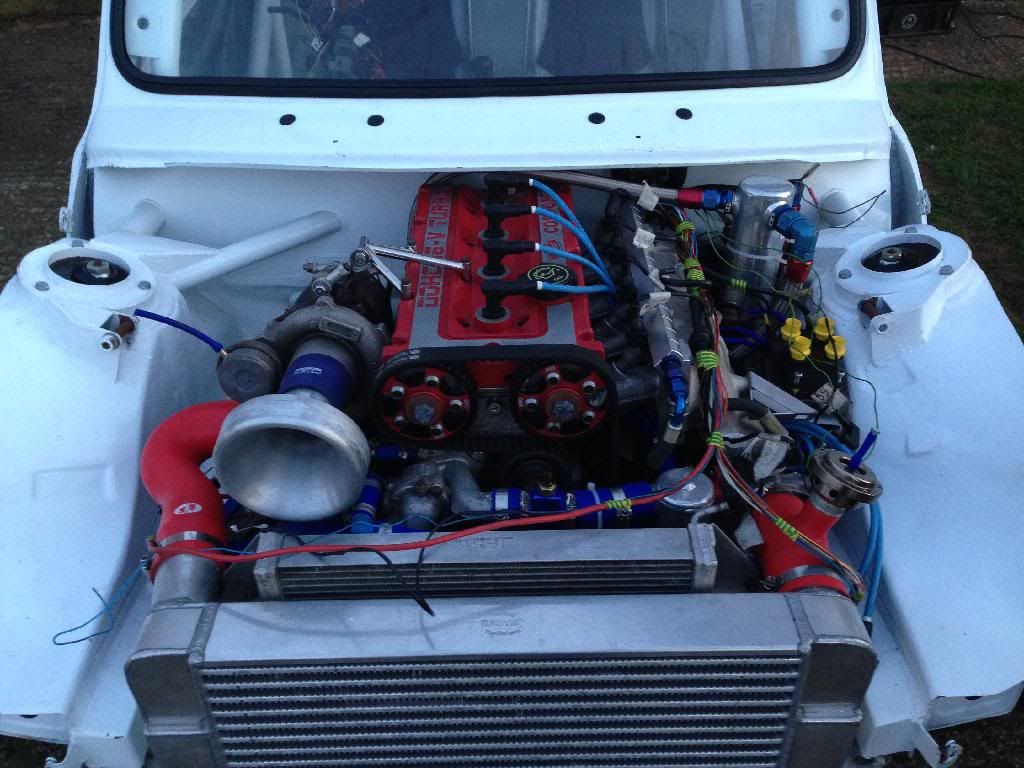
Engine bay with wiring down the injector side as the left side of the engine will have a slightly warm front exit exhaust to contend with. There will be a connector at the front to simply unclip to ease the flip front coming off.
It does look a mess but honest, it is in some order.
There will be two looms, one for the engine and ecu and the other to do all the interior stuff. And yes that is a rather large hole in the bulkhead.
Now I'm off to stock up on loom tape!
Edited by kmol468, 13 March 2014 - 09:04 PM.
#618
Posted 13 March 2014 - 09:14 PM
Bloody hell what a nest of snakes there then. I think turning the tank round won't hurt but the swirl pot should help to eliminate any issues anyway.
#619
Posted 13 March 2014 - 11:12 PM
#620
Posted 14 March 2014 - 10:40 AM
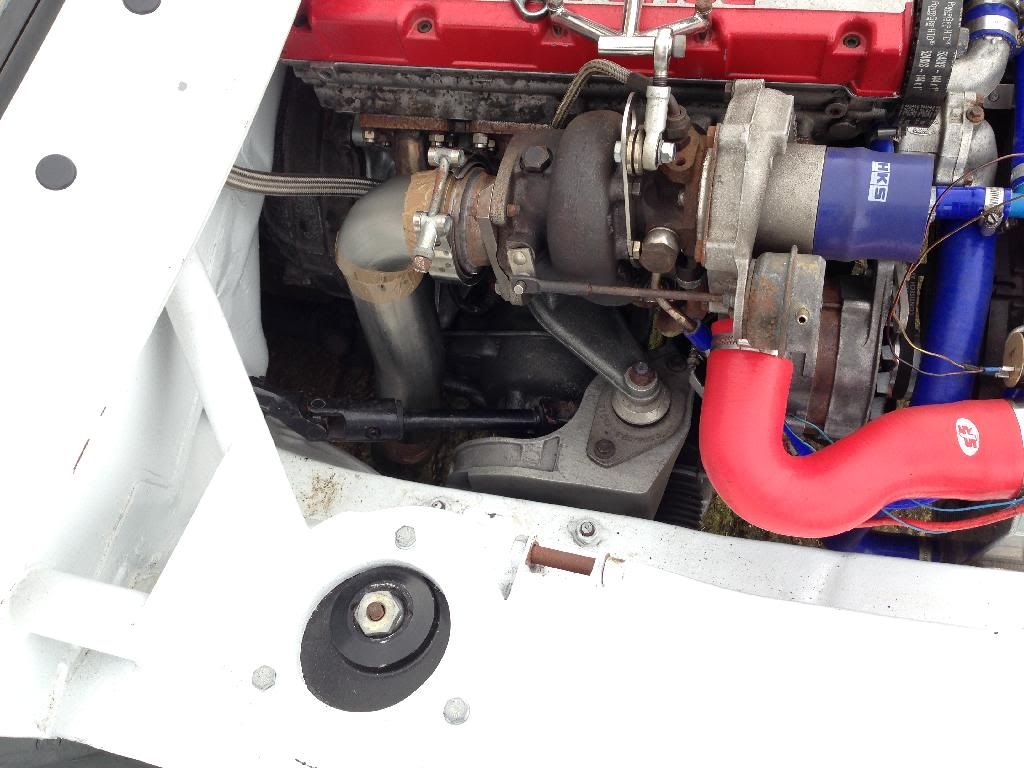
Lovin the ram pipe into the WACKING great turbo!
Thread keeps on giving.
#621
Posted 15 March 2014 - 08:16 PM
Awesome
#622
Posted 14 April 2014 - 08:30 PM
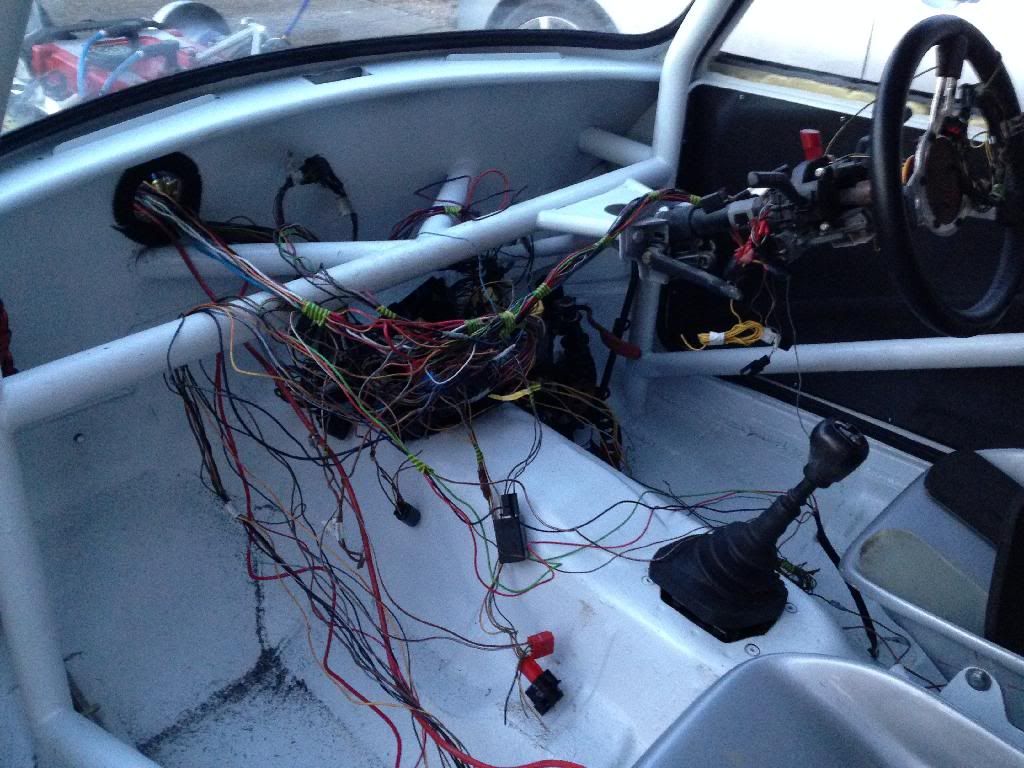
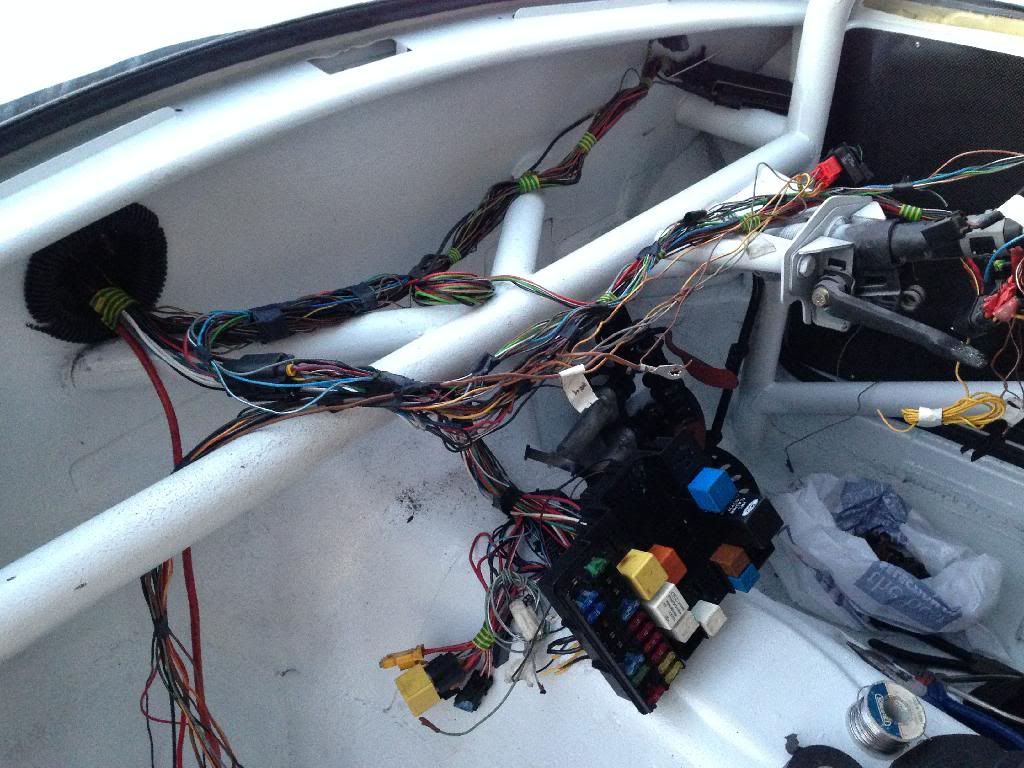
The main ecu loom is at the back, then the main fuse board with two spurs going over to the steering wheel, one for the indicators/lights etc and the other for the dash.
The remaining wires are running down the passenger side for the battery and rear lights.
Now I need my header tank, a basic exhaust and it will be ready to start!
#623
Posted 14 April 2014 - 08:47 PM
Thats a lot of wires
#624
Posted 14 April 2014 - 09:14 PM
#625
Posted 14 April 2014 - 09:15 PM
#626
Posted 14 April 2014 - 09:31 PM
It doesn't have half the stuff anymore but there's still a lot of sensors to connect and it will get refined further..... I just want it to start!
I would love someone to give me a brand new loom that's perfect length, suitable for a YB engine and a mini chassis, but unfortunately one doesn't exist.
As long as it works I will be grinning.
#627
Posted 22 April 2014 - 08:10 PM
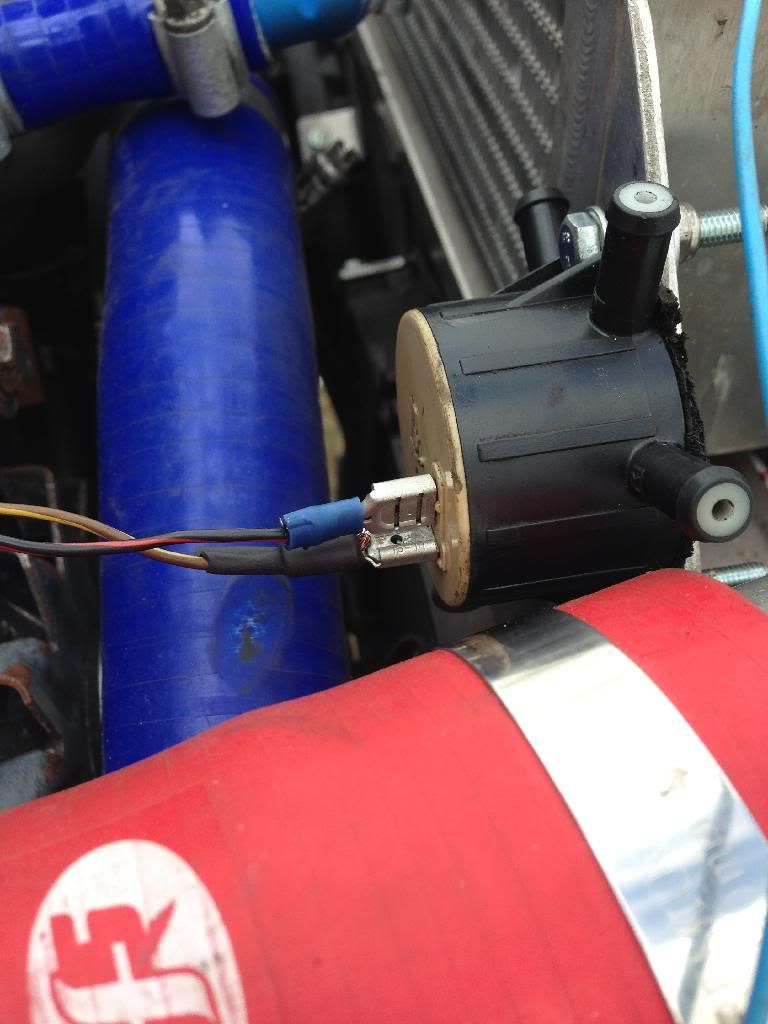
I've bought another amal valve (as I can't find it) and fitted it to the back of the turbo cooler. Hopefully the wires are the right way round, what's the worst that can happen....it only controls the boost level!! Lol
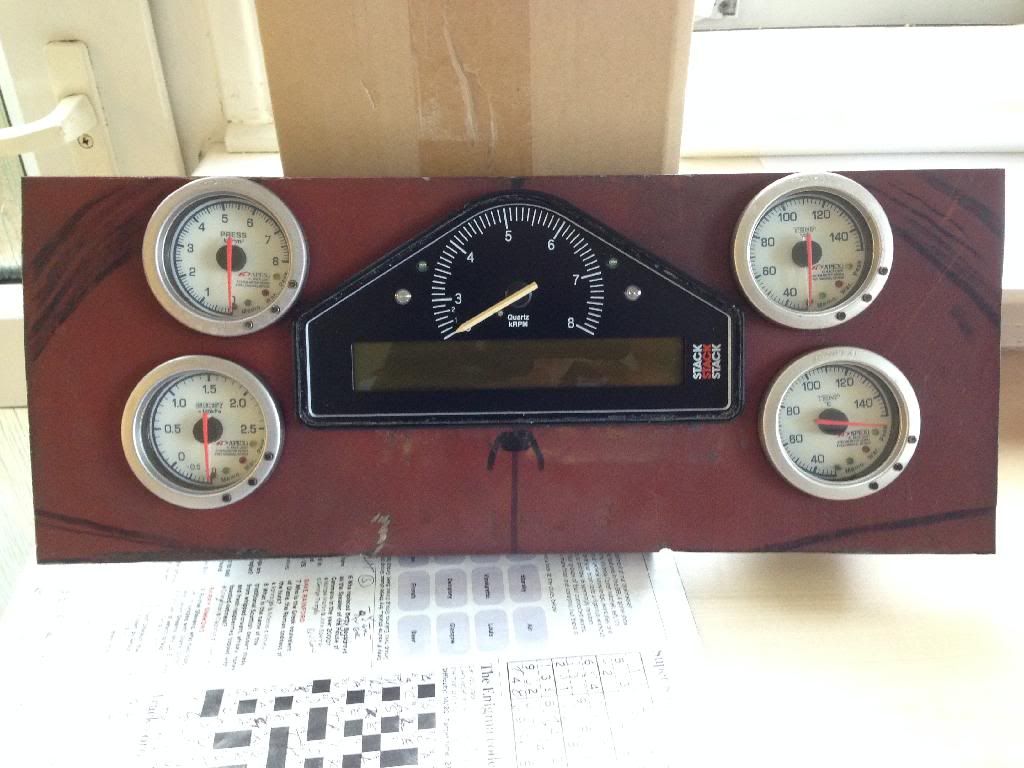
I've also been focusing on the 'extra' wiring which consists of the
stack system,
water injection system
Apexi gauges
Secs monitor - a handy ecu extension which monitors pretty much everything. However it's only small so won't actively be looking at it while driving.
Extra switches and warning lights.
So the plan being, have the majority of dials and gauges in front of the steering wheel with the switches inbetween the seats within arms reach.
The parts shaded black are the bits I can't see while strapped in.
Also hoping to get the header tank and exhaust made in the next week...
I have a week off soon, so if the weather is nice I'll finish things off and it WILL get started. PMA and all that..!
#628
Posted 26 April 2014 - 09:53 PM
Good to see this moving on so well, if/when you get it started could you do a video? I'd love to see this beast running.
Trac
#629
Posted 26 April 2014 - 11:40 PM
I have the exhaust parts so I will be tinkering with that this week aswell.
I haven't decided 100% on the exhaust route but it will be front exit and have no boxes in it! Let fire spitting commence lol.
#630
Posted 28 April 2014 - 09:56 PM
A couple of other things sorted but I didnt progress with things as much as I would have liked. However:
Exhaust is mocked up and sent off to be properly fabricated. Rather unfortunately I'm not going to have a front exit exhaust as its just too problematic regarding the exit of it. it would have either been facing out the front of the car, into the tyre or through the arch.
So its just going to drop down and exit onto the floor. However this way it is possible to twist it around the floor and out alittle after the front wheel arch, so letting me a have a caterham style silencer if required.
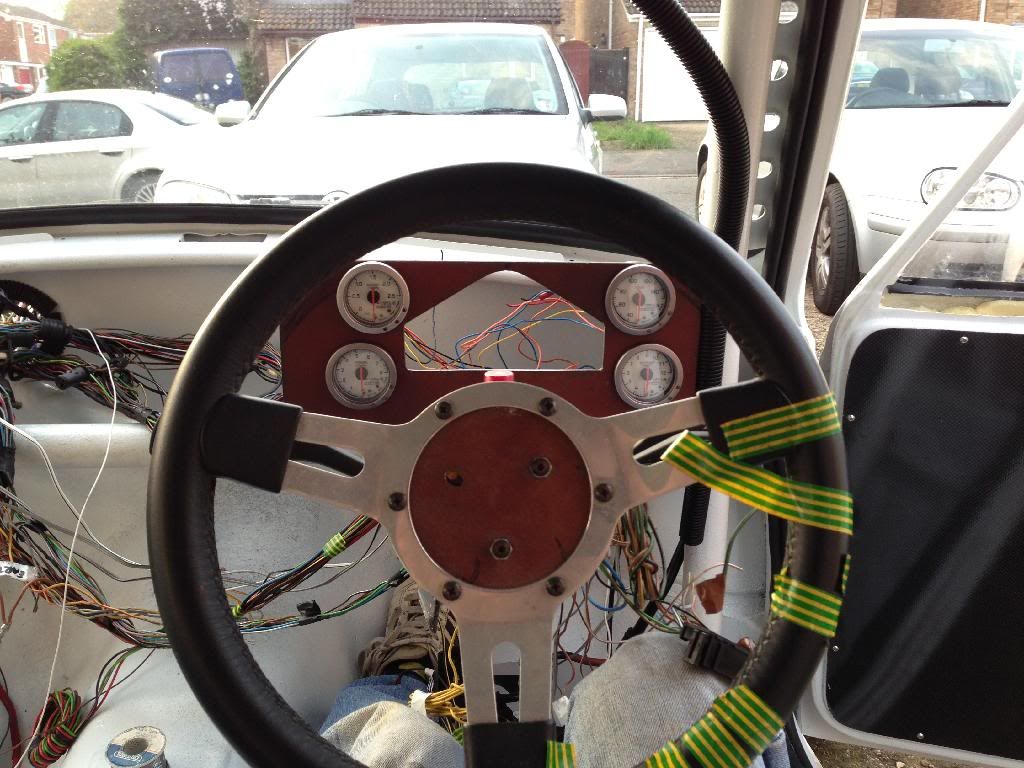
I ran all the other wiring from the engine bay, lambda sensor, egt probe and boost guage into the cabin and mounted my gauges ready for another day of it tomorrow. This is now the view you get.
Edited by kmol468, 28 April 2014 - 09:57 PM.
2 user(s) are reading this topic
0 members, 2 guests, 0 anonymous users