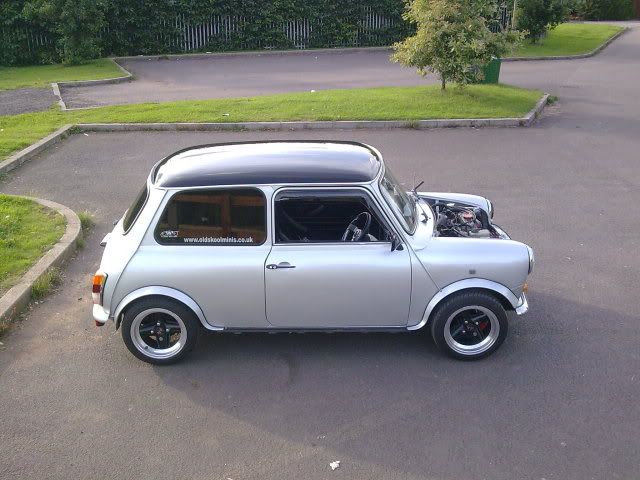
I'm not a fun of silver minis, but i have to say that yours is lovely, really like the red bits to follow the mg theme.


Silver Mini - 998 To Mg Metro 1275cc
Started by
silva_mini
, Apr 19 2009 01:24 PM
38 replies to this topic
#32

silva_mini
-
- Members
-

- 254 posts
Mini Mad
Posted 09 July 2009 - 09:27 AM
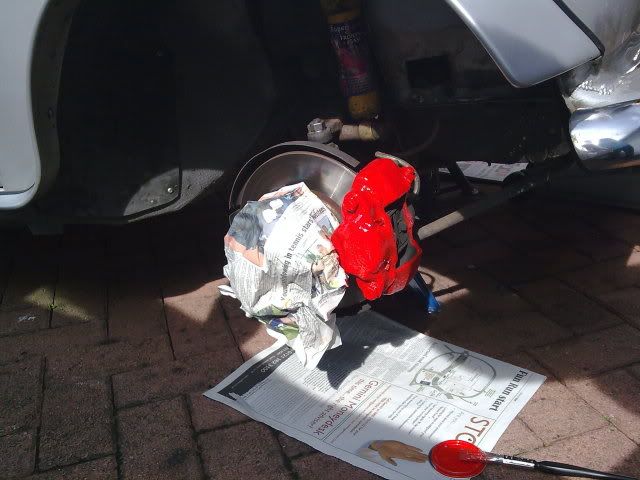
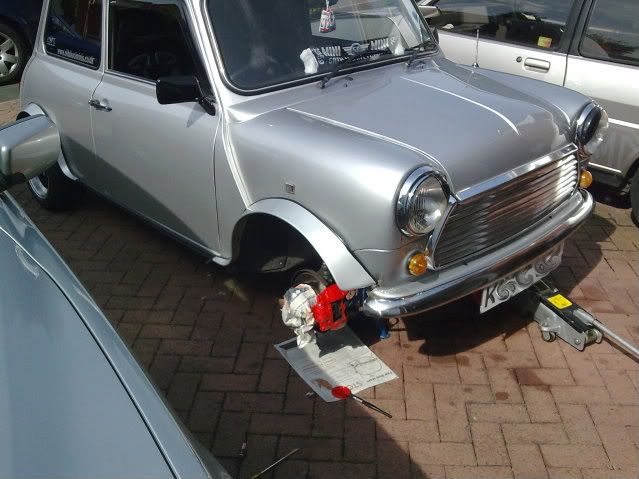
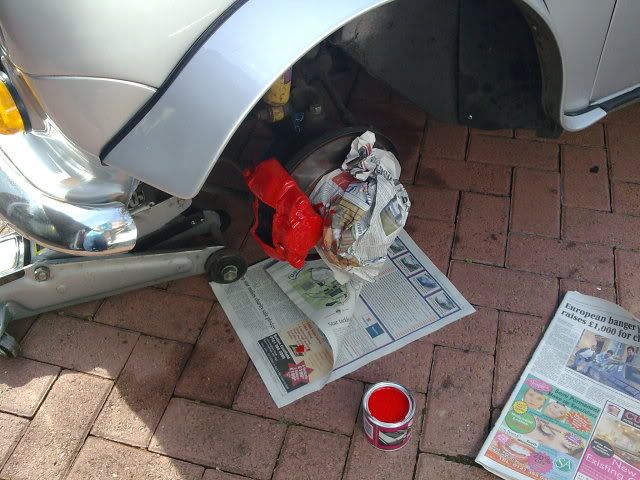
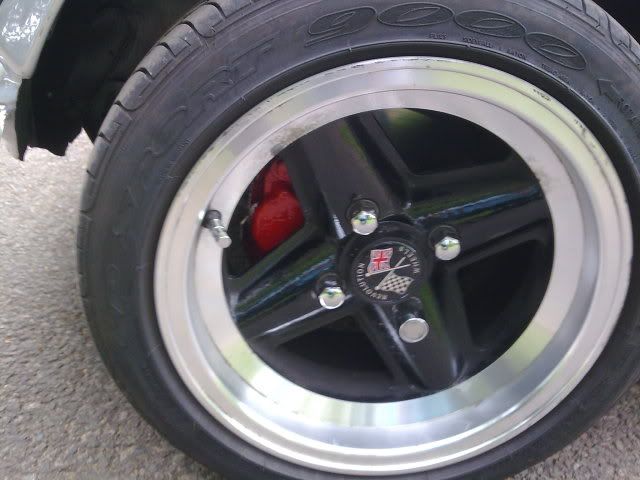
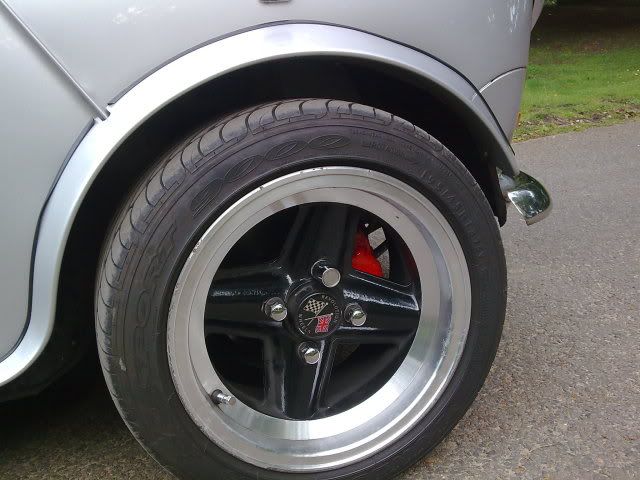
Thank you  Ive got to paint my brake calipers red at the front too.
The standard Rover silver is very dull, I had mine resprayed in a Toyota colour which makes it stand out a bit more
Ive got to paint my brake calipers red at the front too.The standard Rover silver is very dull, I had mine resprayed in a Toyota colour which makes it stand out a bit more
#33
silva_mini
-
- Members
-
- 254 posts
Mini Mad
Posted 04 August 2009 - 09:54 AM
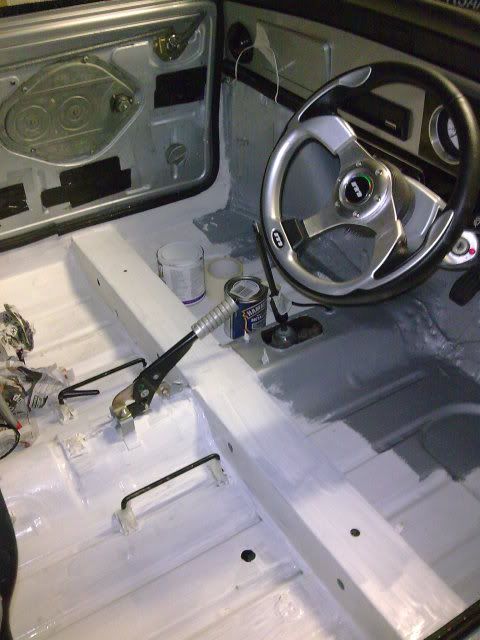
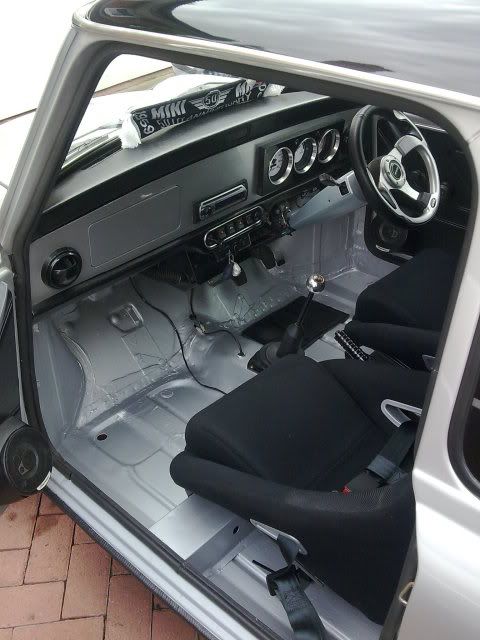
The weather has been against me recently, but i've finally managed to finish painting up the floor inside the mini
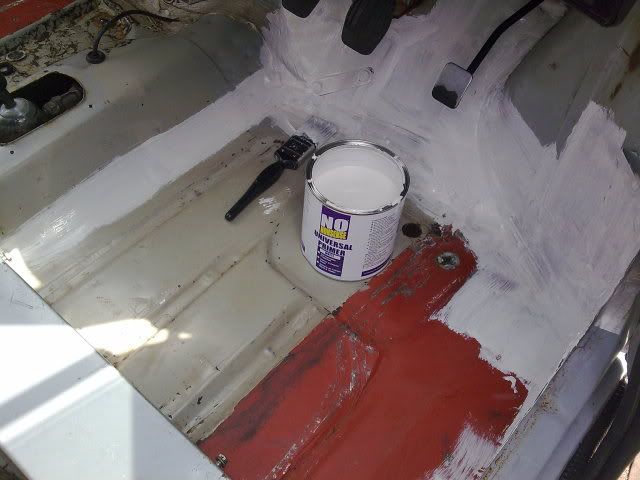
I spent hours removing the last of the stuck on adhesive that was left on the floor panels from the sound deadening. Working in petrol with a small brush then rubbing like mad with an old rag seemed to work the best, still took ages though!
This was my starting point after the sills had been finished...
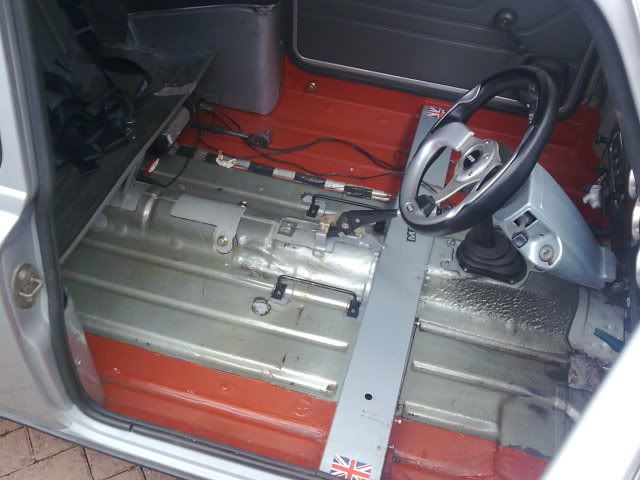
Looked pretty awful!
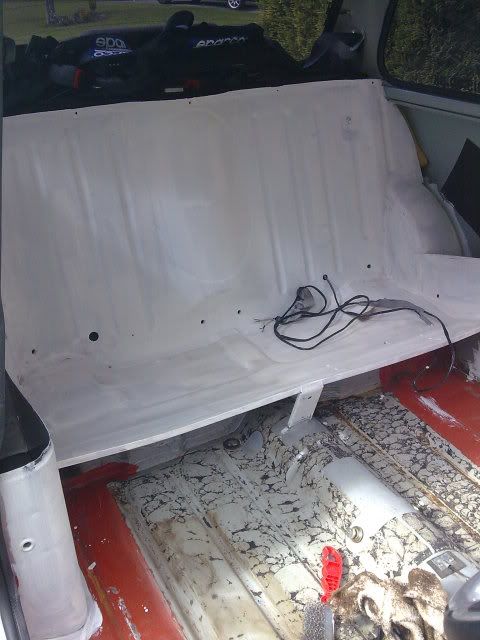
Here is a pic of the sound deadening removed, you can see the stuck on adhesive I was talking about on the rear floor section, behind the crossmember. Removed it in sections, I painted the rear bench first, then decided to start painting the front section so it could hopefully dry by the time id finished removing the adhesive
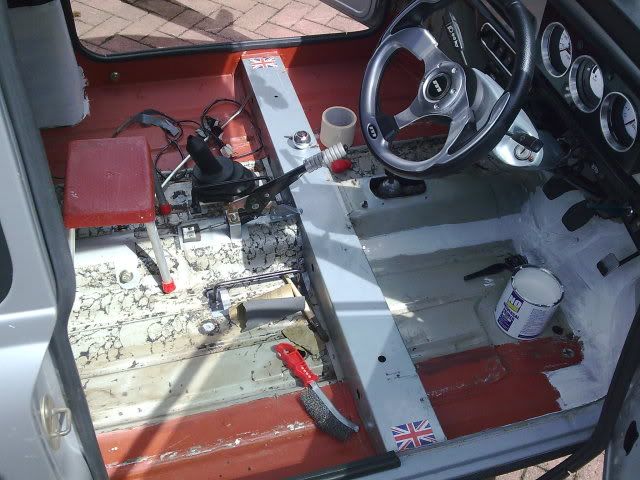
As you can see, I decided to put down a (cheap/thin ) base coat of white primer, despite the final coat being Hammerite Silver. I wanted to spot any imperfections before starting on the final coat.
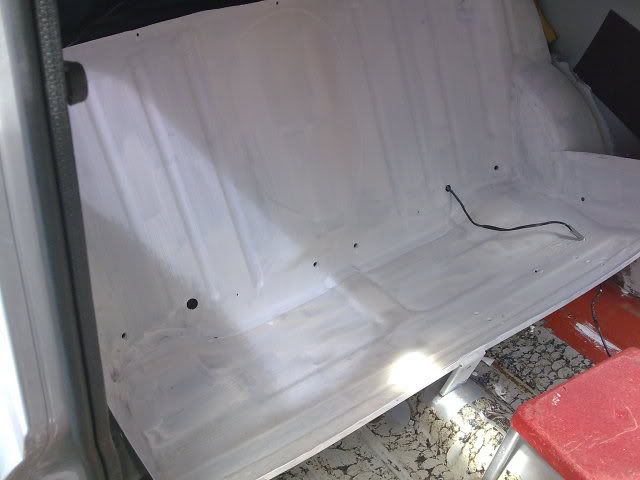
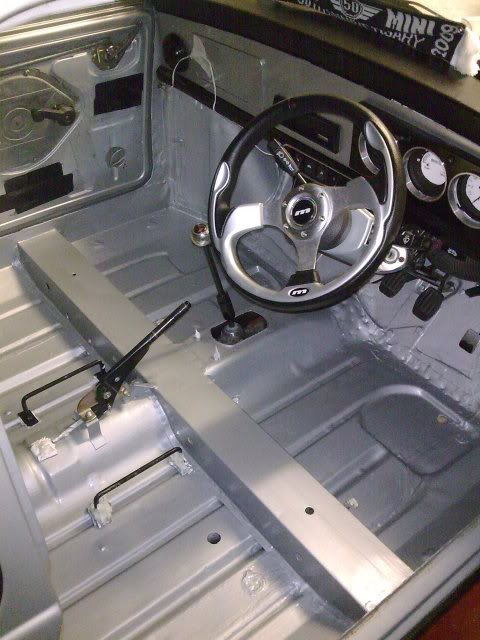
Here's a pic of the silver going on
Picture of the silver drying
Now the photos of the top coat fully dry
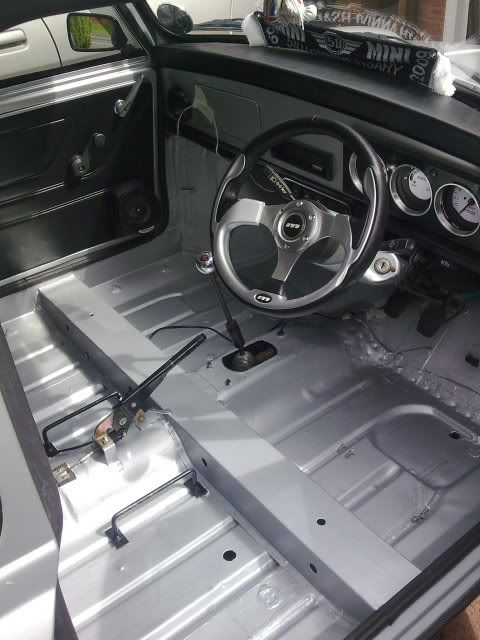

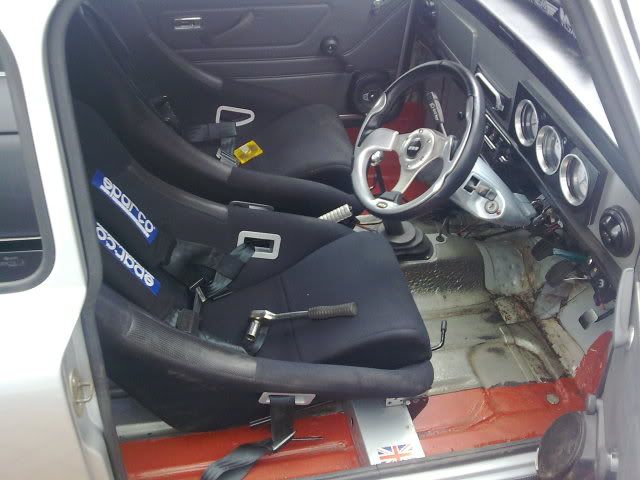
I think it looks a lot better and only cost me the tins of paint and the paintbrushes Just a lot of determination and hard work was needed, but I wanted this look and didnt want to just stick a carpet set in
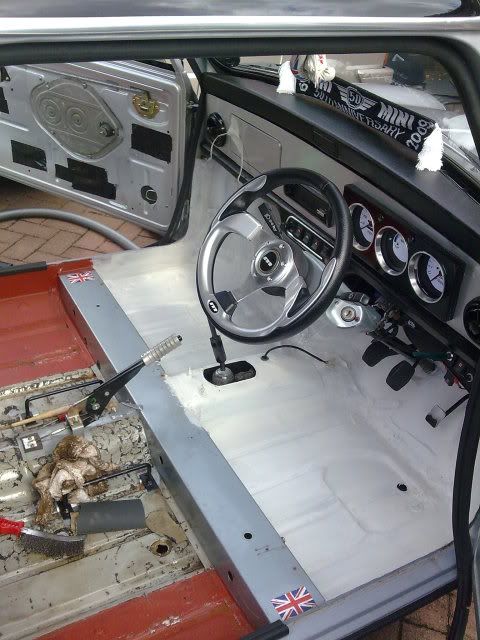
Whilst I was waiting for the floor dry, I painted my seat subframes and handbrake grip Hammerite Smooth Black Wanted to do my gearknob aswell, but its plated in shiney crap so doubt it would come up well 
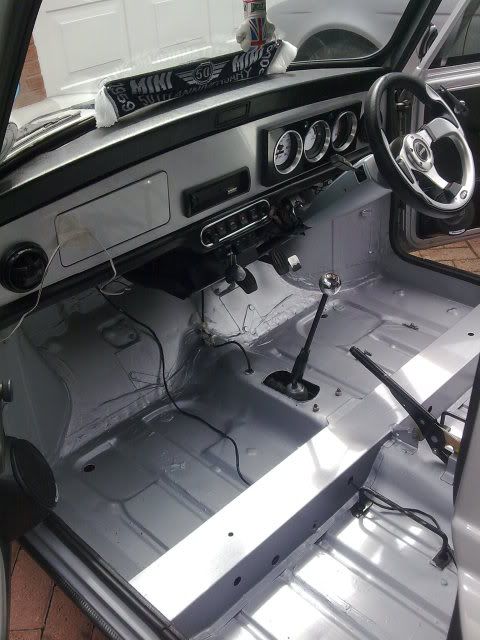
Also sprayed my old grey door cards (you can see them in old photos) black using Halfords Black Vinyl Spray Paint, much cheaper than buying black door cards! They look much better, but needed a few days to dry out properly before the material was tought to the wood backing. Just need a handle set to paint gloss black now
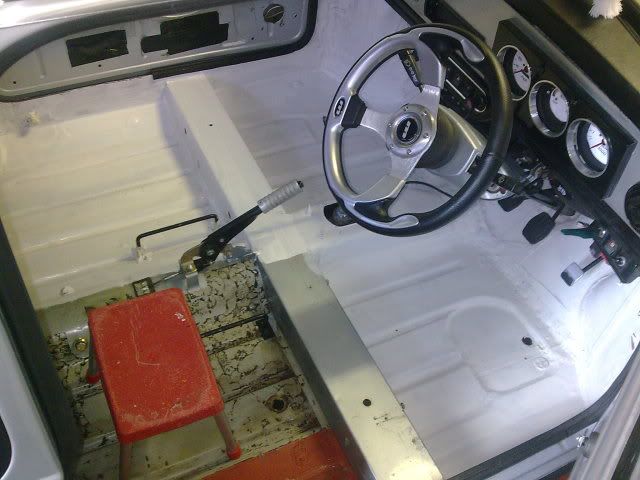
I also cut out the drivers foot rest section of my old carpet set and have velcro'd it under the pedals, you can see all this in this final shot below.
and a better pic to show one of the door cards sprayed
Now i just need to find some cable clips with an adhesive backing to neaten up the wires for the rear speakers and im considering re painting my steering column cowel as it looks a bit dull now.
Would love to know what you guys think of it all??
I spent hours removing the last of the stuck on adhesive that was left on the floor panels from the sound deadening. Working in petrol with a small brush then rubbing like mad with an old rag seemed to work the best, still took ages though!
This was my starting point after the sills had been finished...
Looked pretty awful!
Here is a pic of the sound deadening removed, you can see the stuck on adhesive I was talking about on the rear floor section, behind the crossmember. Removed it in sections, I painted the rear bench first, then decided to start painting the front section so it could hopefully dry by the time id finished removing the adhesive
As you can see, I decided to put down a (cheap/thin
) base coat of white primer, despite the final coat being Hammerite Silver. I wanted to spot any imperfections before starting on the final coat.Here's a pic of the silver going on
Picture of the silver drying
Now the photos of the top coat fully dry
I think it looks a lot better and only cost me the tins of paint and the paintbrushes
Just a lot of determination and hard work was needed, but I wanted this look and didnt want to just stick a carpet set in Whilst I was waiting for the floor dry, I painted my seat subframes and handbrake grip Hammerite Smooth Black
Wanted to do my gearknob aswell, but its plated in shiney crap so doubt it would come up well Also sprayed my old grey door cards (you can see them in old photos) black using Halfords Black Vinyl Spray Paint, much cheaper than buying black door cards! They look much better, but needed a few days to dry out properly before the material was tought to the wood backing. Just need a handle set to paint gloss black now
I also cut out the drivers foot rest section of my old carpet set and have velcro'd it under the pedals, you can see all this in this final shot below.
and a better pic to show one of the door cards sprayed
Now i just need to find some cable clips with an adhesive backing to neaten up the wires for the rear speakers and im considering re painting my steering column cowel as it looks a bit dull now.
Would love to know what you guys think of it all??
#34
jaydee
-

- Members
-
- 8,565 posts
Crazy About Mini's
Posted 04 August 2009 - 10:00 AM
Nice job, good result with paint brushing. think its a lot of elbow grease to polish it..lol
#35
silva_mini
-
- Members
-
- 254 posts
Mini Mad
Posted 04 August 2009 - 10:27 AM
Thanks , my dad was trying to convince me to spray it instead of brushing it, I was visioning nightmares of overspray everywhere though!  With Hammerite being very thick its easier to paint out the brush marks.
Im considering Laquering it all though, according to the Hammerite instructions I need to wait 5 weeks for the paint to properly cure!!
, my dad was trying to convince me to spray it instead of brushing it, I was visioning nightmares of overspray everywhere though! With Hammerite being very thick its easier to paint out the brush marks. Im considering Laquering it all though, according to the Hammerite instructions I need to wait 5 weeks for the paint to properly cure!!
#36
silva_mini
-
- Members
-
- 254 posts
Mini Mad
Posted 08 August 2009 - 09:35 PM
Nice warm day today, perfect for painting brake calipers
#38
Deathrow
-

- TMF IT Specialist
-
- 5,734 posts
Have you tried turning it off and on again?
- Name: Adam
- Location: Manchester, UK
Posted 17 August 2009 - 06:19 PM
That looks grand!
Just looked through your log again as I've just bagged myself an MG Metro engine myself.
I don't suppose you have a list of things I need to worry about when I come to get it in the car?
Just looked through your log again as I've just bagged myself an MG Metro engine myself.
I don't suppose you have a list of things I need to worry about when I come to get it in the car?
#39
Fire_monkey
-

- Members
-
- 489 posts
Speeding Along Now
Posted 17 August 2009 - 06:25 PM
projects looking good man


1 user(s) are reading this topic
0 members, 1 guests, 0 anonymous users


