Jump to content


Photo
- - - - -

HAYABUSA POWERED COOPER R.W.D.


  • Please log in to reply
565 replies to this topic

#421 markrally

markrally

    Z Cars

  • TMF+ Member
  • PipPipPipPipPipPipPip
  • 1,378 posts
  • Local Club: Miniaddicts.co.uk

Posted 18 June 2006 - 08:25 PM

Hi Mark,

Did you pick up that zinc plated cable stop bracket from Chris? I've been wondering how I should do mine, and the bracket in the pic looks like a nice solution...

Cheers,

Monte


Fitted the throttle cable and linkage on the pedal end, and tensioned it up to ensure it just reaches full throttle without over stretching the cables which could result in a failure!!!


Hi, the bracket is standard Hayabusa cable fixing/mount.


Must be missing from yours then??

Cheers

#422 Monte Busa

Monte Busa

    Super Mini Mad

  • Noobies
  • PipPipPipPipPipPip
  • 681 posts
  • Location: Michigan, USA

Posted 18 June 2006 - 09:13 PM

Good to know it's a standard piece...time to get out the microfiche...

Hi, the bracket is standard Hayabusa cable fixing/mount.


Must be missing from yours then??

Cheers


#423 markrally

markrally

    Z Cars

  • TMF+ Member
  • PipPipPipPipPipPipPip
  • 1,378 posts
  • Local Club: Miniaddicts.co.uk

Posted 20 June 2006 - 09:58 PM

I didnt get anything done over the weekend as i was away at the british Rallycross meeting at Anglesey, So time to crack on with things again now.
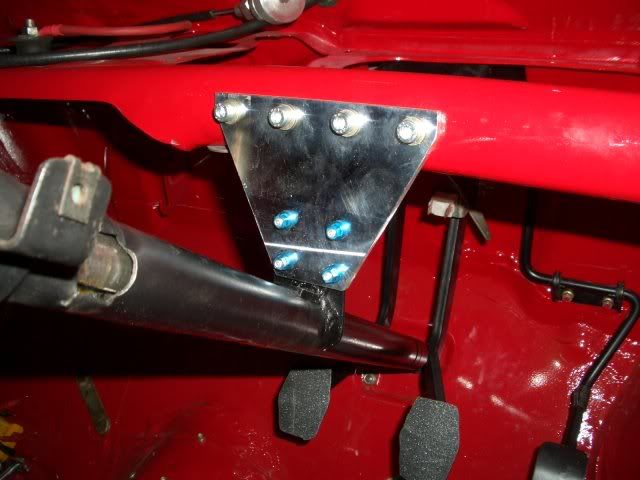
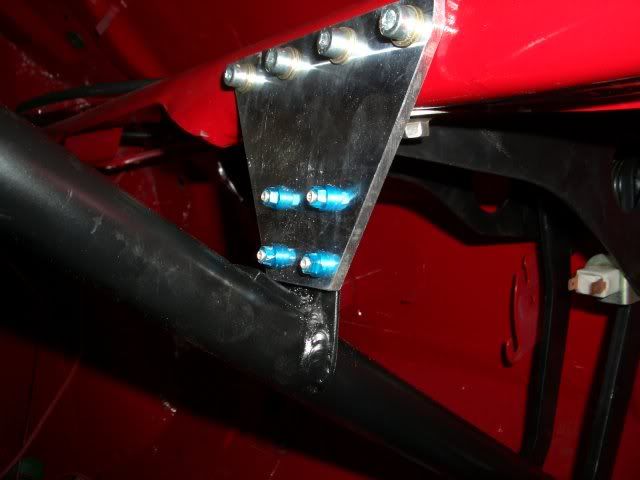
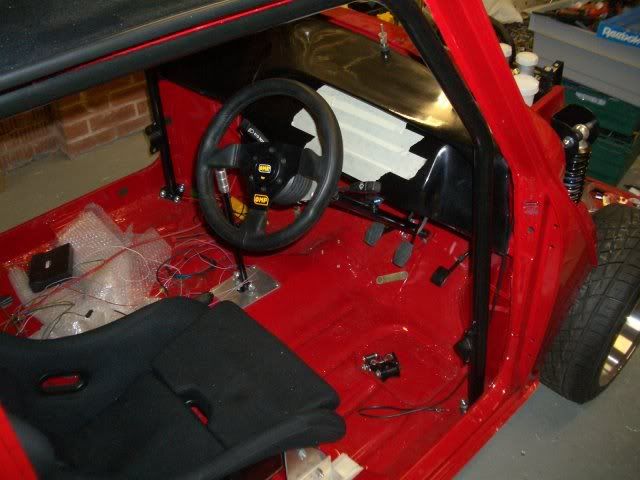
As i have never even driven a mini let alone own one before i was a little disapointed to say the least with the steering column mounting especially when you fit one of those dropper items that everone seems to fit.
I decided that i needed to improve this a bit as it makes for a poor handling car especially when you cant feel what is going as the column is floating around the dash, even Chris @Z-CARS has commented on this matter and improved his demo cars now and the feedback from the steering is now improved.
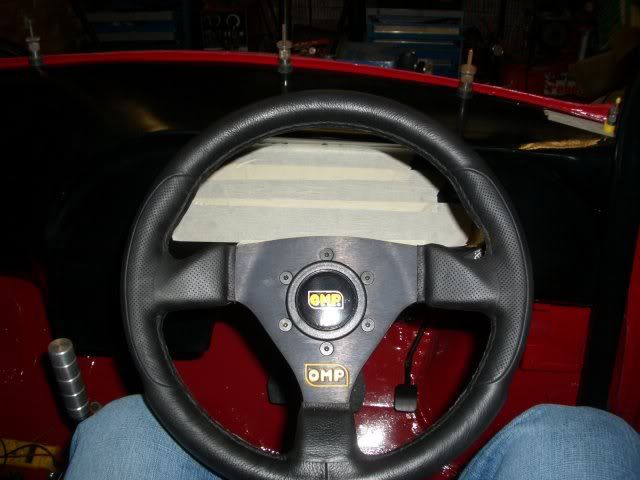
I decided to use one of these dropers to set the posistion of the column to a posistion of where it was most comfortable for me and i would be able so see the instruments on the dash through the steering whell without having to make much effort as i only want to be able to glance down for a quick check whilst driving.

I come up with a simple but effective bracket that could be altered if needed but will remain fixed and solid.


Posted Image

Posted Image

so once fitted this is my eye view with just glancing down down, so my stack tacho will fit nicely in there!!! :D :w00t:

Posted Image

As you can see i still have the dash to drill out and mount the switches and gauges but that is this weeks job.
You can just see the old column dropper and bracket on the floor which will end up as e-bay fodder but it is really only suitable for the bin really!!!!

Posted Image

Cheers :(

#424 gizmo

gizmo

    Mini Mad

  • Noobies
  • PipPipPipPip
  • 132 posts

Posted 20 June 2006 - 10:13 PM

Hi, Mine went into the trash. I wouldnt wish that on anyone else....Car is looking great...RichMk1

#425 Dick Dastardly

Dick Dastardly

    Mini Mad

  • Members
  • PipPipPipPip
  • 261 posts

Posted 21 June 2006 - 06:46 PM

I feel the same level of concern about the column dropping brackets and the amount of lateral movement they allow at the steeering wheel, and I've been mulling over the idea of designing my own bracket and getting it cnc machined from billet ally. I think it's going to go on the "to do" list along with A048r's. I'll post some screen grabs of the cad model when complete, and if anyone wants one, let me know and I'll get a price for a "bulk" quantity....

All the best
D.D.

#426 markrally

markrally

    Z Cars

  • TMF+ Member
  • PipPipPipPipPipPipPip
  • 1,378 posts
  • Local Club: Miniaddicts.co.uk

Posted 29 June 2006 - 10:49 PM

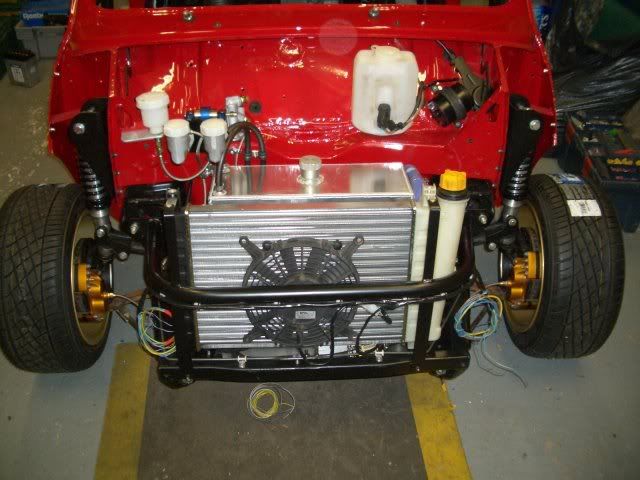
Well i was away again at the weekend so no progress again but i have spent every evening on it till midnight al this week sorting the wiring loom out.
Once again as i have never owned a mini before i have discovered that the quality of the switches and fusebox is not really very good and may cause problems for the future.
So I have decided to construct my own loom from scratch using only the original steering column switches and hazard switch, Everything else is new.

The underbonnet wiring loom is finished except for putting the plugs on the headlamp connections and connecting the indicators which have been supplied by Colin @ Northwest minis :xxx: :(

Posted Image

I hope to be able to fit the front end next week so it will really start to look like a mini but i found it easier to do all the under bonnet work without the fron end on.

Wiper motor and washer bottle now fitted finally.

Also managed to hide the wiring loom and run the cable through the bulkhead

Posted Image

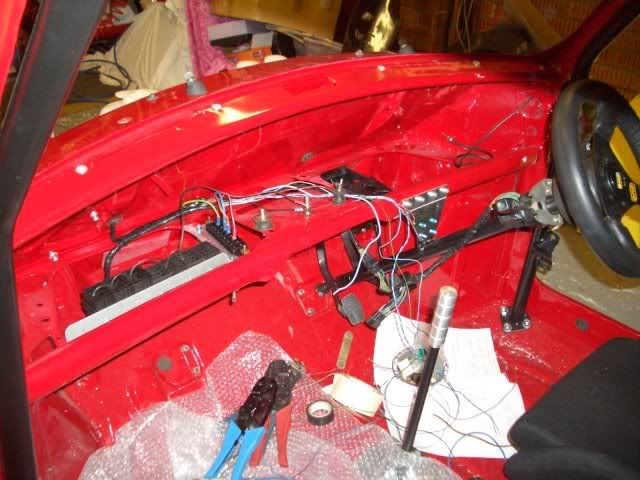
This is what im doing now, it looks a long way of yet but a few more nights should have it all done.

Posted Image

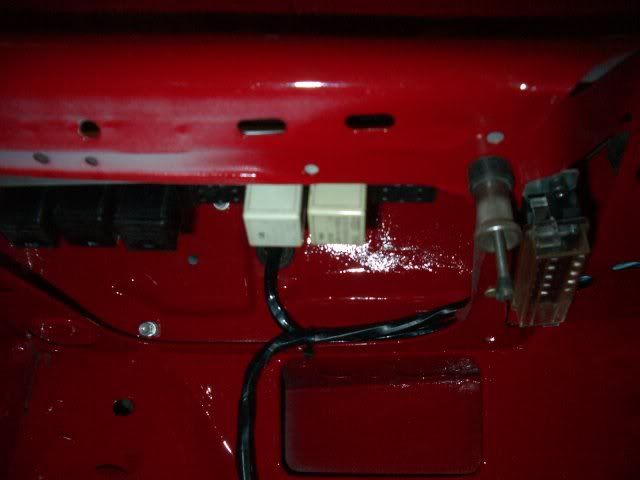
I have mounted the relays and fusebox under the passenger side of the dash so it will be easy to get to.
I havnt fitted all the relays yet as the flasher units are to be plugged in there aswell.

Posted Image

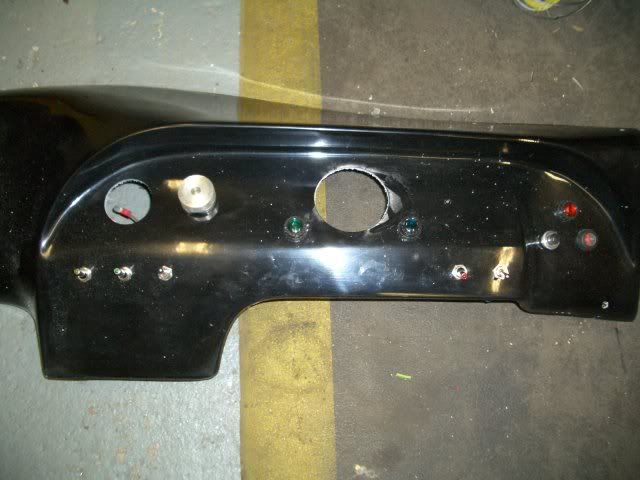
Here is the dashboard under construction, i still need to finish off the holes to get the rough edges smoothed off then remove the switches etc to cover it ready for refitting.

Posted Image

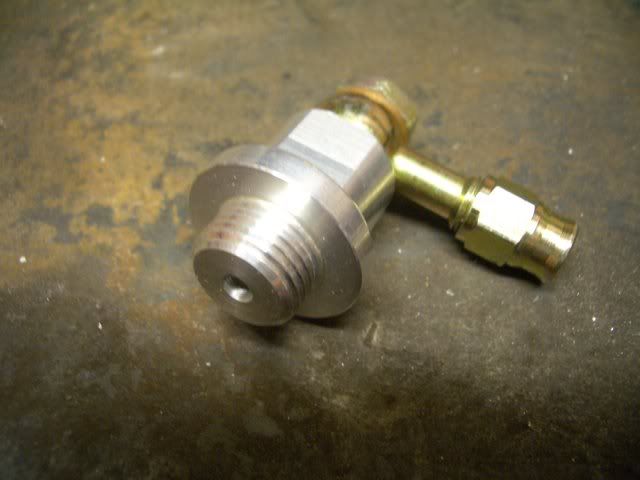
I have also been speakin to a few people about mounting the oil pressure gauge take offpipe into the engine block as the standard hayabusa oil pressure switch is underneath the engine and most people just fit a T-peice and replace the switch and fit the pip to the gauge but these have been known to crack and leak so i didnt want torun the risk so the other way is to have a fitting with an adapter into the side of the engine where suzuki have fitted a blanking plug in the main oil gallery. I then plumb it up to the gauge in Goodridge brake line pipe which is more than adequate for the job.

Posted Image

I will probably update a bit more next week now as im away at the weekend again now.

Cheers

#427 Mincento

Mincento

    Speeding Along Now

  • Members
  • PipPipPipPipPip
  • 443 posts
  • Location: Stoke-On-Trent

Posted 30 June 2006 - 12:35 AM

Damn good progress and i love the new fusebox and relay box idea as its something ill be doing when i get a mini, its got to be the worst thing about a mini as the position and quality is extremely poor :xxx:

will be nice to see it with the front end on as it will look kinda complete

do you have a motor home? as youre away alot like my parents are with theirs

wayne

#428 Digby

Digby

    Learner Driver

  • Noobies
  • PipPip
  • 23 posts
  • Location: Chepstow

Posted 30 June 2006 - 07:44 AM

Hi there,

its looking good... the wiring just soaks up time without there being any visible progress. Getting the front on feels like a huge leap.

Just a thought.... if I were doing it again, I'd fit the windscreen before fitting the the front end. The screen was a b*st*rd to fit...well the locking strip was, it was the job I sweared most at in the entire build ....just a thought that might save a scratched paint job.


regards,


Digs
www.geocities.com/drusling


Well i was away again at the weekend so no progress again but i have spent every evening on it till midnight al this week sorting the wiring loom out.
Once again as i have never owned a mini before i have discovered that the quality of the switches and fusebox is not really very good and may cause problems for the future.
So I have decided to construct my own loom from scratch using only the original steering column switches and hazard switch, Everything else is new.

The underbonnet wiring loom is finished except for putting the plugs on the headlamp connections and connecting the indicators which have been supplied by Colin @ Northwest minis :xxx: :(

Posted Image

I hope to be able to fit the front end next week so it will really start to look like a mini but i found it easier to do all the under bonnet work without the fron end on.

Wiper motor and washer bottle now fitted finally.

Also managed to hide the wiring loom and run the cable through the bulkhead
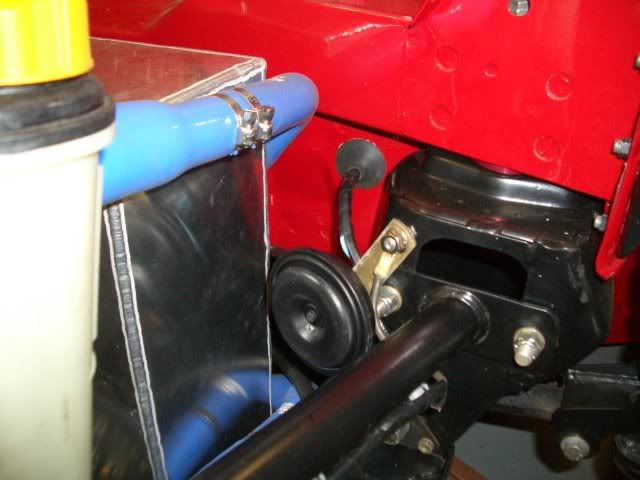
Posted Image

This is what im doing now, it looks a long way of yet but a few more nights should have it all done.
Posted Image

I have mounted the relays and fusebox under the passenger side of the dash so it will be easy to get to.
I havnt fitted all the relays yet as the flasher units are to be plugged in there aswell.
Posted Image

Here is the dashboard under construction, i still need to finish off the holes to get the rough edges smoothed off then remove the switches etc to cover it ready for refitting.
Posted Image

I have also been speakin to a few people about mounting the oil pressure gauge take offpipe into the engine block as the standard hayabusa oil pressure switch is underneath the engine and most people just fit a T-peice and replace the switch and fit the pip to the gauge but these have been known to crack and leak so i didnt want torun the risk so the other way is to have a fitting with an adapter into the side of the engine where suzuki have fitted a blanking plug in the main oil gallery. I then plumb it up to the gauge in Goodridge brake line pipe which is more than adequate for the job.
Posted Image

I will probably update a bit more next week now as im away at the weekend again now.

Cheers


#429 philly c

philly c

    Speeding Along Now

  • Members
  • PipPipPipPipPip
  • 316 posts

Posted 30 June 2006 - 01:41 PM

Almost there Mark!!

Keep it going fella!Great to see that your making sure that the qaulity of the final finish is going to be spot on!

Phil

#430 markrally

markrally

    Z Cars

  • TMF+ Member
  • PipPipPipPipPipPipPip
  • 1,378 posts
  • Local Club: Miniaddicts.co.uk

Posted 30 June 2006 - 02:01 PM

Almost there Mark!!

Keep it going fella!Great to see that your making sure that the qaulity of the final finish is going to be spot on!

Phil


Front end is going on monday as the dash isnt finished yet so will cover it over when fitting the screen, Thanks for the tip in advance Digby.

A certain Helen Webster has been in touch............Look out soon. :xxx: :(

Cheers

#431 Xiao_Bin

Xiao_Bin

    Super Mini Mad

  • Members
  • PipPipPipPipPipPip
  • 621 posts

Posted 30 June 2006 - 02:16 PM

very neat I love it :xxx:

#432 Dick Dastardly

Dick Dastardly

    Mini Mad

  • Members
  • PipPipPipPip
  • 261 posts

Posted 30 June 2006 - 07:15 PM

Great progress as usual Mark! Just a note on the fitment of the screen- I found it incredibly easy. It was one of the jobs (like the wiring!) that I was dreading the most, and yet it took no more than 10 minutes on my own to fit. The key is having the right tools for the job- particularly for the finishing strip. Fortunately my neighbour restored a mini ages back, and still had his tool so it was job done!

D.D.

#433 Mincento

Mincento

    Speeding Along Now

  • Members
  • PipPipPipPipPip
  • 443 posts
  • Location: Stoke-On-Trent

Posted 02 July 2006 - 11:03 PM

A certain Helen Webster has been in touch............Look out soon. :w00t: ;)

Minimag feature? ;)


Great progress as usual Mark! Just a note on the fitment of the screen- I found it incredibly easy. It was one of the jobs (like the wiring!) that I was dreading the most, and yet it took no more than 10 minutes on my own to fit. The key is having the right tools for the job- particularly for the finishing strip. Fortunately my neighbour restored a mini ages back, and still had his tool so it was job done!

D.D.

Ive heard both good and bad from many people, i did it once an a mates mini with my other mate and it was going so well then the rubber ripped (i think was too old) and the glass fitter who was one of the lads that said it was pi*s easy said if poss use a new rubber and use a proper filet strip tool for the chrome trim or it can get tricky but he reconned like you D.D that it was easy even without his training

wayne

#434 markrally

markrally

    Z Cars

  • TMF+ Member
  • PipPipPipPipPipPipPip
  • 1,378 posts
  • Local Club: Miniaddicts.co.uk

Posted 04 July 2006 - 11:09 PM

More Progress:

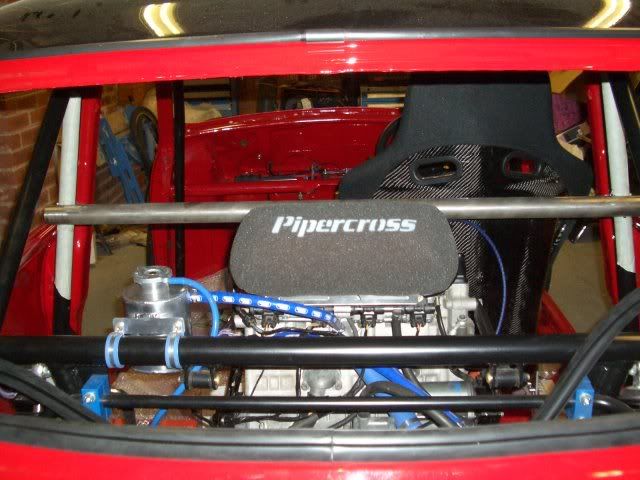
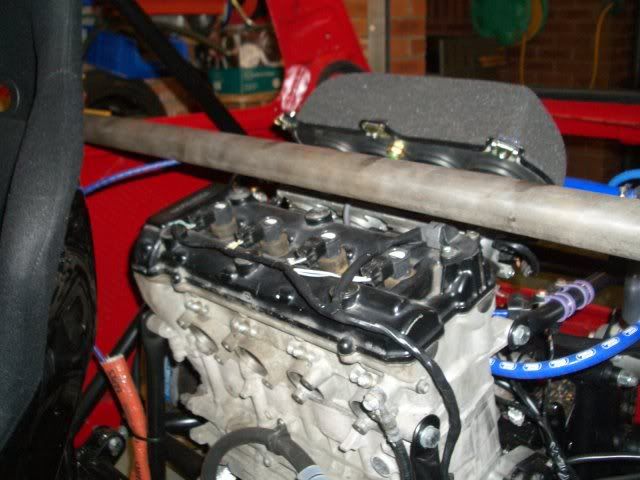
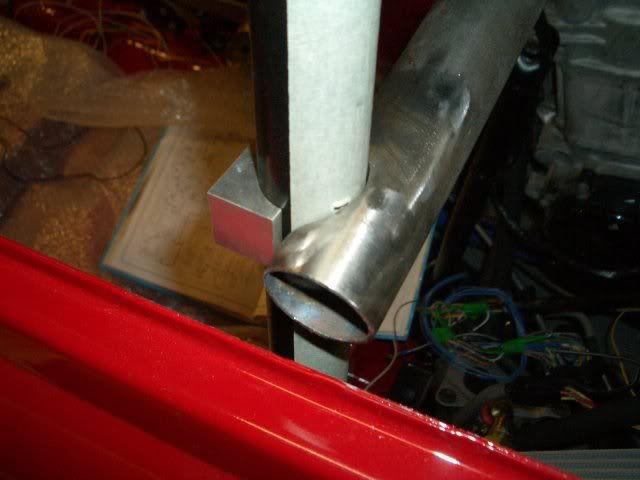
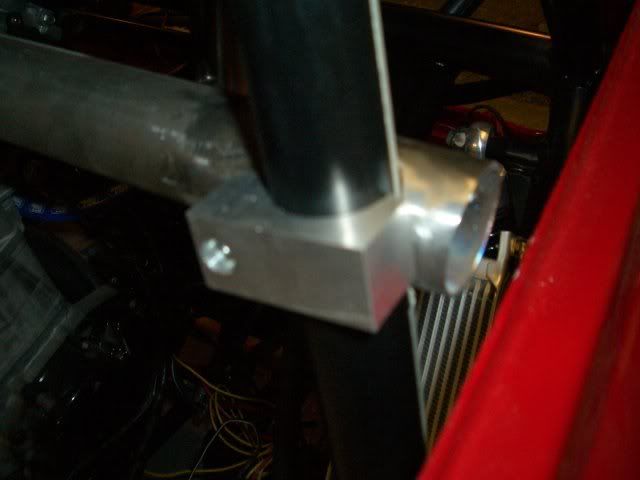
My mate Tony has been round lately making this cross bar to mount the harness's on, As the rear of the car in my opinion is not very strong now if you were to be involved in a serious accident so we decided to construct a bar which can be removeable if required but still remain strong and more than adequete for the job

Posted Image

It has been mounted the main rollcage hoop and is held in place by a simple alloy clamp.

Posted Image

Posted Image

Posted Image

I just needs sending to the powder coaters this week to finish it off.

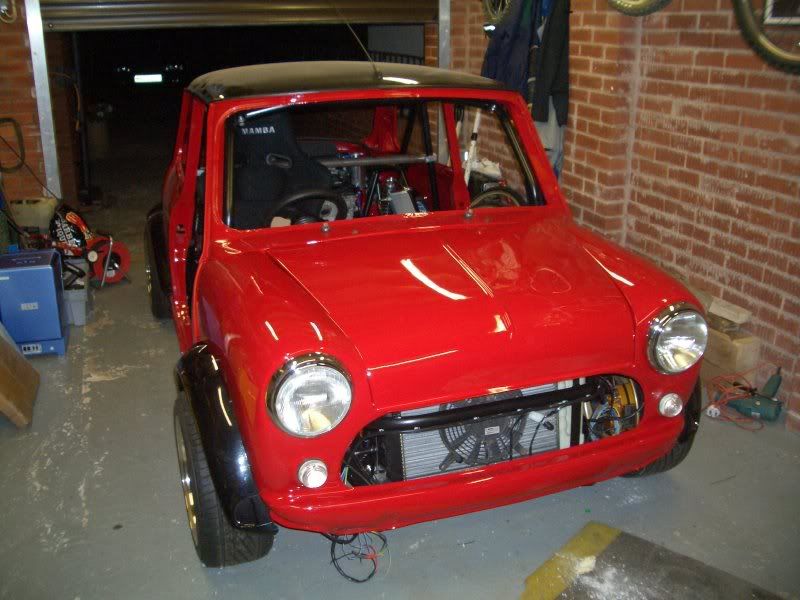
I have now also fitted the front end and lights etc and trial fitted the arches again but as i am now not fitting a front bumper i need to trim the forward portion of the arch away below the last mounting bolt to give it the look i want and to stop it flapping about!!!

Posted Image

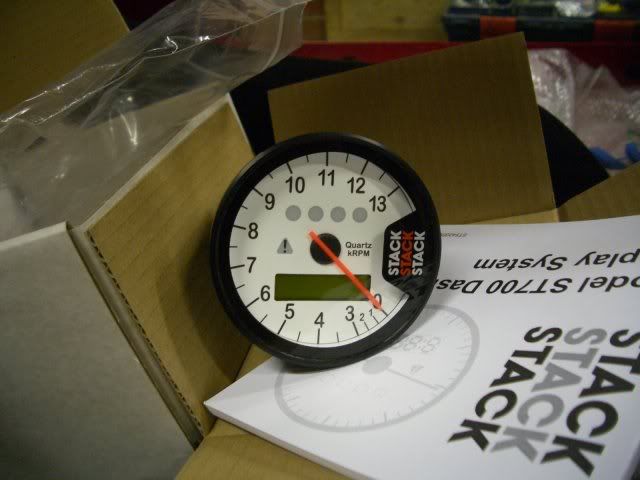
I have also been shoping today as my stack tacho has finally arrived!! :w00t: ;) ;)

Posted Image

More updates to follow later in the week..........................

Cheers

#435 ed4ran

ed4ran

    Cadwell Event organiser

  • TMF+ Member
  • PipPipPipPipPipPipPipPipPip
  • 2,849 posts
  • Location: Stoke On Trent

Posted 05 July 2006 - 12:20 AM

The cross bar for the harnesses is one of the things im going to add to mine,
only it will be where the door bars meet the rear hoop, so its quite abit lower,
During the many hours of TV I seem to watch (all completely educational of course) there was one bit where they happened to be mounting harnesses and they side the best place for the mount was level with the middle bottom of the rib cage (when it goes squidgy) and just behind the drivers seat so if you ever went upsidedown your harness still holds you in the seat.

Love the look of the car. :w00t:


1 user(s) are reading this topic

0 members, 1 guests, 0 anonymous users