Jump to content


Photo

Heel Board Replacement How To?


  • Please log in to reply
31 replies to this topic

#16 blue redtop

blue redtop

    Camshaft & Stage Two Head

  • Members
  • PipPipPipPipPipPipPipPip
  • 1,605 posts
  • Location: norwich

Posted 30 December 2008 - 11:14 PM

thanks.
has anyone got any pics of that area?.:o


I'll get some for you tomorrow, i have a shell with it removed and i have the heritage panel :withstupid: I'll get some photos of where it needs welding/is welded aswell from another shell aswell :thumbsup: >_<


top man.
give this guy a beer :ermm: >_<

#17 mini.rich

mini.rich

    Super Mini Mad

  • TMF+ Member
  • PipPipPipPipPipPip
  • 619 posts
  • Location: Lincs

Posted 31 December 2008 - 07:07 PM

thanks.
has anyone got any pics of that area?.:angry:


I'll get some for you tomorrow, i have a shell with it removed and i have the heritage panel :thumbsup: I'll get some photos of where it needs welding/is welded aswell from another shell aswell :P :dontgetit:


top man.
give this guy a beer :P :P


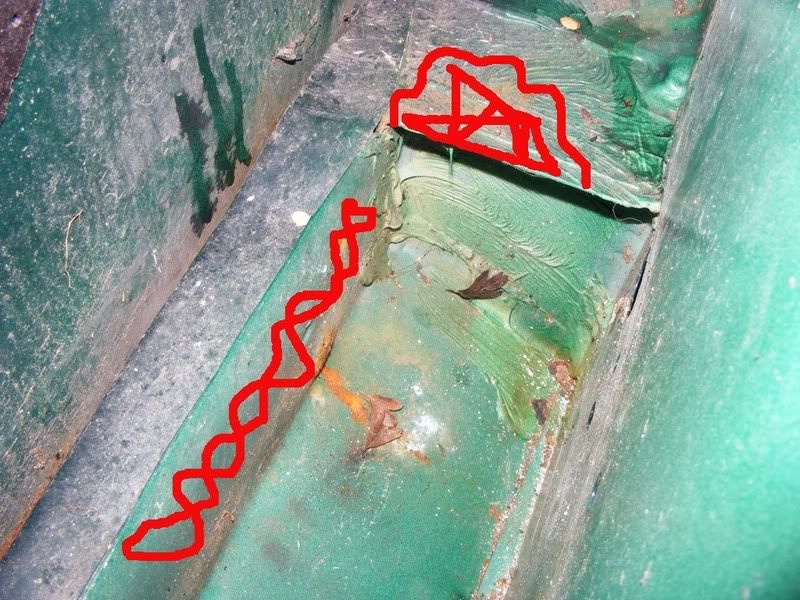
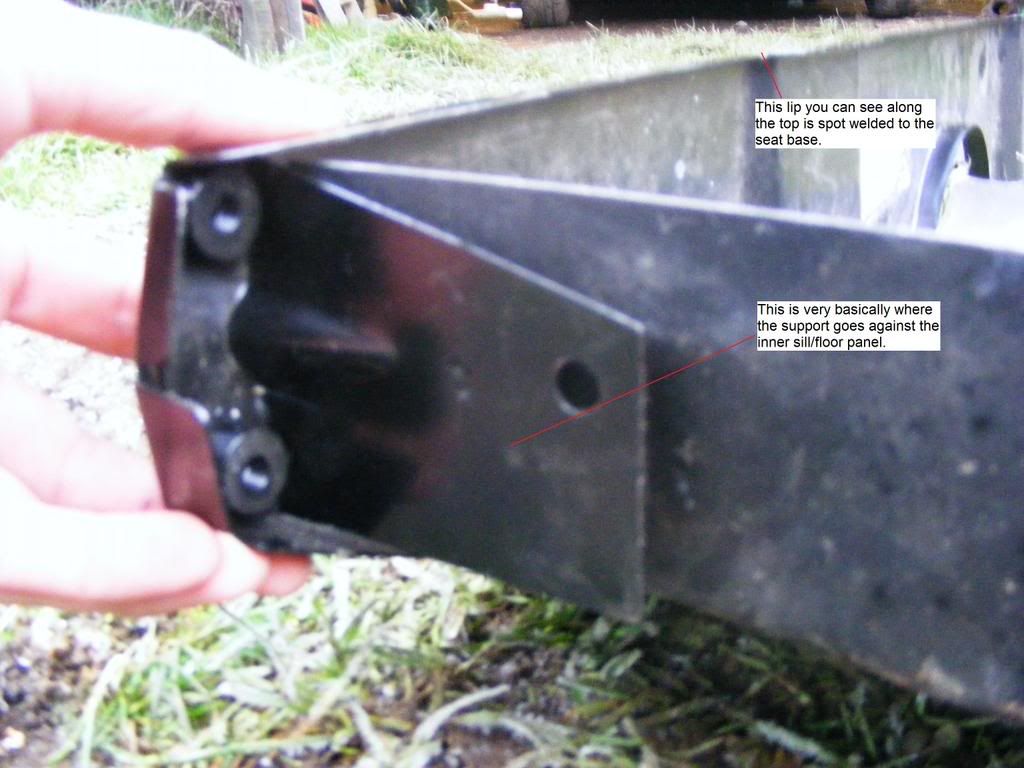
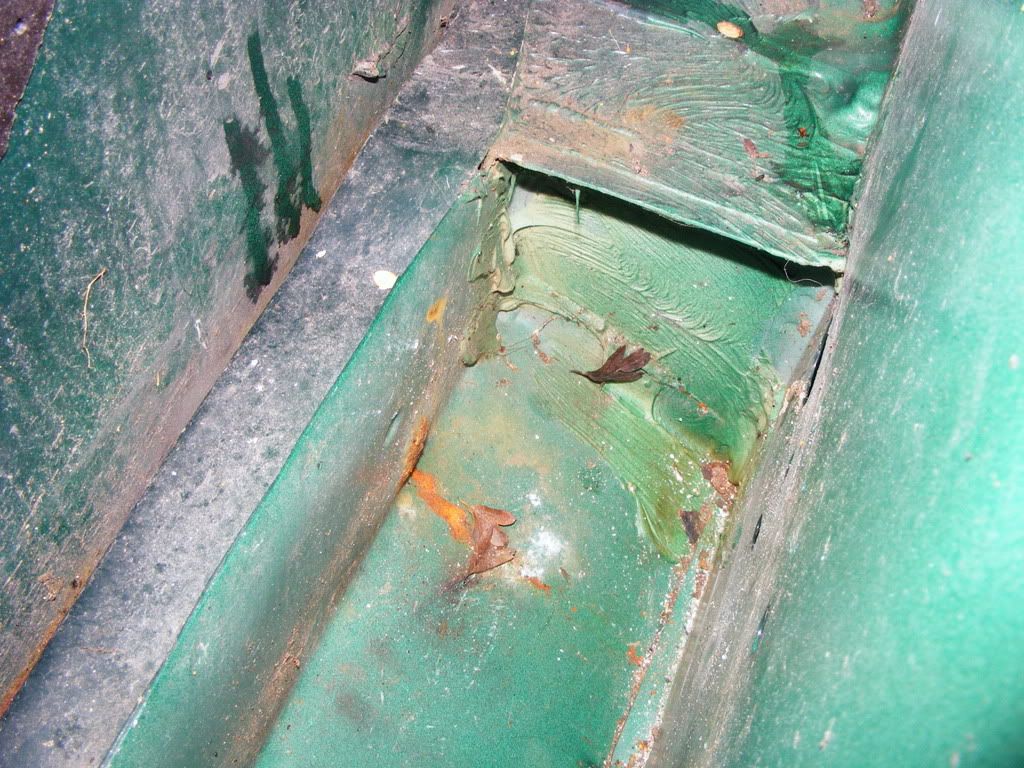
Right, heres some pics and i'll try to explain how the panel fits and what it is welded to. Ideally you will need a spot welder with long arms to reach parts of it, although you could do it with a MIG.

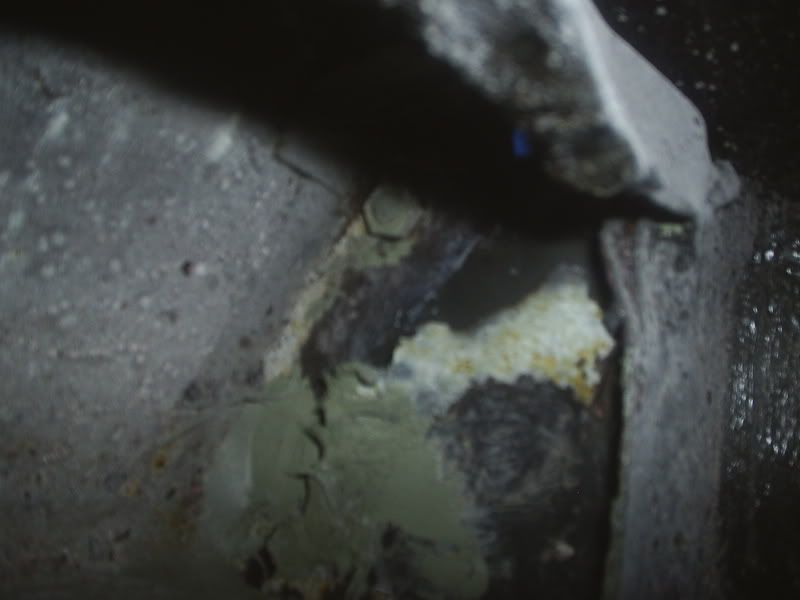
OK heres the heel board.
Posted Image

What goes where.
Posted Image

Posted Image

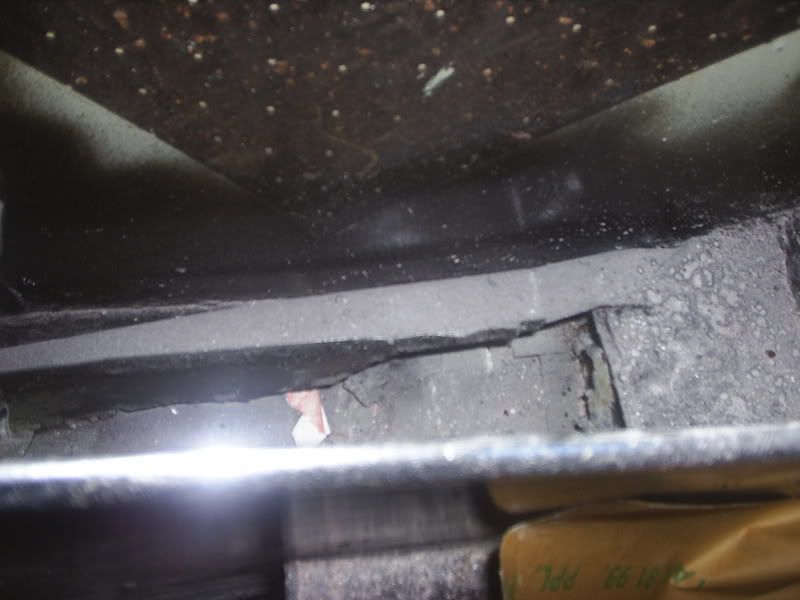
Here you can see where the different parts go over the floor and sill. Not the best pic though, plus rover decided to cover the late minis in stone chip.
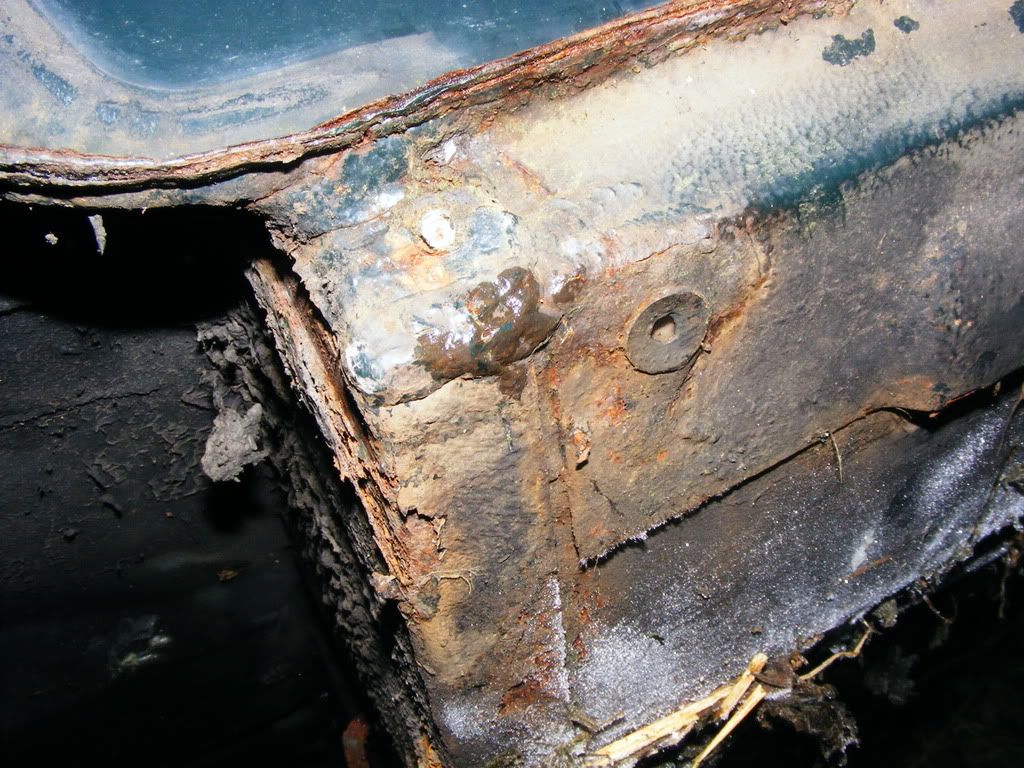
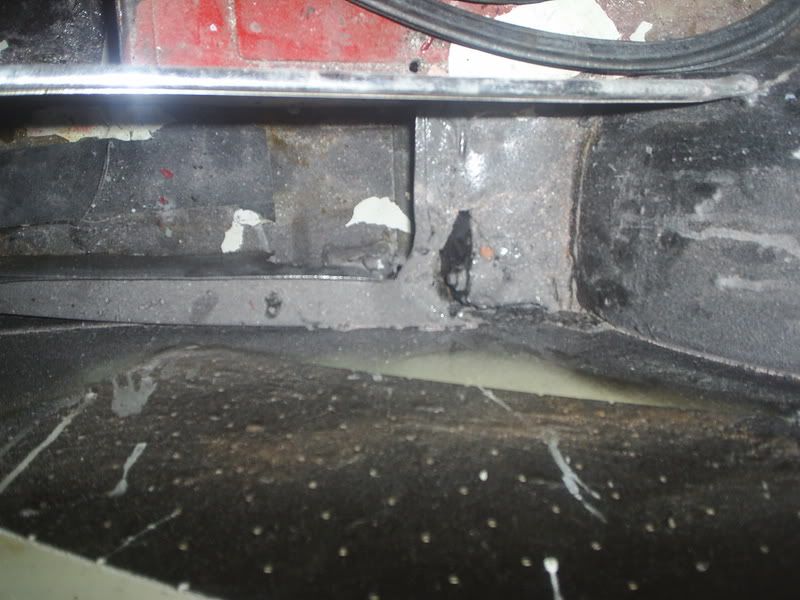
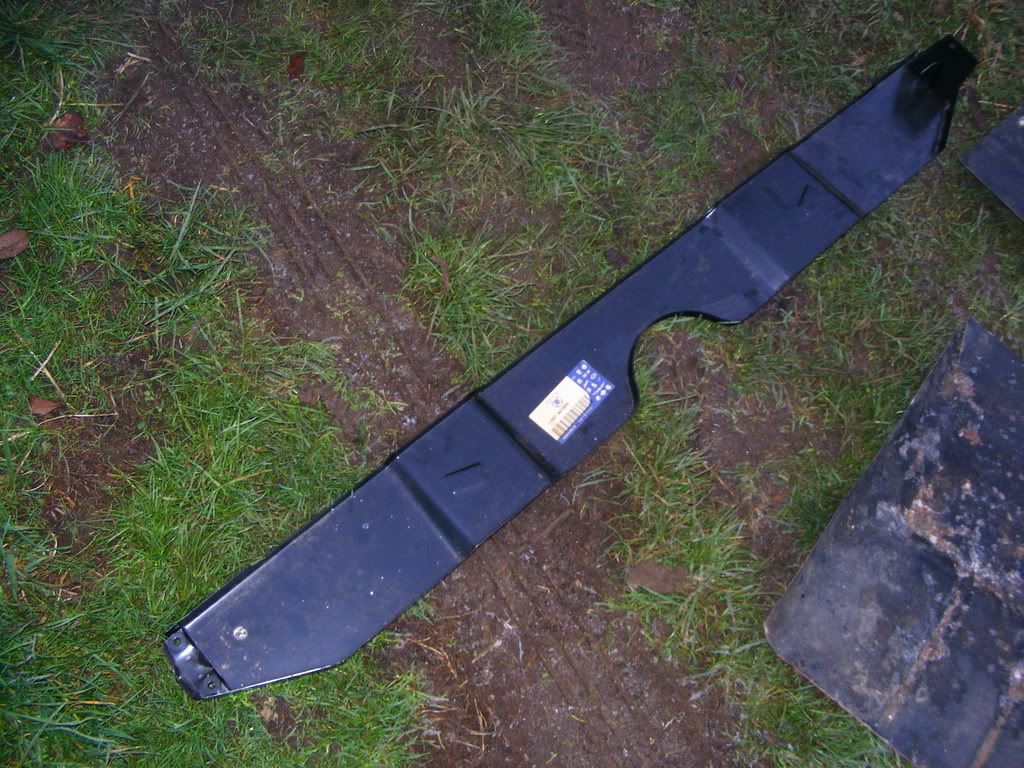
Posted Image

Here is the outside

Posted Image

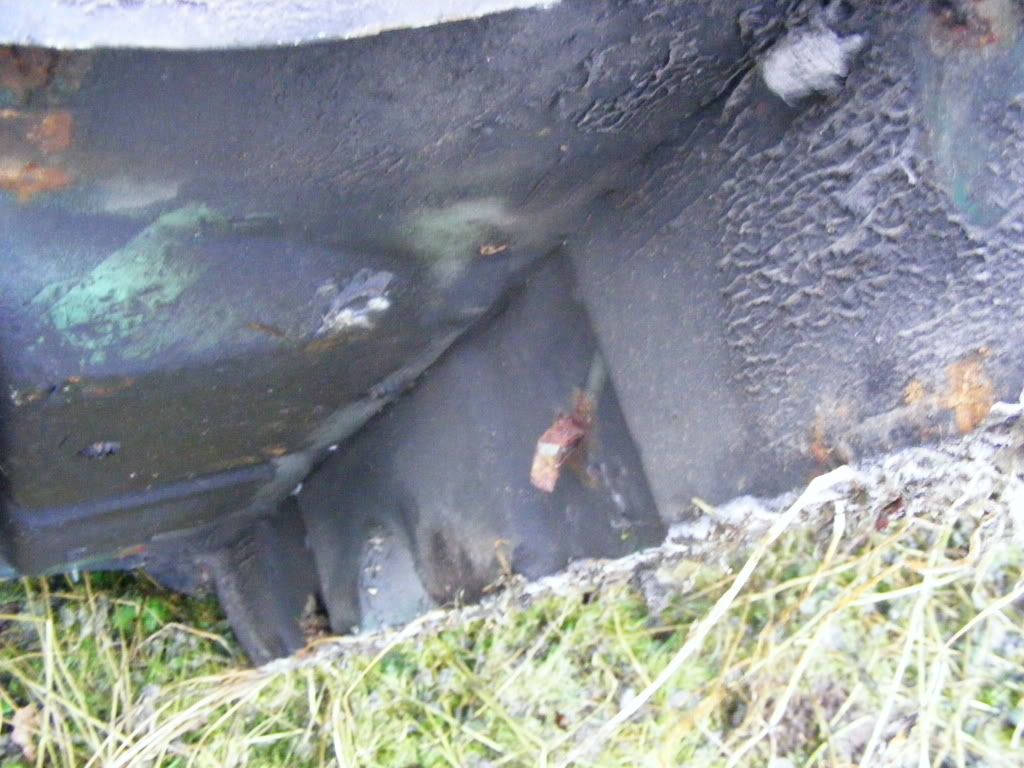
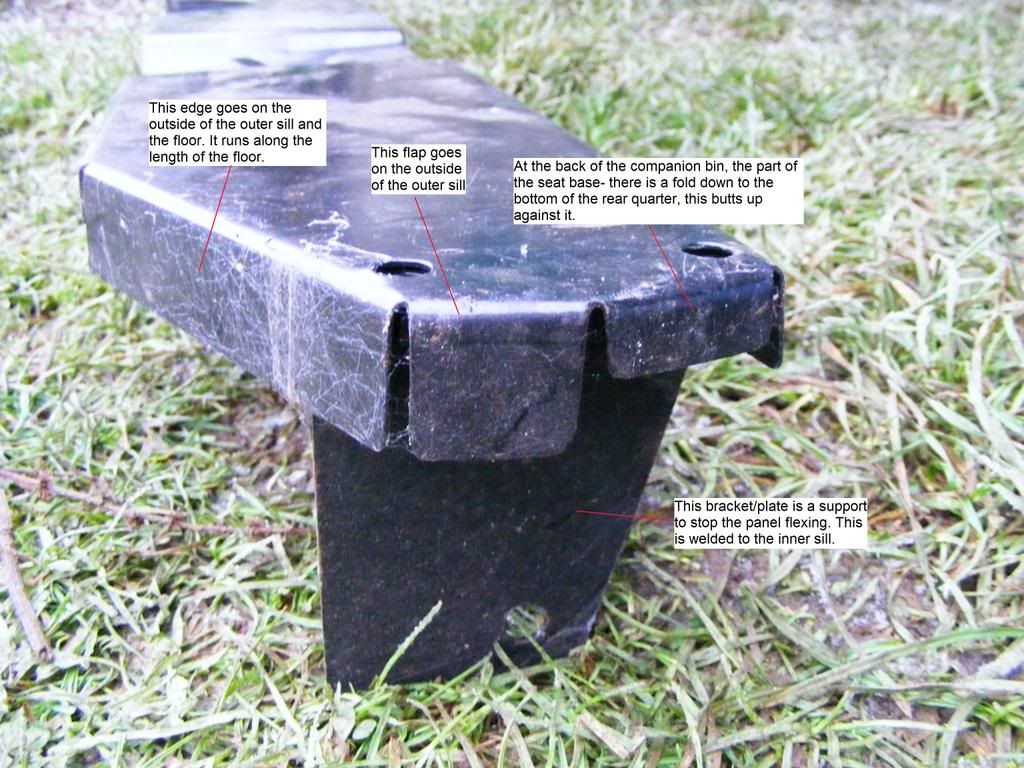
The inside, you can see where the floor panel butts up against it, i'm not sure if the earlier minis had this fold at the end of the floor pans i will have to check, think they were just straight ends.

Posted Image

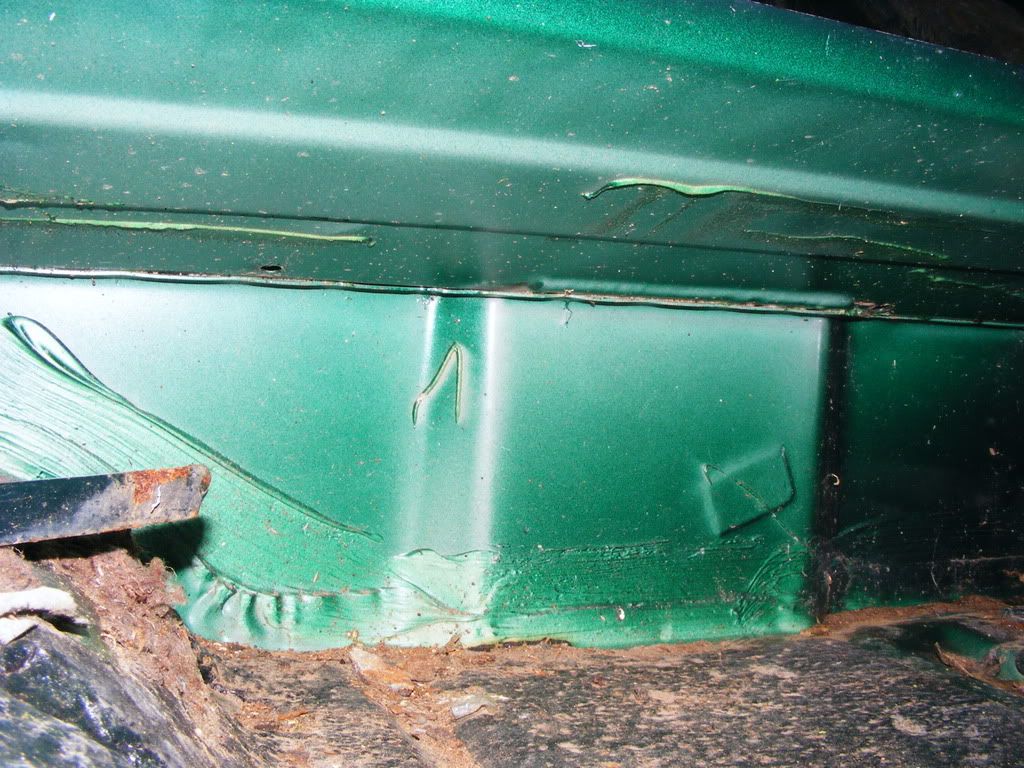
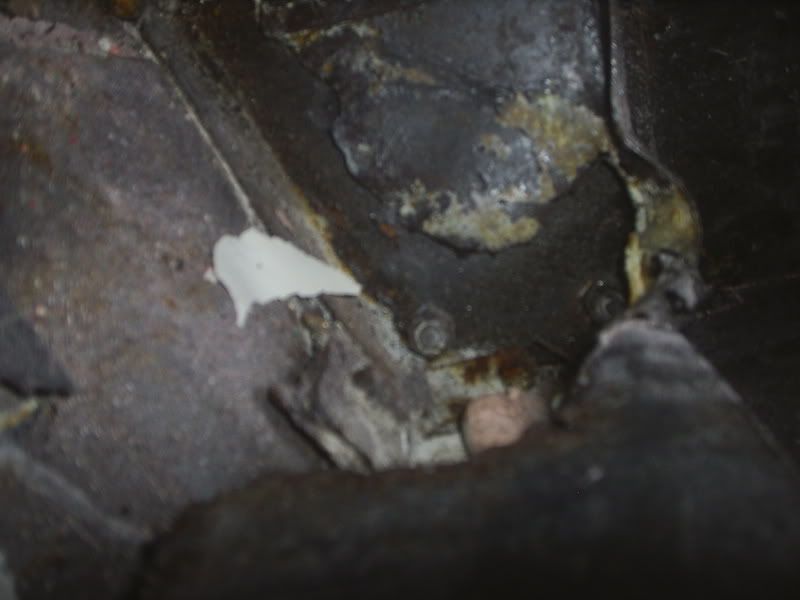
Heres the companion bin, the other side of the inner sill/floor (vertical part) is where the support is spotted on, if you look hard enough you can see the welds.

Posted Image

EDIT: *man danglies* click post instead of preview :-

Edited by mini.rich, 31 December 2008 - 07:15 PM.


#18 blue redtop

blue redtop

    Camshaft & Stage Two Head

  • Members
  • PipPipPipPipPipPipPipPip
  • 1,605 posts
  • Location: norwich

Posted 31 December 2008 - 07:50 PM

those pics are great.thanks

do you know what other panels i will need,in my bins the inner sill is corroded and the bit at the top of the pic is all rusted through.

where ive put the red its rusted through

cheers

Posted Image

#19 mini.rich

mini.rich

    Super Mini Mad

  • TMF+ Member
  • PipPipPipPipPipPip
  • 619 posts
  • Location: Lincs

Posted 31 December 2008 - 10:13 PM

those pics are great.thanks

do you know what other panels i will need,in my bins the inner sill is corroded and the bit at the top of the pic is all rusted through.

where ive put the red its rusted through

cheers

Posted Image


Ah, they always go :D lol, the inner sill part is quite easy, you can either buy a repair panel and cut off what you need or you just need some sheet to make a piece with the same profile, use a sheet bender or a vice to get the right angle (this is my preferred method, but i have a sheet bender and a tight wallet ;) ).
You can get a repair panel for the top part, can't remember if its a heritage one or not. But you can make it aswell :D If you need to you can also get the piece between the rear quarter and inner sill.

#20 blue redtop

blue redtop

    Camshaft & Stage Two Head

  • Members
  • PipPipPipPipPipPipPipPip
  • 1,605 posts
  • Location: norwich

Posted 01 January 2009 - 10:28 AM

thanks for the info.it looks a bit tricky to me,not much room to get the mig welder in. :D

#21 mini.rich

mini.rich

    Super Mini Mad

  • TMF+ Member
  • PipPipPipPipPipPip
  • 619 posts
  • Location: Lincs

Posted 01 January 2009 - 12:13 PM

thanks for the info.it looks a bit tricky to me,not much room to get the mig welder in. :D


I know, the shell i was replacing it on had the seat base and companion bins cut out which made it alot easier.

You can get a repair panel for just the ends, these can be seam welded around the edge, only thing is there's no support, so you have to leave the old one there and weld it to. All this is easier if you have no outer sill on the car, that way you can get to every side to weld- and your inner sill.
They are good if you can get it square and lined up correctly with the subframe, but as with any panel its a case of checking and re-checking measurements before welding.

#22 GreaseMonkey

GreaseMonkey

    Has Ratchet, Will Make Noises

  • Members
  • PipPipPipPipPipPipPipPipPip
  • 3,663 posts

Posted 01 January 2009 - 12:30 PM

I believe this is the panel for the top part

Posted Image

Linky

#23 blue redtop

blue redtop

    Camshaft & Stage Two Head

  • Members
  • PipPipPipPipPipPipPipPip
  • 1,605 posts
  • Location: norwich

Posted 01 January 2009 - 12:41 PM

thanks greasemonkey :D .i thought they were like £30 a side.

im in 2 minds at the moment. weather to get a different shell or fix the rear end of mine.

it also needs repairing where the rear mounts connect on the subframe.
thanks for all the advice rich. i think ill repace the whole heel board panel,if one side is gone the other side wont be far off.

cheers

#24 Goopster

Goopster

    Mini Mad

  • Noobies
  • PipPipPipPip
  • 128 posts

Posted 01 January 2009 - 01:00 PM

This is also useful information for me as I will be tackling repairs on my car in this very area later this month. Many thanks all, much appreciated! :D

#25 blue redtop

blue redtop

    Camshaft & Stage Two Head

  • Members
  • PipPipPipPipPipPipPipPip
  • 1,605 posts
  • Location: norwich

Posted 01 January 2009 - 02:28 PM

im sure it will be very helpful for lots of people.

im surprised there isnt a how to do it guide on here somewhere.:D

#26 blue redtop

blue redtop

    Camshaft & Stage Two Head

  • Members
  • PipPipPipPipPipPipPipPip
  • 1,605 posts
  • Location: norwich

Posted 01 January 2009 - 03:13 PM

some pics of my rusty bits.

passenger side bin. notice the rust hole in the closing panel.(you can see the subframe mount bolts).
Posted Image

passenger side again.looking at there the subframe mounts.looks like someone in the past fitted the corner bits of the heel board,but just fitted it over the rusty one.
Posted Image

drivers side, rusty inner sill in bin.
Posted Image

drivers side again,looking where the subframe mounts.rusty.
Posted Image

the joys of minis.

#27 partsguy1

partsguy1

    Mini Mad

  • Members
  • PipPipPipPip
  • 163 posts

Posted 01 January 2009 - 04:36 PM

Extreme HeelBoard replacement. Pics may help though.
Terry
[attachment=77042:Boot_floor_removed.jpg][attachment=77043:Boot_floor_mocked.jpg
]
Easier to do when you remove the floors.
[attachment=77044:right_fl...ut_out_2.jpg]
Job done.
[attachment=77045:Zero_Rust2.jpg]

Edited by partsguy1, 01 January 2009 - 04:52 PM.


#28 ANON

ANON

    More Jammy than a Jammy dodger.

  • Traders
  • PipPipPipPipPipPipPipPipPip
  • 2,682 posts
  • Location: my house
  • Local Club: pony

Posted 01 January 2009 - 05:40 PM

if it needs work on the rear of the boot floor you might as well replace the whole boot floor/seat base, it's only about £100.
rear bins are about £20 so it wont cost you much more and you get rid of all the old nasty metal.

#29 edi57

edi57

    One Carb Or Two?

  • Members
  • PipPipPipPipPipPipPip
  • 821 posts

Posted 01 January 2009 - 06:41 PM

Posted Image

Sorry to hijack the thread but I've got a question.

I understand that A is the inner sill/floor pan.

B I understand is this panel...

Posted Image

C is what I don't understand?? Would the original pressing have just be a part of B?

Thanks,

Ed

#30 blue redtop

blue redtop

    Camshaft & Stage Two Head

  • Members
  • PipPipPipPipPipPipPipPip
  • 1,605 posts
  • Location: norwich

Posted 01 January 2009 - 06:53 PM

i think
a is the floor pan (not sill)

b is closing plate
c is inner sill,gets welded to floor.

Would the original pressing have just be a part of B? dont know to be honest

nice pics partsguy :thumbsup:

Edited by blue redtop, 01 January 2009 - 06:54 PM.


1 user(s) are reading this topic

0 members, 1 guests, 0 anonymous users