neway...
Hiya to all the nice guys,
some of you may of already seen i have created dashboards a while ago, however i have now managed to create a newer and much better dashboard
 . For my new custom dashboard it was one again lined like the old one but with a better quality material for speakers. As this dash is supporting two 10cm Sony XS-F1035's.
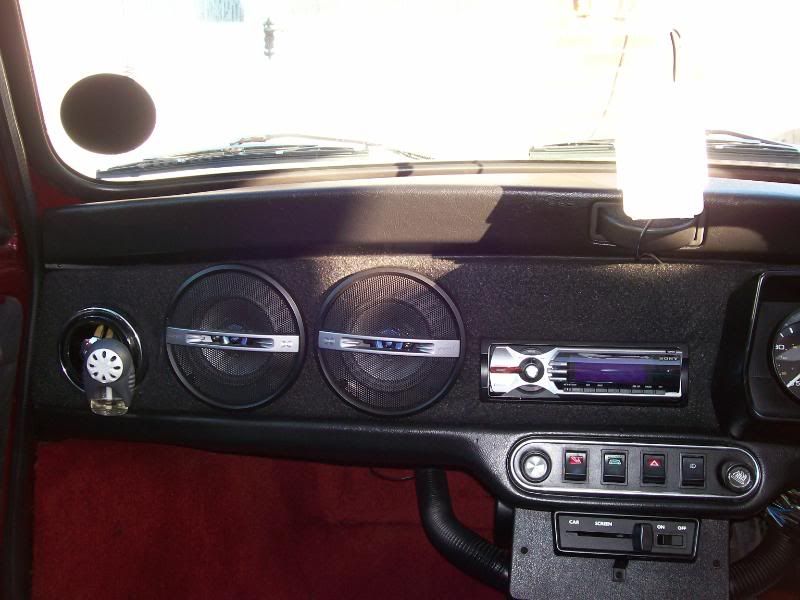
 So heres how you can create the ideal dashboard which not only supports two speakers, the vents but also supports a CD player (head unit), and has enough room for other switches if you choose. If you carry on reading i shall also include how to transfer your ashtray into an Ipod Holder, which is ideal use of wasted space if you dont smoke. And it can easily be turned back into a normal ashtray if you wish to later on.
So heres what you will need:
Firstly you will need the following tools:
• Copan Saw
• Jig Saw
• Pencil
• Ruler
• Compass
• Hand Saw
• Electric Hand Drill
The materials you will need are:
• The Waterproof MDF at 1.5cm to 2cm thickness roughly
• Cardboard for template
• Carpet or lining of your choice, i used the Autoleads Black Acoustic Carpet 1m x 2m from Halfords (in black) £24.99
• 6 Wing Nuts and Bolts
• Screws or Strong Adhesive
Ok firstly you will need to create a template via cardboard, i have attached 2 different templates below:
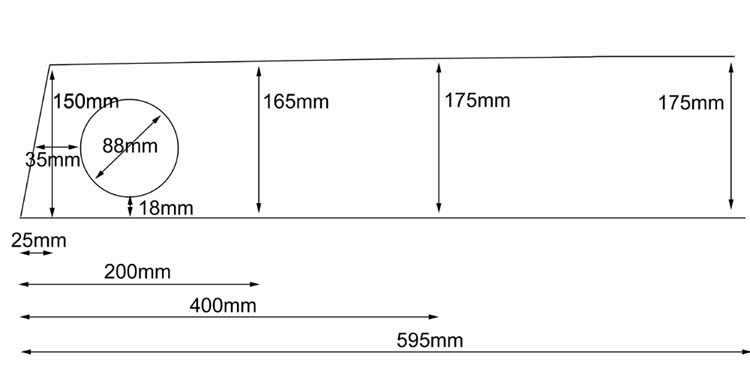

However create only the left half of the dash, so if your sittin in the car, create the half that joins to the 3 clocks or 2 clocks (note i did mine for 3 clocks so sizes may vary for you if you have 2 clocks). Now for your template create the rough outline, and then cut out where the vent is, and where you personally would like the speakers and cd player, i put my speakers next to each over on the left next to where the vent is, and then the CD player nearer to the center. Once you have cut the template out and you are happy with it, you can now transfer this to the piece of MDF, and then cut it out. Before making sure it fits, the top of the dash needs to be angled, so that it slops in towards the front of the car. This may vary the angle depending on your dash, so just sand until it fits, now try the dash out and make sure it fits in place, it should sit nicely against the front. Once your happy with it, you will need to copy the vent end onto another piece of MDF, you are now creating a duplicate end for the driver side vent. This bit is miles smaller, again copy the previous steps until you happy with it. Now before fixing the brackets you need to cover the dash in the materials, to do this either use a strong adhesive or small screws to hold the lining in place. Once that is complate you can now make the fixing brackets.
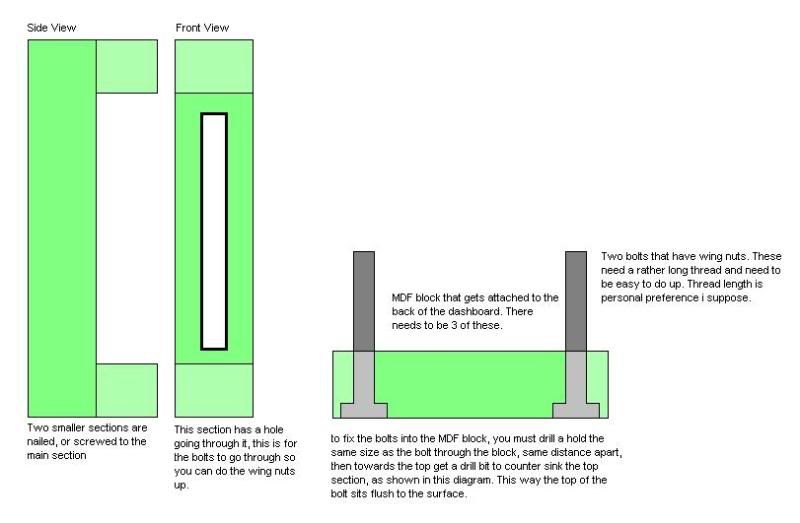
To create the fixing brackets i used the same MDF as this is a sturdy materials. Now there are two parts to the fixing brackets, the first part we shall do is the actual bar section of the bracket, below are the set of diagrams needed to help you create the brackets, now unfortunatly i cant remember the measurments however the idea of these brackets is that the longer section is to be long enough to sit behind the top and bottom rail, then the smaller section with the bolts in gets screwed to the back of the dashboard, and then thedash gets put into place, and the bolts go through the hole, and you can do the wing nuts up and then it shall secure the dash into place. You will need 3 of these fixing brackets, two for the bigger side and one for the smaller side.
Below is the diagram:
Now you should of lined the dashboard and created the fixing brackets, you can now start to fix the dash into place, this part may be a bit fiddly, so for this, make sure the vent is fully detached from the bulkhead, and then put the longer sections of he brackets into place, now put the dash into place and feed the bolts through the holes of the over part of the bracket, and then tighten in place with the wing nuts, this part is fiddly. Once you have got this into place you can start to install the speakers, and the cd player, make sure you fit the cd player first and access it from the speaker holes, and then fit the nearest speaker to the cd player, and then attach the vent, (please note this is a complete *** to get in, so purchase the adapter from mini spares firstm, this is the hose extension, product code JBB100550, ORDER TWO OF THESE. Now once the vent is fitted you can fit the final speaker.
Now you can fit the other side (this side is more fiddly), then bolt into place and fit the last vent, now you will think but you havent got a bit going across the three clocks to make it look all in one, well for this part, is simple, as the carpet i used is very adaptable, i cut a bit in a long length, rolled it up and used a screw driver to wedge this part above the clocks and mold it into the dash i just fitted, and there you have it, it now looks like an all in one dashboard. There is also plenty of room for other switches.
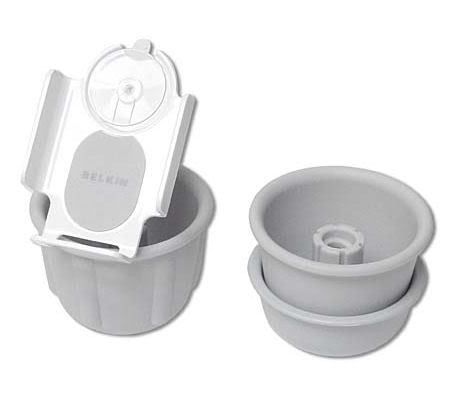
Now i mentioned earlier how to create a ipod holder out of a ash tray, this part is simple, i had the ideal as i got one those bluetooth ipod head units for my mini, but previously before owning the mini bought this ipod holder that fits into cup holders, as shown below, this obviously doesnt fit as there are no cup holders so got me thinking, for this part you will need.
• Copan saw
• Pencil
• Drill
• Some of the carpet used earlier
• Belkin Ipod holder
This is the ipod holder
Now, for this you need to detach the ashtray mounted in the dash, this is easy it just pops out, once it is out, you need to make a template that fits into the ashtray, it should look like my diagram below, make sure its not 100% the same size of the ashtray as you need to cover it in carpet.
Below is a diagram of the section you need to cut out:
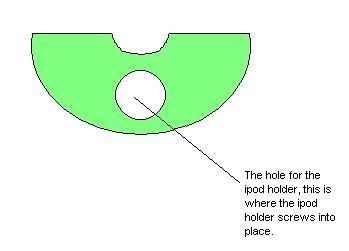
Once this is cut out, you then carpet the piece and screw the ipod section into the hole you drilled earlier. Now push this tight into ash tray, and then refit the ash tray. This is what i ended up with:

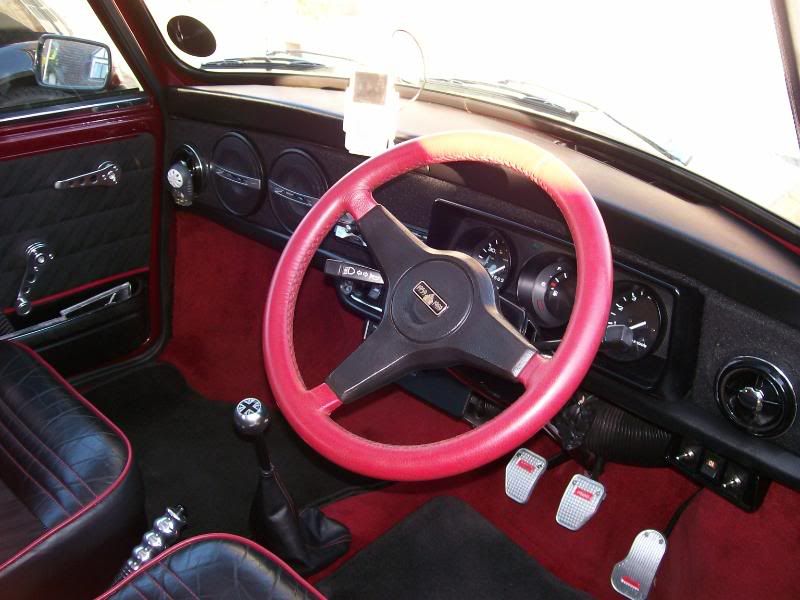
And this is the Ipod holder (sorry pictures are not great, sun was shining through onto the dash)

Feel free to comment me or ask any questions.
[b]Russell Mini Thirty
Edited by Russell-Mini30, 28 December 2008 - 12:53 PM.