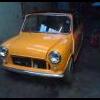
1989 Austin Rover Retro Mayfair
#211

Posted 04 October 2010 - 06:03 PM
[attachment=103472:HPIM3385.jpg][attachment=103473:HPIM3386.jpg]
[attachment=103474:HPIM3388.jpg]
I still haven’t found the energy though, to go back and pull the flywheel/clutch back off just the fit the stupid dust thing.
#212

Posted 06 October 2010 - 07:18 PM
There was only really thing I could do, swap the battery over from the 25 and see what of my wiring worked (or not).
As since buying the mini as a project, I’ve never known what worked and what didn’t wiring wires and then I went and changed/replaced stuff as well, that was also untested uptill now.
So I connect up the battery and try a few of the electrics and… nothing *scratches head* Ermm, ok.
I could only find my little test tight, but that would be enough to work out what’s wrong.
Quick check across the battery and yep, the battery and test light works.
So I then try the main feed from the starter to earth, nope still nothing *scratches head*
Checked a few earths and cleaned up the one in the boot and suddenly things started working.
The good news is that despite me changing various bits of the loom, adding relays and stuff, mostly everything works. Apart from the wipers, as I have absolutely nothing and some of my wires on the tow plug are crossed for the front, as I had the side lights flashing as the indicators and the indicators as the side lights. But still that’s just an easy fix of swapping a few wires round.
So after a little play with everything, just one last thing crossed my mind, ok I can’t start it up yet (no fuel tank) but would the engine turn over?
Turn the key and… nothing… and again, nothing… *scratches head* ok have another little play and replace the starter relay and… all I get is a bussing from the relay.
Have another little play and work out if I remove one of the 2 brown wires at the starter with the ring terminals, the starter motor burst into life but, it wasn’t able to turn the engine over.
What I’m thinking has happened is as the engine hasn’t been turned over for a while by hand and with the new rings, the engine has partly seized.
So with the plugs already being out, I poured a fair bit of oil down the bores, stuck a jack under the n/s of the engine and removed the rad bracket/engine mount.
One long breaker bar plus an old section of exhaust as an extension I try and turn/free up the engine by hand. When all of a sudden it frees off and the Mayfair mush have been exited by this, as it squirted most of the oil that was all down the bores all over me.
But apart from me being covered in oil at that point the engine did start to turn over freely by hand, so hopefully it will do the same the next time I trying with the starter.
#213

Posted 07 October 2010 - 08:03 PM
So I either need a larger battery, been borrowing the one of the 25 or a new/more powerful starter motor, both of which I really can’t afford at the mo.
So I’m hoping till I either find a chap battery/starter or can afford new items, is to wheel it out of the garage, refit the n/s calliper and go round and bleed up the brakes.
Then depending upon how that goes, going round and testing all the electrics and getting those working as well.
[attachment=103547:HPIM3399.jpg][attachment=103548:HPIM3401.jpg]
#214

Posted 10 October 2010 - 04:49 PM
I had original had those in the 25 at one stage back in my youth (god I feel old), but not all under the rear seat. The fronts were in some metro door pockets, but I don’t really like the look of them (still have them somewhere) and besides I’ve got some much nicer door pockets lined up for the doors.
[attachment=103647:HPIM3410.jpg][attachment=103648:HPIM3412.jpg]
[attachment=103649:HPIM3414.jpg][attachment=103650:HPIM3416.jpg]
[attachment=103651:HPIM3419.jpg]
All I have left now is to cover over it with some more black carpet/felt and its done. Just need to find a dirt-cheap head unit now, the ex has got the one decent spare cd one I had and all I’m left with is a few crappy (but working) cassette players.
And now I’ve got all of my electrics working, I’ve got a few picks of what my custom dial faces look like when fully lit.
[attachment=103652:HPIM3424.jpg][attachment=103653:HPIM3426.jpg]
Edited by 1984mini25, 10 October 2010 - 05:19 PM.
#215

Posted 10 October 2010 - 07:48 PM
[attachment=103698:HPIM3429.jpg]
#216

Posted 11 October 2010 - 07:21 PM
[attachment=103717:HPIM3436.jpg]
Not too bad for some one that was supposedly useless at woodwork at school. Door cards up next, seeing as the ones I have, have stupid hole left over for one of those winder things.
#217

Posted 11 October 2010 - 07:26 PM
#218

Posted 11 October 2010 - 09:35 PM
#219

Posted 12 October 2010 - 03:50 PM
For a lash up with the under seat ones being bargain basement cheapies at only £20 for the lot a few years ago at a maplins sale and the second-hand front Kenwood ones. It doesn’t sound too bad, can’t really hear the ones in the dash, but then at least there is something up front and not all from behind.
I’ve also decided that the starter motor has had it, the engine turns over freely, but the start solenoid just clicks and nothing else.
And before anyone says the batteries at fault, I’ve been playing around with the electrics for the best part of 3 days. But after swapping the less than fully charged battery back on to the 25, it fired up first try of the key with no fuss.
#220

Posted 13 October 2010 - 09:56 PM
I did with mine but when I put it back together the plunger that pushes out the starter gear was slightly twisted, there is a little plastic bung/plug on the end of the solenoid it worth popping out with a small screwdriver to take a look.
Good luck great car.
#221

Posted 13 October 2010 - 10:56 PM
on the starter motor front did you take it apart to paint it?
I didn’t no, just like everything else it just got a quick degrease in white sprit, wire bush and paint. The solenoid is firing the pinion into the ring gear on the fly, just not wanting to turn it.
I’ll try another starter though as this one was the original that came with this engine, so could be getting on for 20 plus years.
Just something that was meant to simples as turning the engine over, build up oil pressure and then finish bolting everything back up ready to fire it up, hasn’t.
It’s just a paint that what with the recent tantrum with the 25 I’m not really in a potion to just throw new parts/money at it.
Plus I had hoped on getting the painting finished before the weather turned, but never mind, I’ll just have to finish everything else first and then finish the paint.
#222

Posted 17 October 2010 - 08:58 PM
After checking a few things over to try and work out why the engine would turn over one minute and then size solid the next, there was only one real solution, reluctantly pull the engine back out and tear into it.
So that’s exactly what I’ve done one the last 3 days, pulled the engine out, engine off gearbox, fettled the crank and bearings, put it back together, changed the head gasket and refitted. Didn’t get many picks as I just wanted it done, spent near enough 11 hours alone on it today (yesterday).
All because of a slight seating problem on one of the big end bearing shells, it would turn over freely until left when it would seize up solid.
Luckily it only cost me a few gaskets witch I had spare anyways, left over from the original build and from the 25’s engine needing the same.
[attachment=103929:HPIM3448.jpg][attachment=103927:HPIM3441.jpg]
[attachment=103928:HPIM3444.jpg]
All I’ve got to do now is go back over it and connect everything back up and see if it actually turns over on the starter this time round.
Edited by 1984mini25, 17 October 2010 - 08:59 PM.
#223

Posted 18 October 2010 - 06:24 PM
I tend to try and keep all the bolts and stuff with what ever there for. But that didn’t stop butter fingers me from dropping one of the starter motor bolts into the flywheel housing, I caught the washer though.
So instead of fitting everything back up, I had to pull the clutch/flywheel back off again to retrieve the bolt.
Still I’ve just got the carb to bolt back on (all of 10 minuets) and the battery to hook up and I can see about turning it over.
Edited by 1984mini25, 19 October 2010 - 06:14 PM.
#224

Posted 19 October 2010 - 05:26 PM
#225

Posted 20 October 2010 - 06:01 PM
I don’t mind bolting things up and trying bits before cleaning them up, paint and refitting. I probably estimate excluding the welding/panels that only about 5 to 10% of this mini is made up of brand new items. The rest is just whatever second-hand stuff I could find or even make myself.
Still I think I’ve decided on what badges to stick on the boot once it’s painted properly.
[attachment=104006:DSC_00463.jpg]
1 user(s) are reading this topic
0 members, 1 guests, 0 anonymous users


