My Mini Project - Project Snowball!
#241

Posted 15 September 2009 - 07:03 AM
cool work!
cant wait to see it finished
#242

Posted 15 September 2009 - 07:43 PM
#243

Posted 26 September 2009 - 08:46 PM
Finally got a few things to make a little progress. I'm hoping this ignites the enthusiasm a bit which continues to wane!
Was passing minispares on the way to a meeting yesterday and couldn't help popping in. Bought myself the following;
Facet electric fuel pump, some unions and mounting kit.
Inline fuel filter.
Smiths 0-8000 RPM rev counter.
A nice shiny bonnet badge.
Tomorrow I'm gonna get out in the garage and finish my dashboard panel, fit the rev counter, and start looking at ways of fitting the fuel pump on the rear subframe. I need to look at running the live wire down to my switched live in the fuse box, but want to find a nice tidy permanent way of doing this so I avoid potential damage to the wire. Then all I need to do is work out how much hosing I need, which will most likely be braided hose which is stronger. I'll also get some nice shiny new clips.
I'm still deliberating about whether I want a later cooper grill on the car. The rest of the car has later looks - Mk2 lights, later number plate light etc, so I'm thinking this would keep to the overall appearance. Trouble is it's gonna cost me a few quid to get the lip welded onto the bonnet and resprayed. I think I'll save the bonnet badge for the very last job of the project
#244

Posted 08 October 2009 - 04:51 PM
Realising that the parts in my last thread wouldn't achieve much progress, I've been slowly collecting bits and pieces. I want to finish the fuelling next, so I've bought/ordered;
Cotton braided fuel line
Hose clips
Bolts to fix the carb to the inlet manifold (a really small thing, but a stop to progress nonetheless)
Adjustable engine steady - The standard fixed length one isn't suitable as my HIF44 carb doesn't clear the bulkhead, so this adjustable one should suit.
K&N cone filter
A toggle switch, and various electrical connectors.
So, jobs to do now are;
Drill mounting holes for pump into rear subframe - mount pump. Remember to affix earth wire.
Cut appropriate lengths of hosing, connect tank to pump, pump to fuel line, fuel line to filter, and filter to carb, secure with hose clips.
Run red wire from fuel pump to switch, then from the switch to the ignition feed.
Fit K&N filter to carb.
Mount carb onto inlet manifold.
Fit adjustable steady, adjusted to clear carb from bulkhead.
Affix choke cable to carb.
While I'm at it I can also fit the fanbelt and secure the alternator, as I also bought a fanbelt today, so another little job now possible.
I've also been busy progressing the interior. I didn't want to retrim the front seats originally as I liked the brown velvet style material, but I just couldn't find any matching trim anywhere to sort out the rear seat and the doorcards. So I've shipped my front and rear seats to Retro Retrims for them to sort out. It's gonna be chocolate brown vinyl with beige stitching.While they are at it they are sorting me out with doorcards, rear arch trims, and rear bin trims, so I'll have virtually finished the interior when it comes back. Apart from the headlining that is, which has deteriorated quicker than I thought with the useless tape I used. Looks like I'll be getting this redone quicker than I thought!
#245

Posted 13 October 2009 - 12:22 AM
#246

Posted 13 October 2009 - 07:22 PM
I read it back myself occasionally and think the same. If only it was the case!
#247

Posted 14 October 2009 - 09:10 PM
Went to minispares and thought 'sod it, I'll just buy loads of stuff!'
Got it all home, and typically, as I had loads of bits, started cracking on doing 6 jobs at once, and not progressing very far.
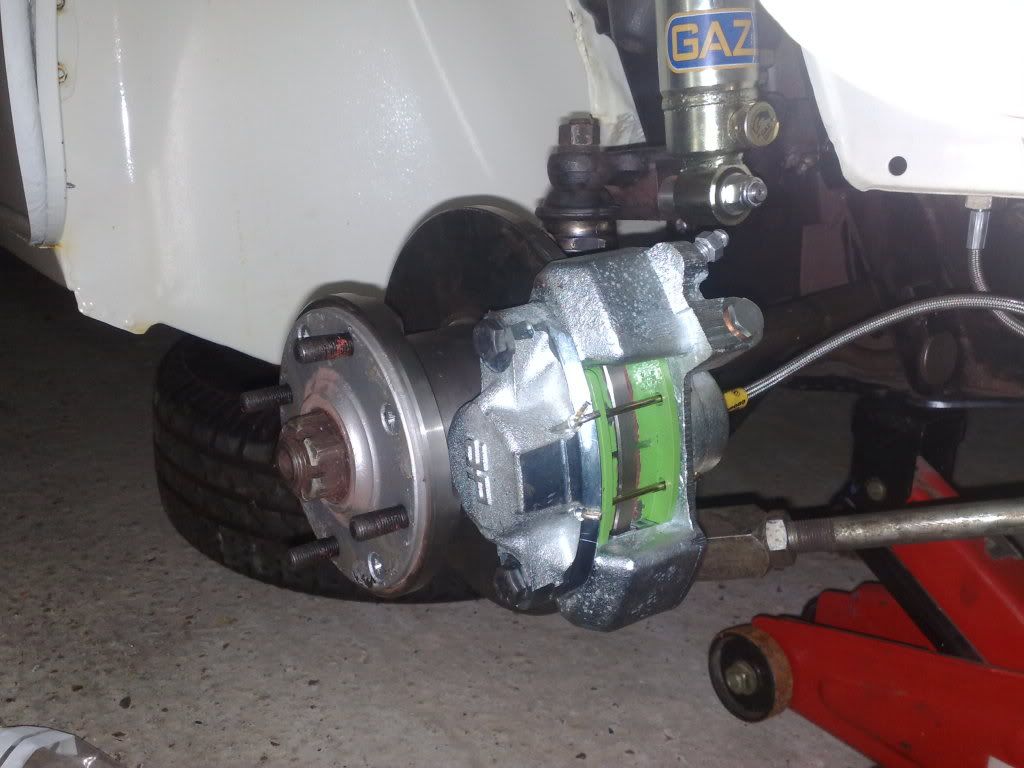
Fitted one brake caliper, still have to do the other one. Once I've done this all I need to do is fill them up with fluid, adjust the handbrake and bleed them and the I'll have fully functioning brakes!
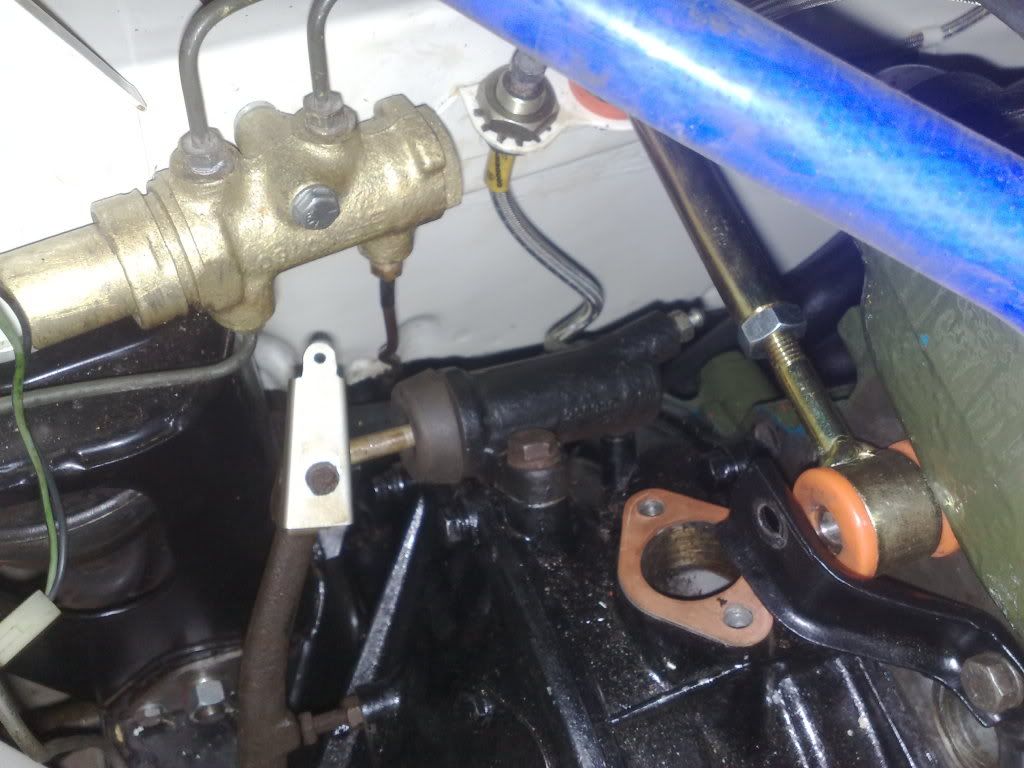
Fitted the clutch slave, hose and a new spring clip thing. Now discovered I need the clip thing for the other side of the spring, and everything is done for the clutch bar filling it up with fluid and bleeding it.
Forgot to take a pic, but I also bought and fitted a rear bumper. I bought genuine Rover bumpers and couldn't believe how rhubarb the bolts lined up. The front ones are well out, so some persuasion might be necessary.
Also got myself a Lumenition Ignition module, started fitting then discovered I have a Ducelier distributor, so it doesn't fit. D'oh! I'm walking in the dark with the ignition, I really don't have any idea what I'm doing, so any tips would be great. Can I just source a cheap 45D distributor and fit the Lumenition, or is there a better way?
I also spent an age trying to move my engine forward, so I can get enough clearance for the carb on the bulkhead. I feel like I 've spent more time dismantling the car than building it, and the engine just doesn't move very far at all. I'm sure I'll get there eventually, then I can fit the carb, and all the fuelling pipework including an inline filter I bought.
So a mildly frustrating evening, but I got something done at least!
#248

Posted 14 October 2009 - 09:21 PM
Great to see the project going again
I say try and find a cheap 45d dizzy, I think Harber07 on here had some very cheap or even free
Your doing well!!
#249

Posted 08 November 2009 - 09:46 PM
A minor update, sorry no pics.
Got out and did some bits and pieces. Fitted the other brake caliper on the passenger side, so the brakes are now complete ready for filling with fluid and bleeding. I need to get out and adjust the handbrake and find out the bleeding sequence and the brakes are complete.
Finally managed to fit the hose clip on the bottom radiator hose, but still can't get the bolt in on the bottom radiator mount.
Fitted the inlet manifold/carb and k&n filter. Also fitted the fuel filter and hosing, so it's looking dead smart.
I also did a few tidying up jobs, with bits and pieces I had unfinished, like the air ducting under the front wings, and the odd nut and bolt here and there.
I should be collecting the interior on Tuesday morning, and me and my mate Dan are gonna be fitting this in the next couple of weeks. The car will be so close to finished when thats in!
The plan - I'm going to assemble and get everything fitted the best I can. There's not much more left to do. Once I've done this I'm booking it into ML Motorsport so they can do the following;
Fit distributor curved to suit engine.
Fit lumenition ignition
Set up ignition timing and run engine correctly for the first time.
Set up suspension and tracking.
Hopefully they'll also be able to modify the front arches to clear the wheels.
Once this is done I'll get my headlining refitted by a specialist so it looks top trumps. Then it'll be ready to go! Once it's ready to drive I'll probably tinker with it to make it better and better, as they say a mini is never finished, but I'm certainly gonna enjoy driving it.
#250

Posted 26 November 2009 - 09:09 AM
#251

Posted 26 November 2009 - 09:49 PM
#252

Posted 28 November 2009 - 09:03 PM
Edited by Checker, 28 November 2009 - 09:04 PM.
#253

Posted 16 December 2009 - 10:55 PM
Checker - As far as I know you can have 2 foglights, as long as they are a minimum of 100mm away from the brake lights so the don't confuse people. There are quite a few cars out there with 2 fogs on the n/s and o/s so I'd doubt there'd be any problem. I could be wrong though as you've said you had problems.
Right, well thinking about it, I should really get on with this mini. I have the following jobs left to do;
Interior needs fitting - to do this I need to get some door clips, but the rest should be strightforward
Electric fuel pump mounted on rear subframe and plumbed in.
Fill fuel tank
Clutch spring fitted, and clutch cylinder filled and bled.
Brakes filled and bled.
Fit grill, and bonnet lip.
Fit and connect horn
Adjust bonnet latch and fit spring.
Source a dizzy, get re-curved and fit.
Adjust steering column position
Fit leads, coil, fanbelt.
Fit new battery.
Buy and Fit number plates
Fit that darned bolt in the lower bracket of the radiator, any ideas on how to do this as I just can't manage to get it in!
Get the suspension set up, probably at ML motorsport.
Fit hoses to heater, fill cooling system.
Fill engine with fresh oil.
Take to ML Motorsport for them to run in and set up engine, and sort out rubbing wings on the front wheels, and make final checks.
MOT & tax
Insurance
FUN!! (hopefully!)
Quite a long list still!!!!
#254

Posted 21 December 2009 - 11:01 PM
Look luck, and stick in there, you're so close to fun time!
#255

Posted 19 January 2010 - 07:23 PM
Just to bring everyone up to speed, a while ago I fitted the bumpers, which really make the car look complete


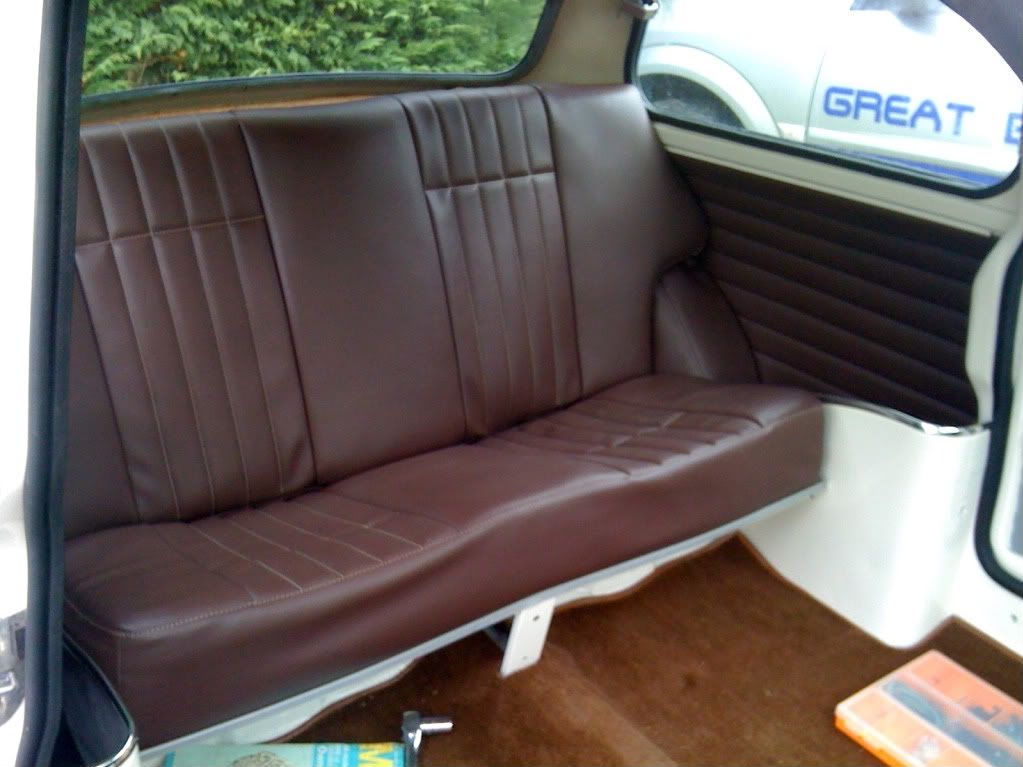
Then I finally got round to fitting some of the interior. Fitted the rear quarter cards and the rear seat. Also continued fitting various carpet panels.
Then, I re-checked the speedo wiring. Lucky really because I'd accidentally fitted the wire for the fuel gauge onto the water temp gauge and vice versa, which would have been interesting. also sussed out a couple of other connections, as well as sorting out the stereo wiring. Now I just have to connect my rev counter and voltmeter and I'll be done with the dash wiring and the dash can go in!

I love how low the mini looks in this picture. Shame because I doubt I'll be able to get away with having it that low, as I reckon there'll be serious scrubbing!
Next job is to finish fitting the interior, then continue with odds and sods. Every job seems to take an age to get done at the moment.
1 user(s) are reading this topic
0 members, 1 guests, 0 anonymous users


