Supercharged K20a2 Vtec - Race Spec
#541

Posted 02 October 2010 - 10:13 AM
#542

Posted 04 October 2010 - 05:14 AM
Just got a quote back for the wire erosion of the alternator plate - £350, so I am gonna keep searching as that is too much, worse case scenario is I have to get it all milled out which would leave a lot of waste.
Your right about the weather, it was proper karzi over the weekend so I didnt get to breakfast club @ Goodwood on Sunday, next year....
#543

Posted 04 October 2010 - 05:15 AM
probably my favourite mini i have seen on the forum !!! absolutely amazing!!
Thanks
#544

Posted 06 October 2010 - 09:55 AM
The main problem I foresee from here is where the column meets the splined part of the rack, on the old one the splined bit had a depression all the way round for the fixing bolt, the new rack only allows the bolt to be fixed in one angle on the slpines and as the splines are hardened steel you cant exactly go maching them with normal maching equipment. The problem lies in that the column is made of a hex bar which only allows 60deg of movement in any one turn so lining up with the rack could prove to be a nightmare - I will let you know........
I have two sets of spacers, 30mm and 45mm, you can guarantee that it'll be 25 or 55 but we need to start somewhere. SO fingers crossed on the weekend I will be getting the rack back together and putting it on the car. Its been a bit hairy driving the car over the past few weekends as there has only been hand tight bolts holding everything together. so its been tickover in first gear everywhere - which hasnt been far - garage to trailer and vice versa really.
The new brackets for the anti-roll bar are currently being machined for me - cheers Steve... made from billet, they should really do the job very well.
Defo looks like the alternator bracket is going to be milled, pity as its now not going to have the curves that I had re-drawn into the design thinking it would be wire eroded. I guess it'll never really be seen anyway so theres no real need for curves. ho hum.......
#545

Posted 06 October 2010 - 03:08 PM
Defo looks like the alternator bracket is going to be milled, pity as its now not going to have the curves that I had re-drawn into the design thinking it would be wire eroded. I guess it'll never really be seen anyway so theres no real need for curves. ho hum.......
Looking forward to seeing this once it’s all done, but why does having it milled prevent it from being curvy?
I have no idea what the design is like, but I’ve seen some amazing products produced on a mill.
#546

Posted 07 October 2010 - 05:31 AM
Defo looks like the alternator bracket is going to be milled, pity as its now not going to have the curves that I had re-drawn into the design thinking it would be wire eroded. I guess it'll never really be seen anyway so theres no real need for curves. ho hum.......
Looking forward to seeing this once it’s all done, but why does having it milled prevent it from being curvy?
I have no idea what the design is like, but I’ve seen some amazing products produced on a mill.
We could probably make the effort and get some nice curves in it, however in the interest of getting it done swiftly and at little cost I think straight lines will do, this project has truly broken the bank so anyhting I get done now needs to be at minimum cost.
Roll on the weekend so I can put it all back together........
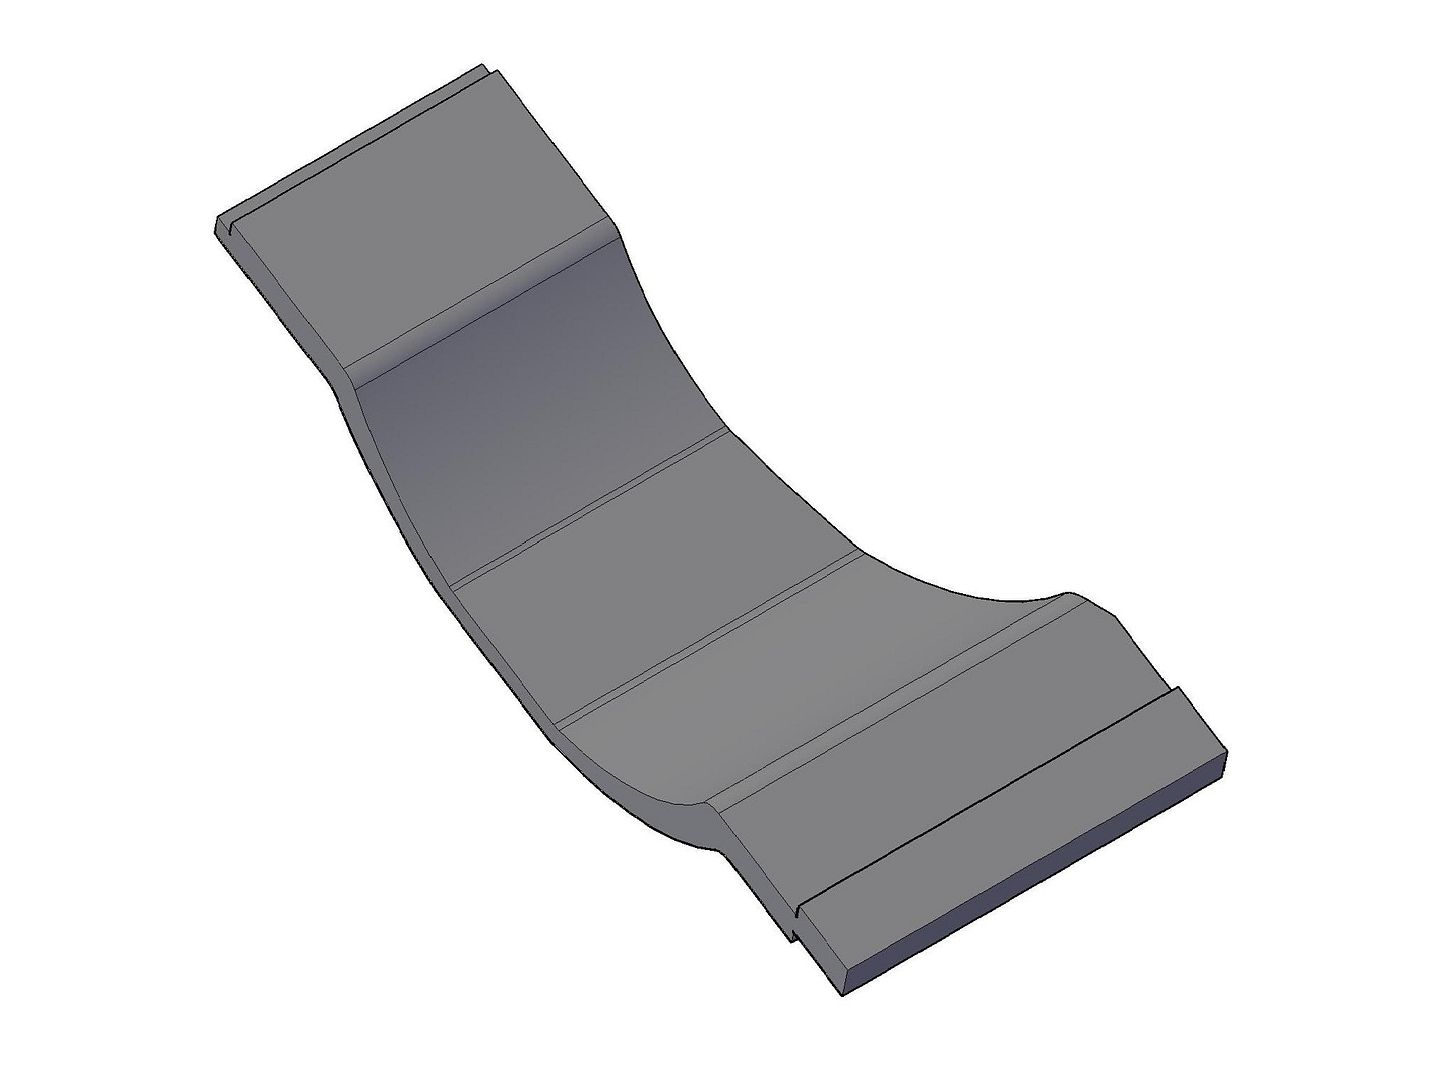
Here's a rendering of what the bracket is to look like(minus fixing holes):
Edited by cptkirk, 07 October 2010 - 05:34 AM.
#547

Posted 11 October 2010 - 07:45 AM
SUCCESS - I got my new rack fitted on the weekend with all my shiny new bits as well and I have to say it has improved the feel of the car by a huge amount. although I have to report that my rack is not self centring due to it being too stiff, now I have read the Haynes manual I have to get at it again to remove some preload shims, bit of a pain in the ar5e but not the end of the world. It makes you concentrate even harder driving it when it doesnt self centre - I love a challenge. On the plus side the wheels no longer rub on the wells due to the restricted movement in the sportspack rack.
I am still considering putting a kit together but need to look into it a bit further now I have the information from my build.
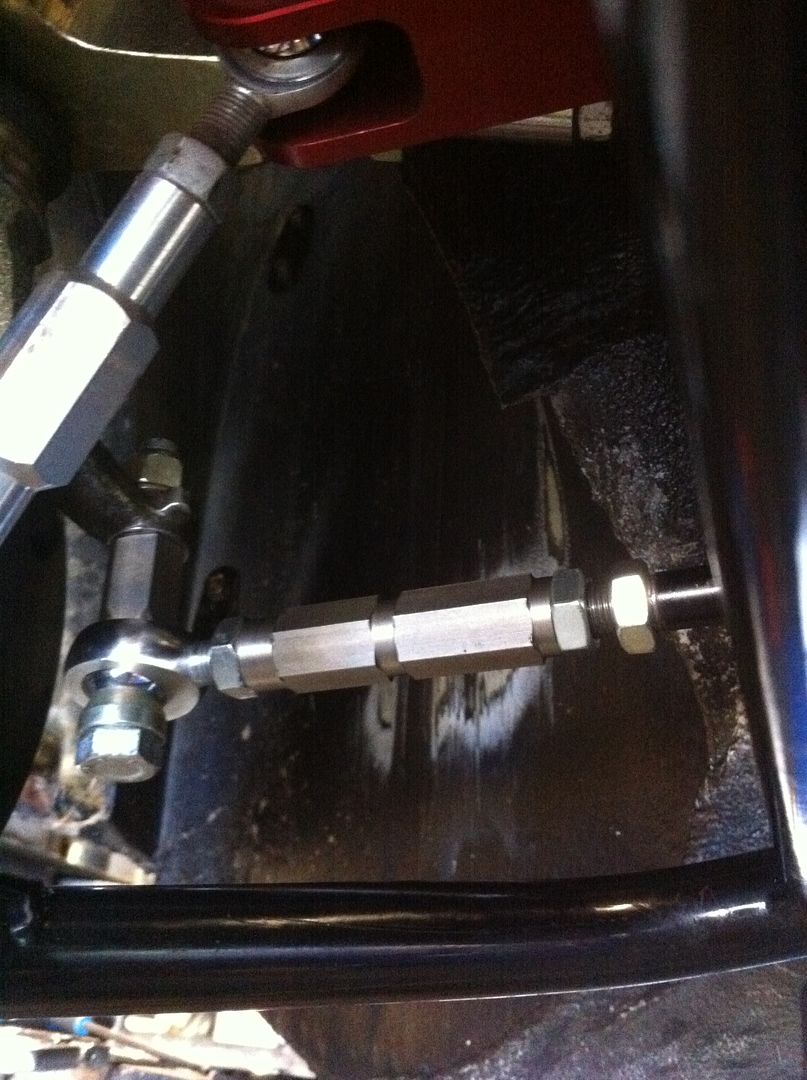
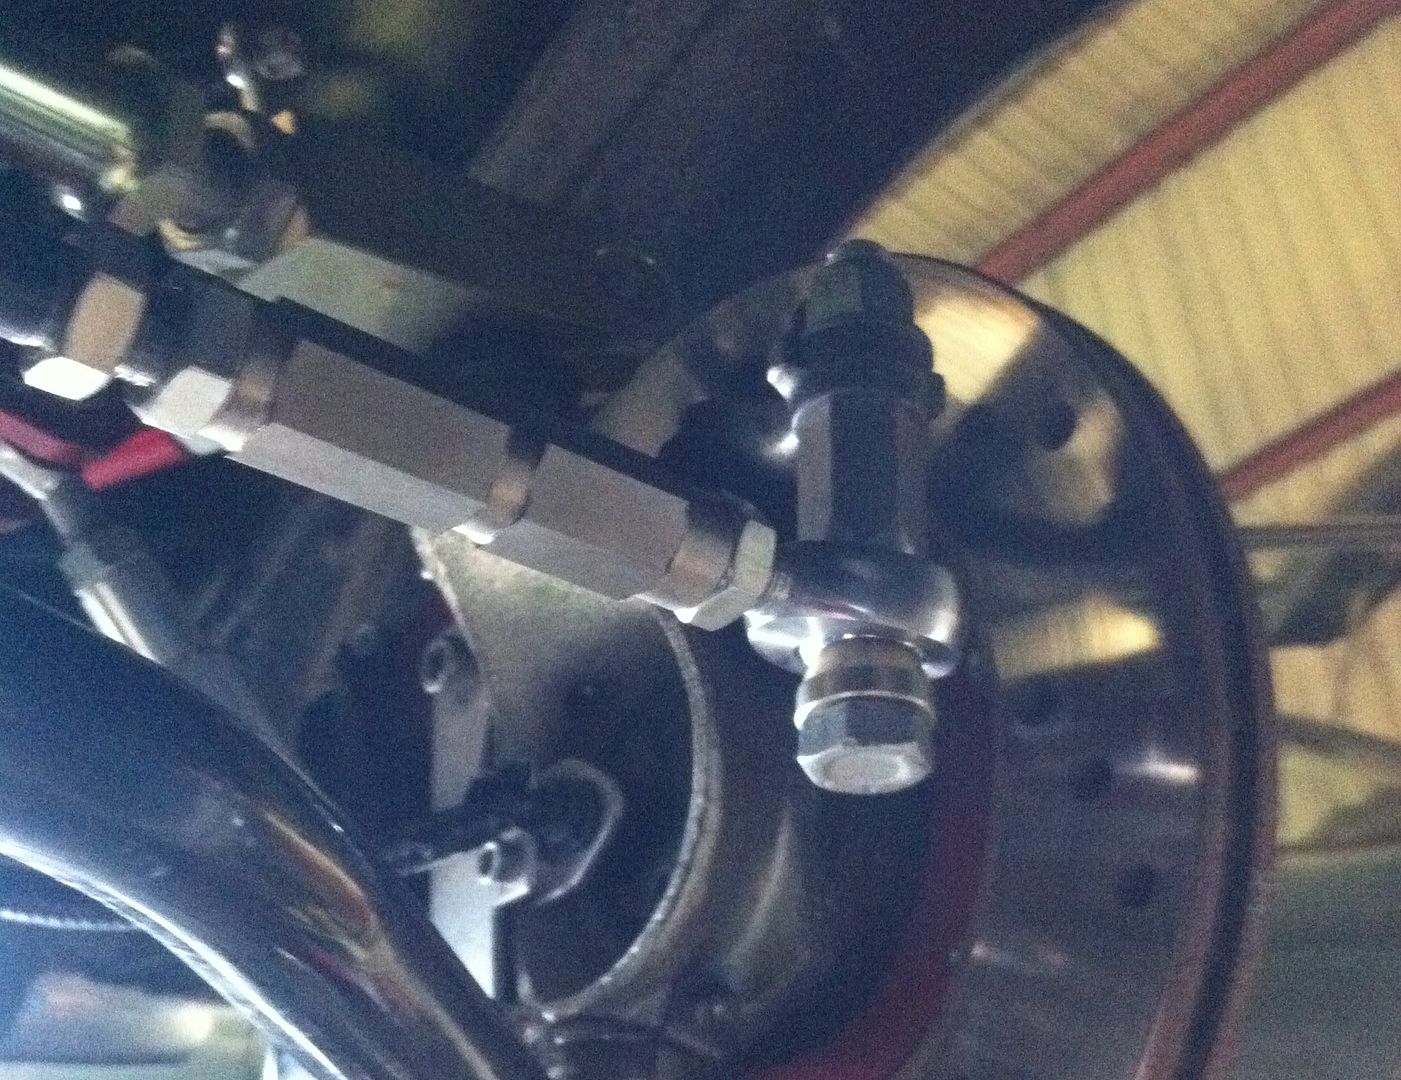
So anyhoo, I got a couple of snaps of the kit in place on the weekend and here they are:
Edited by cptkirk, 12 October 2010 - 05:22 AM.
#548

Posted 11 October 2010 - 08:37 AM
This week when I took the O/S front wheel off I was really surprised to find the original ARB pick up completely snapped, now I know I said they were rubbish before but I didnt think they were going to snap at the point that it did - right across the horizontal bolt hole (see picture later on). the surprise was more for the fact that last week it hadnt snapped and this week it was yet all I did was drive about 100metres ticking over in first, guess it was the final straw.
Fortunately my good mate Stevie G had milled up some new ones to my design which I promptly fitted on saturday.
When I removed the old pick ups I though I had best check the ARB to see if it was rotating freely, guess what? Yer thats right it was pretty much solid and I could literally put all of my weight on it before it would move (and thats quite a lot of weight) and it would only move with a yank. So ARB bushes apart, lubricated and back together, hey presto the front ARB now rotates.
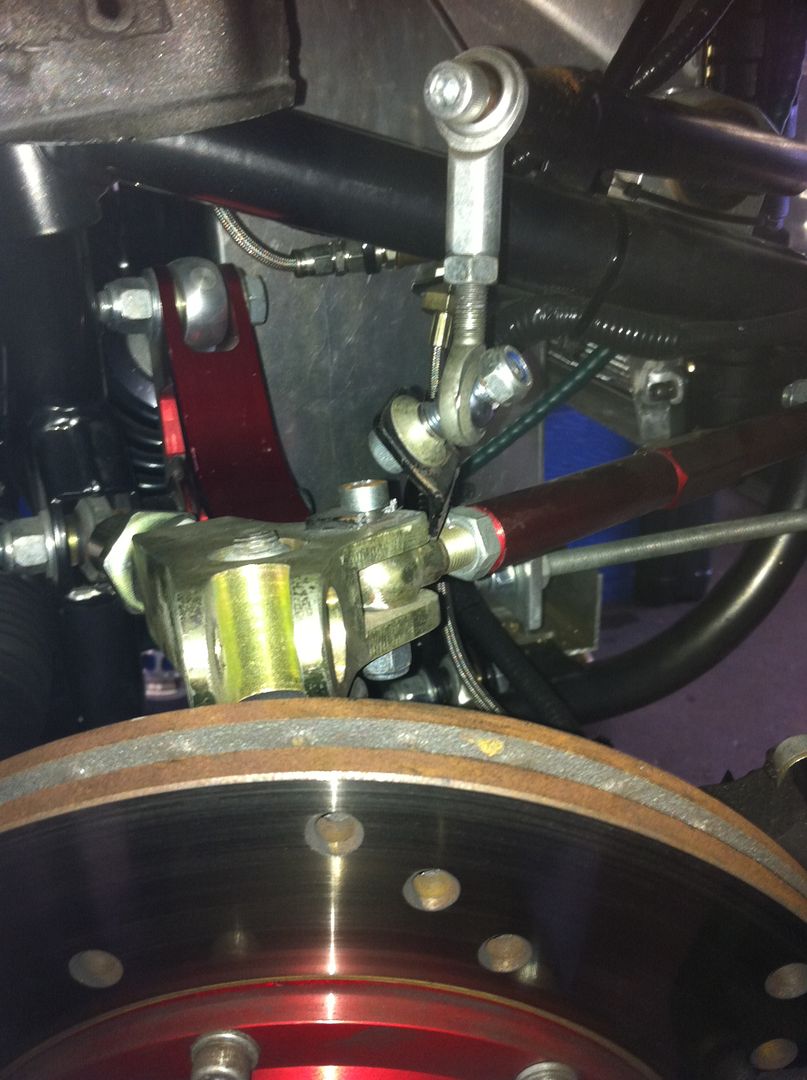
The thinking behind the new pick ups was to spread the load over the two sides and the gulley in the middle is exactly 13mm to hold the bolt hex captive when tightening, I have to say it worked a treat. The upright of the pick up furthest away from the rose joint is threaded allowing the nut in the middle to lock off against the pick up so as not to cause pinching of the two uprights when tightening the bolt that supports the rose joint.
So again I got a few snaps along the way, the first is of the failed unit supplied with the car and the following two are of the new billet piece:
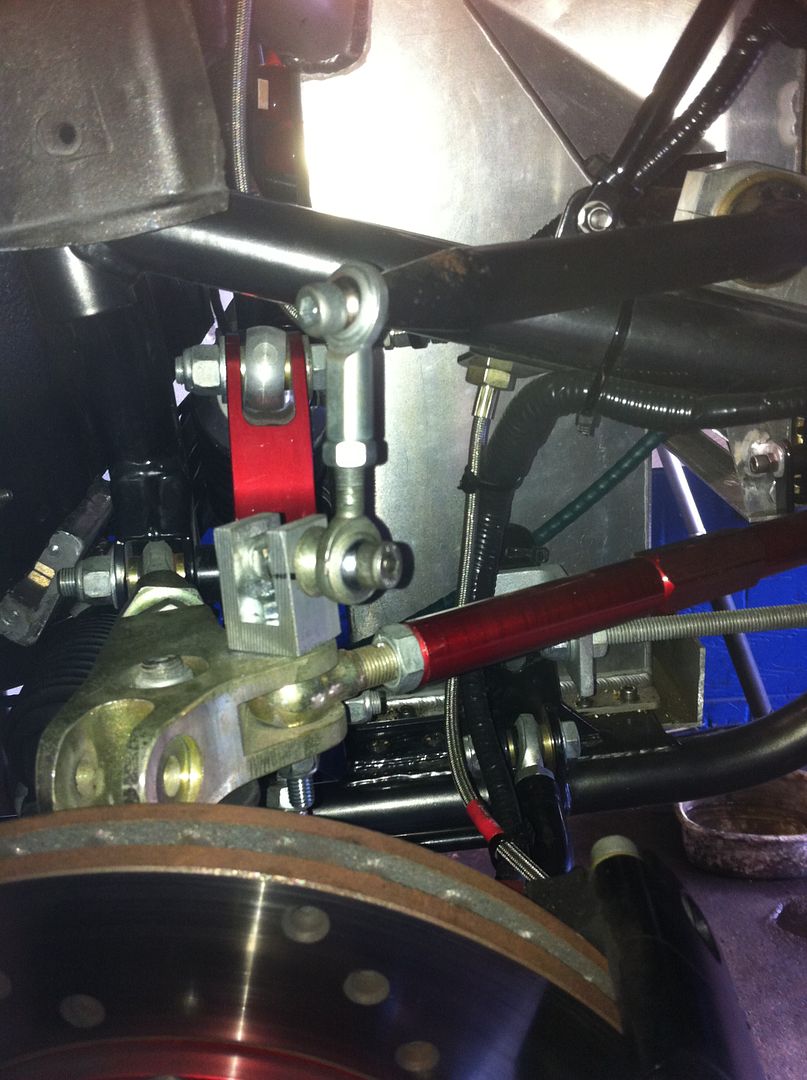
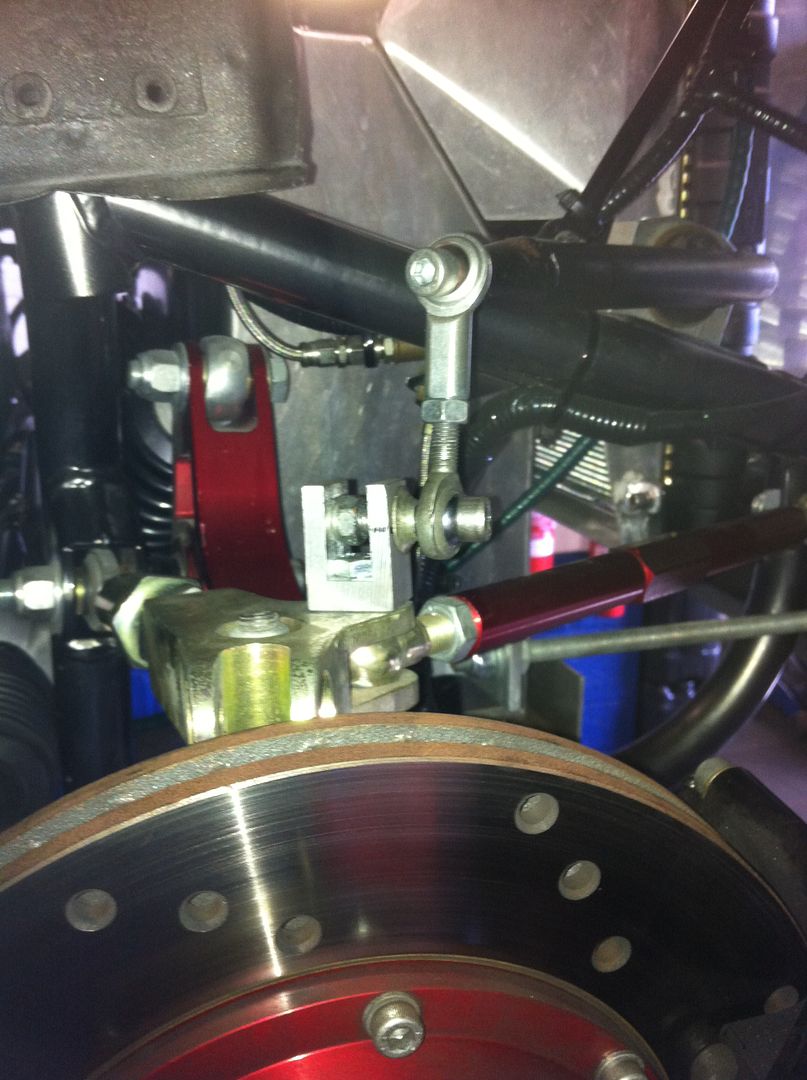
#549

Posted 11 October 2010 - 02:30 PM
#550

Posted 12 October 2010 - 07:31 PM
On a side note those standard ARB pick-ups are shocking!
#551

Posted 13 October 2010 - 09:06 AM
Have you got any more photo's on your front break setup? Which model willwood calipers have you got and how do you find them?
#552

Posted 13 October 2010 - 09:18 AM
nice build, I receenlty helped put a k20 supercharged engine in the back of a mini pickup for autograss racing.
Have you got any more photo's on your front break setup? Which model willwood calipers have you got and how do you find them?
Pretty much all the photos I have of the car are already posted up in the build thread, I know there are alot of pages but if you can find the bit where I was mounting the speedo sensor then there are a few more there and also where I fitted the front towing eye which is only a few pages back. The model is Powerlite and I find them very good. I had reservations about not having servo assist but I neednt have worried as they are very good without. I have the Wilwood pedal box as well, you will need .75 master cylinders with the Powerlites.
How does the pickup go? I bet if flies as it'll be alot lighter than mine.....
#553

Posted 15 October 2010 - 01:04 PM
nice build, I receenlty helped put a k20 supercharged engine in the back of a mini pickup for autograss racing.
Have you got any more photo's on your front break setup? Which model willwood calipers have you got and how do you find them?
Pretty much all the photos I have of the car are already posted up in the build thread, I know there are alot of pages but if you can find the bit where I was mounting the speedo sensor then there are a few more there and also where I fitted the front towing eye which is only a few pages back. The model is Powerlite and I find them very good. I had reservations about not having servo assist but I neednt have worried as they are very good without. I have the Wilwood pedal box as well, you will need .75 master cylinders with the Powerlites.
How does the pickup go? I bet if flies as it'll be alot lighter than mine.....
unfortunetly the pickup through a rod out on it's first outing, new engine being buitl of the winter,
Cheers for the info on the brakes
#554

Posted 25 October 2010 - 09:51 AM
With the photoshoot in mind I hadnt yet done any timings for the car and as my SPA speedo gauge allows me to do whatever timings I want I thought I would give it ago. So I found a nice flat and fairly smooth bit of road (private road of course
The Results:
0-60 = 3.4 seconds
0-100 = 8.0 seconds
40-60 = 1.6 seconds
I only had three or four attempts at the standing starts and the 40-60 is just from one run and needs a few more runs to see if I can get it down with different gear selection. The standing starts were done taking off in first, minimal slip, no wheel spin, drop it and go. I reckon I can get both times down with practice and a clutch I didnt care too much about, still there not bad for an amateuer......
Car is now off the raod for a cleaning session ready for the photoshoot, so keep em peeled for the article in Miniworld sometime in the future.....
#555

Posted 27 October 2010 - 03:35 PM
I'll be delighted if mines anything like that.
What d'you think the 0-60 would be like without the charger?
John
1 user(s) are reading this topic
0 members, 1 guests, 0 anonymous users


