Supercharged K20a2 Vtec - Race Spec
#241
Posted 26 August 2009 - 07:31 PM
So it has taken ages to get this far with the wiring, I can honestly say I did not expect it to take so long but it has been an experience of which will stand me in good stead if I decide to do another project in a couple of years.
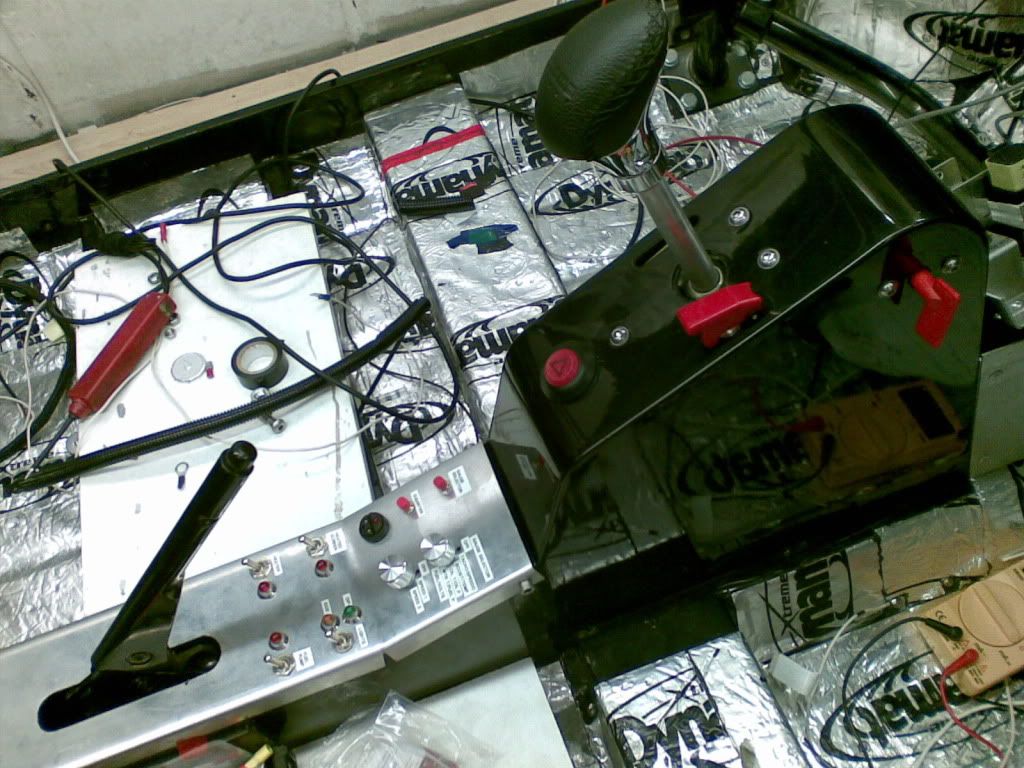
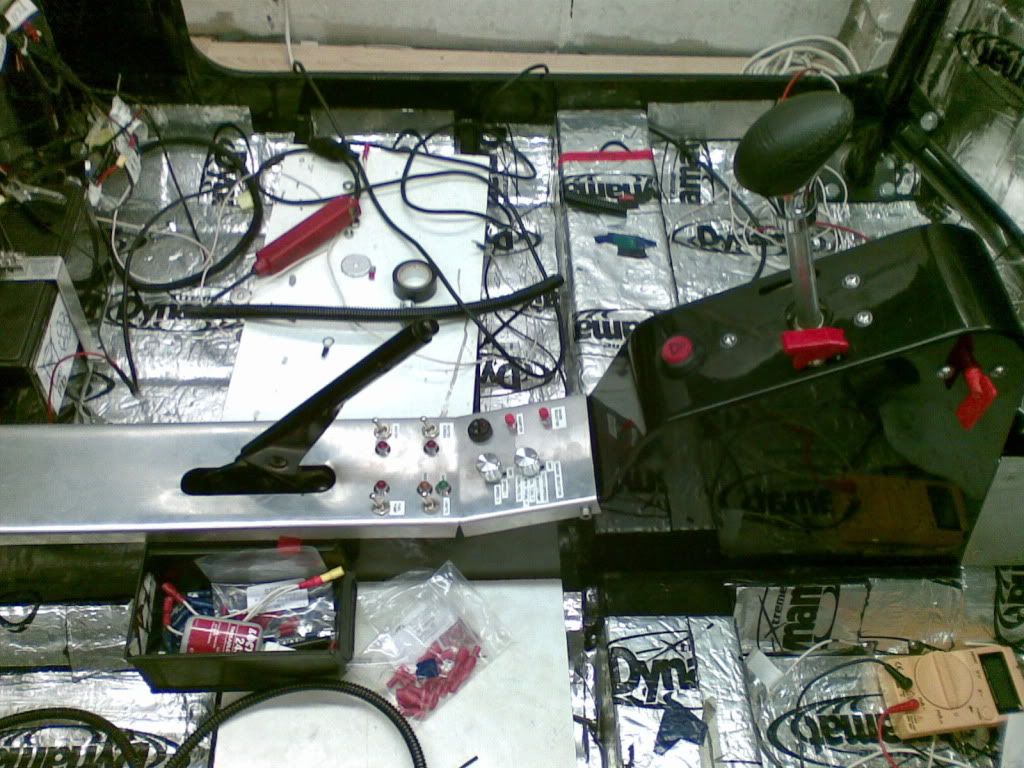
I am not going to go into too much detail yet as to the specifics of the switches, I will however say that all the switches you see on the centre console are all the switches in the car, other than main/dip, horn and indicators, I will reveal that little beauty nearer completion as I dont want anyone copying it before mine is finished.
The raised tunnel has been a real blessing when it comes to the wiring, it may have meant that I have had to extend a few of the original loom wires but it was worth it and the link from the front of the tunnel to the front firewall is invaluable, you can get all your wiring and brake lines through it and get your handbrake in there to boot (advisable to make a plate up to sit between the handbrake mech's and the wiring - will get a picture when I take the cover of next)
So here are a couple of snaps of the centre console with switches and LED warning lights.
#242
Posted 26 August 2009 - 07:36 PM
Edited by cptkirk, 26 August 2009 - 07:36 PM.
#243
Posted 26 August 2009 - 09:56 PM
Edited by miniQ, 26 August 2009 - 09:58 PM.
#244
Posted 27 August 2009 - 03:11 PM
#245
Posted 30 August 2009 - 08:27 AM
#246
Posted 30 August 2009 - 07:10 PM
this project is perfect ...!!!!!
#247
Posted 31 August 2009 - 04:35 PM
I suppose with all projects you re-asses the finish date on a weekly basis and a project like this is never 'finished' as such as theres always something more you can add.
Terrible luck with the engine but you seemed to have bounced back well and continued with the brilliant work.
Keep up the good work and enjoy it!
Chris
#248
Posted 31 August 2009 - 08:39 PM
#249
Posted 01 September 2009 - 08:54 AM
nice! i see you went for a momo 'quark'? gear knob lol i would never be able to decide what momo products to buy to much choice
The knob is a Momo F16, its last years model but it still looks good. I wanted a knob that gave more feedback as to the direction of travel, it may sound odd but having that shape subconciously helps me to work out where I am going with the gear stick, well compared to a normal round one. Also for the last few years my Accord Type R had a Titanium gearknob and that thing was either too hot or too cold to touch so I wanted something with leather on this time.
lol great one your cars coming along great your projects been the inspiration for me to learn how to do fabrication properly thats why im starting engineering this year so then ill be improving more and more
Glad to be of service, although I must tell you that I hold no formal qualfications in fabrication or engineering and this is the first time I have done a project of this type (building a car). I wish you well on the course.
Wow! I've just spent the last hour reading this topic and I must say it's the best hour I've had on a sunday morning in a long time. Hats off. I can't wait to see this beast in action. It's given me some great ideas. Good luck.
Thanks for the comments.
me too...
this project is perfect ...!!!!!
Again Thanks.
Well i've just spent most of the afternoon reading through this project and i have to say the attention to detail and fabrication work are second to non, simply amazing.
I suppose with all projects you re-asses the finish date on a weekly basis and a project like this is never 'finished' as such as theres always something more you can add.
Terrible luck with the engine but you seemed to have bounced back well and continued with the brilliant work.
Keep up the good work and enjoy it!
Chris
Thanks, yes I am re-assessing the completion date weekly at the moment, things never quite work out how we want them and I find myself waiting on others more than I would like but there are things that I just cant do myself or require that third hand to do them. I have been enjoying what summer we have had for the last couple of weeks so havent managed to get much done to the car, however I did manage to help with my trailer over the weekend so that is coming along, again not as quickly as I wanted but it is getting there.
Great work cptkirk! I can't seem to find the answer in the thread. Where did you get the arches from? I'm guessing zcars but their shop page doesn't seem to work on their web page to confirm this.
You are correct they are Z's own arches, I wish I had had the side seams deseamed now but it's too late for that now. I think that would have made the arches look even smoother.
I aim to get cracking back into the project this week, I spent some time making a list of stuff to do over the weekend and it ran into 4 pages of A4 and still growing so I can get some sort of structure back into the build. Its difficult to concentrate on one thing when there is so much to do.
More updates soon.
#250
Posted 02 September 2009 - 11:27 AM
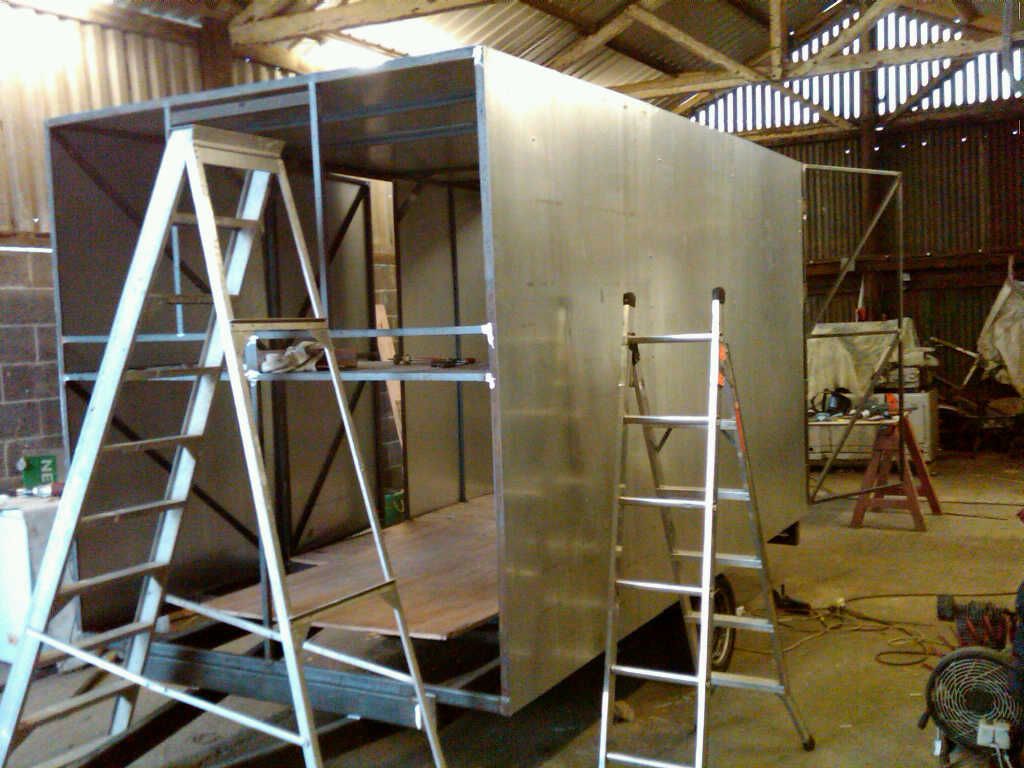
Thought I would post a picture of the trailer as it is being built, its made specifically for the mini, more importantly its made specifically for a Z's mini as it has a single axle far enough back to counteract the weight being at the rear of the car. Its got a workbench at the front end (the end closest in the picture), just enough room for a set of wheels and some tools, its high enough to stand in and has its own leisure battery to run the interior lights and exterior work lights which double up as reverse lights. We currently have the skin drilled and ready to go back on, however the frame needs cleaning then priming then painting, the bottom is getting undersealed. I should have some more pictures of it soon, unfortunately when working on it on the weekend I managed to drill the end off my finger (using the teeth of the chuck - I was holding something whils my brother was drilling - he couldnt stop laughing). Anyways - here it is:
#251
Posted 03 September 2009 - 10:26 PM
well if the car was not enough work, you have started a trailer. Man you never stop do you!
its seem just the job. I had trouble getting mine on & off a trailer as the things so dam low. You need a big pat on the back for giving everybody such an intresting topic to read.
I look forward to seeing it one day!
Lee
#252
Posted 04 September 2009 - 06:49 AM
Hi Kirk
well if the car was not enough work, you have started a trailer. Man you never stop do you!
its seem just the job. I had trouble getting mine on & off a trailer as the things so dam low. You need a big pat on the back for giving everybody such an intresting topic to read.
I look forward to seeing it one day!
Lee
Lee
Ha ha, yer your right I am a glutten for punishment, fortunately the trailer has been mostly built by my brother and my old man (to my initial design) and my brother has the perfect size shed to build it in. I am building my car in a single garage with barely enough room to swing a mouse never mind about a cat.
The trailer has been made so that it can be tilted and the surrounds for the lights have been made strong enough to double as landing points, although the ramps should be long enough (2.4m) to drive the car in without too much hassle or titlting.
What can I say about the topic? I try and make it as interesting as the car will be, I am aiming for every part of what I have done for and to the car to be the best that I can acheive and if people like what I have done then brilliant. Cars are very subjective and what one person may like another may find to boy racer-ish, to plain or just dont like it. As with anyone doing a project like this I have made it how I want it, and I like it so I guess thats all that matters.......
Andy
#253
Posted 05 September 2009 - 04:43 PM
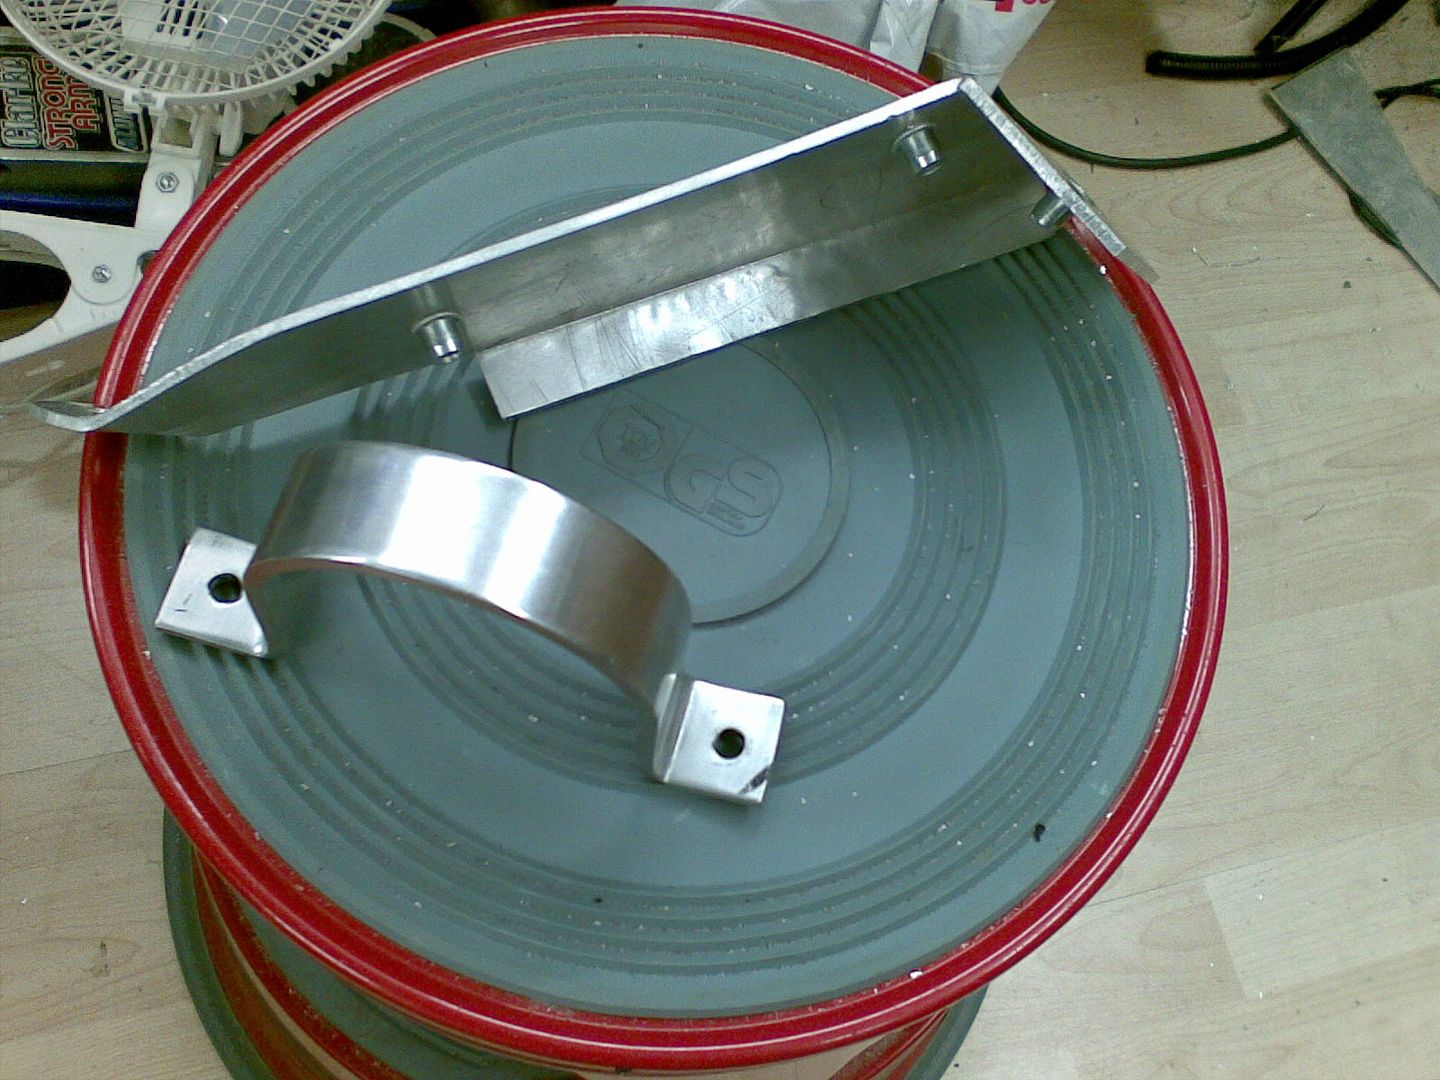
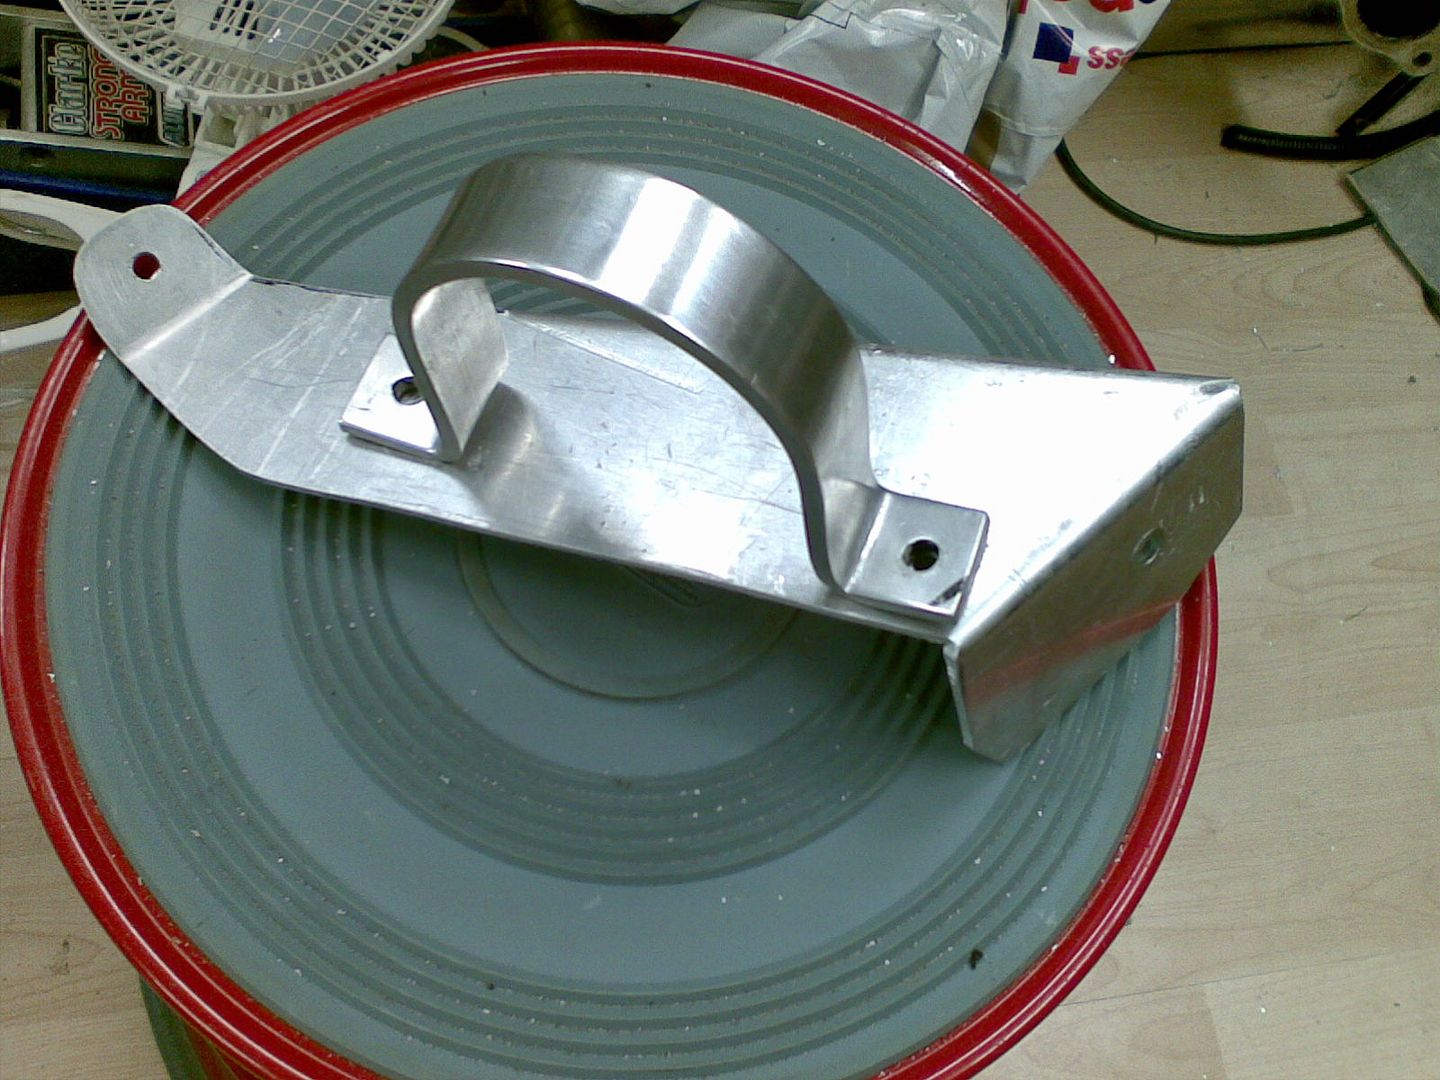
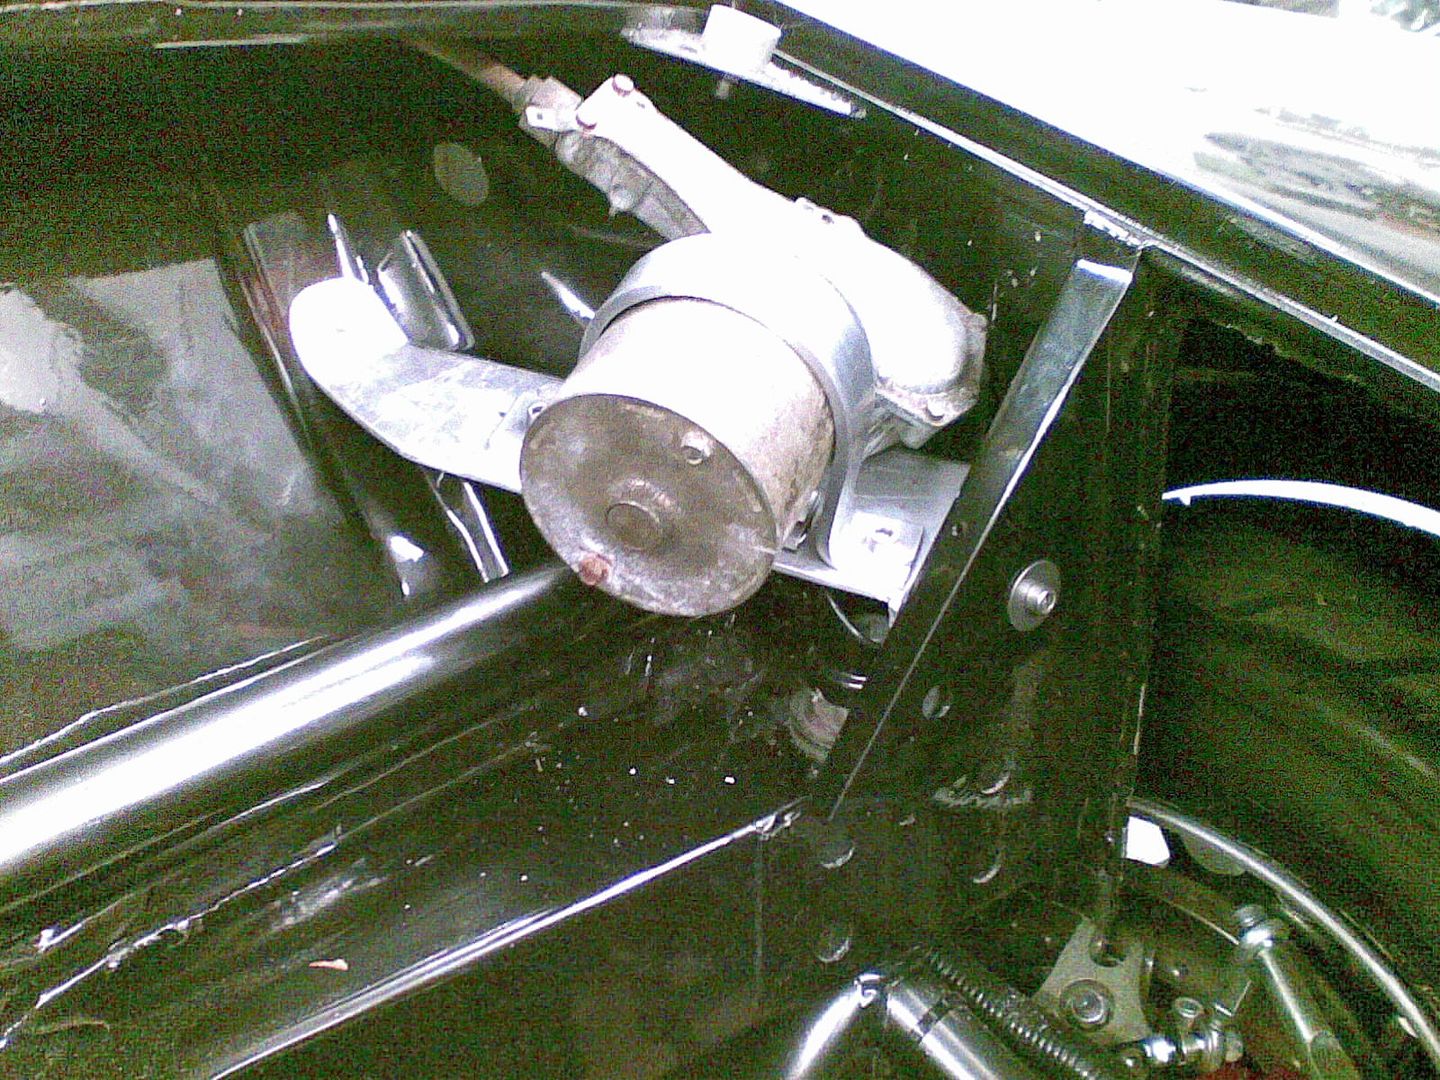
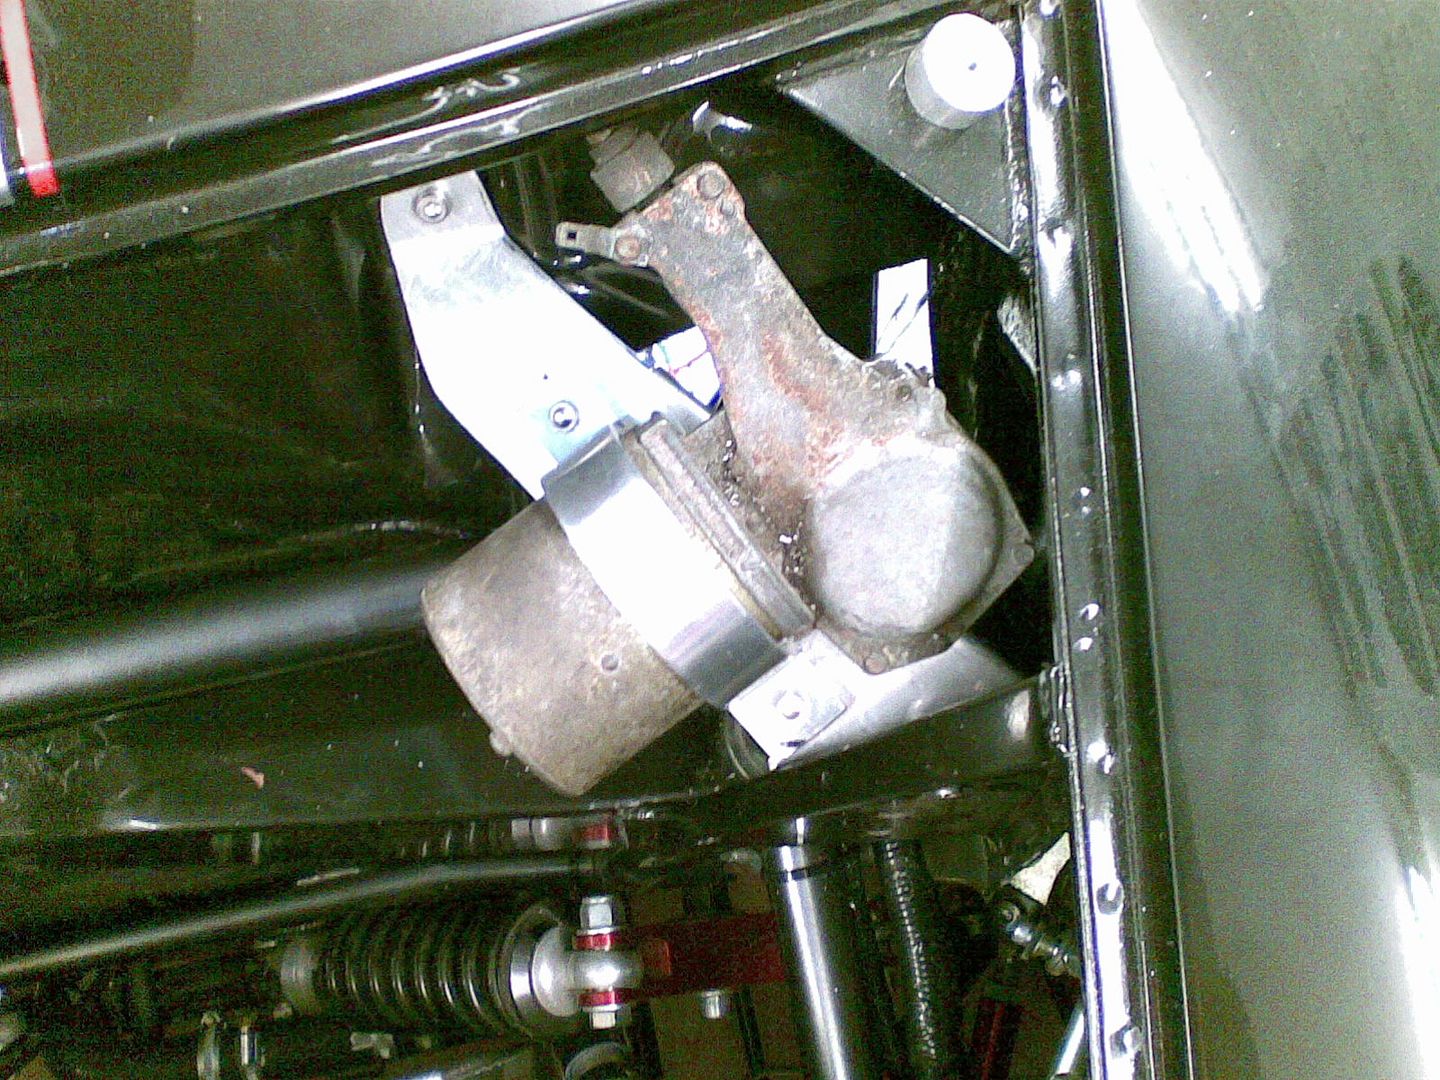
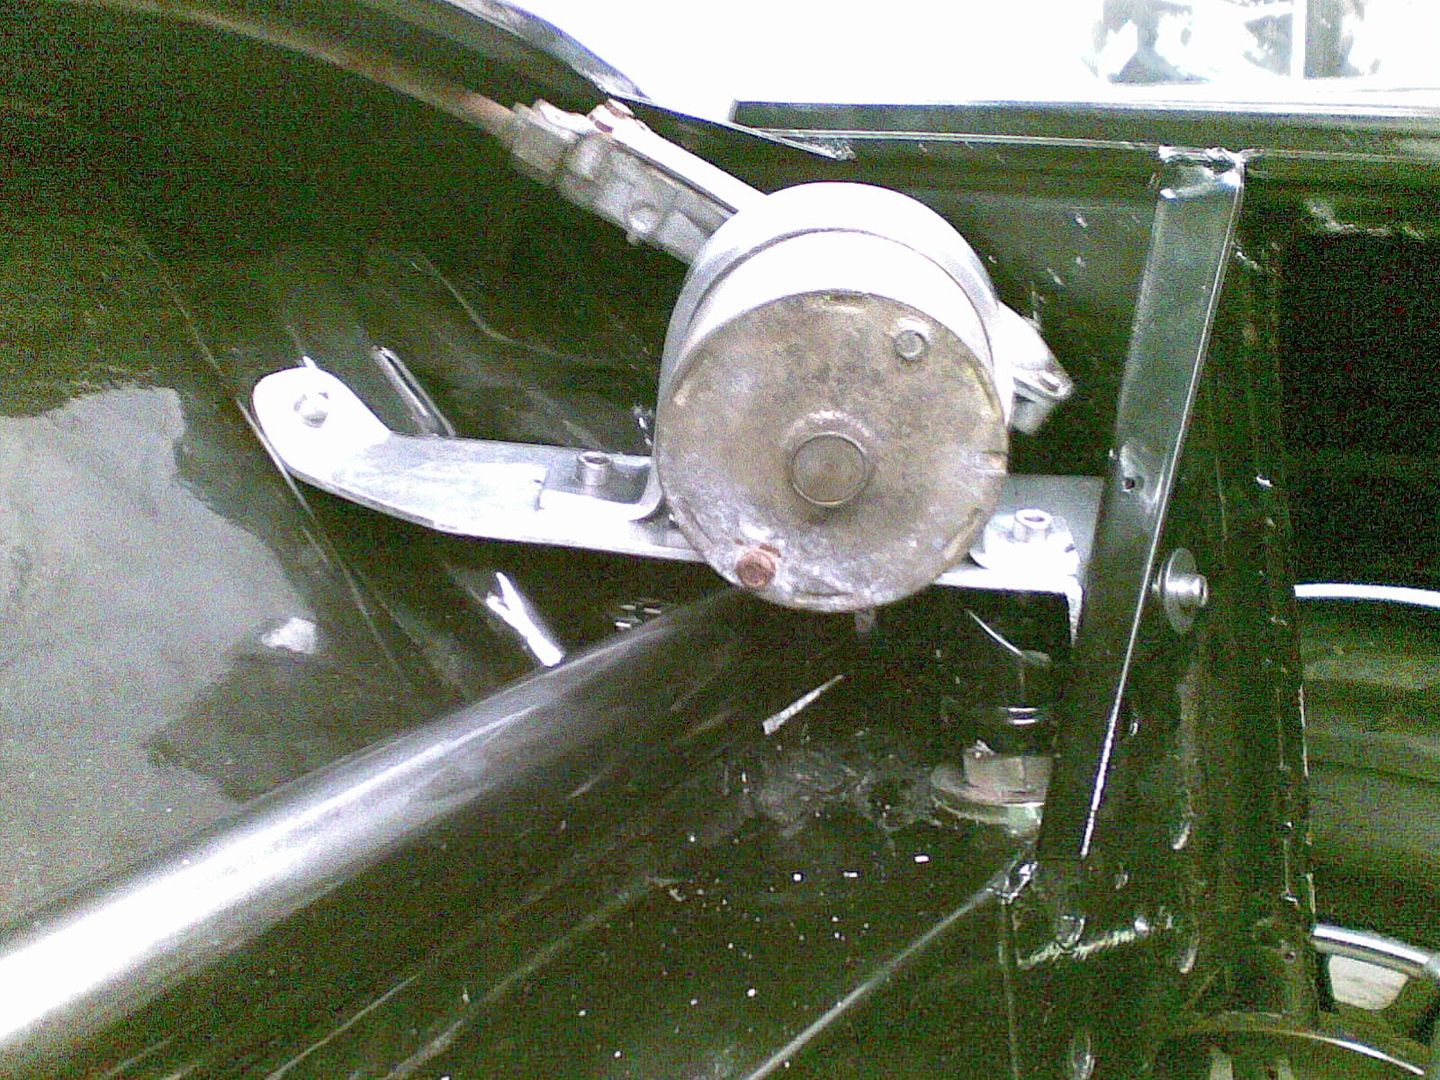
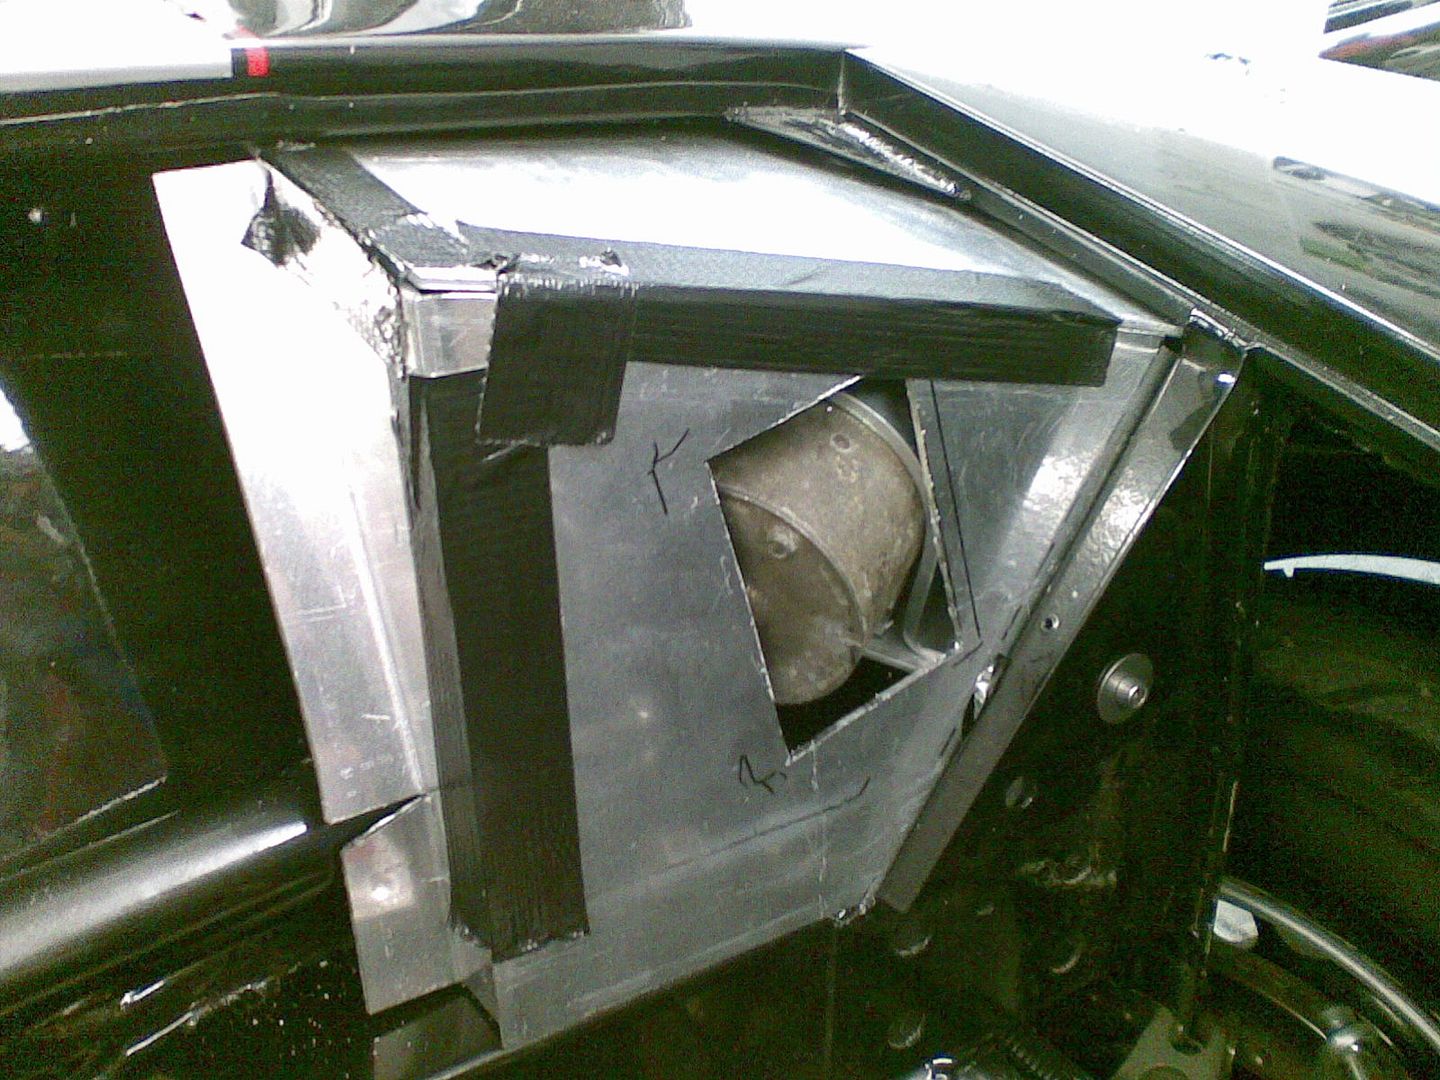
I ahd purchased a wiper mount from Z's some time ago and when I came to fitting it the other day it became apparent that it wasnt going to fit into my plan, so I had to think up another way of mounting the motor. I have utilised the upper bent bit of bar from the Z's mount and fabbed up a bottom mount, my reason for the change will become apparent in the next thread.
The motor is old and under closer inspection I found the contacts are so corroded that I had to order a new one, another qucik £100 - bugger.
So here is the mount:
#254
Posted 05 September 2009 - 04:58 PM
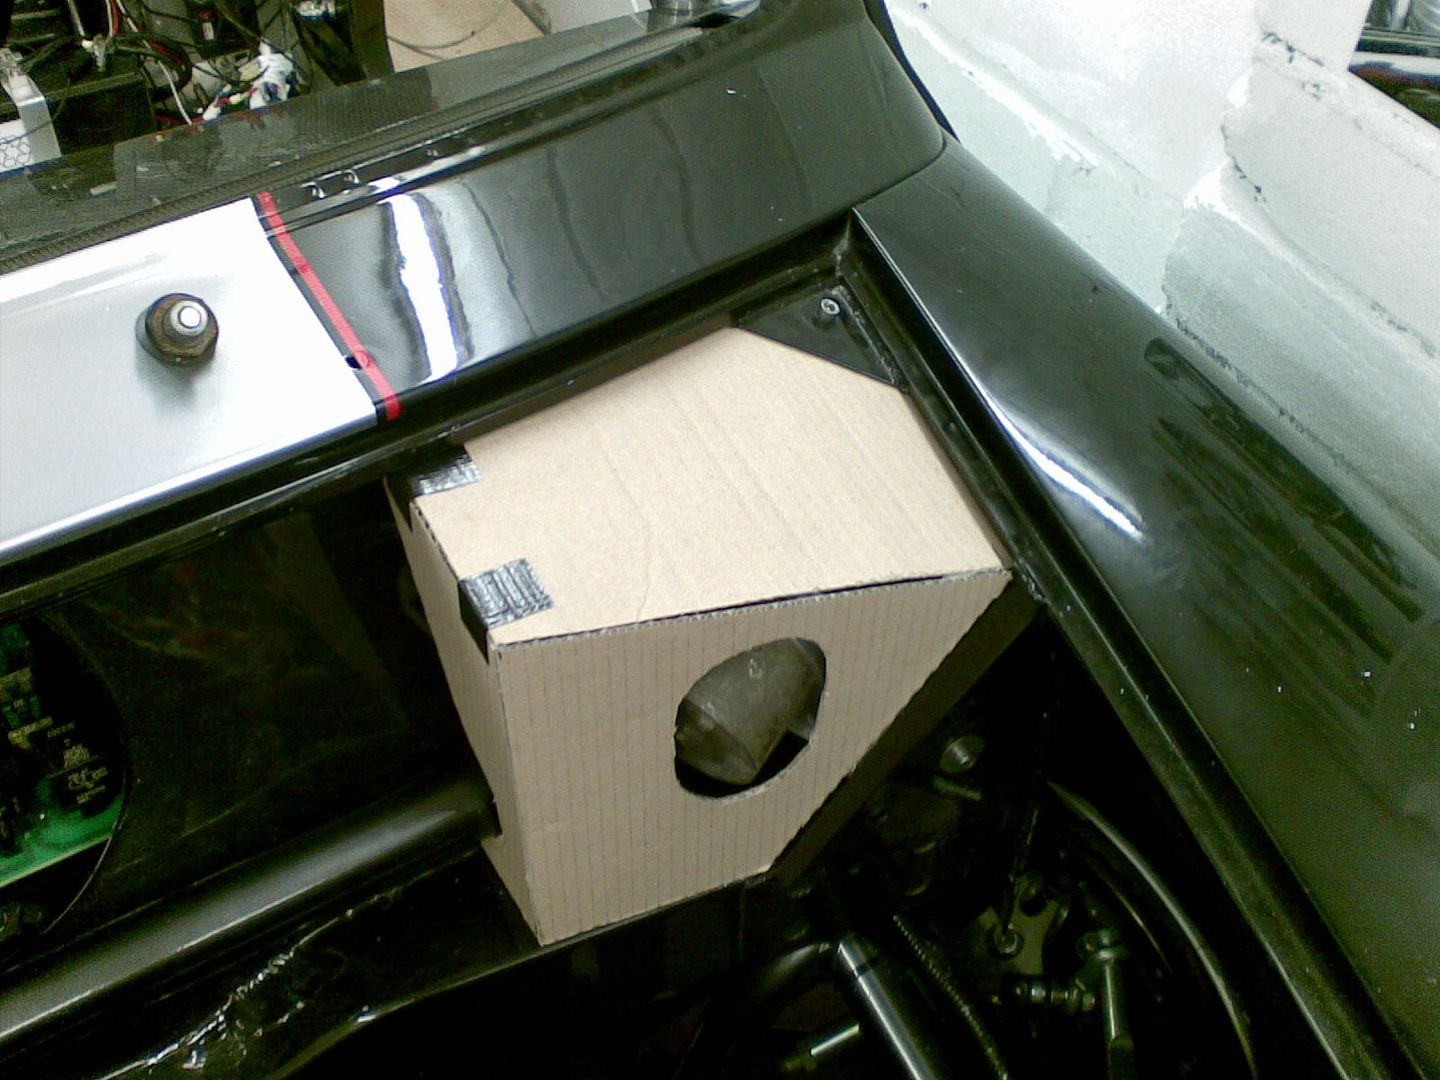
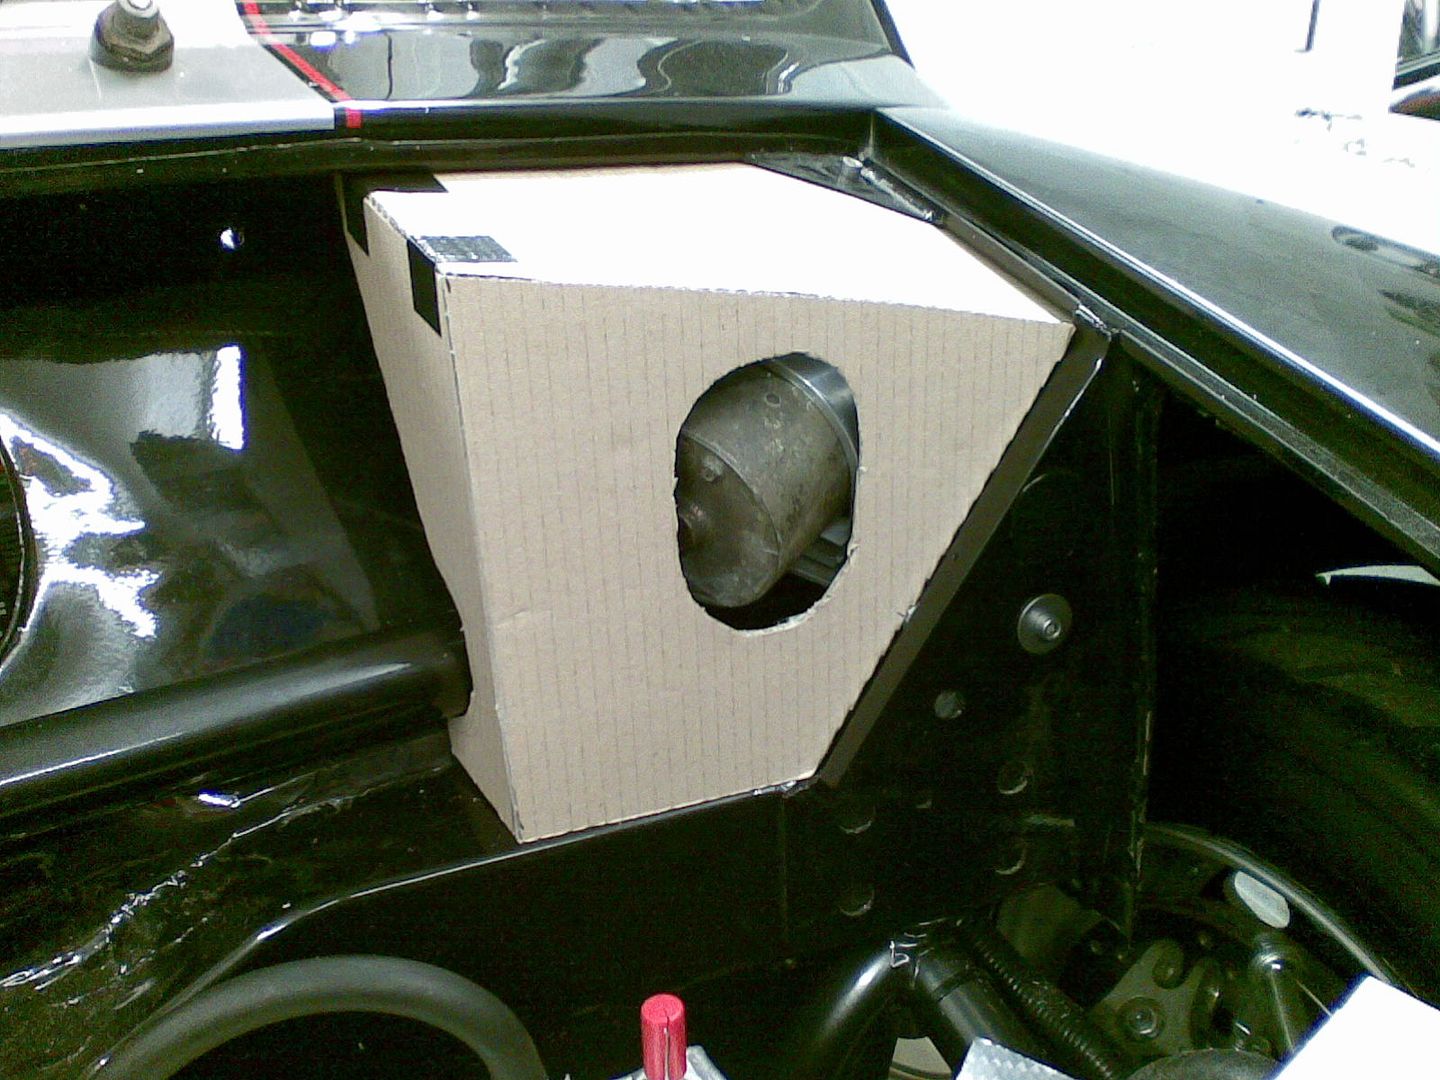
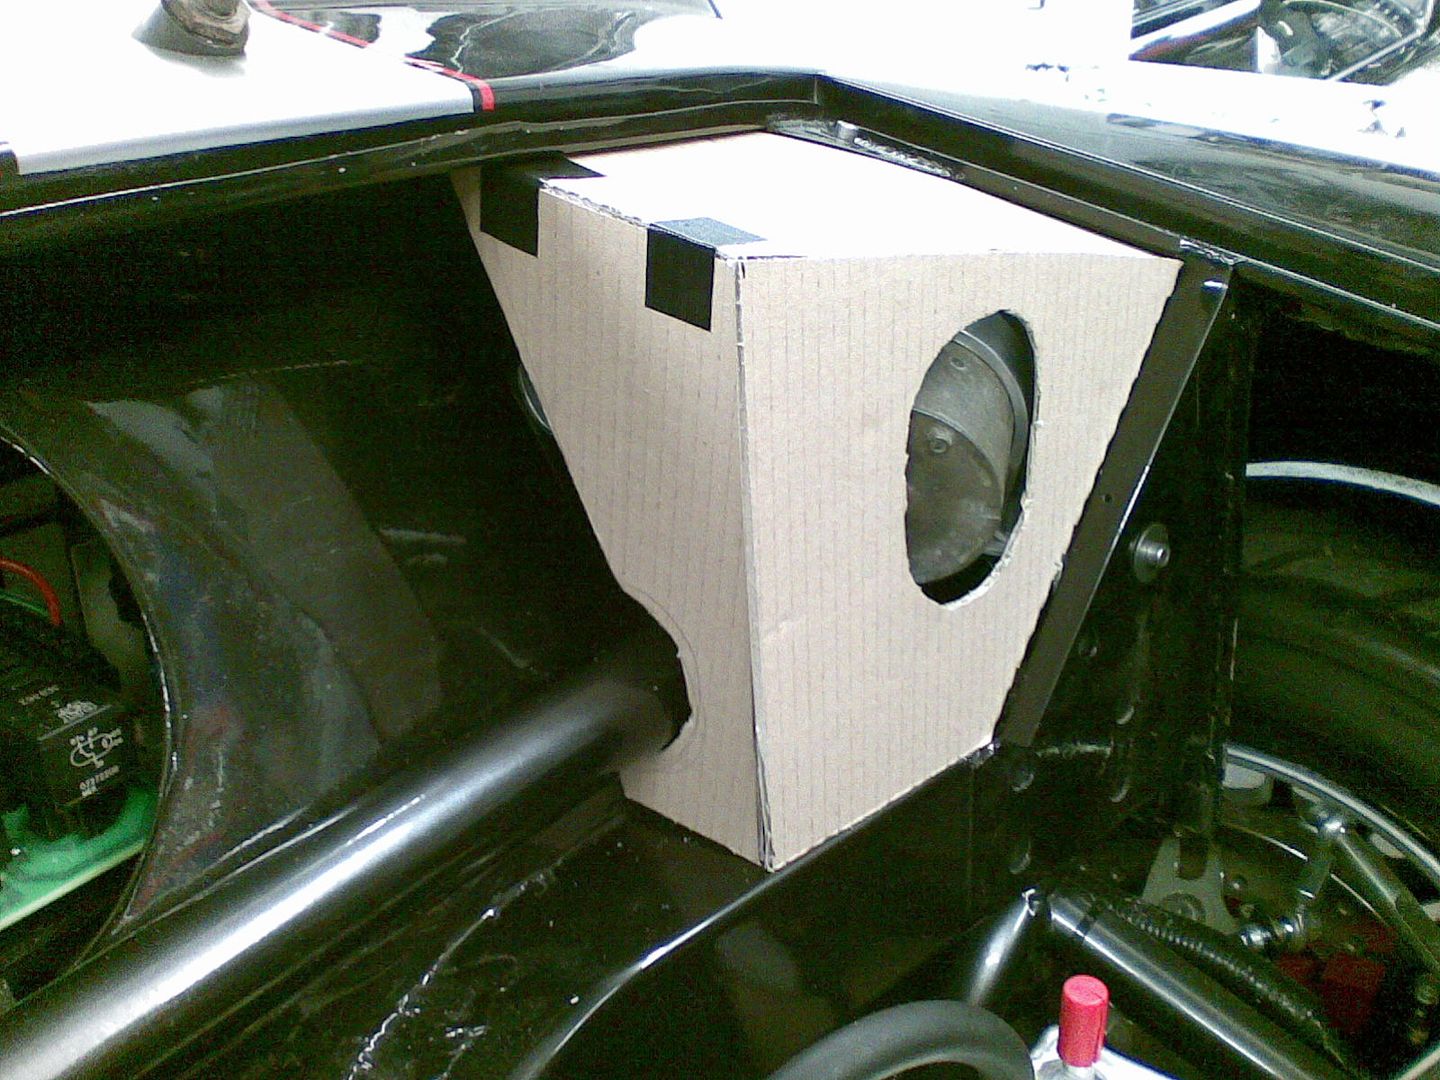
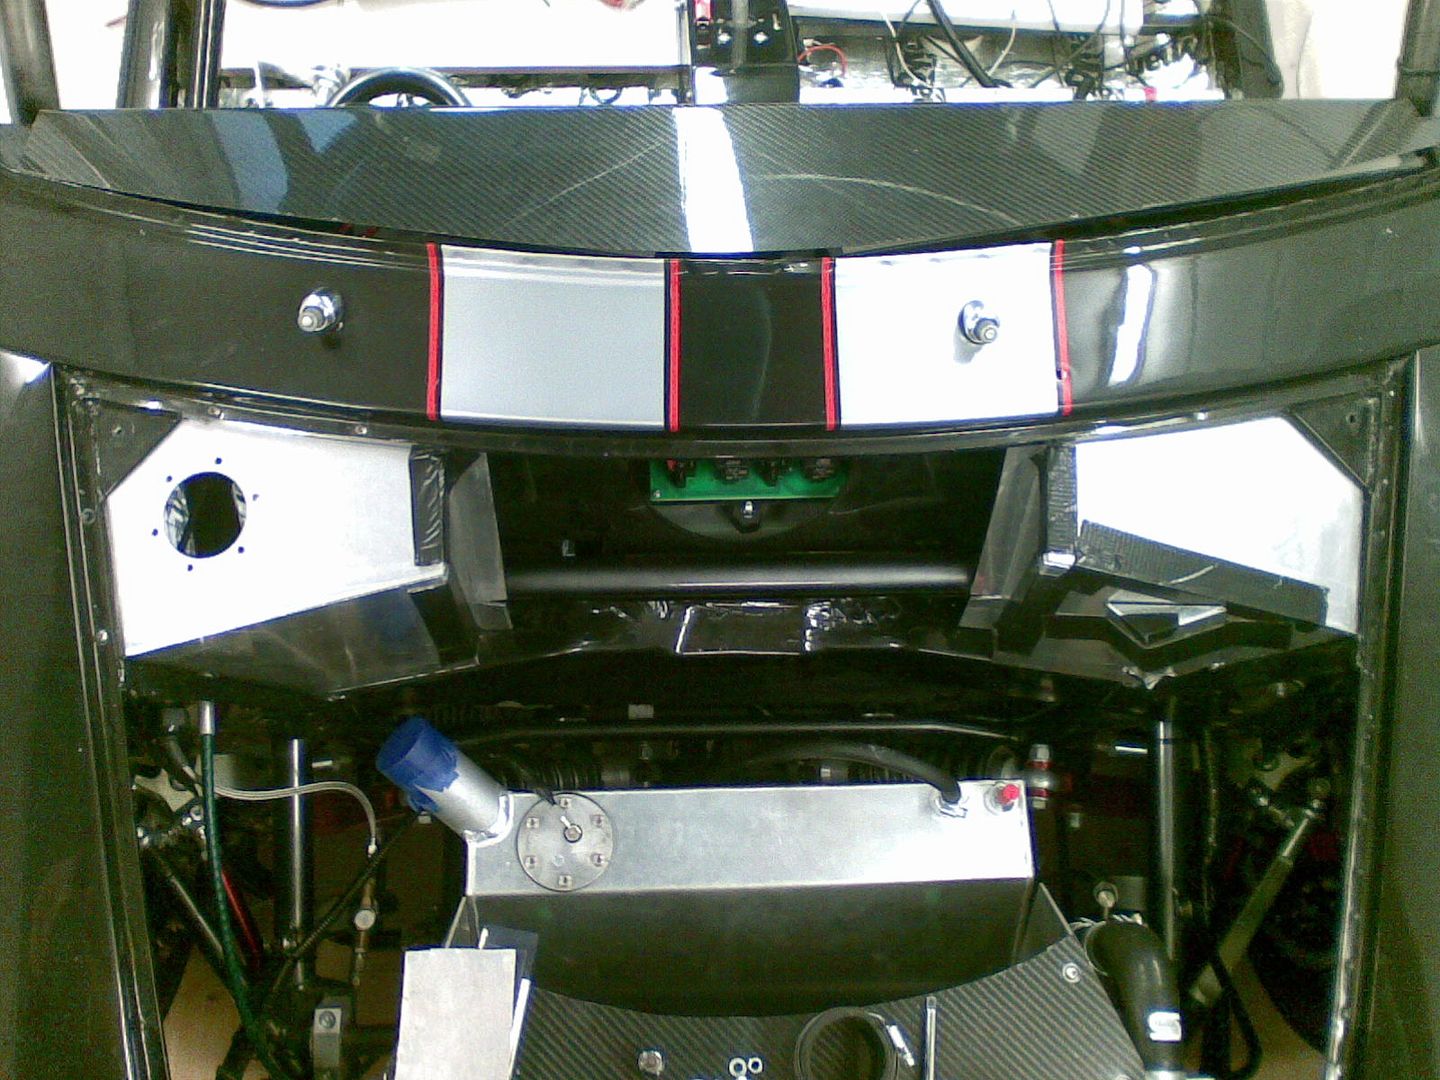
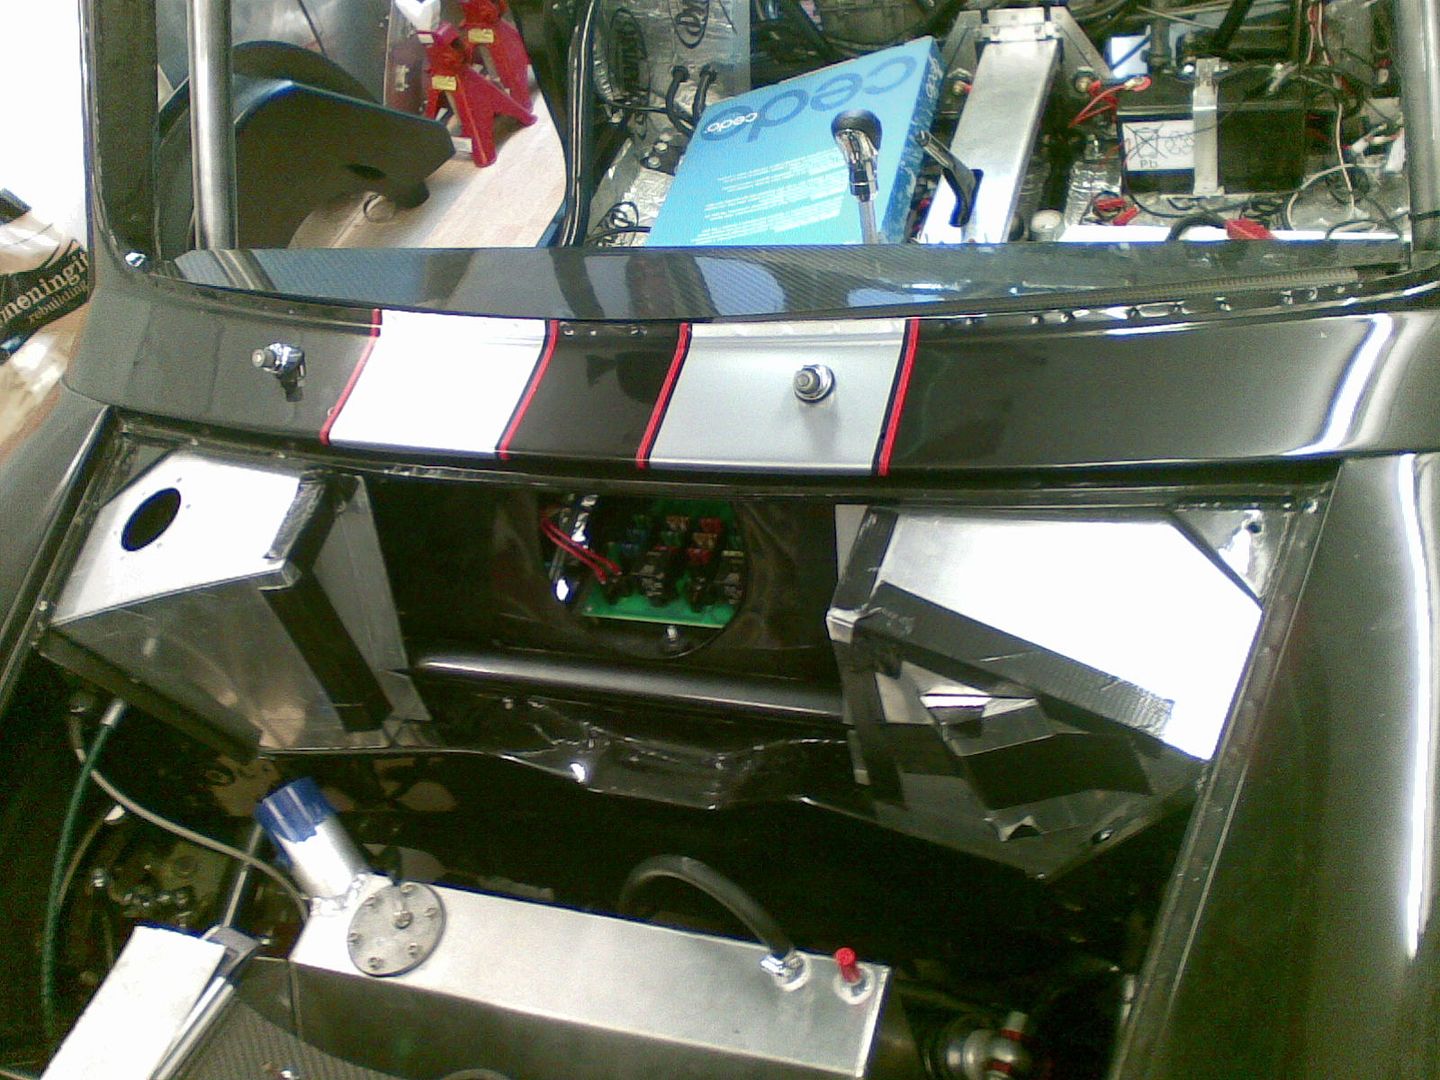
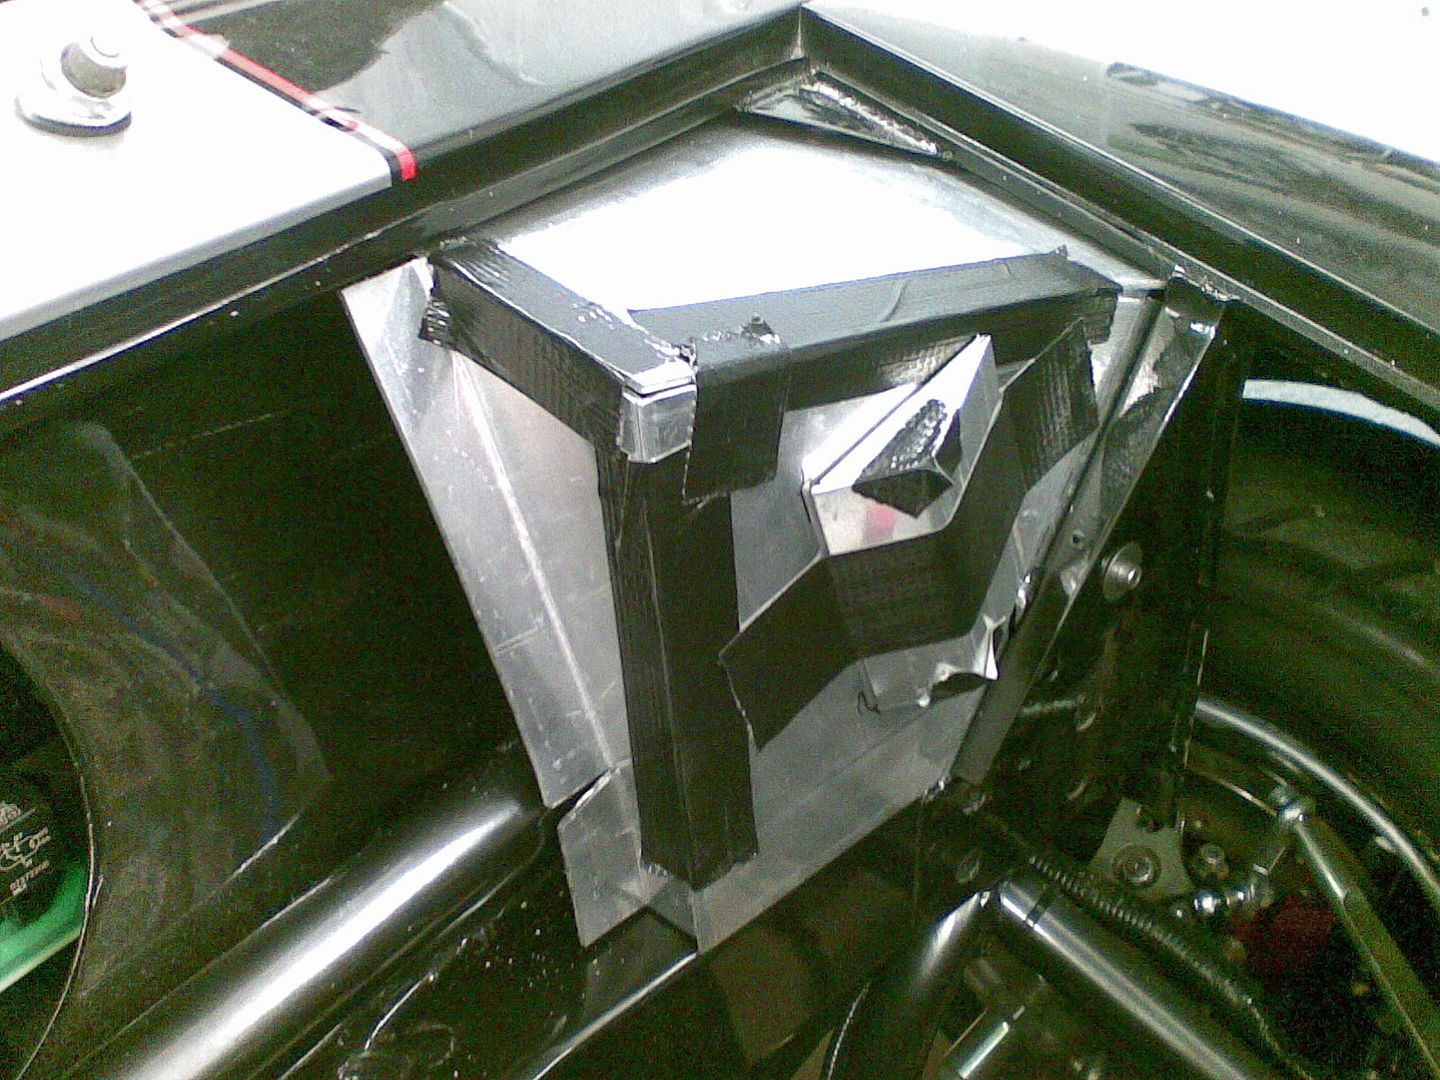
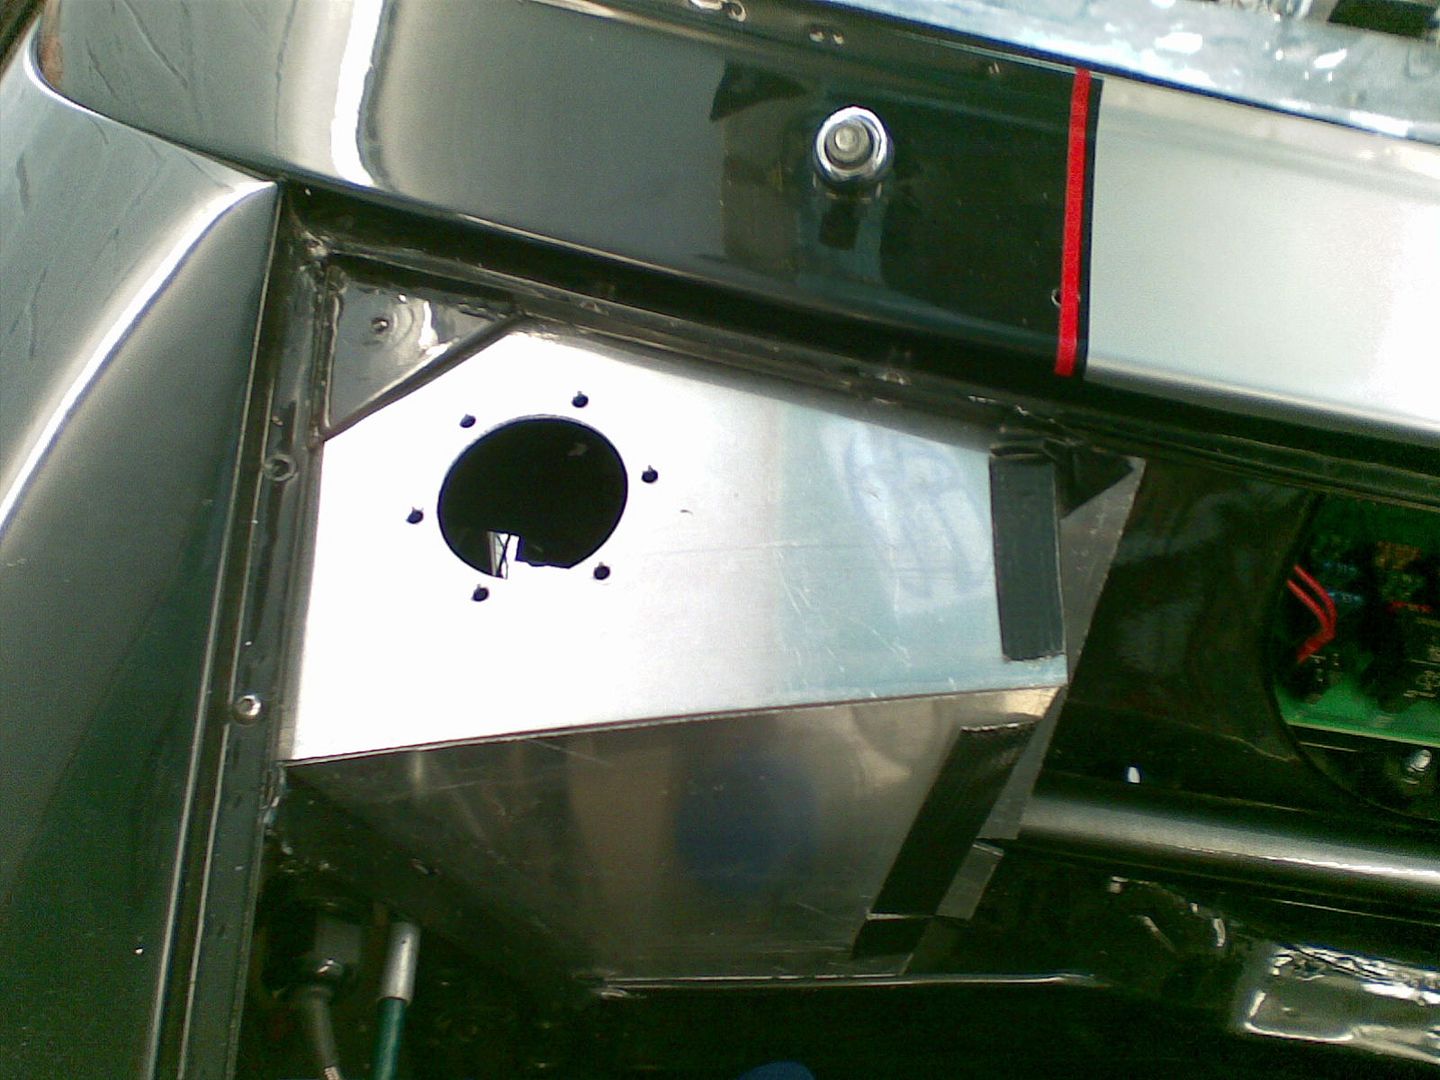
When using a Race Spec frame there is the need to cut through the front bulkhaed to mount onto the front subframe bolts, also as I had the full race spec pedal bias box there is another hole in the front bulkhead for moutning this to the bar that runs along the ffront of the bulkhead. Non of this looked easy to watertight, so fabbing head on I have decided to enclosed the front bulkhead in a 3 peice arrangement. I started out as normal with these things by making a cardboard template and then cutting out the ali plate, I have had to remove the fuel cap plate that I had Z's make and I still have to feed a pipe through to connect back to the fuel tank. I still have to make the centre plate that I will probably get engraved and polished, the two outer parts will be sprayed to match the car.
You will soon be able to see why I made the wiper mount as I did, although I wish I could have got the motor to fit further back thatn it does - too much hassle.
So here is the progres so far:
#255
Posted 05 September 2009 - 05:12 PM
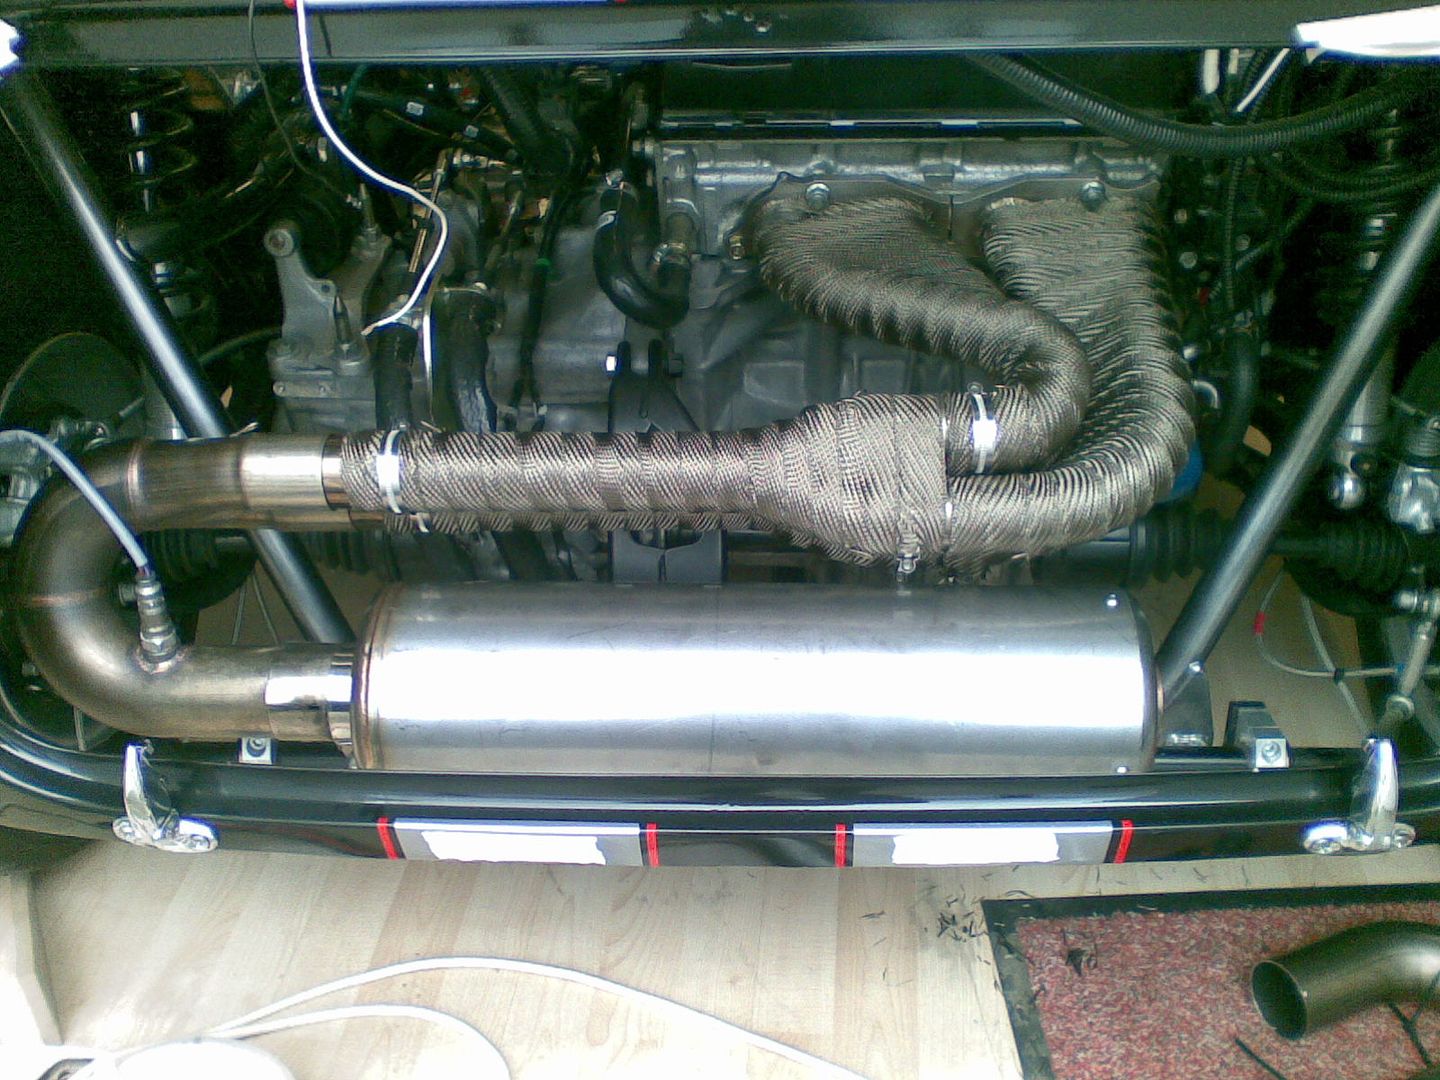
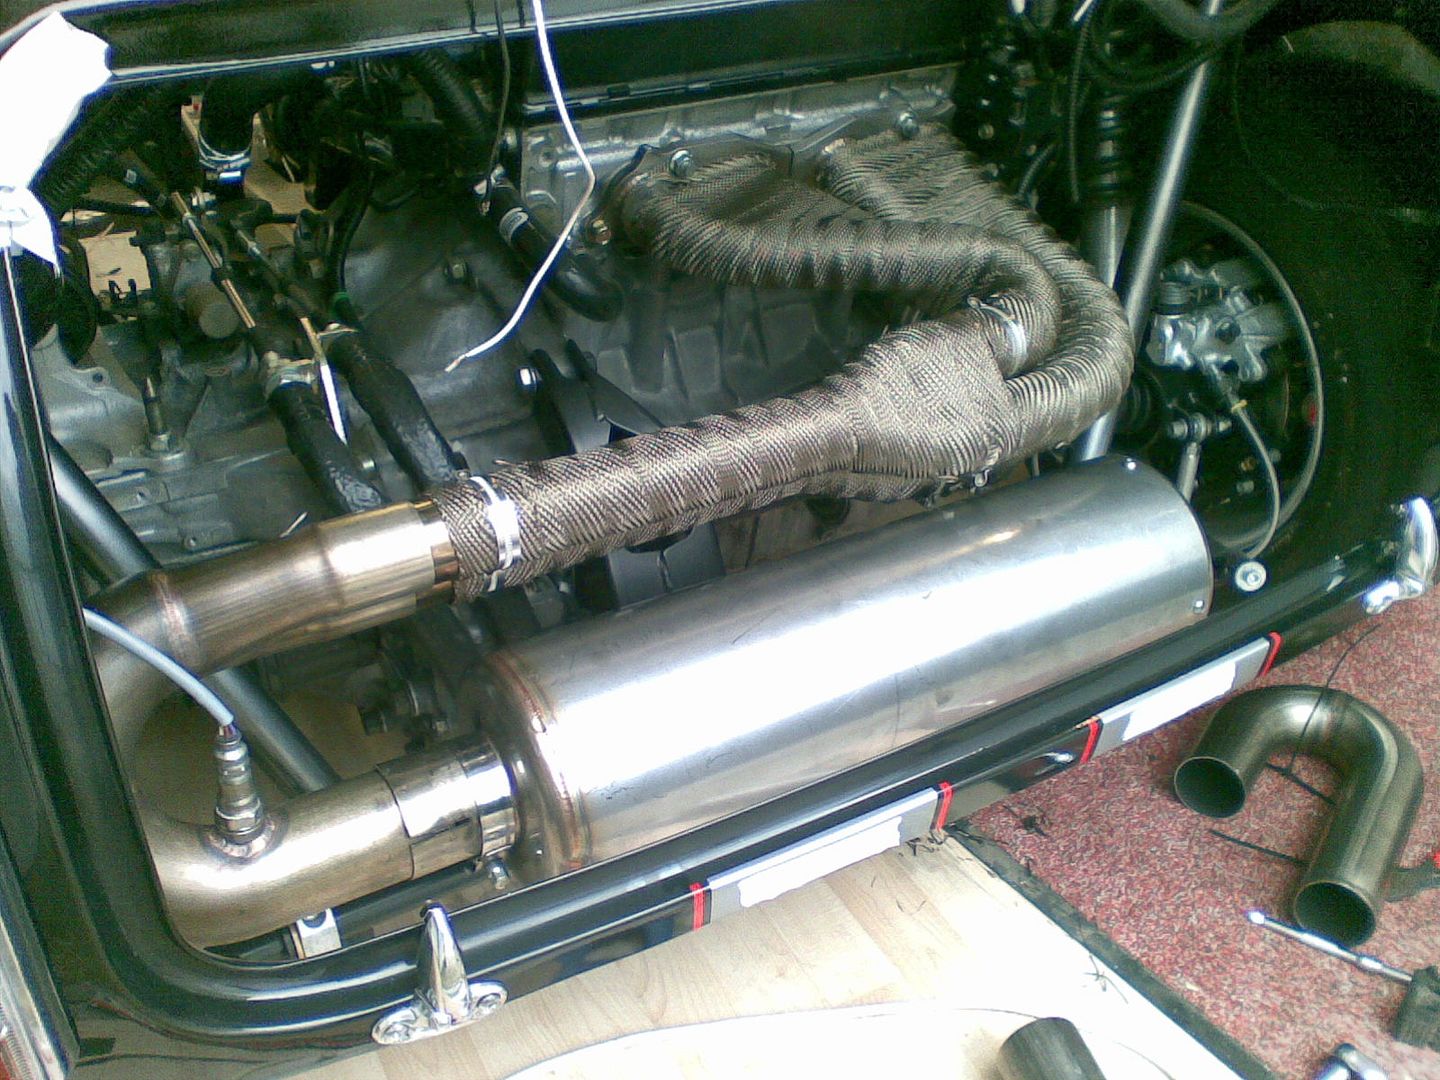
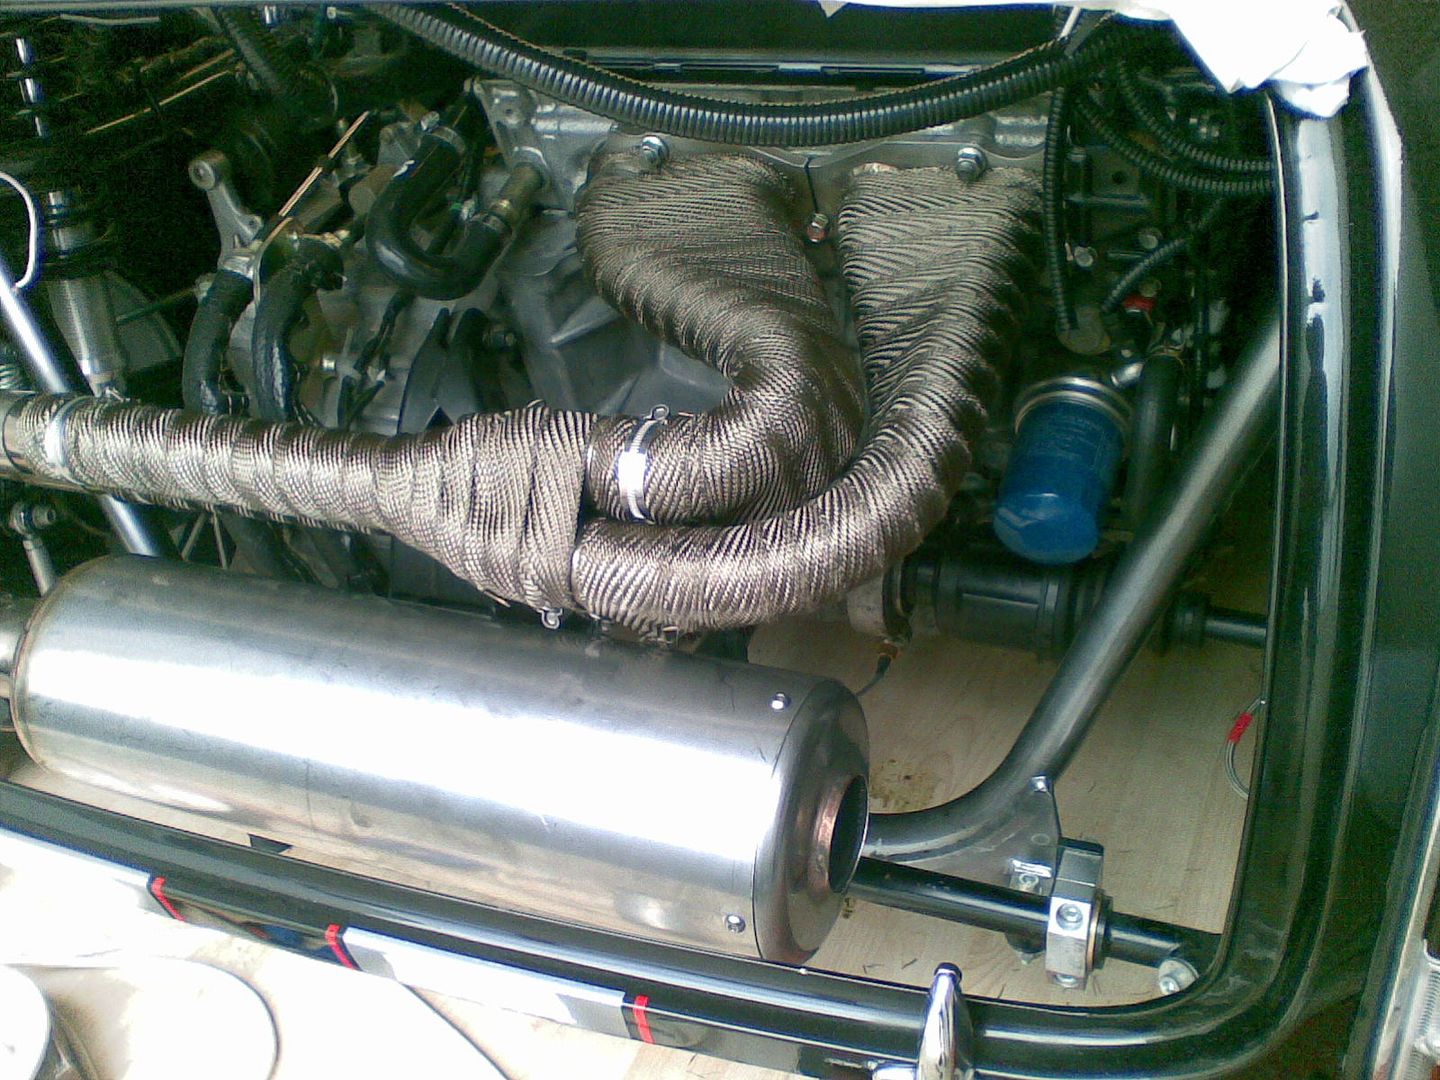
As it says on the tin really - DEI Titanium Exhaust Wrap.
The more eagles eyed will pick up on the fact that the exhaust is in peices, so before anyone says it is being 're-modelled' so that I can fit the diffuser, havent 100% decided how yet, just another hurdle to overcome. Sorry to Simon at Z's I know he spent some time on my exhaust making a nice oval exit for me, I keep seeing other cars with an oval exit and want to have something different.
It does have a nice look to it and as it is made from pulverised lava rock (I always hear Dr Evil saying "melting hot magma" when I say/read that) not fibreglass it is a pleasure to use and you dont have to wet it to wrap it, dont know if it'll smoke like fibreglass yet, wait and see on that. Beleive it or not what you see is a full 50 foot roll used so I have to order some more now -bugger.... more bloody expense.
Before anyone comments on the use of stainless hose clips not stainless cable ties, I have tried both and the hose clips grip a *melon* load better and allow easier adjustment if required. There not the prettiest but they do the job.
1 user(s) are reading this topic
0 members, 1 guests, 0 anonymous users