Hi Folks
Just a quick post to answer a couple of questions that have been asked as some were asked a while ago now.
A little update due when I get some better photo's that involve a bit of welding and some leather !! Settle down!!
Not long now!
Many thanks again for all the kind comments, much appreciated.
Bean: Zo's still not re-started taking driving lessons yet, Gutted !!!
Brams96: The relays are standard 12v automotive 4 pin switching relays. Top tip, buy quality ones. One of mine burnt and stuck on when I flashed the spotlamps. Most embarrasing. I used 1 for each pair of lamps and one for the start button which sits in parallel with the start circuit from the key. Do not try to power the starter motor direct from an accessory relay. If you need more detail, drop me a PM.
chappy: You need to change the whole lot. Column, column brackets, steering lock, cowl, steering wheel, switches, airbag rotary coupler (for the horn).
Shop around for the parts and you can do quite well. I paid £20 for the column, bought the switches, wheel, airbag & coupler from an MGF breaker (much cheaper than mini specialists). You can get a new cowl for £14 ish (I know that now)! The ignition switch is the killer. If you see one complete with the key for less that £50, buy it! Try and get a bit of the loom from the switches down as well, it will make life so much easier. Drop me a PM if you need more detail.
Kind regards and Happy 2011 to all
Steve


Daughter Zoe's Mini - Yeah Right!
Started by
stevede
, May 25 2009 06:48 PM
723 replies to this topic
#497

Austinminimark
-
- Members
-

- 260 posts
Mini Mad
- Location: redditch
- Local Club: redditch
Posted 05 January 2011 - 11:42 PM


hi sorry just wondering if your able to email me the dimensions of the spit. read through you project ten times at least and still cant get enough. made me want to take my turbo mini into the garage. but first i need a spit.
email: [email protected]
thanks
mark
#498
stevede
-
- Members
-
- 1,164 posts
As seen on TV
- Local Club: None
Posted 08 January 2011 - 04:37 PM
Austinminimark: Thank you for the comments. I sold the spit a while back to a TMF member. I also sent out a number of emails with sizes etc on. Unfortunately, due to a computer issue where I had to replace a motherboard, and where my back up email file became corrupt, I no longer have any record of the sizes etc.
If anyone reading this was one of the ones I sent the spit details to, perhaps you would be so kind as to forward them onto Austinminimark. Thanks.
Edit: spelling
If anyone reading this was one of the ones I sent the spit details to, perhaps you would be so kind as to forward them onto Austinminimark. Thanks.
Edit: spelling
Edited by stevede, 08 January 2011 - 04:37 PM.
#499
stevede
-
- Members
-
- 1,164 posts
As seen on TV
- Local Club: None
Posted 09 January 2011 - 12:36 PM
Hi fellow TMF'ers
Just a quick update following on from my last update where I hinted about some leather.
Nothing to get too excited about, but here's another small step forward on the interior.
Some of you may remember a while back when I had an offer of some seats from an MGF. I had been looking for a while and when these came along, I couldn't resist.
They need refurbishment / recovering but I quite like the idea that they came out of the same factory as the mini, albeit a different flavour.
As I got them

Test / dry fit to gauge clearance


Then with an idea of how we were to fit them, off to my pals workshop.
The locking mechanism for the rails is operated by a single linked lever. The original lugs for fitting the MGF are riveted on and easily removed.

Hi-Tech seat work stand

We cut some 6 x 40 flat bar and welded them (Square - not as in the picture) to the rails.


Some flat plate at the front, drilled to match the original hole pattern

Welded to the front bar

Following another test fit and some measuring, a hoop was made for the rear and welded on

Fitting into the car. - Original mounting holes at the front

Through the floor at the rear with some 50 x 50 x 3mm stainless plates underneath

Utilising the original front points mean that if ever I refit std type seats, the fixings are still there
Once I am happy with the comfort of the seats ect, I will find someone to re cover them for me along with a matching rear.
Fully fitted.


As with most larger, (same width but much deeper) non standard seats at the correct setting for me, they are touching the rear bins.
I have an idea to "sculpt" the top of the bin where the seat touches to give adequate clearance without affecting the seat belt mounting or the integrity of the bin to the car.
Any alternative suggestions welcomed.
That's about it for this one. Maybe see a few of you at Bingley
Thanks for looking
Regards
Steve
Just a quick update following on from my last update where I hinted about some leather.
Nothing to get too excited about, but here's another small step forward on the interior.
Some of you may remember a while back when I had an offer of some seats from an MGF. I had been looking for a while and when these came along, I couldn't resist.
They need refurbishment / recovering but I quite like the idea that they came out of the same factory as the mini, albeit a different flavour.
As I got them
Test / dry fit to gauge clearance
Then with an idea of how we were to fit them, off to my pals workshop.
The locking mechanism for the rails is operated by a single linked lever. The original lugs for fitting the MGF are riveted on and easily removed.
Hi-Tech seat work stand
We cut some 6 x 40 flat bar and welded them (Square - not as in the picture) to the rails.
Some flat plate at the front, drilled to match the original hole pattern
Welded to the front bar
Following another test fit and some measuring, a hoop was made for the rear and welded on
Fitting into the car. - Original mounting holes at the front
Through the floor at the rear with some 50 x 50 x 3mm stainless plates underneath
Utilising the original front points mean that if ever I refit std type seats, the fixings are still there
Once I am happy with the comfort of the seats ect, I will find someone to re cover them for me along with a matching rear.
Fully fitted.
As with most larger, (same width but much deeper) non standard seats at the correct setting for me, they are touching the rear bins.
I have an idea to "sculpt" the top of the bin where the seat touches to give adequate clearance without affecting the seat belt mounting or the integrity of the bin to the car.
Any alternative suggestions welcomed.
That's about it for this one. Maybe see a few of you at Bingley
Thanks for looking
Regards
Steve
#500
Brams96
-

- Members
-
- 2,308 posts
Up Into Fourth
- Local Club: Kentish Mini Club
Posted 09 January 2011 - 08:20 PM
Here's one idea. You could cut part of the corner of the bin out reverse it and reweld it. You could do the whole length like I've shown or just the top part, that way you'd be keeping some strength in it (if it is even needed there). Just my 2p worth.
Attached Files
-
 Rear_Bin_Seat_Idea.JPG 13.08K
19 downloads
Rear_Bin_Seat_Idea.JPG 13.08K
19 downloads
Edited by Brams96, 09 January 2011 - 08:21 PM.
#501
stevede
-
- Members
-
- 1,164 posts
As seen on TV
- Local Club: None
Posted 09 January 2011 - 09:15 PM
Here's one idea. You could cut part of the corner of the bin out reverse it and reweld it. You could do the whole length like I've shown or just the top part, that way you'd be keeping some strength in it (if it is even needed there). Just my 2p worth.
Thanks for that. I don't know if there is enough room for that all the way down but I had thought along similar lines at the top part.
My other thought is to simply cut the required shape from the top of the bin at the front corner.
It isn't an immediate problem so I will keep looking at what others have done to get around the issue.
Regards
Steve
#502
shough
-
- Members
-
- 196 posts
Mini Mad
- Location: Surrey
- Local Club: N/A
Posted 16 January 2011 - 02:19 PM
Absolutley incredibly amazingly awe inspiring!!!!
Superb work I am very impressed with this.
Can't wait to see the interior completed.
Keep the posts coming.
Superb work I am very impressed with this.
Can't wait to see the interior completed.
Keep the posts coming.
#503
Danny_California
-

- Members
-
- 1,263 posts
One Carb Or Two?
- Location: Warwick
Posted 16 January 2011 - 11:16 PM
Great way of mounting the seats steve, I look forward to seeing them covered! Looks like the driver of the car they came out of had a lot of lonely drives, judging from the difference in wear! lol
#504
stevede
-
- Members
-
- 1,164 posts
As seen on TV
- Local Club: None
Posted 06 February 2011 - 05:04 PM
Hi Folks, thought it was time for a little update.
Not too much been happening as work seems to have eaten most of my time, but still a few ideas buzzing around and bits here & there getting done.
The real good news is that the mini is getting lots of use. I'm using it a couple of days a week if I am in the office and it's developing quite a following now, with colleagues asking where it is if I use the Passat! Also took a trip to Bingley last weekend and other than using a bit of oil, never missed a beat.
Thanks for the kind comments once again,
Shough: Thank you, I can't wait until the interior is complete. I have had a couple of quotes for the seats to be recovered now and to get what I want, I need to do a little more saving.
Danny_California: Yes, I see what you mean about the seats but then mostly, there's only me in the mini as well at the moment. Very happy with them though, very comfy.
So, Before Christmas I put an order in with Chris at retro for a dash pannel and as usual, wanted something a little different. Chris gave me a couple of options & the choice was made.

I also wanted to add some extra soundproofing and after a few searches, the consensus was Screwfix Bitumen Flashing.
Before

Stripped out

3 layers of flashing, cut moulded & stuck on. (I didn't have one to hand, but when I do bits again I reckon a small wallpaper seam roller is the tool of choice)

Some more foam packing (a cut up sleeping roll)

And then the fun started...........................
Could I get them to fit properly? No.
I think the problem is that I have put MDF shelves in, coupled with the layers of flashing tape it meant that the cards woudn't go back as far as required at the bottom, to get the top in without bending the backing. Plus, upholstery is not one of my top skills. Still a little perseverance, some trimming and I made an okay job of it.
Looks better than the picture suggests as it's had a little more fettling now.

Some more foam on the shelf stuck on with spray glue

And then covered with some, I think it's accoustic cloth of some sort, bought from Stanford last year.

On with the other side and having learnt a little, this one went in better

A piece of felt on the centre and job done

I can't believe the difference in noise with all that in place. It isn't quiet by any stretch as I still have no sound proofing on the floor and no carpet, but very noticeable all the same.
I'm not 100% hapy with the dash cards, no doubt down to my fitting skills, so I may be tempted to get some blanks tailored, confirm the fit exactly and then get them re-covered.
That's pretty much it for this update but I do have another one in the pipeline which may interest you.
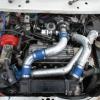
I bought and fitted a TIM tacho a while back as I couldn't bring myself to pay nearly £100 for a Smiths period one but now, the TIM one looks so out of place in my opinion.
Whilst at Bingley, I chatted to a trader with an immaculate one for sale (RVI) and asked if it would work with the Accuspark module I have in the distributor. Yes came the reply. I had already told my pal to kick me if I came close to spending £100 on a unit, he did & we walked away.
Upstairs, I spotted another (RVI again) and with the other traders words still in my mind, "how much"? £30. Tried for £25 but no joy, Sold!
Tried to wire it yesterday without sucess and after numerous searches, the general opinion is that RVI will not work with the Accuspark module. Either that or I have a faulty unit, or both.
So there they are sat side by side, with me trawling the net, ebay & others thinking I should have spent the money at the beginning..........

When I came across an old paper written by non other than DK Lawson.
Well that was it. Watch out Blue Peter, here I come again! And if that hasn't given you a clue, you'll just have to wait, as I'm not telling until a minor ebay purchase arrives to finish it off.
Thanks for stopping by
Kind regards
Steve
Not too much been happening as work seems to have eaten most of my time, but still a few ideas buzzing around and bits here & there getting done.
The real good news is that the mini is getting lots of use. I'm using it a couple of days a week if I am in the office and it's developing quite a following now, with colleagues asking where it is if I use the Passat! Also took a trip to Bingley last weekend and other than using a bit of oil, never missed a beat.
Thanks for the kind comments once again,
Shough: Thank you, I can't wait until the interior is complete. I have had a couple of quotes for the seats to be recovered now and to get what I want, I need to do a little more saving.
Danny_California: Yes, I see what you mean about the seats but then mostly, there's only me in the mini as well at the moment. Very happy with them though, very comfy.
So, Before Christmas I put an order in with Chris at retro for a dash pannel and as usual, wanted something a little different. Chris gave me a couple of options & the choice was made.
I also wanted to add some extra soundproofing and after a few searches, the consensus was Screwfix Bitumen Flashing.
Before
Stripped out
3 layers of flashing, cut moulded & stuck on. (I didn't have one to hand, but when I do bits again I reckon a small wallpaper seam roller is the tool of choice)
Some more foam packing (a cut up sleeping roll)
And then the fun started...........................
Could I get them to fit properly? No.
I think the problem is that I have put MDF shelves in, coupled with the layers of flashing tape it meant that the cards woudn't go back as far as required at the bottom, to get the top in without bending the backing. Plus, upholstery is not one of my top skills. Still a little perseverance, some trimming and I made an okay job of it.
Looks better than the picture suggests as it's had a little more fettling now.
Some more foam on the shelf stuck on with spray glue
And then covered with some, I think it's accoustic cloth of some sort, bought from Stanford last year.
On with the other side and having learnt a little, this one went in better
A piece of felt on the centre and job done
I can't believe the difference in noise with all that in place. It isn't quiet by any stretch as I still have no sound proofing on the floor and no carpet, but very noticeable all the same.
I'm not 100% hapy with the dash cards, no doubt down to my fitting skills, so I may be tempted to get some blanks tailored, confirm the fit exactly and then get them re-covered.
That's pretty much it for this update but I do have another one in the pipeline which may interest you.
I bought and fitted a TIM tacho a while back as I couldn't bring myself to pay nearly £100 for a Smiths period one but now, the TIM one looks so out of place in my opinion.
Whilst at Bingley, I chatted to a trader with an immaculate one for sale (RVI) and asked if it would work with the Accuspark module I have in the distributor. Yes came the reply. I had already told my pal to kick me if I came close to spending £100 on a unit, he did & we walked away.
Upstairs, I spotted another (RVI again) and with the other traders words still in my mind, "how much"? £30. Tried for £25 but no joy, Sold!
Tried to wire it yesterday without sucess and after numerous searches, the general opinion is that RVI will not work with the Accuspark module. Either that or I have a faulty unit, or both.
So there they are sat side by side, with me trawling the net, ebay & others thinking I should have spent the money at the beginning..........
When I came across an old paper written by non other than DK Lawson.
Well that was it. Watch out Blue Peter, here I come again! And if that hasn't given you a clue, you'll just have to wait, as I'm not telling until a minor ebay purchase arrives to finish it off.
Thanks for stopping by
Kind regards
Steve
#505
GreaseMonkey
-

- Members
-
- 3,663 posts
Has Ratchet, Will Make Noises
Posted 06 February 2011 - 05:11 PM
You need an RVC one 
#506
Beej123
-
- Banned
-
- 1,184 posts
One Carb Or Two?
- Location: Stourbridge
- Local Club: Splinters Mini Club
Posted 06 February 2011 - 05:19 PM
Read this in installments over about a month, cannot believe the patience and attention to detail you have, amazing project and can't wait to see the finished product!
James
James
#507
stevede
-
- Members
-
- 1,164 posts
As seen on TV
- Local Club: None
Posted 06 February 2011 - 05:23 PM
You need an RVC one
Not anymore I don't

#508
Resist
-

- Noobies
-
- 51 posts
Stage One Kit Fitted
Posted 07 February 2011 - 12:45 AM
I read this whole topic from start to finish a few weeks ago. The car looks absolutely fantastic!
Funny story aswell!
When I was at Bingley on the 30th Jan Me and my dad decided to take a walk around the car park where all the Mini's were parked and have a look around.
When we were walking round, My Dad said "That one looks Nice, I like the Spot lights at the front". I looked over and said "Oh yeah, I've seen one similar to that on the Mini Forum" and then realised it was your car!
Looks Great Mate, can't wait to see it fully finished!
#509
stevede
-
- Members
-
- 1,164 posts
As seen on TV
- Local Club: None
Posted 09 February 2011 - 09:21 PM
Thanks for the kind comments guys. Much appreciated.
Remember I said it was Blue Peter time again and that I'd update when a certain ebay purchase arrived. Well, it wasn't a washing up bottle, sticky back plastic or a pair of Val's old knickers but..............

So what ??
The original picture and the comment about an idea inspired by DK Lawson?
Here we go.
Strip the Smiths unit as nothing really to loose
Could be a goer

Face & movement out of the TIM unit. Had this apart before to upgrade the lighting inside
Re drilled the Smiths face using the TIM one as a template. Reckon it could fit quite nicely.

Movement a little bit deep though. I need a plan

55mm hole saw through the back. Measure once, twice & again and then out with the hacksaw.
No going back now.

Sealed in place with epoxy glue

Whilst the glue was going off, More led's to make it nice and bright

a little bit of playing with the trim pot as the gauges weren't exact in their range on the markings.

Once dry, quick test to check it all fits


A coat of paint, inside & out


A new loom piece made up

Bolted in using the original TIM fixing points

Finishing touch, chrome centre piece

Trim & new glass in place

And finally, A chrome pod to put it in

Well chuffed with the result. Especially as other than the chrome ring & glass (few quid) it didn't cost me a penny to convert
Thanks for looking.
More soon
Regards
Steve
Remember I said it was Blue Peter time again and that I'd update when a certain ebay purchase arrived. Well, it wasn't a washing up bottle, sticky back plastic or a pair of Val's old knickers but..............
So what ??
The original picture and the comment about an idea inspired by DK Lawson?
Here we go.
Strip the Smiths unit as nothing really to loose
Could be a goer
Face & movement out of the TIM unit. Had this apart before to upgrade the lighting inside
Re drilled the Smiths face using the TIM one as a template. Reckon it could fit quite nicely.
Movement a little bit deep though. I need a plan
55mm hole saw through the back. Measure once, twice & again and then out with the hacksaw.
No going back now.
Sealed in place with epoxy glue
Whilst the glue was going off, More led's to make it nice and bright
a little bit of playing with the trim pot as the gauges weren't exact in their range on the markings.
Once dry, quick test to check it all fits
A coat of paint, inside & out
A new loom piece made up
Bolted in using the original TIM fixing points
Finishing touch, chrome centre piece
Trim & new glass in place
And finally, A chrome pod to put it in
Well chuffed with the result. Especially as other than the chrome ring & glass (few quid) it didn't cost me a penny to convert
Thanks for looking.
More soon
Regards
Steve
#510
GreaseMonkey
-
- Members
-
- 3,663 posts
Has Ratchet, Will Make Noises
Posted 09 February 2011 - 09:32 PM
Wow that was really good!
You've earned yourself one of these

You've earned yourself one of these


1 user(s) are reading this topic
0 members, 1 guests, 0 anonymous users


