Jump to content


Photo
- - - - -

1275 Gt Resto. Better Than What We Usually Start With!


  • Please log in to reply
79 replies to this topic

#1 pickupmad87

pickupmad87

    Previously adampadmore

  • Members
  • PipPipPipPip
  • 273 posts
  • Location: woking

Posted 25 August 2013 - 07:05 PM


Alrite Guys. Time for a new Project!! I know we havent finished the pickup yet but
this came up at a price that we couldnt refuse!!!
 
so lets begin. as the title says its alot better than what we usually start off with 
which is a bonus.
 
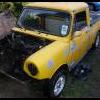
heres the beast.
IMG_20130816_184302_zps79700356.jpg
 
and heres some pics of the areas that need attention.
 
Front floorpan needs repairing, slight repair on the inner wing and slight repair on the inner sill at the front drivers side.
20130825_130602_zps97a189d1.jpg
 
Very slight repairs to the wheel arch and the rear valence closing panel on the drivers side.
20130825_130622_zps2f952d48.jpg
 
Rear valence needs panel beating straight.
20130825_130634_zps9e19c8eb.jpg
 
Wheel arch passenger side needs slight reapir.
20130825_130650_zpsa2f6b681.jpg
 
Floorpan repair, inner sill and slight repair to innerwing needed.
20130825_130712_zps17a4151f.jpg
 
And we need to get rid of this hideous thing!!! More on that next!
20130825_130721_zps71e9b470.jpg
 
seeing as we have got a "spare" mini in the back lane, we have decided to do a roof swap.
 
so alot of carefull measuring is in need. all measurements and points of measuring have been marked off with marker pen.
20130825_132445_zps5dcc01b3.jpg
 
20130825_132438_zpsef992828.jpg
 
with this done we welded in some bracings to keep the door gaps and to stop the shell from twisting.
20130825_130729_zpsbae70b63.jpg
 
with the bracing in and checking of all mesurements we transfered the measurements onto the spare mini! with this done
it was time to get the spotweld drill and grinder out!
 
 
off with its head!!
20130825_150611_1_zps05be8db4.jpg
 
20130825_150304_zpsba04022d.jpg
 
20130825_150411_zpsd381635f.jpg
 
to maintain strength when welded back together all he joints are staggered by 100mm.
 
20130825_154319_zpsd9216c8a.jpg
 
with all the cuts finished, a very liberal coat of weld through primer was applied to all the surfaces.
20130825_155615_zps20a11393.jpg
 
with all of this completed it was time to do the same to the "spare" mini.
 
20130825_155517_zps39dfcde3.jpg
 
20130825_151834_zpscd058840.jpg
 
and again weld through primer applied to all the internal surfaces.
 
20130825_155507_zpsc7345760.jpg
 
dont worry about the "spare" mini were keeping the rest of that instock for my van project when i get hold of one!
 
now it was time to mate the two together!  
 
20130825_163233_zps7f1d0111.jpg
 
we went round measuring off our datums we had set and tacked the two together. it got a bit late in the day by 
the time we got to this point, so we will finish welding it tomrrow.
 
before we knocked off we thought we would take the oversill that had been put on, on the drivers side.
luckily it had been put on so badly it was easy to take off! look theres the original sill. this winds me up something kronic!
 
20130825_170943_zps7695fd26.jpg
 
and this is why you dont use the dredded over sills.
20130825_170958_zps764ffe8e.jpg
 
look at all the moisture they hold in!!
 
thats it for today, should be updating more tommorrow.


#2 chrisj

chrisj

    Mini Mad

  • Members
  • PipPipPipPip
  • 283 posts
  • Location: Leicestershire

Posted 25 August 2013 - 08:06 PM

Fantastic start, looks like a reasonably good shell.

Will be following closely.

#3 Ben_O

Ben_O

    Mill Road Garage

  • Paint Doctor
  • PipPipPipPipPipPipPipPipPipPip
  • 9,785 posts
  • Location: Isle of Wight

Posted 26 August 2013 - 05:29 AM

Cant believe you have started another project! LOL

Looks like a good one. It must be so nice having "spare" mini's laying about for spares!!

Good luck with this. I will be watching!


Cheers


Ben


#4 pickupmad87

pickupmad87

    Previously adampadmore

  • Members
  • PipPipPipPip
  • 273 posts
  • Location: woking

Posted 26 August 2013 - 07:28 PM

as promised a bit of an update!
 
basicly we have finished welding the roof back on to the car.
 
IMG-20130826-WA0032_zps1a481592.jpg
 
IMG-20130826-WA0031_zps50779d74.jpg
 
we then ground them all flat and sprayed a quick coat of etch primer on them.
 
IMG-20130826-WA0030_zps1139f3b6.jpg
 
we then had a look at the remains from under neath the "bover" sill!
 
apparently if you shove loads of wire mesh into a hole and slap aload 
of filler over it. this is just as good as welding the hole through the 
door post and through the sill up properly.
 
IMG-20130826-WA0035_zps41629c63.jpg
 
IMG-20130826-WA0036_zps26844bab.jpg
 
IMG-20130826-WA0034_zps9f8c62fc.jpg
 
thats it for today, hopefully more tomorrow.


#5 pickupmad87

pickupmad87

    Previously adampadmore

  • Members
  • PipPipPipPip
  • 273 posts
  • Location: woking

Posted 27 August 2013 - 08:52 PM

Small update..
 
while I was at work today my dad cracked on with the GT.
 
He started off by cutting the rust out of the drivers side a panel, sill, floorpan nd bottom of the inner wing.
 
IMG-20130827-WA0005_zps37d5b9b1.jpg
 
IMG-20130827-WA0011_zps4e1b17b2.jpg
 
IMG-20130827-WA0008_zps44f94cbe.jpg
 
Floorpan welded in
 
IMG-20130827-WA0003_zps4eeb56ea.jpg
 
IMG-20130827-WA0020_zps599e9053.jpg
 
IMG-20130827-WA0012_zpsaae1044b.jpg
 
Sill welded on
 
IMG-20130827-WA0021_zps049b3c6d.jpg
 
door step repair piece made and started to tack in.
 
20130827_165734_zpsfbcc6102.jpg
 
20130827_170234_zps8586ec24.jpg
 
IMG-20130827-WA0015_zpsa6128f63.jpg
 
thats it for tonight.


#6 pickupmad87

pickupmad87

    Previously adampadmore

  • Members
  • PipPipPipPip
  • 273 posts
  • Location: woking

Posted 30 August 2013 - 08:49 PM

Evening all!
 
started off by cutting the remains of the old passeener side floor pan out and the rot in the inner wing.
 
20130829_143003_zps28a864a0.jpg
 
Then welded the floor pan in.
 
20130829_150310_zpsc009571e.jpg
 
IMG-20130830-WA0020_zpsab319324.jpg
 
then sorted the repair on the inner wing.
 
IMG-20130829-WA0004_zps0a5334a1.jpg
 
IMG-20130829-WA0004_zps0a5334a1.jpg
 
After that primed the inner sill.
 
20130829_143716_zps257f0e5c.jpg
 
then welded it on.
 
IMG-20130830-WA0012_zps0fe26289.jpg
 
then after making the repair panel repaired the bottom portion of the a panel.
 
IMG-20130830-WA0011_zpsed946f86.jpg
 
IMG-20130829-WA0004_zps0a5334a1.jpg
 
A little help from the cats.
 
IMG-20130830-WA0027_zps0702f6c7.jpg
 
IMG-20130830-WA0022_zps77d5dcdb.jpg
 
then lastly repaired a section on the passenger side wheel arch.
 
IMG-20130830-WA0021_zps17b10877.jpg
 
thats it for tonight more tomorrrow.


#7 72clubman

72clubman

    Speeding Along Now

  • Members
  • PipPipPipPipPip
  • 443 posts
  • Location: Leicestershire
  • Local Club: Charnwood Minis

Posted 30 August 2013 - 10:36 PM

Very impressive, you're a braver man than I, wouldn't dream of taking off the roof! Can't beat a good GT! 


#8 ZEBERDEE

ZEBERDEE

    Mini Mad

  • Noobies
  • PipPipPipPip
  • 110 posts
  • Location: Surrey
  • Local Club: Box Hill Mini Club

Posted 31 August 2013 - 12:09 AM

Looking nice mate keep up the good work


Edited by ZEBERDEE, 31 August 2013 - 12:09 AM.


#9 Ben_O

Ben_O

    Mill Road Garage

  • Paint Doctor
  • PipPipPipPipPipPipPipPipPipPip
  • 9,785 posts
  • Location: Isle of Wight

Posted 31 August 2013 - 12:40 AM

This is amazing!

The speed you work at is so impressive. You do more in a day than most do in 2 months!! me included!!

Its looking great. No doubt it will be done and on the road in no time!


Ben


#10 MrBounce

MrBounce

    Up Into Fourth

  • TMF+ Member
  • PipPipPipPipPipPipPipPipPip
  • 2,597 posts
  • Location: The Manroom in Ipswich

Posted 31 August 2013 - 03:06 PM

This is completely brilliant. Looks like my old GT (a Pageant Blue '79). If you don't mind me asking, what are the first 3 letters on the number plate?


#11 minimikej

minimikej

    Speeding Along Now

  • Members
  • PipPipPipPipPip
  • 347 posts
  • Location: Derbyshire

Posted 31 August 2013 - 04:06 PM

Proper repair work going on here, looks very good!


#12 pickupmad87

pickupmad87

    Previously adampadmore

  • Members
  • PipPipPipPip
  • 273 posts
  • Location: woking

Posted 01 September 2013 - 01:22 PM

Mr bounce I dont know what the numberbplate is at mo waiting for the log book to come bk from dvla!

#13 mc1

mc1

    Passed Test

  • Noobies
  • PipPip
  • 26 posts

Posted 02 September 2013 - 08:06 AM

Great work! Keep it up :-)

#14 pickupmad87

pickupmad87

    Previously adampadmore

  • Members
  • PipPipPipPip
  • 273 posts
  • Location: woking

Posted 02 September 2013 - 08:56 PM

alrite guys,
 
little update for the past couple of days.
 
started off by removing the rear vallence, we had thought of saving this but with the rust that was under the
 paint we decided it would be a much better job if we just replaced it
 
drilled out all the spotwelds.
20130831_152537_zps20163248.jpg
 
removed the vallence.
20130831_162221_zps6c7709d0.jpg
 
we got new vallence closing panels but didnt get the ones that go back to the vallence. so one of them needed
a slight repair, the other just needed rust treating.
 
20130831_160443_zps195ef236.jpg
 
20130831_160450_zps5df19a9c.jpg
 
all welded in.
 
20130831_161412_zps69b6e810.jpg
 
this is what we use to convert the rust.
 
20130831_115107_zpsdd4a17e8.jpg
 
after this there was a small repair needed to the drivers side wheel arch and boot floor
 
IMG-20130901-WA0002_zps605b1736.jpg
 
once the repairs were made, the rear valence was trial fitted to get the position for the closing panels.
 
IMG-20130901-WA0012_zps76338941.jpg
 
welded in.
 
IMG-20130901-WA0007_zpsdd04050e.jpg
 
20130831_165134_zpsedda5be0.jpg
 
20130831_165134_zpsedda5be0.jpg
 
vallence all welded on.
 
20130901_144658_zps892cba68.jpg
 
with all the welding finished in the rear end, it wa time to stonechip the underneath.
 
IMG-20130902-WA0015_zpsa495a12a.jpg
 
IMG-20130902-WA0010_zps87bddb9a.jpg
 
IMG-20130902-WA0009_zpsd1e904c7.jpg
 
with that done, we looked at at repairing the top of the drivers side wing.
 
IMG-20130901-WA0010_zpsb3d72bcc.jpg
 
all cut out.
 
IMG-20130902-WA0004_zpsd3ef6331.jpg
 
repair panel made.
 
IMG-20130902-WA0006_zps78348875.jpg
 
all welded in with the slight scuttle repair that was needed.
 
20130902_173229_zpsc8467e7e.jpg
 
thats it for tonight, more tomorrow. 


#15 MrBounce

MrBounce

    Up Into Fourth

  • TMF+ Member
  • PipPipPipPipPipPipPipPipPip
  • 2,597 posts
  • Location: The Manroom in Ipswich

Posted 03 September 2013 - 12:57 PM

You really don't hang about do you?! On top of that both yours & your Dad's work is utterly awesome. Well done!


Are you going to keep it Pageant Blue?


1 user(s) are reading this topic

0 members, 1 guests, 0 anonymous users