
Can You Help Identify These Wiring-Loom Connections?
#1

Posted 27 November 2011 - 05:37 PM
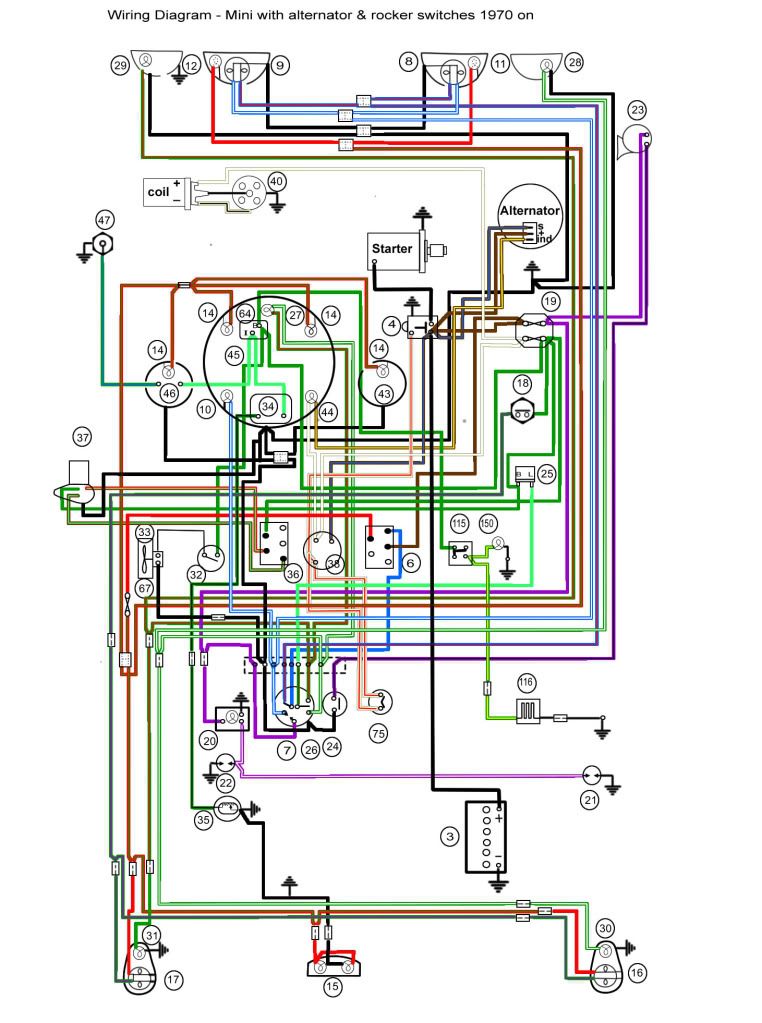
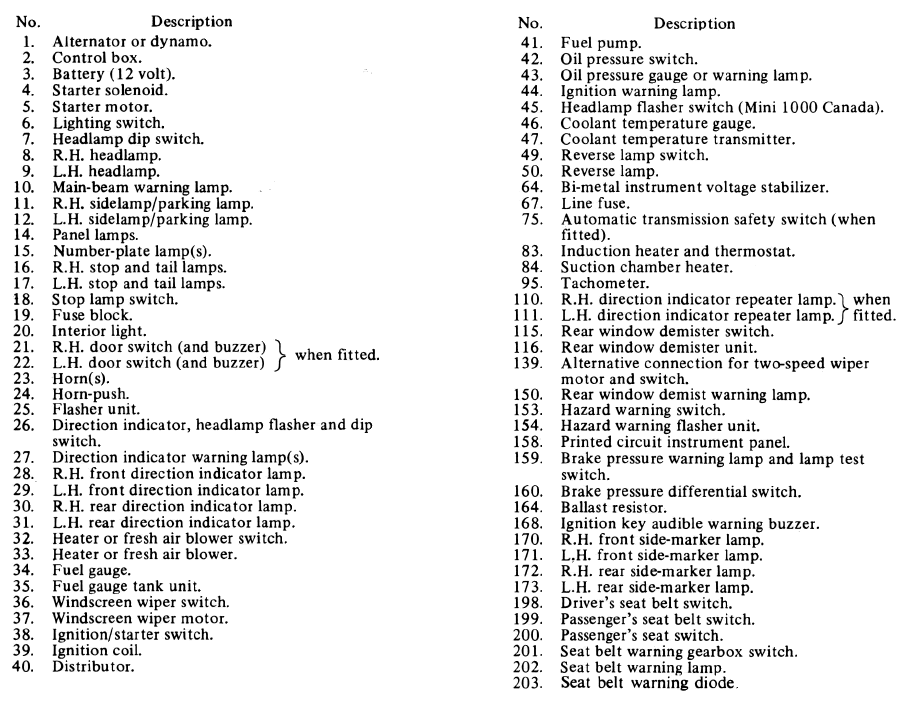
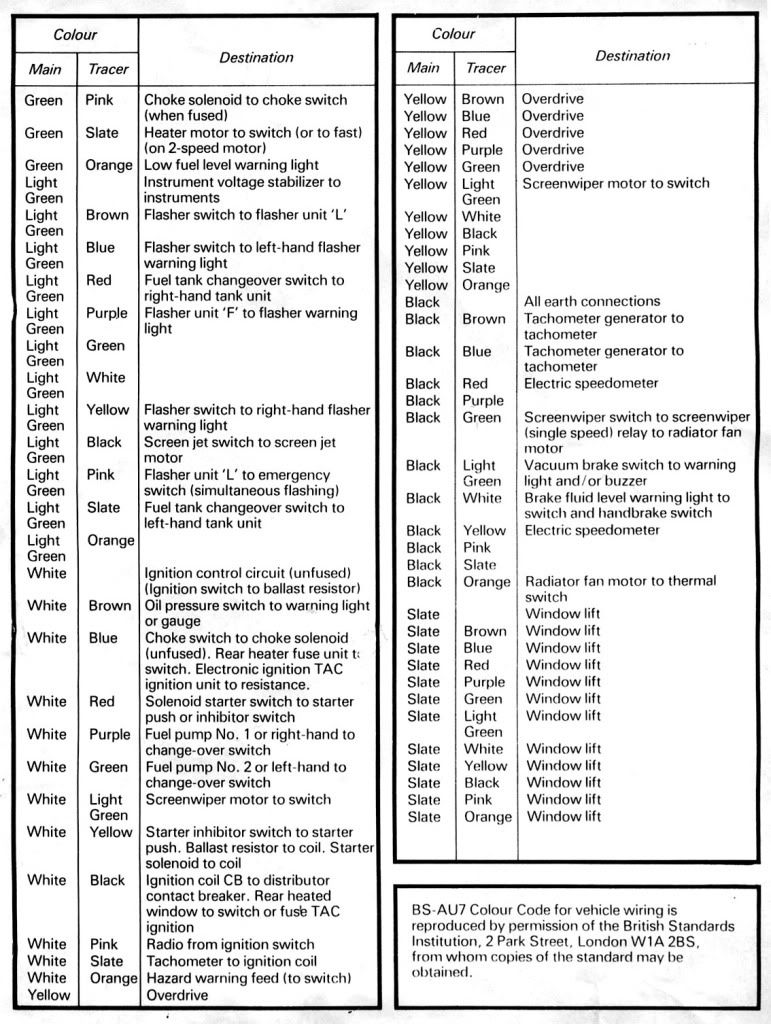
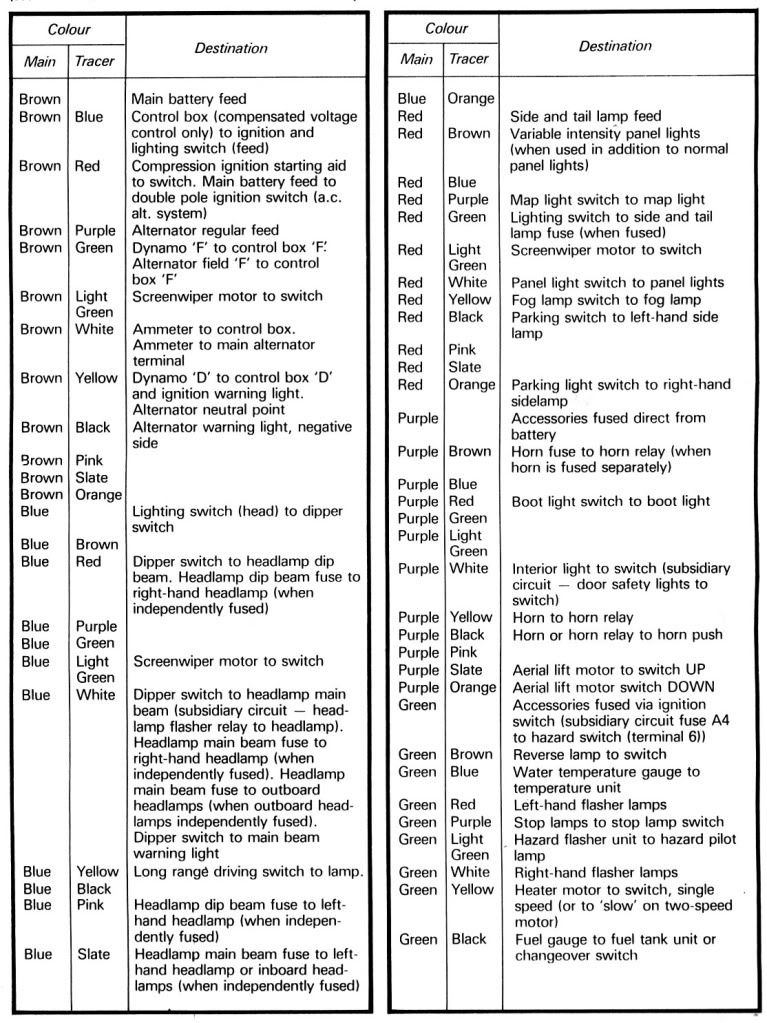
I'm currently stripping down my '84 mini mayfair for a rebuild. I don't know a lot of history on the car and the engine has certainly been played with in the past. I know I'm missing a few bits but I'm not sure what the connections below should be connected too - can anyone help identify them?
A = Purple / black wire
B = 2 x Green / red wires going into single connection
C = 2 x Black wires going into a single connection
http://i334.photobuc...wchilli/aaa.jpg
D = 2 x Black wires going into a single connection
E = Gren / white wires going into a single connection
http://i334.photobuc...owchilli/aa.jpg
F (listed a E below - dang!) 2 wires into a connector - 1 is green/black and 1 is Black. i think this might be from the screen washer bottle (missing from the car)
and while I'm at it:
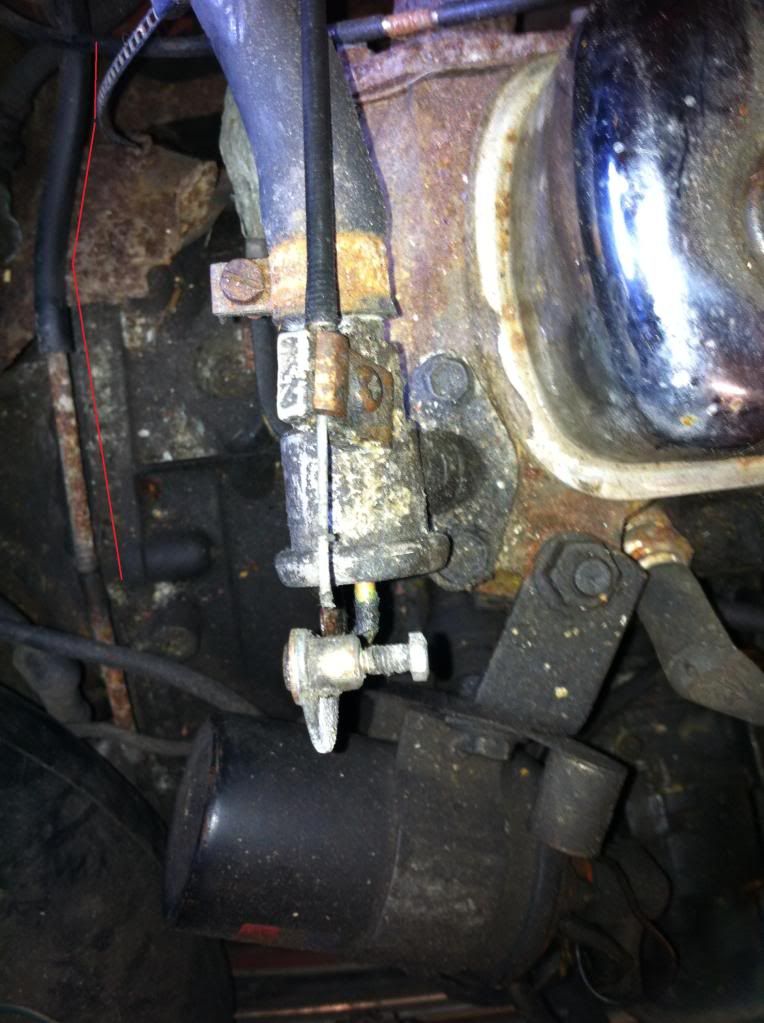
G - is the the Clutch breather? should it be connected to anything?
http://i334.photobuc...lowchilli/a.jpg
#2

Posted 27 November 2011 - 06:07 PM
b indicator
c ground
d ground
e indicator
f sreen wash
g i cant make it out.
#3

Posted 27 November 2011 - 06:09 PM
#4

Posted 27 November 2011 - 06:10 PM
#5

Posted 27 November 2011 - 06:35 PM
Edited by mini_mad_daps, 27 November 2011 - 06:37 PM.
#6

Posted 28 November 2011 - 06:59 PM
However 1 question regarding the leads you've indicated are indicators. The photo below show the headlight and indicator leads which I labelled up when I removed the lights. As such would 'B' and 'E' be joiners for extending the wiring loom or points you'd take the side indicator from (if you had one)?

#7

Posted 04 December 2011 - 06:28 PM
Mad Mk1 help identify the wire connections in questions. However, I have another question. The photo below shows me holding the drivers indicator cable and the two terminal (also indicator live and earth) coming from the same point on the wireing loom. What are the addition wire for and what are the black covers on the end of the wires (2nd photo)
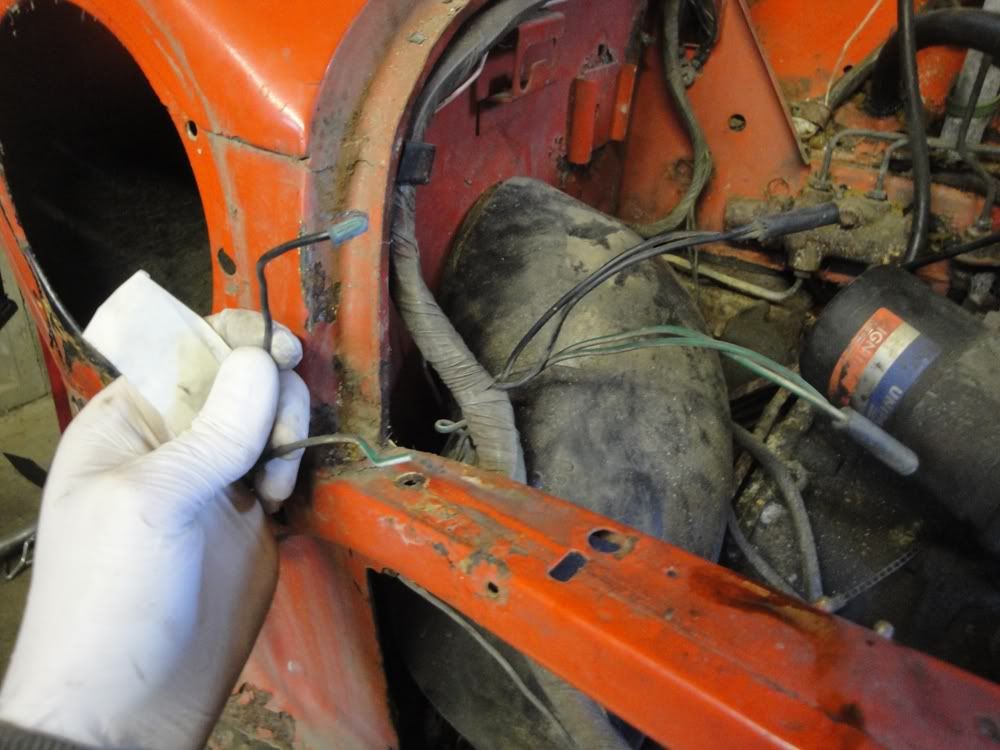
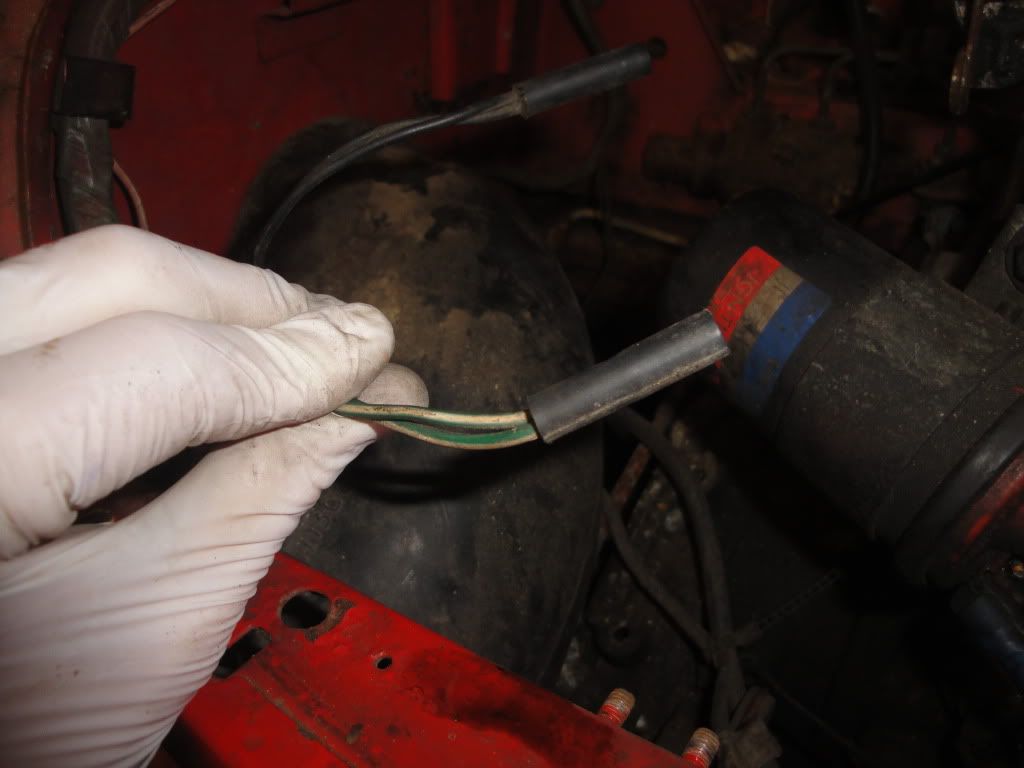
Thanks for any help
Chris
#8

Posted 04 December 2011 - 06:38 PM
#9

Posted 04 December 2011 - 07:26 PM
Sorry that's a bit of a crap photo for G - I've marked it with a red line below. It a rubber tube plugged into....the clutch housing??
#10

Posted 04 December 2011 - 08:19 PM
#11

Posted 05 December 2011 - 05:51 PM
any ideas regarding this?
Hi All,
Mad Mk1 help identify the wire connections in questions. However, I have another question. The photo below shows me holding the drivers indicator cable and the two terminal (also indicator live and earth) coming from the same point on the wireing loom. What are the addition wire for and what are the black covers on the end of the wires (2nd photo)
Thanks for any help
Chris
cheers
Chris
#12

Posted 05 December 2011 - 06:05 PM
Cheers Zef,
any ideas regarding this?
Hi All,
Mad Mk1 help identify the wire connections in questions. However, I have another question. The photo below shows me holding the drivers indicator cable and the two terminal (also indicator live and earth) coming from the same point on the wireing loom. What are the addition wire for and what are the black covers on the end of the wires (2nd photo)
Thanks for any help
Chris
cheers
Chris
Those spare wires you have found are for side indicators, witch were only needed at the time for minis that were for export.
Mine has them, but as side indicators aren’t needed till after 86, your best off taping them up and tucking them out the way with the rest of the loom.
#13

Posted 05 December 2011 - 07:00 PM
Thanks again
1 user(s) are reading this topic
0 members, 1 guests, 0 anonymous users


