Retro Twin Cam Mayfair - A Proper Job
#1
Posted 24 October 2011 - 09:33 PM
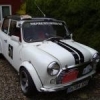
When last on the road the car looked like this...
Which has become this (excuse the messy garage, I'm the only one who tidies it)...
So instead of just keeping it on the road bleeding money like I have been for the past while, I thought I would start from scratch and fully rebuild it. I'm going for a retro mk1 look (I would love a MK1 but simply cannt find a project to take on), and planning on doing a Specialist Components twin cam engine. I'm focusing on bodywork first, but hope to be on the engine by spring time next year. Ive been working on the car for the past couple of weeks but haven't got round to starting a topic, so there's abut of catching up to do! Onwards...
I stripped the car down to a bare shell 2 weeks ago to start looking at what really needed doing, including a nice rusty sill
A crusty boot
And some horrible sill strengtheners and rear subframe mounting points (on both sides )
#2
Posted 24 October 2011 - 09:34 PM
(tennis ball on the gear lever after I almost put it through my lung!)
Stripped out all the crappy wiring. After 24 years of being patched over and over again there wasn't anything left of the original loom, just hundreds of soldered joins, so a brand new loom will be going in. It was almost impossible to find any decent original parts under the bonnet!
All out! Yay!
Headlining out...really not looking forward to it going back in!
Then engine out time
Much easier than I thought!
Which left the shell looking decidedly empty, well, apart from all the rubbish I then dumped in it!
Bulkhead looks a bit rough, but it's mostly surface from when the carb float overfilled and poured fuel all over it!
#3
Posted 24 October 2011 - 09:34 PM
Bores looked like they were in good nick, but...
...liners, dang! I had planned on boring the engine out so this meant I would either need to source a new block or keep the current capacity. I'm undecided at the moment!
Intact, the whole engine was in pretty good nick, and I haven't really treated it kindly in the last 5 years! Nevertheless, no blown gaskets, no gear teeth, nothing but oil in the sump!
Crank all looked ok too
And then I had a pile of stuff to get rid
So all in all, it was an uneventful strip down, apart from the linered block, bit of a bummer! Currently that's where it's at. I have never welded before, but I'm going to buy a welder as soon as I can and then get to it! Bit daunting, but I just really fancy learning! More to come very soon!
#4
Posted 24 October 2011 - 10:36 PM
#5
Posted 24 October 2011 - 10:47 PM
Thanks
Dan
#6
Posted 25 October 2011 - 06:39 AM
#7
Posted 25 October 2011 - 10:14 AM
#8
Posted 25 October 2011 - 04:37 PM
Very cool styled car but good luck with the Retro style! Rebuild of car and engine side by side. You sir are much braver than me! Im doing car first, engine after Too many bits to go missing!
Thanks! I still love it but just fancy a bit of change, and I've always loved Mk1s just because its such a timeless look! Don't worry, I'm not that brave either , I just stripped it to see which bits I could reuse in the new engine. It's not so much losing bits, but the huge immediate cost would be a bit daunting ! I found a couple of other pics of it in better days:
Looks great! Out of interest. What are you doing with the rocker cover ?
Thanks
Dan
I'll be selling it along with most of the other bits and pieces from it's old guise, if your interested give me a PM! I'll be polishing it and touching up a few parts of the yellow before it's sold since it's just been sat around for so long
How long ago was the first pic taken as it looks in mint condition there, such a shame it has to be re done, but will be worth it in the end I'm sure.
Two and a half years ago, not long enough for how it looks now! It was before I was really too confident with being hands on and I took it to a bodyshop who didn't do the best job...looked great for a while but wasn't really a lasting finish! I sure hope it will be worth it!
Are you going the be replacing the wings and front panel too? as they look pretty mint but then again your scuttle closers could be gone like mine were looks like a great project tho!
I don't plan to, initially they look fine but, as you say, I think the scuttle closers and flitch panel may be a little past it (I'll get in with Mr. Stabby this week and have a prod). I'm torn between keeping the steel front or fitting a one piece carbon front (keeping the inner wings to avoid an IVA) at the moment too!
#9
Posted 25 October 2011 - 07:08 PM
MK1 speedometer, ebay bargain at £6! Pretty awful condition, but stripped it apart, resprayed the body and touched up the face, cleaned the mechanism up and a bought a new bezel.
I did the same for the other gauges I had (does anyone know whether you can purchase a new glass for the rev counter with that redline included), and also have a water temp in the same style as the oil and vacuum.
I also have a 14'' Motolita wheel
Lucas dipping rear view mirror (this will be cleaned up, another ebay bargain!)
A pod for the rev counter (great part from Mark at MK1 Performance Conversions)
Butlers map light (no pictures of when I bought it, but it was beaten as well!)
#10
Posted 26 October 2011 - 02:20 PM
Since I'm planning on using the KAD internal shifter kit to take the gear change housing into the car I thought I would doll it up . The car is going to be somewhat comfortable, so I don't want it to be all function over form. Cleaned it up, primed, then sprayed with a wrinkle paint.
Pretty gross when it came off the car
Cleaner
Rubbed down
Primed
Finished
I've had mixed results with wrinkle paint before from following the can instructions (I was using Hycote), so decided to do things a little differently. If anyone is doing the same, try this:
I warmed up the part with a heat gun prior to spraying and used a large halogen work lamp to heat the area up. I then sprayed 4 coats with 5 minutes in between, each coat sprayed thickly to the point that anymore paint and it would run. After each coat I used the heat gun to evenly heat the paint (the first coat will probably not show any signs of wrinkling when doing this and will be very glossy, don't worry! Further coats will begin to wrinkle). By the second coat I began heating up my electric oven to 110ºC (make sure the oven is not on fan). Heating the part in the oven means you get well defined and even wrinkling. When the fourth coat was on, I let it sit for about 5 minutes before placing it on the middle shelf of the oven. I left it here for 30 minutes, then turned the oven off and left the part inside over night to cool down slowly with the oven. This worked out really well for me, whereas I've never really been happy with the finish that the can instructions give .
Close up of the finish
I hope that helps anyone doing the same!
#11
Posted 26 October 2011 - 06:39 PM
#12
Posted 26 October 2011 - 06:39 PM
Love that steering wheel, very retro, and the wrinkle paint is nice too but far too much hastle for my limited patience. Keep it up though and the result will be as it should have been from the bodyshop !!
Graham
#13
Posted 26 October 2011 - 07:34 PM
Hi,
Love that steering wheel, very retro, and the wrinkle paint is nice too but far too much hastle for my limited patience. Keep it up though and the result will be as it should have been from the bodyshop !!
Graham
It was a bit more work than a normal finish but I do have too much time at the moment and can't get on with what I really want to, so wasting time is the name of the game!
#14
Posted 26 October 2011 - 08:40 PM
good luck with it all!!
ED
#15
Posted 26 October 2011 - 09:13 PM
nice job on the guages, i love refurbing parts! its so satifying! that rev counter is a rare one going up to 10K... they are what the works cars used, more comonly seen in 8K form... I look forward to seeing how this goes!
good luck with it all!!
ED
Thanks Ed! Completely agree! There's something massively rewarding about it! I use to buy dead gauges, fix them up and sell them on ebay, it's nice to actually keep the result!
I know, I've only seen a few and took a while before I found one that I could actually afford! It's been freshened up like the others but I'm having problems sourcing a new glass for it (well, plastic really) with the redline included. Don't really need the whole glass, but I think it will be impossible to paint the redline as it is .
1 user(s) are reading this topic
0 members, 1 guests, 0 anonymous users