Jump to content


Photo
- - - - -

My New Trailer Project


  • Please log in to reply
136 replies to this topic

#16 998dave

998dave

    998cc's Of Dave Goodness

  • TMF+ Member
  • PipPipPipPipPipPipPipPipPip
  • 4,566 posts
  • Name: Dave
  • Location: Essex

Posted 09 April 2010 - 02:15 PM

Fine work and clearly explained. Could this be pinned?


Thanks Twister.

Maybe when it's finished and I have a 'complete' photo for it, (in fact I could pin it myself).

#17 998dave

998dave

    998cc's Of Dave Goodness

  • TMF+ Member
  • PipPipPipPipPipPipPipPipPip
  • 4,566 posts
  • Name: Dave
  • Location: Essex

Posted 12 April 2010 - 07:22 AM

Considerably slower progress this weekend, I started by filling some of the dents in on the body and sanding the filler back, didn't want to be too loud on a Saturday morning.

Posted Image

After lunch, my self-imposed noise limit was lifted, and I set about the roof with my angle grinders to try to make it lid shaped.
Note to all, it's really useful having two grinders, one for cutting, one for grinding.

First off I cut the A-pillars off, about 6" away from their tops, (I may want those two bits for the Hornet cabrio you see.
Then the B-pillars and C-pillars were removed, and the roof put on the trailer body to mark up.

Posted Image

I then cut the roof to length, and checked it on the body, looks good.

Posted Image

I then cut the lid in half lengthways and using spare blocks of wood laid the parts out in place.

Posted Image

The gutter rails (?) are holding the lid up further then I expected, so they're going to have to come off.

Posted Image

Gaps look much better once the gutter rail's removed, note I've kept the gutter though...

Posted Image

I then measured between the two halfs, and cut the centre 4" out of the front of the roof to fit.

Posted Image

Due to the length of the trailer another couple of filler pieces are required, and were removed from the left over bits of roof.
All the bits laying in place on the trailer, waiting to be welded.

Posted Image

Unfortunately as it took a long time to knock out the dents in the roof, (remember the car was rolled), that's as far as I got with it.

#18 998dave

998dave

    998cc's Of Dave Goodness

  • TMF+ Member
  • PipPipPipPipPipPipPipPipPip
  • 4,566 posts
  • Name: Dave
  • Location: Essex

Posted 13 April 2010 - 11:18 AM

A few additional pictures of the chassis now it's finished, (ish).

Posted Image

Posted Image

Also drilled the draw bar for the tow hitch, and Hammerited the holes, just let them dry overnight and today, then I'll put the tow hitch on when I get home tonight.

#19 998dave

998dave

    998cc's Of Dave Goodness

  • TMF+ Member
  • PipPipPipPipPipPipPipPipPip
  • 4,566 posts
  • Name: Dave
  • Location: Essex

Posted 13 April 2010 - 09:44 PM

This evening I bolted to tow hitch to the draw bar, that is all...

Tomorrow I'm lifting the lid off, and starting to tidy the edges, also maybe finish filling the body, and tidy up the fuel filler area.

Not got any sheet metal or angle iron left, so can't do much more this week!

Dave

#20 E.L.M.O

E.L.M.O

    Up Into Fourth

  • Members
  • PipPipPipPipPipPipPipPipPip
  • 3,953 posts
  • Location: London

Posted 13 April 2010 - 10:37 PM

Looks good!

#21 Ethel

Ethel

    ..is NOT a girl!

  • TMF Team
  • PipPipPipPipPipPipPipPipPipPipPip
  • 25,732 posts
  • Local Club: none

Posted 13 April 2010 - 11:22 PM

Nice work - doesn't an empty subframe ride high!

If you can't all find Minis that are genuinely beyond hope to make in to trailers someone (ABS?) makes a fibreglass one. It's a bit smaller but lots lighter than one carved from a car.

Looks good!


#22 998dave

998dave

    998cc's Of Dave Goodness

  • TMF+ Member
  • PipPipPipPipPipPipPipPipPip
  • 4,566 posts
  • Name: Dave
  • Location: Essex

Posted 14 April 2010 - 07:00 AM

Nice work - doesn't an empty subframe ride high!


Yes it bloody does, very stiff suspension too.

Going to have to load up the trailer and set it behind a car to get my tow bar angles to match the draw bar.

#23 998dave

998dave

    998cc's Of Dave Goodness

  • TMF+ Member
  • PipPipPipPipPipPipPipPipPip
  • 4,566 posts
  • Name: Dave
  • Location: Essex

Posted 19 April 2010 - 08:59 PM

Nice work - doesn't an empty subframe ride high!


To follow up, an empty trailer rides quite high too it turns out.

Posted Image

Posted Image

Nothings bolted together, I just wanted to see how it sat, found out the following;
- Got to trial with some more weight in to see how ride height changes.
- May have to lower the trailer a bit, will machine the trumpets a few mm if necessary.
- The subframe sits at an angle, which makes the top sit at an angle, got to put another slight bend into the drawbar so it come out of the transmission tunnel straight.
Ah well, better to know now so I can get on with it.

Dave

#24 998dave

998dave

    998cc's Of Dave Goodness

  • TMF+ Member
  • PipPipPipPipPipPipPipPipPip
  • 4,566 posts
  • Name: Dave
  • Location: Essex

Posted 23 April 2010 - 04:58 PM

Took the trailer back apart again today, and collected some sheet steel to plate the front and rear deck.
All going well, half the deck done, other half about 40% welded, but then I ran out of gas, so got to get some more tomorrow.
Hoping to get the rear deck done tomorrow, and the front started, then Sunday I'm going to Manningtree classic car show.
Dave

#25 stuwhitfield

stuwhitfield

    Mini Mad

  • Members
  • PipPipPipPip
  • 161 posts
  • Local Club: Brighton

Posted 24 April 2010 - 07:22 AM

Following this with interest. Could you post up the dimensions of the draw bar once its finished?

#26 998dave

998dave

    998cc's Of Dave Goodness

  • TMF+ Member
  • PipPipPipPipPipPipPipPipPip
  • 4,566 posts
  • Name: Dave
  • Location: Essex

Posted 24 April 2010 - 08:07 AM

Following this with interest. Could you post up the dimensions of the draw bar once its finished?


I probably can do yes, I started with a length of 40x40 box section,
Once I've got it sorted I'll try to draw it up though it's not that hard to do, and you may need to change one of the angles depending on trailer weight.

D

#27 998dave

998dave

    998cc's Of Dave Goodness

  • TMF+ Member
  • PipPipPipPipPipPipPipPipPip
  • 4,566 posts
  • Name: Dave
  • Location: Essex

Posted 24 April 2010 - 08:57 AM

Picture's from yesterday;

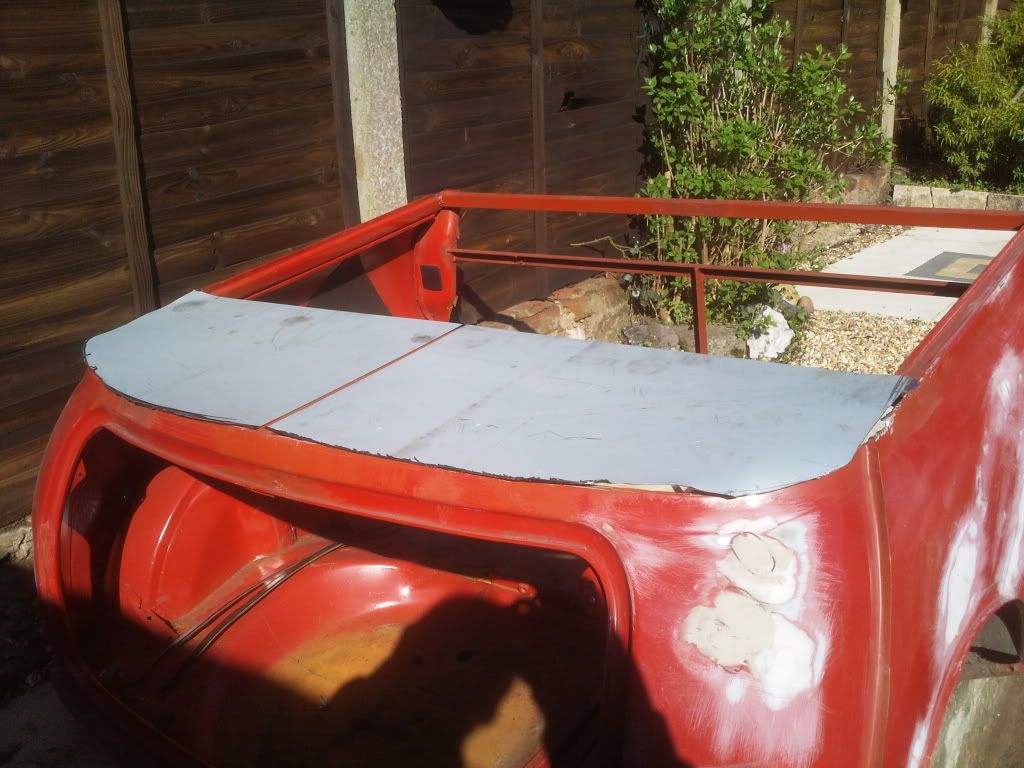
First off I cut two sheets of metal roughly to shape;
Posted Image

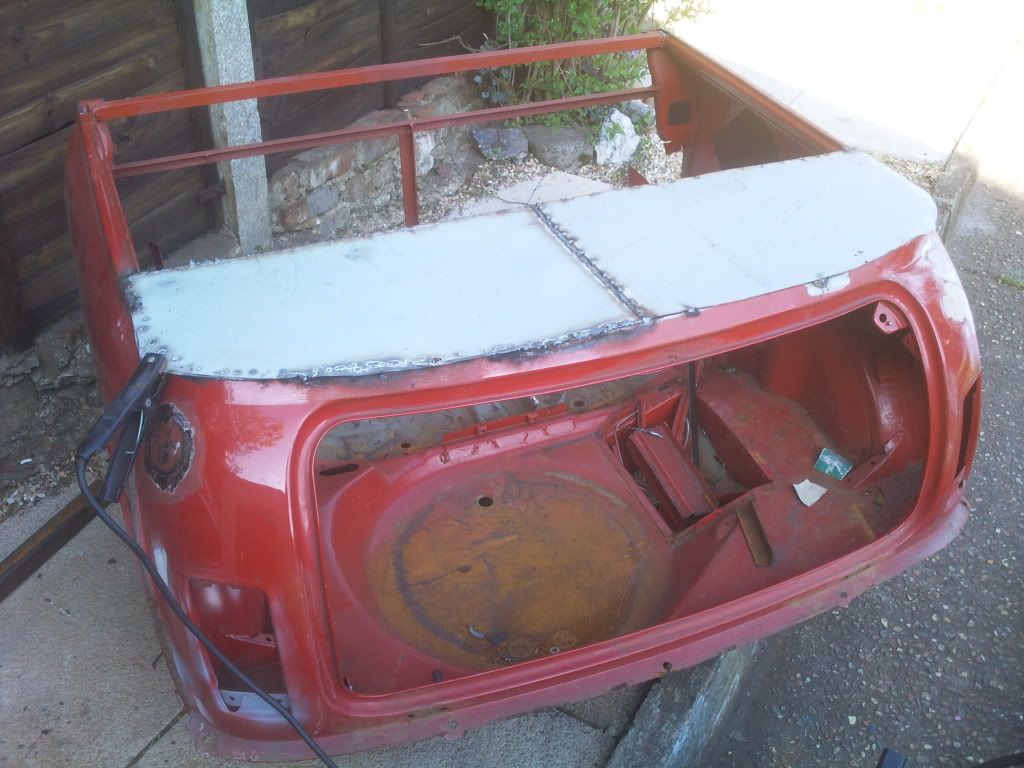
Then tacked it all round, and stiched the edges together;
Posted Image

And along the front edge, these have to be water tight to protect any luggage I carry.
Posted Image

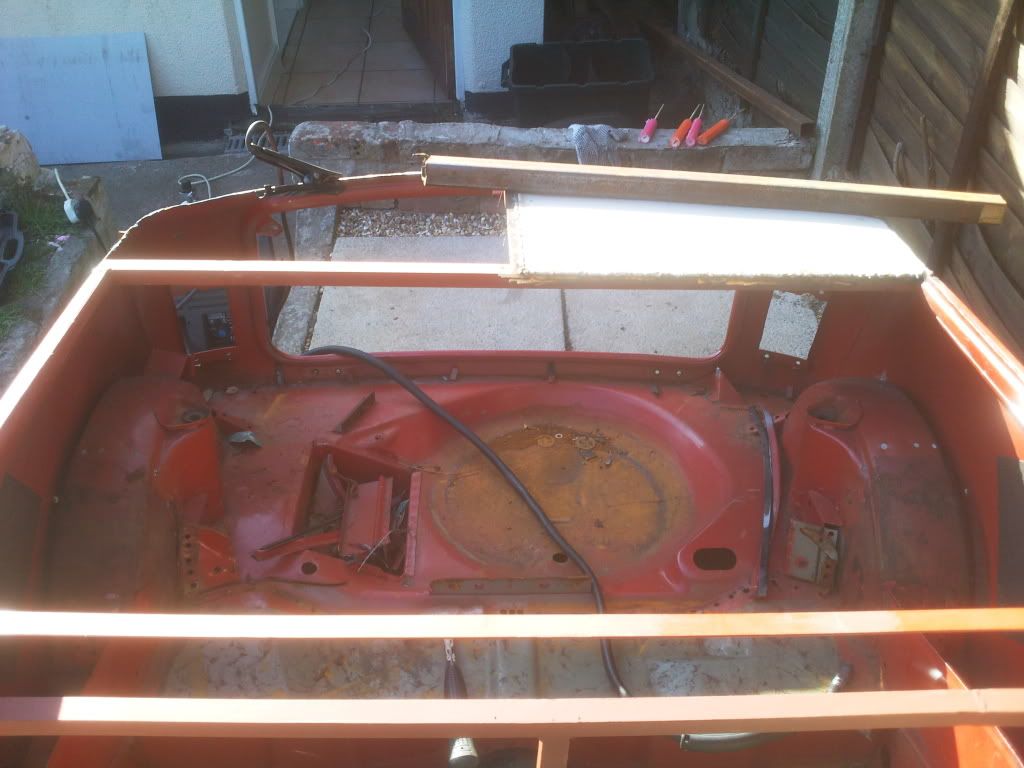
Once one side was welded on, I started the second side;
Posted Image

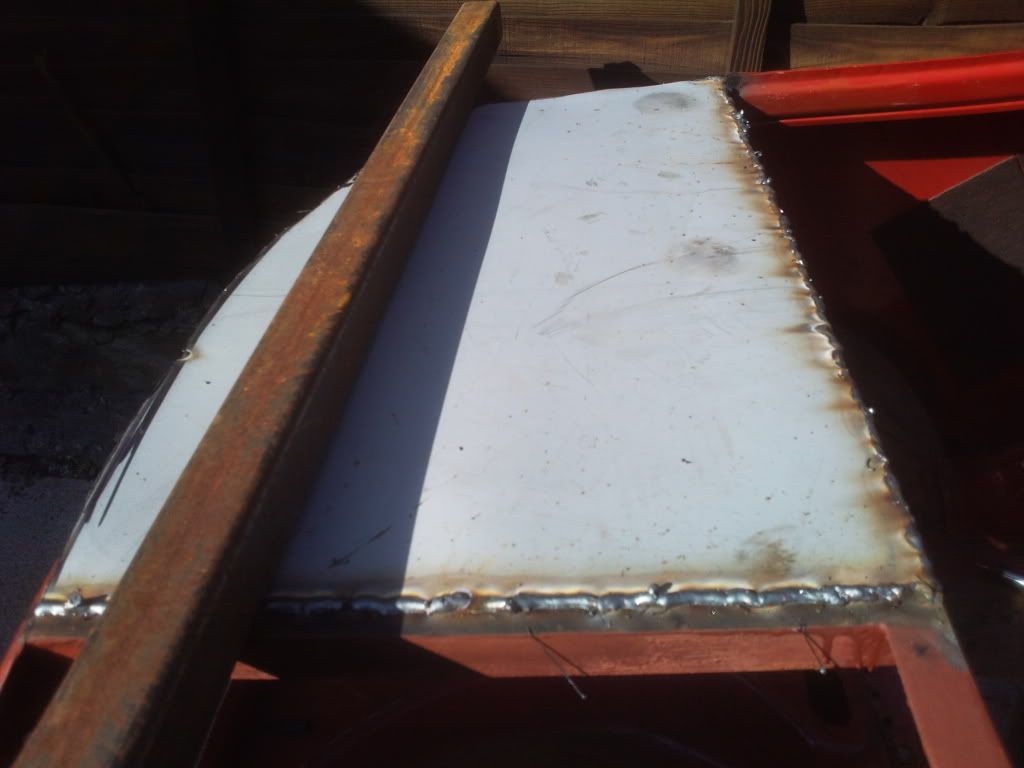
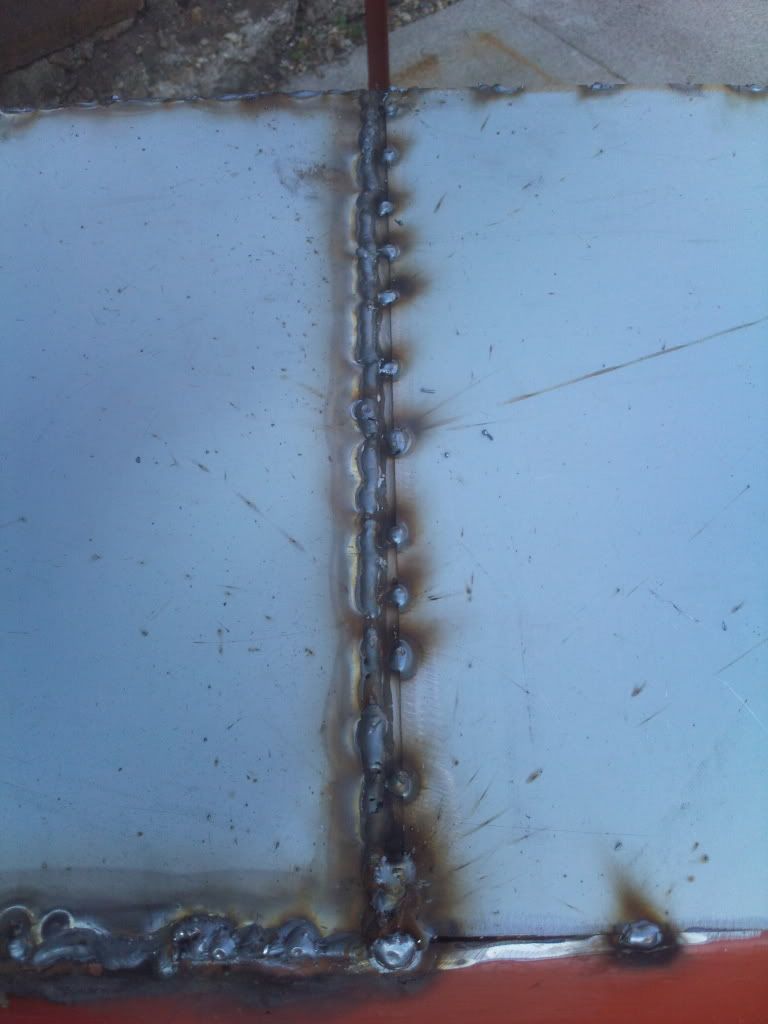
Unfortunately I ran out of gas, but this does mean I got some photo's of the welding method I used;
Posted Image
You can see how I tacked the metal all the way round, not putting too much heat into one place.
The left hand panel shows the welds filled in.
The right hand panel shows the panel just spot welded.

Once I've finished welding the panel in I'll have to trim the curved rear edge, clean up the welds and fill any gaps to make a nice flat surface.
The rear deck will then be primed and painted, and eventually have a thin wooden top put on, (following the shape of the deck, but about 2" in from the edges.

Now I've just got to finish my tea and then go get more welding gas.

Dave

#28 adam_93rio

adam_93rio

    Up Into Fourth

  • Members
  • PipPipPipPipPipPipPipPipPip
  • 3,271 posts

Posted 24 April 2010 - 09:13 AM

this is coming together really well, i managed to get myself a trailer project on thursday for £30. its rotten but the shape is there which is all i need to start it

told you i wouldnt cut a mini up lol

im a bit nervous about when it comes to making a lid for it tho. roof panels are hard to come by a lot of the time and expensive to buy new just to cut up

keep cracking tho, the trailer looks really good. really neat work!

#29 998dave

998dave

    998cc's Of Dave Goodness

  • TMF+ Member
  • PipPipPipPipPipPipPipPipPip
  • 4,566 posts
  • Name: Dave
  • Location: Essex

Posted 24 April 2010 - 10:33 AM

Adam,

Show us a photo of what you've got then!

You'll probably have to start by cutting what you have to size, and then brace the front like I did.
Next turn it upside down, and clean up the bottom, making any repairs before you start on the rest of it.

For the lid, you needn't use a roof, you could make it flat, or put bars on it, or have it all a nice wooden or leather deck?

Dave

#30 998dave

998dave

    998cc's Of Dave Goodness

  • TMF+ Member
  • PipPipPipPipPipPipPipPipPip
  • 4,566 posts
  • Name: Dave
  • Location: Essex

Posted 26 April 2010 - 12:24 PM

Got new welding gas bottle and regulator so I'll be able to start again this week.

I hope to finish that 2nd deck plate tonight, and start cleaning up, then I'm off to Germany Tuesday.

Next free evening, Weds, I may get a chance to start plating the front, if not it'll be next weekend.

Dave


1 user(s) are reading this topic

0 members, 1 guests, 0 anonymous users