Jump to content


Photo
- - - - -

Clutch Removal, Verto, Pictures.. Nervousness


  • Please log in to reply
15 replies to this topic

#1 Fitz

Fitz

    Passed Test

  • Noobies
  • PipPip
  • 26 posts

Posted 24 March 2009 - 07:52 PM

1987 mini, 998, verto

Well, I've been browsing the forums here for a couple weeks while I waited for parts and dinked around with a bunch of other bits and pieces while the mini is off the road... but I'm finally getting down to the final part of my clutch removal/refitting.. and I'm a bit 'stuck' as it were!

As it's my first mini, I'm learning a lot as I go.. I've got the Haynes manual, this forum... just enough to be dangerous! ;)

Posted Image

So that's where I'm at...

MY QUESTION: We took the bolts out that hold the flywheel to the clutch.. should I have done that?

We put the puller on, and started turning until it became quite difficult, which I expected from all the reading here... but as it sits right now, the flywheel is already loose behind the clutch.. and I'm not sure if I should have removed those bolts first? I'm nervous to go cranking on it anymore.. is there anything I'm missing that you can see? (something I haven't removed? should not have removed?) OR.. should I just man up and start cranking the hell out of the puller?

I'd love to swing a hammer at the centre of the puller, as directed in many threads in the forum.. but there's no space to swing! It's more like a little love tap than a good solid CRACK!

Looking forward to your responses.. thanks!

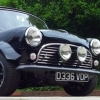
Gratuitous shot of my mini this winter, before I took it off the road for repairs... help me get it back!
Posted Image

#2 mike.

mike.

    Crazy About Mini's

  • Members
  • PipPipPipPipPipPipPipPipPipPip
  • 6,176 posts

Posted 24 March 2009 - 08:11 PM

Yer you're not supposed to undo those bolts first, but really if the puller is engaged properly into the flywheel it shouldn't make any difference.

Theres no need in swinging a hammer at the centre of the puller, it won't put anymore force on the flywheel, will most likely just damage the puller bolt. The idea is that you wind on the puller with quite alot of force, then you give the bolt a small tap. Its just to send some vibration through the flywheel to see if it'll free it, then if not, wind on some more force.

Also not sure if you've got the puller right... I may be wrong here but when i removed my flywheel, i put the flywheel bolt in, then assembled the puller like you have. I did that so the bolt would 'catch' the flywheel, ad they are known to come off with 'explosive' force.

#3 Fitz

Fitz

    Passed Test

  • Noobies
  • PipPip
  • 26 posts

Posted 24 March 2009 - 08:17 PM

Yer you're not supposed to undo those bolts first, but really if the puller is engaged properly into the flywheel it shouldn't make any difference.


Hmm.. something is not right then... with the puller on, the flywheel is wobbly and already loose behind the clutch - that doesn't seem to me like the puller bolts are attached to the flywheel at all.. then what are they attached to? (or if the flywheel is loose, perhaps I've already succeeded?)


Also not sure if you've got the puller right... I may be wrong here but when i removed my flywheel, i put the flywheel bolt in, then assembled the puller like you have. I did that so the bolt would 'catch' the flywheel, ad they are known to come off with 'explosive' force.


Ah, I like this idea... maybe that's what I'm doing wrong! It makes sense to have that on so that it will 'catch'.. we were waiting nervously for the BANG!

I'll give this a go tonight.. thanks for the reply!

#4 adcyork

adcyork

    Speeding Along Now

  • Members
  • PipPipPipPipPip
  • 490 posts

Posted 24 March 2009 - 09:19 PM

the flywheel is loose behind the clutch because you have removed the bolts that hold it to the clutch and taper that fixes the whole lot to the crankshaft. The puller is bolte to the clutch and taper, the bit that needs to come off, not the flywheel behind it that is now loose.

Take the puller off and put the flywheel bolt back but don't screw it in all the way in obviously. Then Just wind the puller in with a breaker bar until it comes off with a bang.

Edited by adcyork, 24 March 2009 - 09:39 PM.


#5 Fitz

Fitz

    Passed Test

  • Noobies
  • PipPip
  • 26 posts

Posted 24 March 2009 - 09:31 PM

Right.. it makes quite a bit more sense now... thanks for your reply, adcyork...

See? Just enough information to be dangerous! I'm glad I stopped when I did... I had never seen a clutch/flywheel assembly anything like that before... usually one doesn't need to remove the flywheel to remove the clutch!

Love learning about all this though, as they ARE a lot of fun to work on!

Edited by Fitz, 24 March 2009 - 09:31 PM.


#6 DaveRob

DaveRob

    One Carb Or Two?

  • Members
  • PipPipPipPipPipPipPip
  • 703 posts

Posted 25 March 2009 - 08:59 AM

Love learning about all this though, as they ARE a lot of fun to work on!

Tell us this in a couple days when that assembly is still not budging........ Mine was almost welded to the crank and I had to cut the bloomin thing off..... and that was after Id had the thing under tension for 3 days with a Sykes Pikavant HYDRAULIC fly puller.... but may be you will be lucky...... As above really.... and wind as much tension on to that bolt as you can get..... ie BIG bar and a fat bloke.... then....as you so eloquently put it.... give it a little 'love tap'..... and stand back

Rob :)

#7 Tinkerbelle

Tinkerbelle

    Mini Mad

  • TMF+ Member
  • PipPipPipPip
  • 246 posts
  • Location: Milton Keynes
  • Local Club: Tyred and Exhausted

Posted 25 March 2009 - 11:56 AM

Make sure you align the slot on the crankshaft at 3-9 oclock or horizontal and bolt the clutch back together i.e. replace and tighten up 6 1/2 inch bolts around the edge. Apply puller and tighten, making sure you use the correct puller bolts into flywheel assembly as they both kind off fit as have similar thread pitch but only one is correct (gold coloured ones not black ones on my kit). Tighten the centre bolt to in excess of the 150ish footpounds which the flywheel bolt was tightened to and tap the end of the puller centre bolt gently. I warn this sequence of tightenign and tapping has taken me about a week before until it releases and when it does it does with a bang and flies off so be careful nothing is around it and it is not too high off the ground.

If you have inadvertantly not aligned the slot prior to first attempt at removal, reassemble and turn the slot until it is vertical 6-12 oclock and gently tap flywheel to try and vibrate the u clip back into place, then try the other orientation i.e. 12-6 oclock. This is what I did after getting my first one jammed.

I now use a air impact gun on the centre bolt as this adds vibration as tightening, but it messes up the puller threads very quickly but takes about 2 minutes to work!?

Hope that helps.

Edited by Tinkerbelle, 25 March 2009 - 11:58 AM.


#8 Pauly

Pauly

    Up Into Fourth

  • Members
  • PipPipPipPipPipPipPipPipPip
  • 4,213 posts
  • Location: Wolverhampton
  • Local Club: Just 4 Fun Minis!

Posted 25 March 2009 - 12:26 PM

Make sure the keyed washer is removed from behind the big flywheel bolt (might have been said in previous posts), the main thing is to make sure the puller is absolutley paraell to the flywheel because if you are pulling at an angle the flywheel boss will be jamming on the crank. In the end I butted up the flywheel puller plate to the flywheel boss so I could get a straight pull, get the puller as tight as you can until you are blue in the face, then a short sharp whack with a hammer should 'pop' it off.

Paul.

#9 Fitz

Fitz

    Passed Test

  • Noobies
  • PipPip
  • 26 posts

Posted 27 March 2009 - 03:26 AM

Wow, you guys are right. I have been tightening and loosening and adjusting and repeating... over and over. The puller bolt is getting a bit worn to say the least.

I suppose I'll just keep at it for now, maybe try and find someone with an air impact to use.

#10 ROD

ROD

    Up Into Fourth

  • TMF+ Member
  • PipPipPipPipPipPipPipPipPip
  • 2,215 posts
  • Location: Sunny ESSEX !
  • Local Club: MCR

Posted 27 March 2009 - 08:38 AM

a Sykes Pikavant HYDRAULIC fly puller....


***Sorry to hijack this thread***

Daverob

Where did you buy it from??

#11 Fitz

Fitz

    Passed Test

  • Noobies
  • PipPip
  • 26 posts

Posted 17 April 2009 - 04:35 PM

Hilarious, I know, that I'm replying two weeks later with success... Got busy and haven't had time to wrench on it... I suppose the built-up frustration was enough to get it off this time - and wow, it does come off with a BANG!


Now I'm trying to figure out how to get that Primary Gear Oil seal on, hopefully without the special tool (can't run 'round the corner and borrow one from someone here in BC, Canada!) - I thought if I could find the right size piece of pipe, I might be able to press it in evenly and gently... but I'm very open to any experienced 'tips' on the subject! =)

Cheers!

#12 Dan

Dan

    On Sabbatical

  • TMF+ Member
  • PipPipPipPipPipPipPipPipPipPipPip
  • 21,354 posts

Posted 17 April 2009 - 04:49 PM

Electrical insulating tape wrapped around the splines is an acceptable substitute for the protection tool. Three or four wraps over the whole splined surface is enough. Then smear the seal and the tape with some engine oil and it will go on nicely. You can use a large diameter very deep socket to replicate the other part of the tool that drives the seal in squarely. You're probably just as unlikely to have a socket like that as the tool itself though. As you suggest, a large diameter pipe would do fine if the end was flat and smooth but you will need to be able to press or drive against it. A large flat washer or plate over the end of the pipe and the flywheel bolt through the centre of that will press it well, that's how the genuine tool works. The only other function of the genuine tool is a step on the face that drives the seal to the correct depth.

Edited by Dan, 17 April 2009 - 04:53 PM.


#13 Fitz

Fitz

    Passed Test

  • Noobies
  • PipPip
  • 26 posts

Posted 17 April 2009 - 05:41 PM

I found an image of the actual tool here ( http://www.minispare...ty=pb&pid=36654 ) ... I can see how a pipe/washer and flywheel bolt could work together to the same effect...

Thanks for the reply, Dan!

#14 Fitz

Fitz

    Passed Test

  • Noobies
  • PipPip
  • 26 posts

Posted 03 May 2009 - 06:10 AM

SUCCESS!

I know it's been a long time coming, but I finally got it back together. I'm totally embarrassed to admit my final mistake.. put the release bearing in backwards. Started it up, started whining... took it all back apart again... needless to say, I am becoming quite quick at the whole process. :shy:

Thanks for the tips along the way!

I can't wait to get it all cleaned up for summer now. An oil change is in order before I get that grille back on as well.

Cheers!

Posted Image

#15 Boycie

Boycie

    Camshaft & Stage Two Head

  • Members
  • PipPipPipPipPipPipPipPip
  • 1,978 posts
  • Location: Kent/ East Sussex border

Posted 03 May 2009 - 07:53 AM

Good work!
A clutch change on a Mini can be quite a challenge- you're an expert now!!

I visited BC in 2003.. loved it :thumbsup: Saw one Mini all the time I was in Canada, reminded me of home :shy:


1 user(s) are reading this topic

0 members, 1 guests, 0 anonymous users